
What is Felt, and How Do I Get Started Making it?
 A hat I made early in my felting experiments (top) and a commercially felted hat. The hats are sitting on the pattern I used to lay out the wool . . .
As I mentioned in the post about my magic purple mittens, felting is probably the fiber technique I have the most claim to be an “expert” on, and, until now, I haven’t posted much about it here at all. Most of my deep explorations into felt happened before I started this blog, and as I’ve been digging into my research and photo archives, compiling what I want to say as an intro to felting, it’s clear there’s enough material here for a least two posts.
I’ve organized this roughly as a list of felt FAQ. I could go on at length from any one of these starting points, but I’ll try to keep it concise. The photos and illustrations here are necessarily going to be a little mishmashy, as they represent work over a big swath of time. Click on the photos to enlarge for an better view of the felt texture. Ok, let’s get started, shall we?
What is felt anyway?
The short answer: Fibers (for real felt these must grow on an animal: a sheep, an alpaca, a cashmere goat etc.) which have matted together into a permanent fabric. It’s the scales on the fibers (like the ones on your hair, visualize the close-up from a shampoo commercial) that open up and cling together. It doesn’t sound permanent, but if you’ve ever tried to pull apart a piece of felt, or un-shrink a sweater that accidentally went through the wash, you know it is.
There are lots of types of felt. It can be made from combed fibers alone, or from fibers that have already been spun into yarn and woven or knitted into fabric. In either case, as long as there are at least 50% feltable fibers in the mix, the fabric should be able to felt. It’s easy to make felt at home (even by accident) and there are factories that make felt on a commercial scale. I’d love to visit one sometime.
Wet Felt
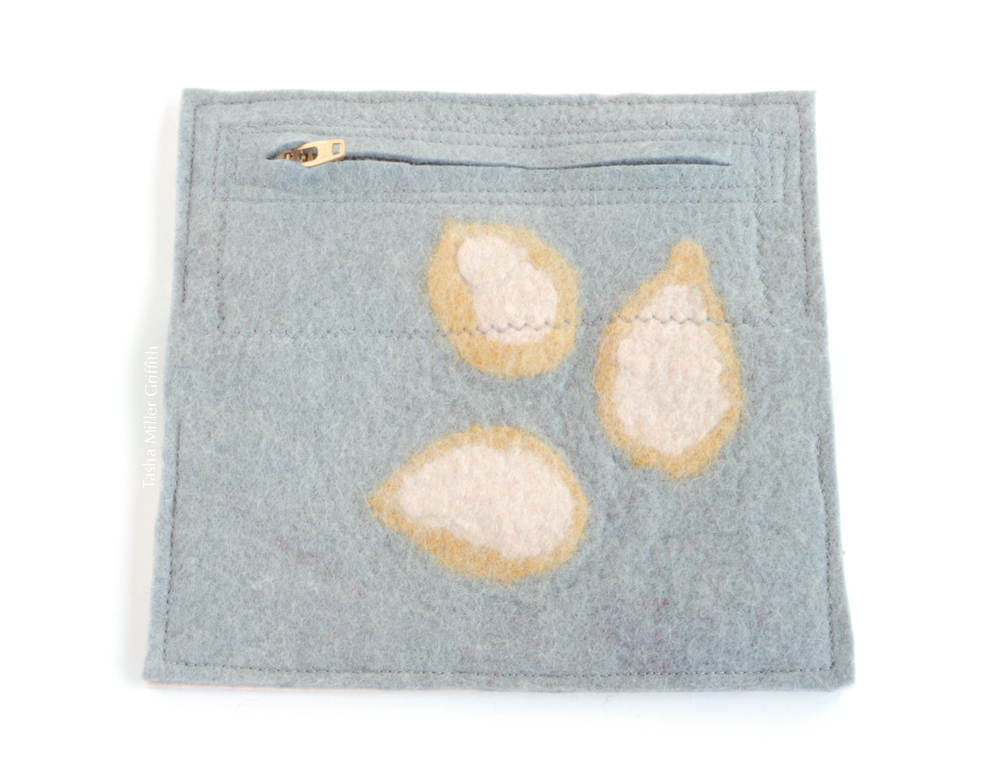
When someone says their work is “wet-felted”, they’re probably talking about the seamless, stitch-less felt made from only fluffy brushed wool fibers (read on for how to make your own). Below is a piece of my hand made wet felt, which I cut and sewed after it was done, to make the wallet. The decoration was made at the same time as the fabric.
Most commercially made felt, whether starting from fibers or fabric, uses some kind of wet or steam process. When you felt your knitting, recycled sweaters, or fabric, you’ll also use water and heat.
A couple of special types of felt that I won’t cover in depth, but wanted to mention, in case you’re curious:
Nuno felt
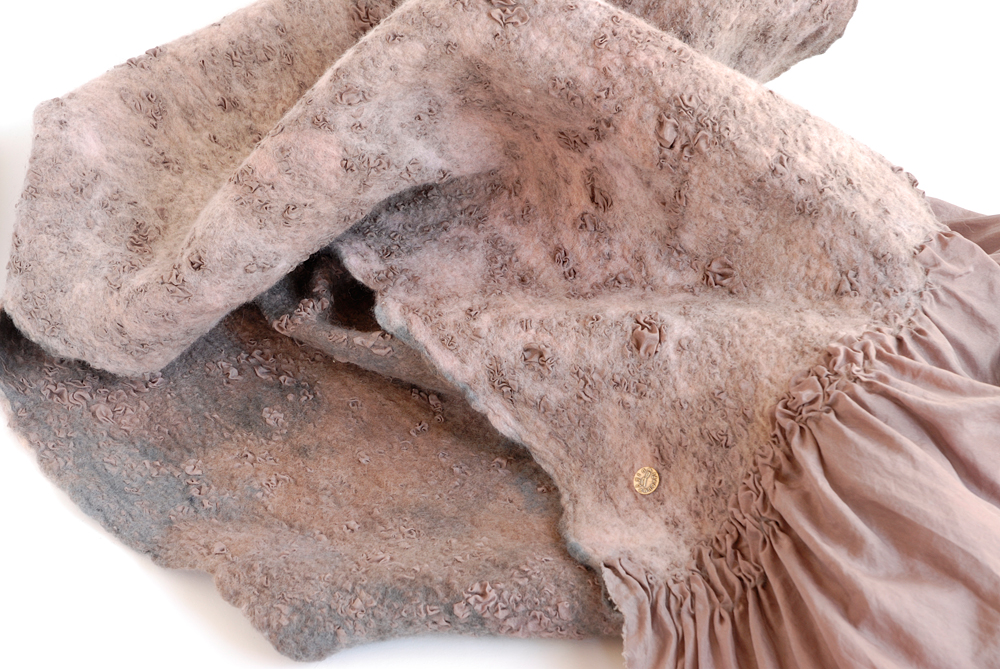
Nuno felt is made with thin layers of wool on either either side of a piece of fine fabric, usually silk. We traded Bryan’s work for the totally gorgeous example below by Gina Pannorfi at one of our art shows this past summer. (Lucky me, it’s just the loveliest thing.) Because the silk provides some of the structure, nuno felt can be quite thin and drapey while holding together.
Needle felt
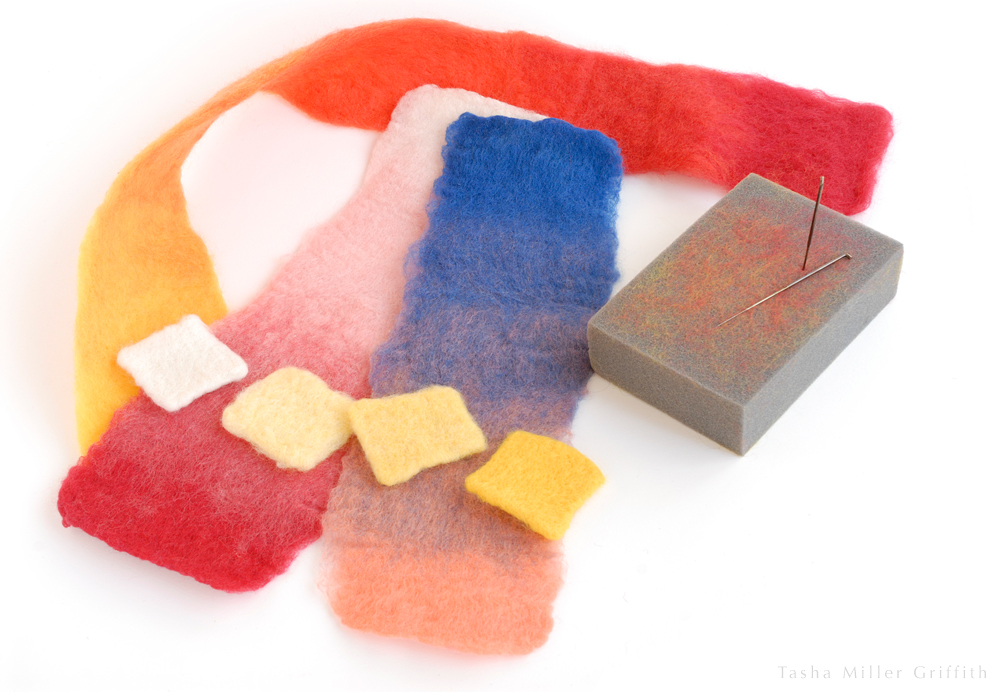
Needle felt is what it sounds like, made by pushing fibers together with a special barbed needle, or a collection of them. Although it doesn’t make a sturdy, hard-wearing fabric the way that wet felting does, amazing detail is possible with needle felt. Do a search for “needle felt” with your favorite animal name on Etsy, and you’ll see what I mean. I made the examples below in a class on color theory for felters—with Pat Spark! She has a whole bunch of good felting information and tutorials on her site if you’re looking for more felt info.
Fake felt
That slightly sticky, slightly glittery “craft felt” at the hobby store is usually made from polyester. The fibers are punched together with needles and/or held together with glue. It really has none of the lovely properties of real felt. Commercial wool and wool-blend felt is more readily available than it used to be (at least in the US), so you may be able to find it at your craft store as well.
How do I make felt?
The short answer: Most importantly agitation, combined with at least a little moisture, and optionally heat, on wool, alpaca etc. makes felt. There are about a million ways to apply these, depending on what you’re working on and what equipment you have.
I’ll start with a quick intro to making felt from just combed wool. I think that way, the rest of the felting process will make more sense, and it’s interesting to know, even if you only plan to felt from knitting or fabric.
If you’re looking for to buy wool for felting, it’s usually sold as roving (a loose roll that spinners use) or batts (which are more convenient for felting, since you can pull off big thin layers).
These photos are from my felt flower tutorial, which will walk you through the whole process if you’re interested.
Step 1
Lay out thin layers of wool, with the fibers alternating directions. Keep in mind that your finished project will shrink in as the fibers pull in toward each other, so make it bigger than you want (I’ll go into how much bigger in the next post). The wool is very fluffy and will seem thick, but it will compress to almost nothing once it’s wet. Use several layers for a cohesive piece of felt. Squish it down with your hand to get an idea of how much fiber is really there.
Step 2
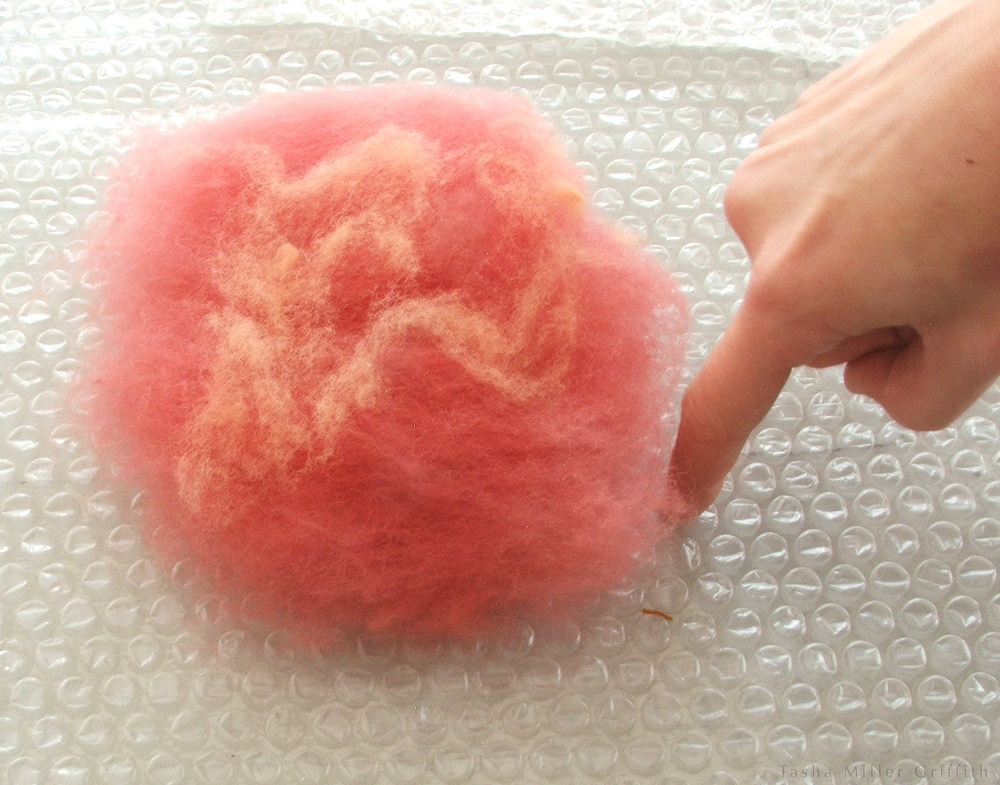
Add a little water. Dripping it from a sponge is a good way. You want the wool to be all wet but not swimming in water. You can squash on the wool gently with the sponge to get it all wet.
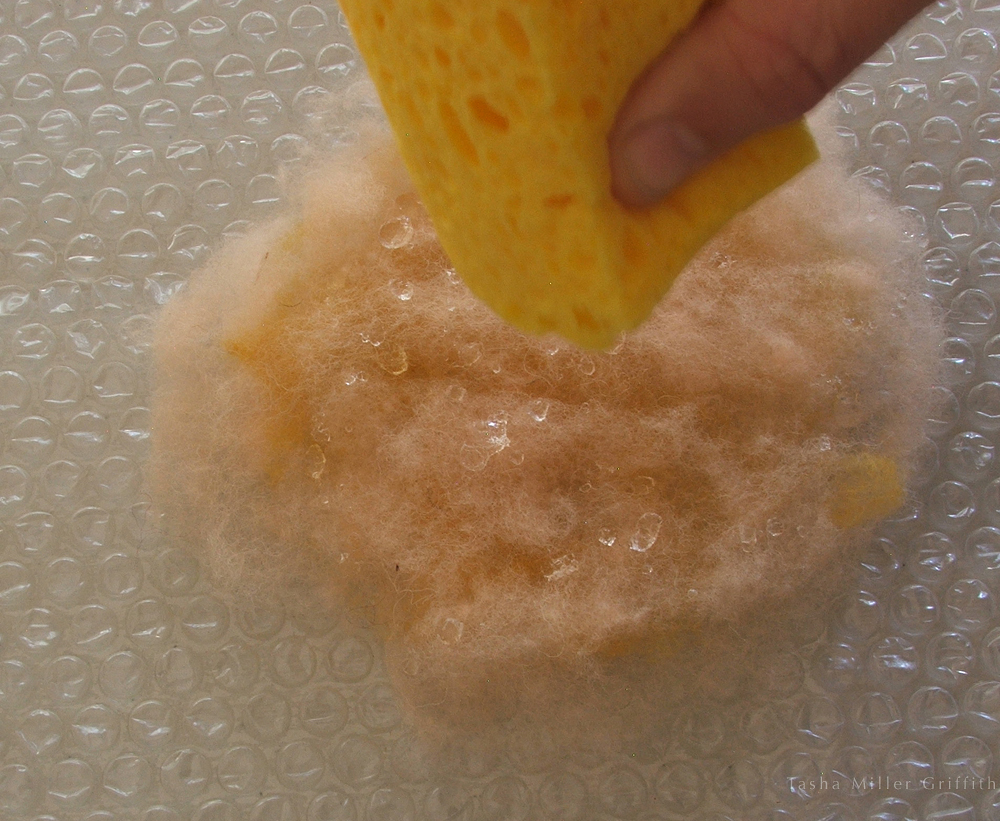
Step 3
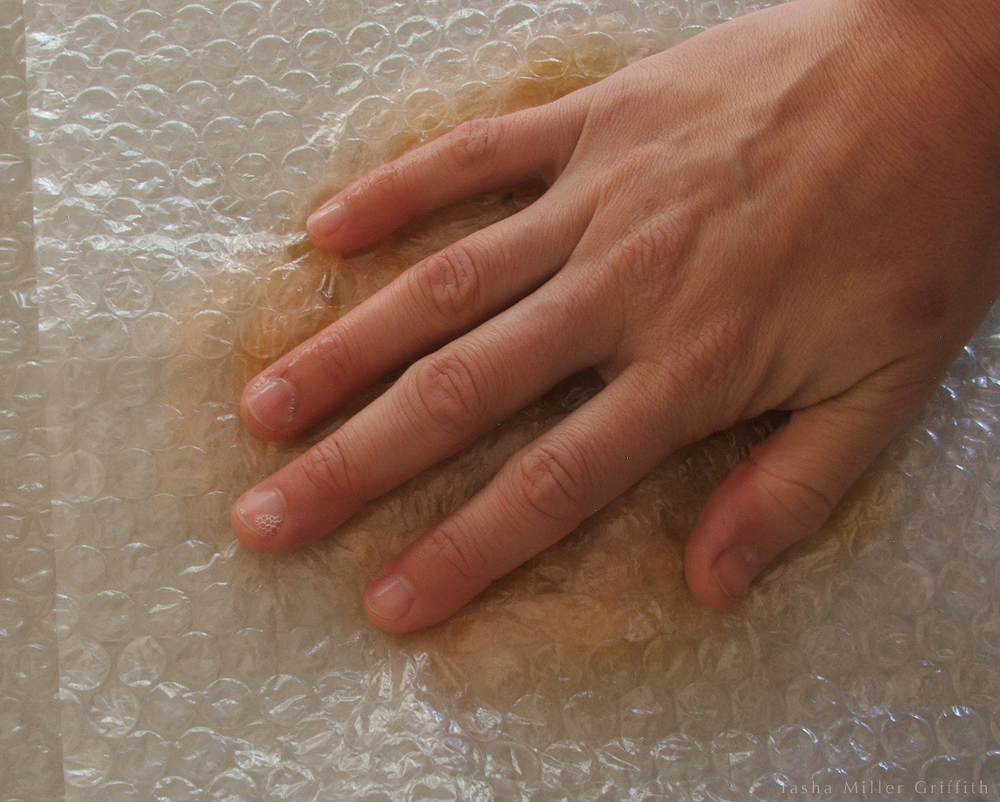
Agitation. Arguably this is the last step, but there are a few stages to it. At first, you’ll need to rub the felt very gently. You want the fibers to cling together, which they won’t do if they’re being shifted all over the place. For wet felting small pieces like this, I like to use two layers of bubble wrap (the ordinary, small-bubble kind), one underneath the fiber and one on top. The bubble helps spread and soften the motions of your hands. Think about getting the bubbles to massage the wool, not about moving your hands on the bubble.
Important!: Felting by hand involves a lot of repetitive motion. As you work, make sure your wrists are in line with your arms and not bent at a strange angle, to avoid injury.
Rub for a couple of minutes, then lift the bubble and check on how things are coming. You’ll probably need to rub some more. As you practice felting, you’ll start to notice subtle changes in the texture of the piece that show how it’s coming along:
 Wet wool layers.
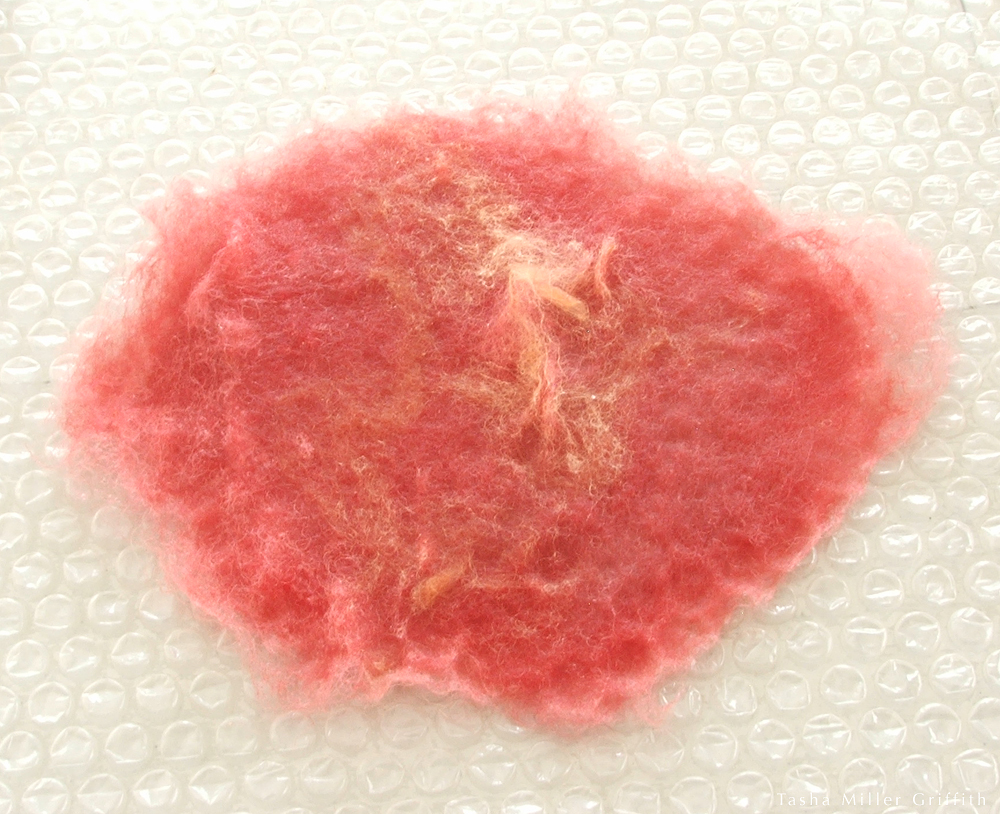 The wool is starting to cling together, but there are still a lot of loose fibers.
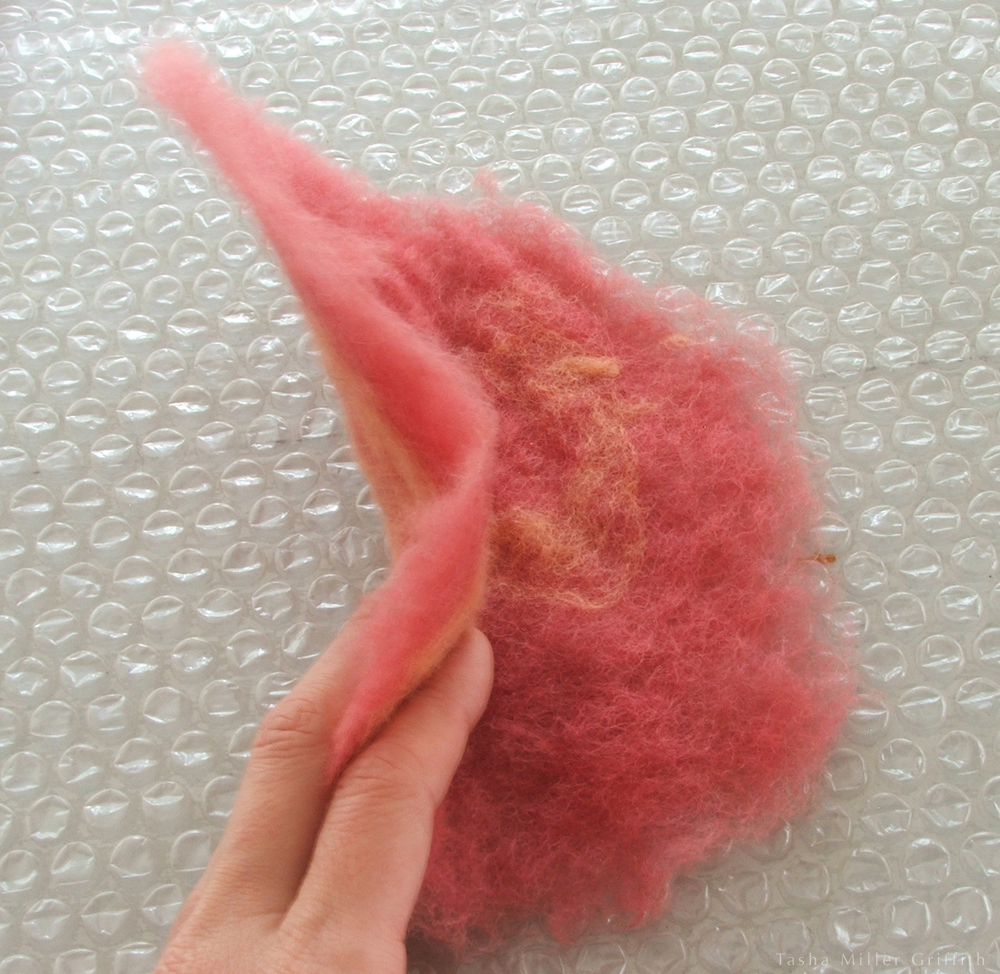
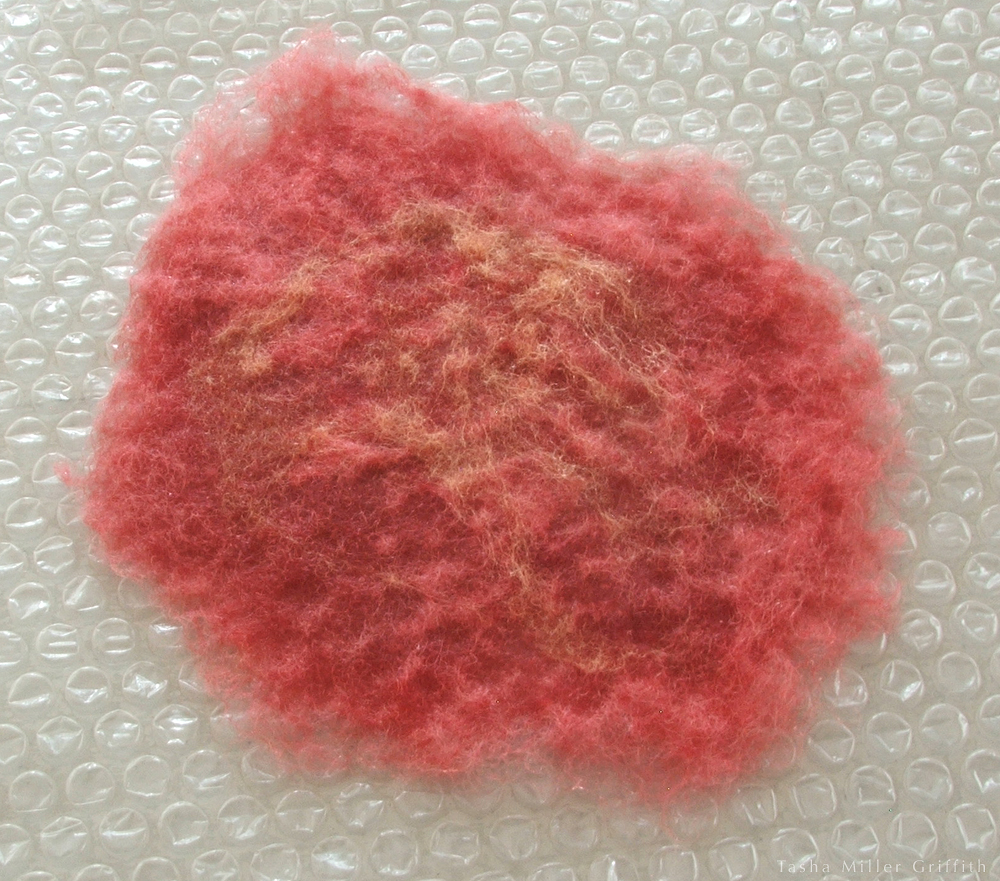 Although still soft, this prefelt is now a cohesive unit.
Once your wool is holding together enough that you can pick the whole thing up and it stays together, it’s what felters call a prefelt. A prefelt isn’t strong enough to be a finished object, and it has lots of fibers that are still ready to cling to each other or to other parts of your project. You can check by pinching up a few of the top fibers to see if they’re attached to the ones below. At this point, the felt is ready for whatever you have in mind for its next stage. It can be easier to work with if you dry it off, by squashing it between two layers of an old towel.
So, my wool is holding together, now what? Read on to Part 2 for how to finish felt like the piece above, how to felt your knitting, more questions answered, and even how not to felt . . .
