A Big Vegetable Roast


roasted peeling beets


I think we first came up with this idea last fall.  Instead of roasting various winter foods as we need them, why not save oven power and kitchen time by roasting a whole bunch of things at once?  I love this idea, and it can save me a bunch of time later in the week.

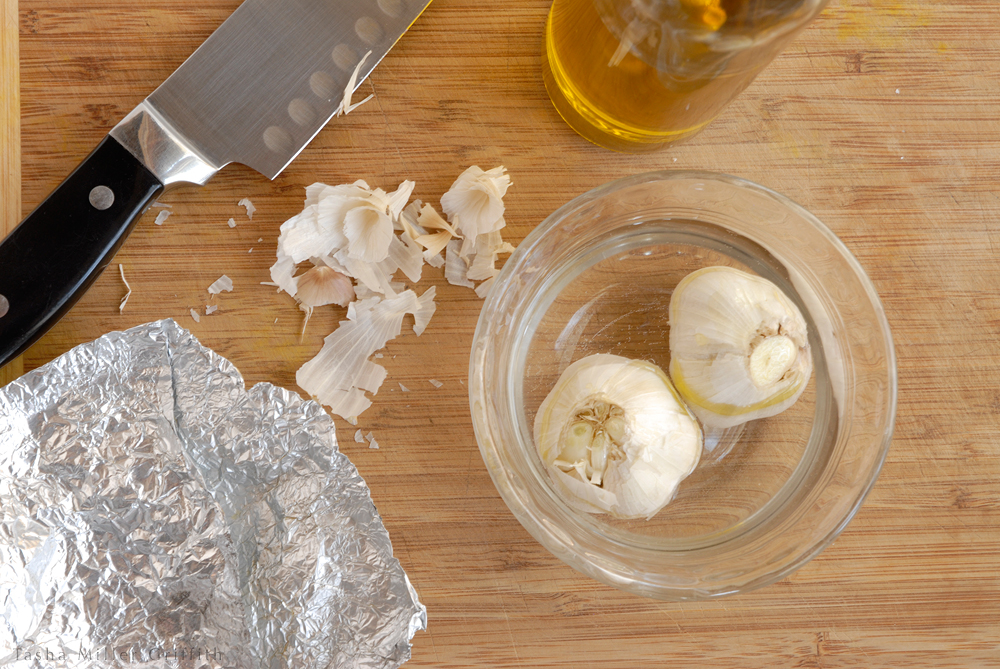
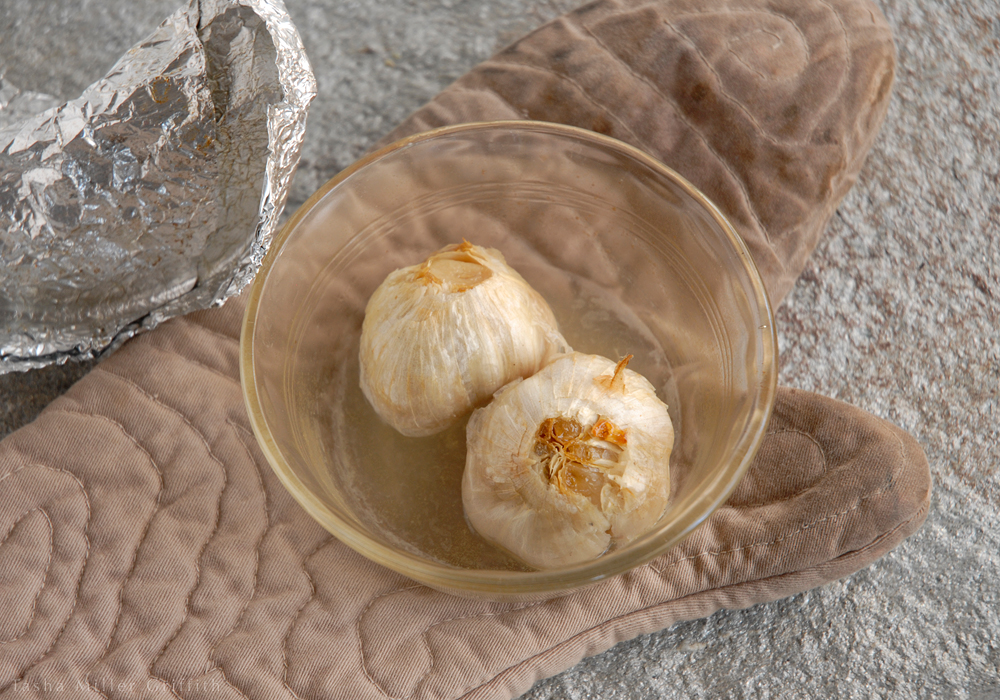
I set the oven to bake at 400° F, and start prepping things.  I like to do garlic first, since it seems to take at least as long as anything else.  Slice just the tops from a head or two, and put in a small oven-proof container.  Pour in water to come about halfway up the sides of the garlic.  Drizzle olive oil right on top of the cloves.  Cover with foil or ideally, a lid.  I use the foil as many times as I can, but I’d love to have a container with a lid for roasting garlic, and beets.  It’s on my list but I haven’t found it yet.

Place the garlic container in a corner of the oven somewhere where it can roast along while you take other things in and out.


roasting garlic before


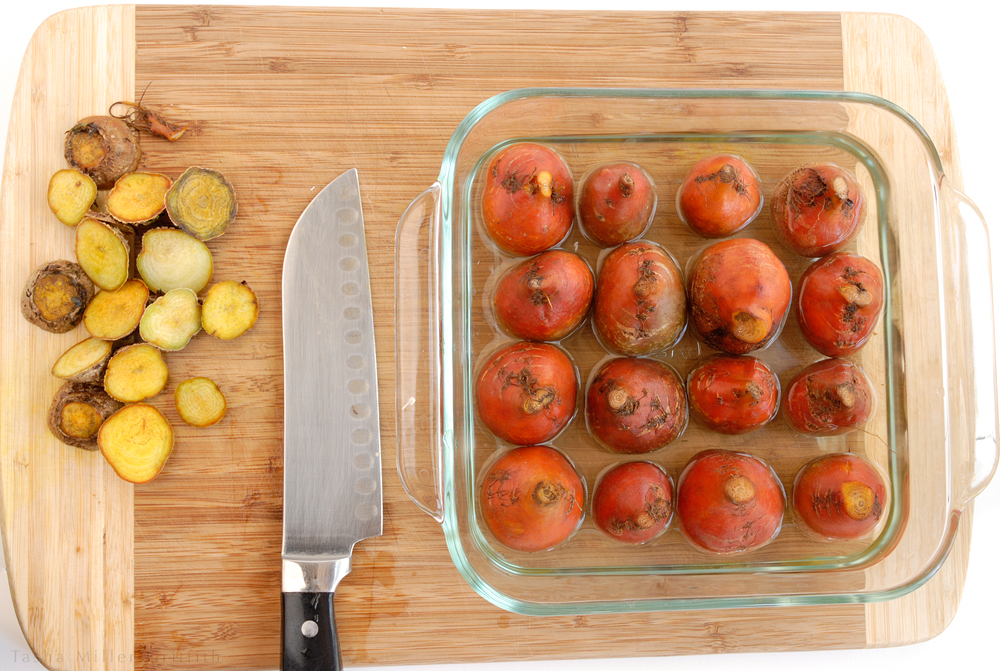
Ok, let’s talking about peeling veggies for a second.  Peeling a raw beet or squash is such a pain that I almost never do it.  But the roasted ones peel like magic.

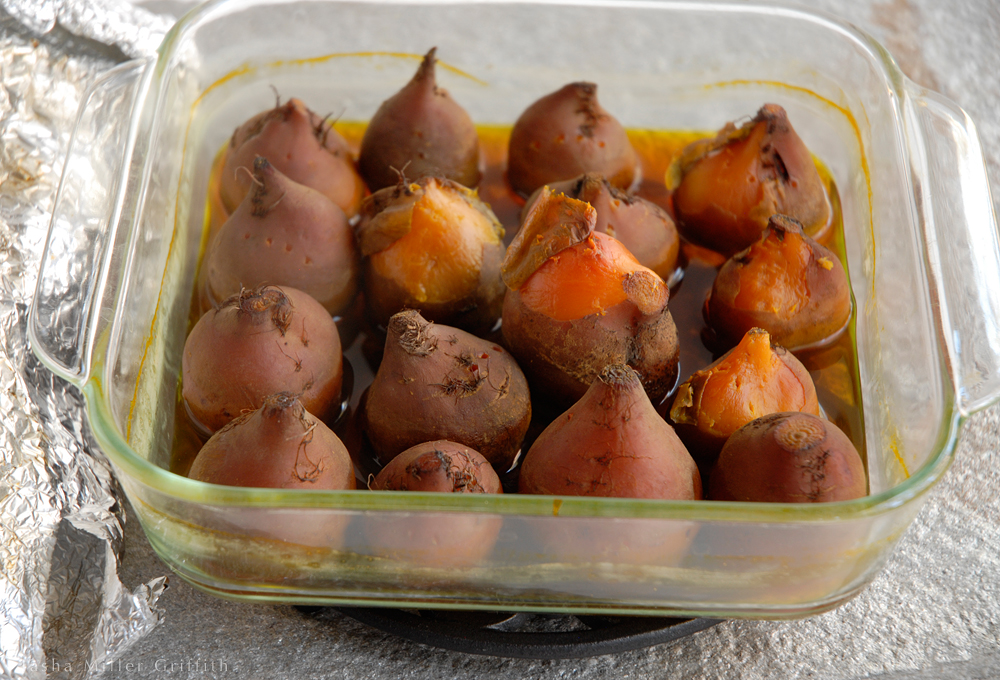
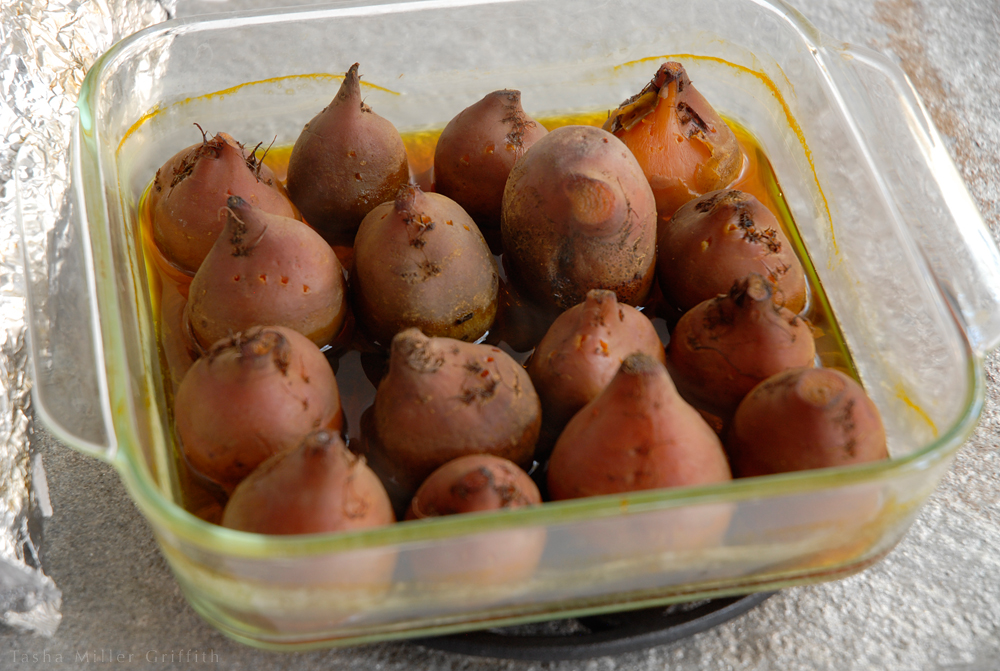
In my oven, beets get a similar treatment to the garlic, except without the olive oil (probably no harm in adding it too …).  Cut off the tops and any long tails, then place them in a pan, add water, and cover.

Put the beets in the oven too.  No need to check on them for at least 20 minutes, big ones can take up to an hour or so.


roasting beets before

Believe it or not, this is the exact set of beets I got in a bag at our CSA store.  Who knew they would fit so precisely?


One of my favorite things to eat all winter long is butternut squash.  It’s good in so many things: soups, winter tacos, quiches, seasoned slices.  Search some of your favorite cookbooks or sites and you’ll get many more ideas.  It’s also much easier to peel when cooked!

Cut the squash in half, and scoop out the seeds.  Said seeds are delicious roasted with a little salt and any other spices you wish.  I usually put them in after the squash is done.

You can either cut the squash into slices, or roast the halves as they are, depending on your later squash plans.  I did some of each.  In either case, rub a little olive oil on the cut faces.


roasting butternut befoe


If you are roasting slices/seeds/small things, be sure to check on them after about 10 minutes, and then every 5 minutes or so.  It’s easy to lose track and burn them while the bigger things are still happily roasting.

I flip the slices over when they get brown on the bottom, so that both sides get nice and toasted.


roasted butternut slices

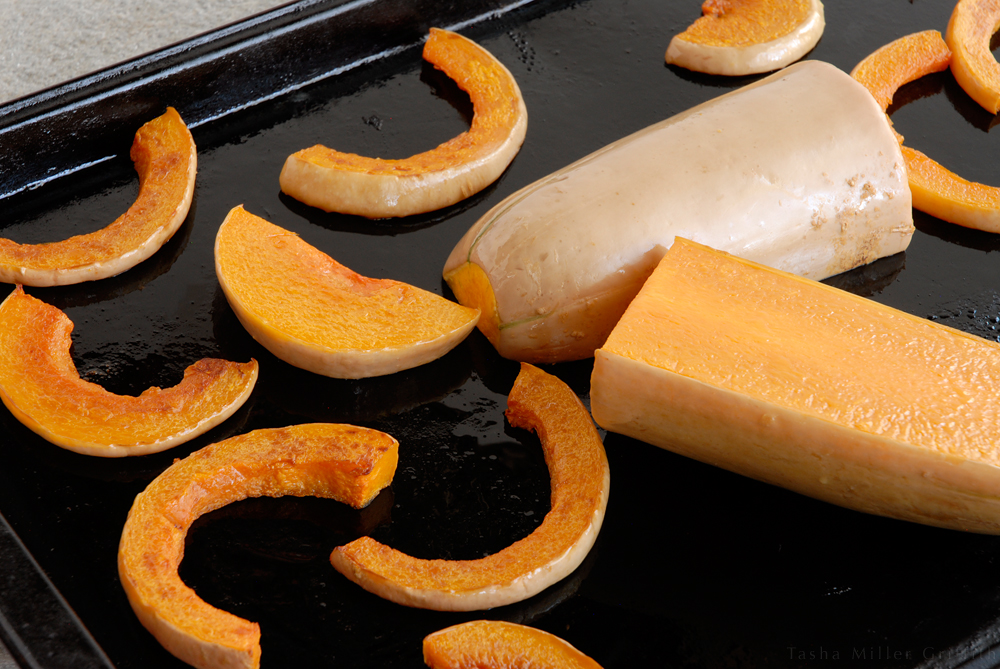
These slices are done, but the bigger chunks need to cook for a while yet.


Not pictured, but also great to roast are:

Sweet potatoes and/or regular potatoes in their skins, or as slices.

Nuts.  Sometimes it’s a lot cheaper/easier to find quality raw nuts and roast them yourself.  These are another thing that’s done quite quickly, so set a timer.


roasted butternut with potatoes


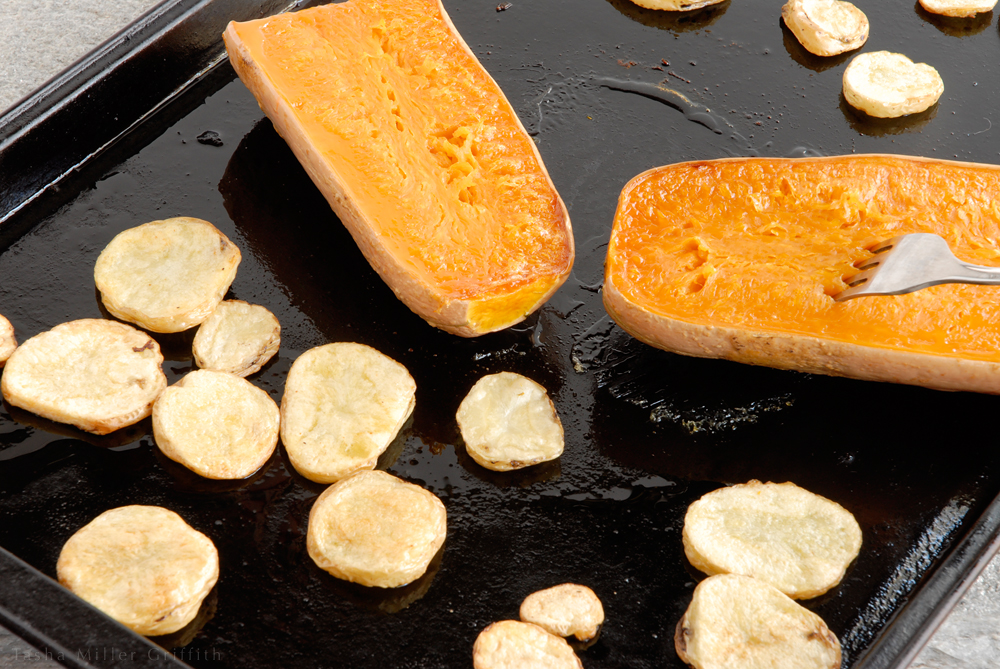
By the time the second round of slices (potato) are done, the big pieces of squash are too—easily pierced with a fork.

Beets are also done when fork-tender, and when the peel slides off with just a push from your thumb!


one peeling beet


And finally the garlic.  I’ve never overcooked it, but if it’s been in the oven for quite a while, check to see if the water has all evaporated.  If so, it’s probably done, and if not, add water so it doesn’t dry out.  To me, done roasted garlic = squishy and a little caramelized on top.  Yum!


roasted garlic


So there you have it, all the roasted veggies you need for the next week or so.

What are some of your favorite winter foods?

Chopping Vegetables, or “Get a Big Knife”


Ok, blog people, let’s talk about something important: chopping vegetables.  Nope, I’m not kidding, in fact I think that being able to do this efficiently can make a real difference in how much work it is to cut up veggies, and therefore how many we cut up and eat.  I have not been to cooking school, so I learned most of my “knife skills” just by experience, and reading cookbooks.  But there are a few simple principles I use now that really make quite a bit of difference.

First of all, get a big sharp knife.  This does not have to break the bank.  When we were renting in Madison, we went to the thrift store, got the most solid-looking/feeling knife (from a rather large and alarming bin of them) went home and sharpened it, and it worked great.  If you use a tiny knife, you will have to cut each piece of each vegetable separately, and that will take forever, and you will be grumpy and think that vegetables are too much work.

Ok, second thing, and this really the key as far as I’m concerned, chop the vegetable into sections, which you can chop together into pieces the size that you want to end up with.  I’ll demonstrate on this squash: cut the ends off (any part you don’t want), and then cut it in half.


Then, cut the halves in half again, so that you have four sections of squash.  You can pull the knife in a curve as you cut if your veggie is curved.  If you want very small pieces at the end, cut into eight sections now, dividing each one one more time.


Now, line up the sections and chop all at once!  You can chop thin or thick pieces, whatever you’d like for your dish.  Notice that the tip of your big knife can stay touching the cutting board as you lift the thicker part near the handle and chop chop chop.


At this point I should perhaps point out that I am usually holding whatever I’m chopping (not the camera) with my non-dominant hand.  And that if you are left-handed, you’ll do exactly the same things, but your chopped squash pieces would appear on the left side of the frame above.  When you’re holding something that you’re chopping, lots of cookbooks advise you to keep your fingertips tucked under, I think on the theory that if your knuckles are sticking out the furthest, they are higher above the thing being chopped, and more likely to bump into the side of the knife than being accidentally shaved by the blade.  Most of the time, I forget to do this.  Use whatever works for you without chopping your fingers.

Also at this point, you may be thinking, “Ok, fine, but not all vegetables come in such a straight and manageable shape.”  Ah ha!  True, but use the same principles to break them up.  For example, I cut this crookneck squash into a (more or less) straight part, and a very curvy part.


Cut off the ends and divide into sections as before.  If one part is noticeably thicker, I’ll cut it into quarters, and leave the thinner section in halves, to get pieces of about the same size.  That way they will all cook in about the same amount of time.


There wasn’t an easy way to line up the curvy sections flat, so I stacked them on top of each other.  It’s all about chopping more pieces with one cut.


Another thing that’s not illustrated, but helps a lot, is having a big bowl (or two if they are not all going to the same dish) to collect your chopped veggies in.  Having a cutting board cluttered with things you’ve already chopped will force you to make smaller, less efficient movements.


Apply the same principles to a round eggplant: slice first, crosswise this time, then stack and cut into pieces the same size as the squash.


A few vegetables have their own variations on these ideas, like onions.  Any other ones you’d like to see covered?

What to do with all these lovely freshly chopped veggies?  All of the ones illustrated here went into ratatouille.


Try it, trust me, it’s faster, it’s so worth it.

When I say “faster,” I don’t mean “hurry” or “rush” (which in my case always leads to mistakes and/or injuries, usually and), I mean more efficient, less time spent doing the same task, even though you are doing it well.  Whenever I think about efficiency as applied to hobbies (like cooking is for me), I think of this quote, it’s from a weaving and sewing book that my grandmother gave me off her shelf when I liked it.  I love the way the authors write about craft:


In all human pursuits there seem to be fast, efficient ways of doing things and slower ways of doing things.  Some weavers hesitate to look for and adopt efficient methods in their craft because they think of themselves as amateurs.  In their heart-of-hearts they feel that it is not appropriate for them to become more proficient.  . . . Loving the craft of weaving and wanting to pursue it more efficiently are certainly not mutually exclusive.  There is every reason, in fact, for all weavers to try to become efficient.  The first benefit of increased proficiency is the production of a better fabric.  There are very few satisfactions that compare with that of a job well done!”

– Handwoven, Tailormade by Sharon D Alderman & Kathy Wertenberger


There’s a lesson here for all of us who make ourselves anything as a hobby.  I’d love to spread this attitude, and the resulting more and better sewing/cooking/weaving/whatever you make.  What do you think?  How to you view efficiency in your hobbies?