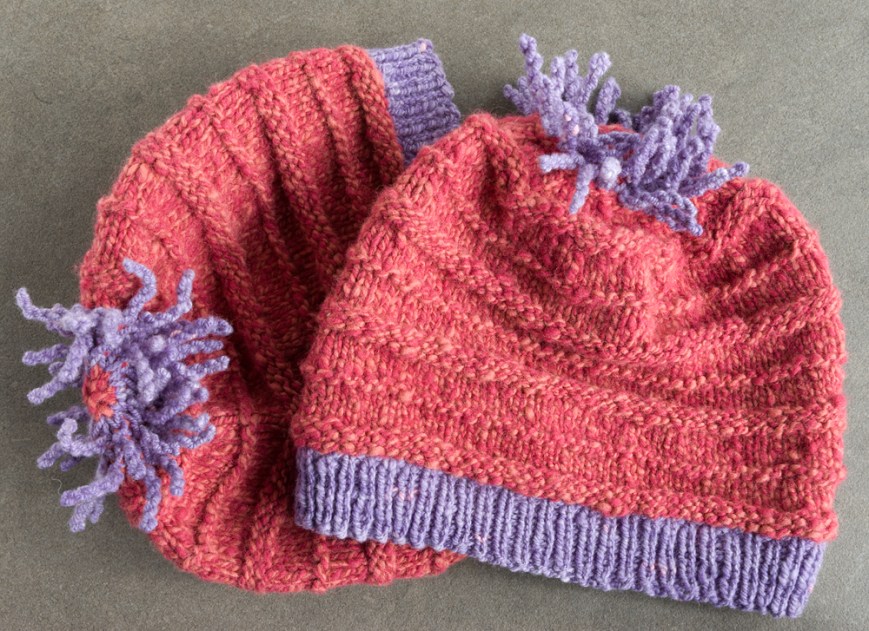
A free pattern to knit and embroider.
I designed this hat for myself, and decided to share the pattern after a friend declared it her favorite thing I’ve ever made. It feels like a really good time to put a little bit of beauty out into the world right now. I’ve been collecting the pieces of this pattern—the photos, the drawings, the yarn specs—in spare slices of time over the past weeks, and now it’s ready to go!
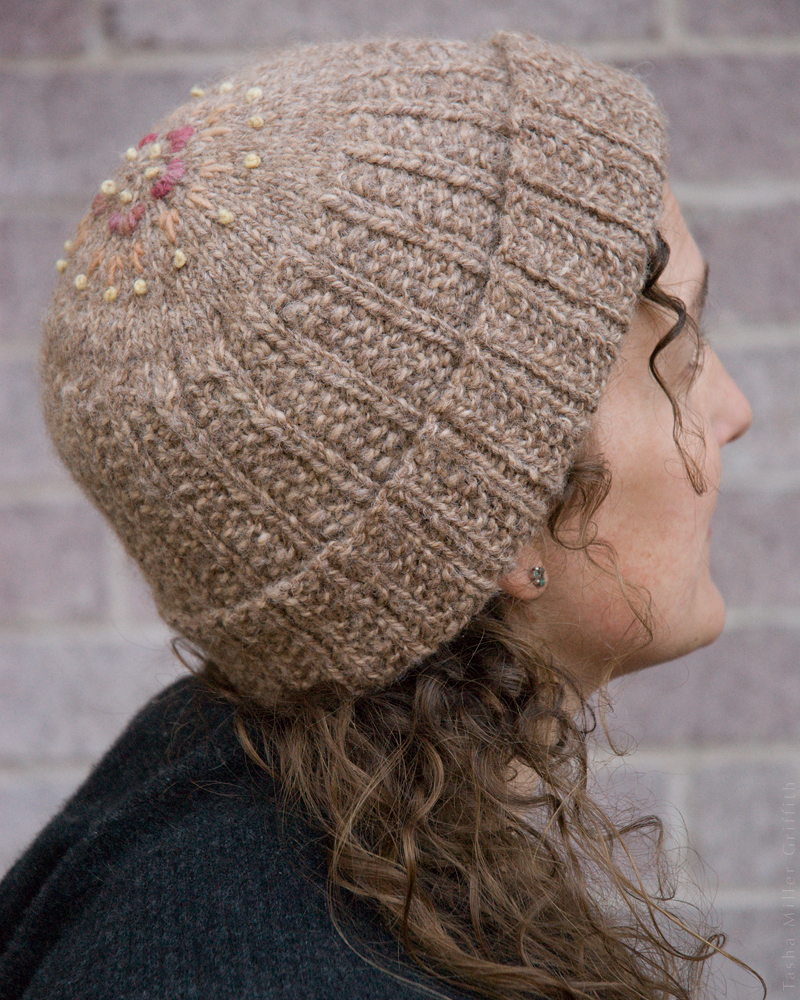
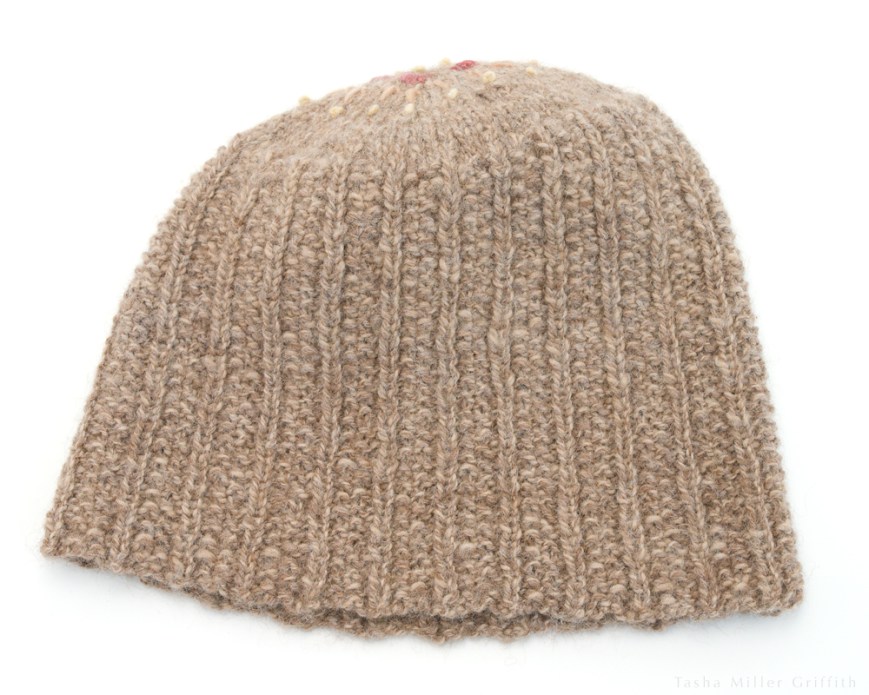
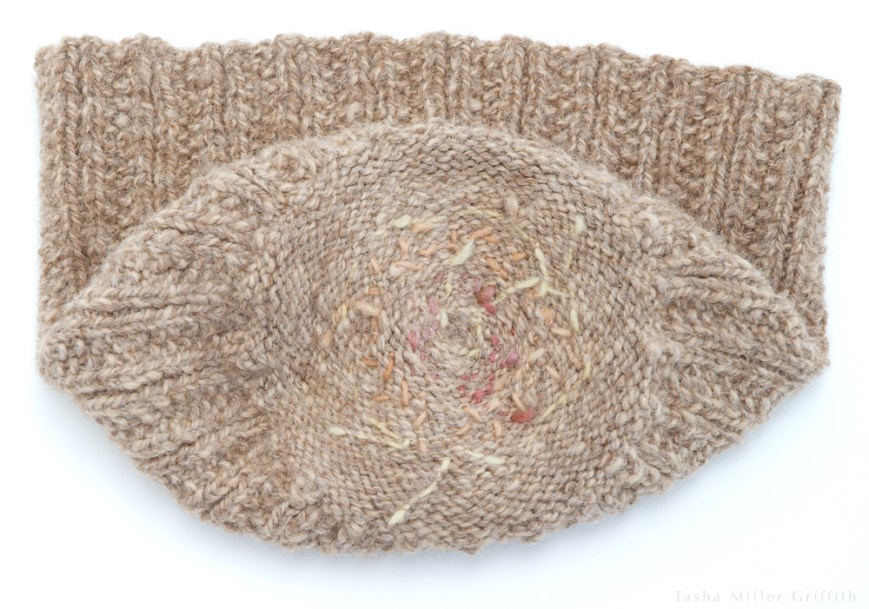
The Star Blossom Hat is mainly seed stitch ribbing, shaped with short rows for a longer back to cover your ears, and designed to be long enough to turn up all around. It has a stockinette stitch top to serve as a background for some sweet and simple embroidery, reminiscent of a cherry blossom or a starburst.
Yarn
Lucky me, I had a big skein of my friend Lauren’s handspun just sitting in my stash. All I remember her telling me about it is, “It’s alpaca.” It was just waiting for this hat I think. Assuming that Lauren didn’t go into production on this and start selling it around the country without telling me, here are the characteristics you want to match in your yarn to get a similar look and feel:
•It’s worsted weight, about 9 WPI.
•It has bounce. 4” of yarn will stretch another ½”, and then easily spring back. It needs a little elasticity so the ribbing pulls in just enough to keep its shape on your head. My yarn has some drape too, like most all alpaca, which is not a drawback here, but also not necessary for this shape to work.
•It’s not too fuzzy. An alpaca yarn with a lot of “halo” effect would obscure the textured stitches and the embroidery, so opt for something fairly smooth.
•It’s a 2-ply yarn, and each ply is a slightly different (natural alpaca) color. It’s also a little bit thick-and-thin, being handspun. Neither of these characteristics is essential to the hat, but both give the texture of the stitches a little more dimension.
•It’s soft enough to comfortably touch my face.
This hat took just about exactly 130 yards of yarn. 150 yards would give you plenty for swatching and margin of error.
Spinning geek details on the original yarn for those interested:
•Angle of twist 27°
•3.5 – 5 twist bumps per inch in plied yarn
•587 yards/pound
Yarn scraps for embroidery:
These are also something I’m lucky enough to have; little bits and pieces from my grandmother’s stash which I’m pretty sure were dyed with natural materials by her or her fiber friends. You can use any scraps you have in colors you like! Or even ask your knitting friends to share and swap scraps. Embroidery is my ultimate use for tiny bits of yarn too beautiful to get rid of. These are singles (one ply) yarns, which gives the stitches a soft fuzzy look.

Gauge
Before blocking I got 5.5 to 6 sts/inch in seed stitch ribbing, and 5 sts/inch in stockinette.
After blocking I got 5 to 5.5 sts/inch in the ribbing (stretched slightly during blocking) and the same 5 sts/inch in stockinette.
Needles:
I think I used US size 4. I knit pretty loosely. Size 5 would probably be a more common recommendation … the point is it doesn’t matter, use the size you need to get the gauge you want!
Sizing
I have a fairly big head, and I hate hats that squish my hair (or worse, my head!). Straight around my forehead, with the measuring tape snug but not tight, measures 22.5 inches, and that’s the size I made the hat (using 5 sts/inch for math). This gives me my personal hat fit of dreams: snug enough to stay on my head, but never tight or uncomfortable. I highly recommend that you measure the hat recipient’s head and take her/his preferences into account. You may have to modify the decreases for the top a bit, but that’s a small price to pay for a hat that really fits!
Seed Stitch Ribbing
This is just so nubbly, I’ve been knitting it into everything lately. I wanted a combination of stitches that would look good on the right or wrong side, so the brim of the hat could be turned up, and this is what I came up with. The columns of ribbing are always purl knit purl, with two stitches of seed in between.
It does look a little confusing at first, so put as many markers as you need, until you can see where the ribbing columns are and which are the seed stitches that should always alternate.

Pattern
Cast on 115 stitches (or the number you determined from your head size). You’ll need a multiple of 5 stitches for the seed stitch ribbing pattern. I used this cast on.
Bring the beginning and end of your cast on stitches together, and knit in the round, in the seed stitch ribbing pattern, until the hat measures 6 1/2 inches tall. (If you have extra yarn, you can knit further at this stage, which mean you can make a deeper turn-up in the brim of the hat when it’s done).
Short rows:
Reserve 40 stitches (or about 1/3 of your total stitches if different) which will be the center front of your hat, by placing a marker on both sides of them. Keep knitting around until you are 4 stitches away from reaching the first marker again, and then turn and knit back until you are 4 sts away from the second marker. (Remember to match the patterns to what you see on the wrong side as you work back.)
Continue to work back and forth, each time stopping 4 sts away from the last turning, until there are 5 groups of short rows or 6 “steps” on either side of center front, and about 40 sts in the middle that will be the center back. The back of the hat should measure 8 to 8 1/4 inches tall.
Work around on the right side, integrating the turning stitches. My favorite is Cat Bordhi’s “Thanks-Ma” method, which uses a clever pick up to make the “steps” basically disappear. Cat’s video explains it specifically for her sock heel, but I’ve used it on all kinds of things since learning it. Still, if you have another favorite short row method feel free to use that instead.
Then knit one more round on the right side, maintaining the patterns, to smooth everything out.
You shouldn’t need to change the numbers in this section, unless your stitch count is very different from mine. If short rows freak you out, you can also skip them altogether, and just keep knitting in the seed stitch ribbing pattern until the hat is 6 1/2 to 8 1/2 inches tall, depending on how much you want to turn up the brim.
Crown:
Switch to stockinette stitch and knit one round plain (knit every stitch). Place a marker at the beginning of your round.
Round 2: Work a K2tog (decrease 1) at every column of knit stitches from the ribbing pattern (23 times around). Or you can think of it as k2tog, knit 3, repeat around. I just think it looks nice to line up the decreases at the knit columns.
Round 3: Same as round 2 (decrease 23 sts again in the same places, or k2tog, knit 2, repeat).
Rounds 4-8: Knit these 5 rounds plain.
Round 9: Decrease at every column again (k2tog, knit 1, repeat).
Rounds 10-14: Knit these 4 rounds plain.
Round 15: knit every two stitches together all the way around (k2tog, repeat).
Rounds 16-18: Knit these 3 rounds plain.
Round 19 to finish: Continue k2tog until there are only 6 stitches left.
Break the yarn, leaving a tail, and thread the tail on a blunt needle, and through the remaining stitches, continuing in the order you would knit them. Thread the tail through the top of the hat to the inside, and pull the last stitches snugly together. Secure the yarn on the wrong side of the hat.
If your stitch count is different, I suggest trying the same number of decreases in each decrease round as you have knit columns from the ribbing, and using my spacing of plain rounds between. If that doesn’t work or you have questions feel free to get in touch, I’d be happy to help you figure it out! I unraveled my crown twice to come up with this formula. It should have a little curve (like your head), but not be too loose or floppy, to show off the embroidery.
Embroidery
I used just two stitches; the simplest running/satin stitches (in two different groupings), and Colonial knots, both which I explain in this post.
I used pins to visually mark the placement of the five knots nearest the center, and then based the other motifs on those, moving outward.

Tips for embroidery on knits:
Whatever stitching you add will also add some bulk and stiffness to the knitted fabric. You can minimize this by:
•Taking the shortest path on the wrong side between the end of one stitch and the beginning of the next.

•Stretching the fabric gently after every few stitches (minimizes puckering).
•For longer stitches between motifs on the wrong side, catching a little bit of the yarns in the fabric as you go along, so you don’t have long floats that can catch on things (I show this for yarn ends in this post).
That’s all, folks! I really hope you all enjoy this pattern, and if you decide to make it of course I’d love to see! It’s now up on Ravelry as well.
Take care everyone and enjoy your winter!