I’ve been planning and dreaming about posting some natural dyeing instructions here for a while, and I’m happy that the time has come! Dyeing fabric and yarn with colors from nature has been an obsession of mine since 2015, when I started researching printing with natural dyes on fabric, and doing my own testing. I have learned an amazing amount since then, and yet still feel like I have only dipped my toes in the vast ocean of possibilities. When I started this adventure, devouring whatever I could find to read, it was before the newest wave of books on natural dyes came out, and so I read a lot of unillustrated books from the last time natural dyes were having a big moment in the 70’s, and whatever came up in internet searches. Most of those sources seemed a little questionable, they presented information without a lot of reasons behind the methods, and they often contradicted each other. I wanted to know what really worked and what were the best methods, so I started testing various dyes and techniques, and haven’t stopped since. I hope that by sharing some of what I know now, I can help build the kind of knowledge base I wished for—both solidly rooted in good, provable methods, and also empowering to those who still have a lot of questions. (Full disclosure: I still have a lot of questions too. It is impossible to know the answers to all of the questions about natural dyes, and that is one thing that keeps me going.) Buckle your safety belts, there’s a hefty dose of science coming (and a bit of philosophy too).
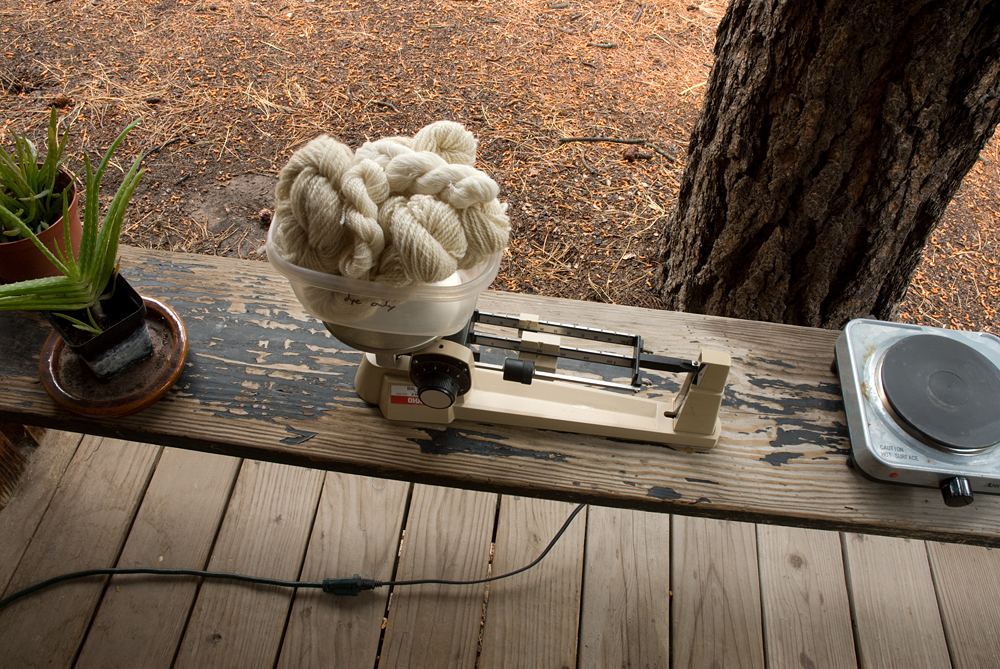
This is my back porch “dye studio.” It’s just a bench where I can put an electric burner and whatever else I need … and it’s my absolute favorite place to be any time the weather is warm enough.
First things first: there are some basic facts and ideas that we are going to need for all the discussion about dyeing that follows, so I’ll put them up here.
Fibers
Animal-grown fibers like wool, silk, alpaca, etc. are made of proteins. These fibers are the easiest to dye, because they readily react with the compounds in mordants and dyes. In fact, as Elizabeth Wayland Barber points out in her (amazing and highly recommended) book Women’s Work: The First 20,000 Years, it was the domestication of sheep and silk worms and the development of wool and silk fabrics that led to color in fashion!
Plant-grown fibers like cotton, linen, and hemp are made of cellulose, and are chemically and structurally different from protein fibers. To bust our first myth right here: it is totally possible to get vibrant colors using natural dyes on plant fibers—it just took a humans a little bit longer to figure out how. The famously intense “Turkey red” color, and the original printed cottons from India that took Europe by storm in the 17th century, were all made with natural dyes on cellulose fibers! They do require a different process for scouring and mordanting than protein fibers to produce deep colors.
Rayon is a man-made fiber created by chemically breaking down wood pulp and extruding it. Since it is made of cellulose, it behaves similarly to plant fibers in dyeing. Bamboo is also a regenerated cellulose fiber (unless, and more rarely, it is processed more like linen). According to my natural dye and fiber mentor Catharine Ellis (see resources at the end of this post) “Tencel” and “Lyocell” are regenerated cellulose fibers produced with a method that recycles almost all of the chemicals and water used, while other methods of producing rayon and bamboo fibers create a lot of chemical waste.
Almost all other synthetic fibers don’t work with natural dyes, so I won’t cover them here. (In addition, synthetic fibers like polyester, nylon, etc. are basically plastic, and create similar environmental issues as other plastics do when they are made, used, and discarded. Especially troubling: they introduce micro-plastics into waterways when they are washed.)
Weight of Fiber
The best way to figure out how much dye, mordant, detergent for scouring, or whatever else you need for your project is to base it on the weight of the fiber you are dyeing. Also sometimes called “weight of goods,” this is the dry weight of the thing you want to dye, whether it is wool yarn or a T-shirt. Weigh it, and write down the weight, preferably in your dye notebook, or somewhere you will be able to find it later. If you are scouring a few things that you plan to dye separately, do your future self a favor and write down the weights of the individual items, rather than just the total. I encourage you to weigh in grams if possible—not to convert ounces to grams (that’s difficult)—just leave all your weights in grams and find percentages that way (that’s easy: 10% of 487 grams is 48.7 grams, etc.).
Dye Pots and Utensils
It’s important to use separate pots, spoons, tongs, containers for weighing things, etc. for dyeing. Do not use the ones you cook with. My philosophy on this is that “non-toxic” is not the same as “good for you to eat.” A large stainless steel pot is a dyer’s best friend, and small ones are also useful. A pot or two and a spoon or tongs to stir with are enough to get you started.
The pot you use for scouring, mordanting, and dyeing should be big enough to give your fiber room to move. If it’s too bunched up, the solution won’t be able to get to all of it and it will dye unevenly. I will often split fabric yardage into a few pieces to make it easier to stir without becoming hopelessly wrapped around itself, and allow it to be divided into batches if needed.
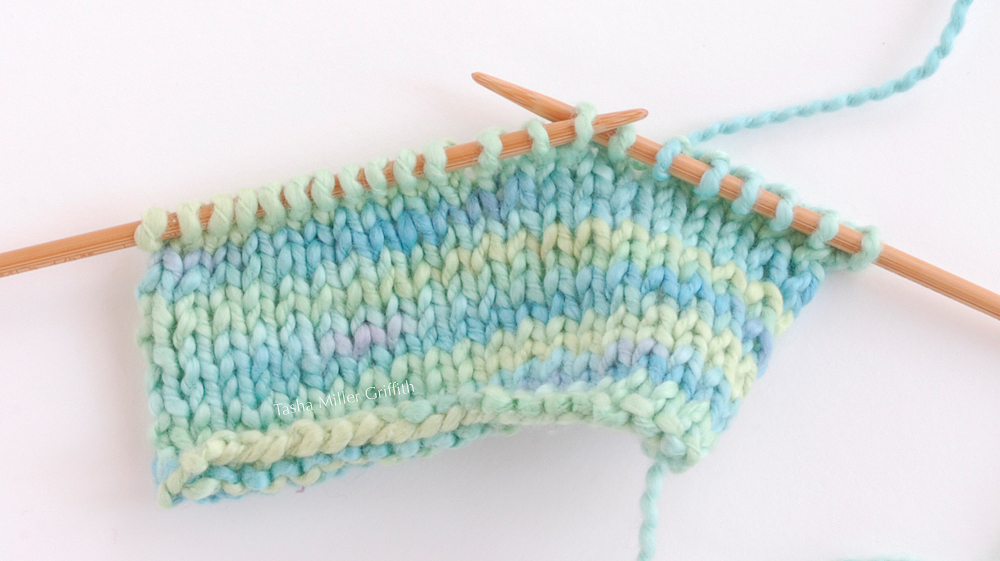
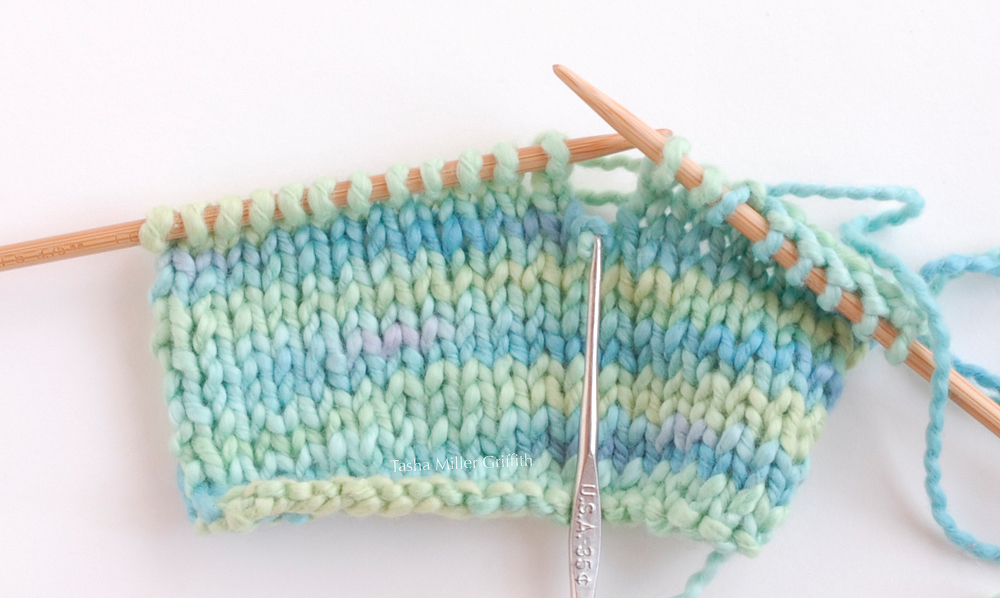
Assuming you aren’t yet overwhelmed, let’s move on. Now we have some natural fiber yarn or fabric that we want to dye. Mordants (to be covered in a later post) and dyes form chemical bonds with the fiber at a molecular level, and they can’t do that if there are a lot of waxes, oils, or dirt in the way—in other words if the fiber is dirty. This is where scouring comes in, meaning intense washing, to make sure the fibers can absorb as much dye as possible.
Does Scouring Really Make a Difference?
Short answer: Yes.
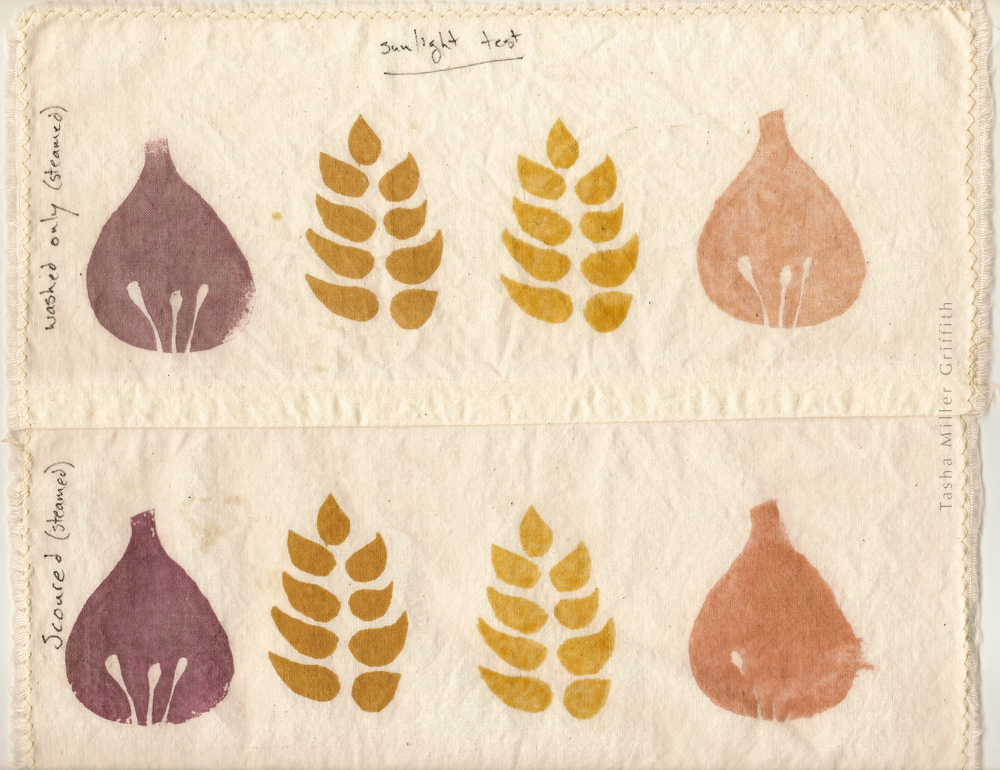
Here below are some of the very first samples I made to test things out. The background is unbleached cotton muslin fabric, washed in the washing machine only (top), or scoured (bottom), before printing with (left to right) cochineal, black tea, Osage orange, and madder dye pastes.1 There is no mordant on these, which is why the colors are dull, particularly the cochineal (more about that later). Notice the differences between the two treatments, how three of the four colors are more saturated on the scoured fabric. (I’m honestly not sure what’s going on with the other color, Osage orange, maybe I will know the answer in another five years or so …)
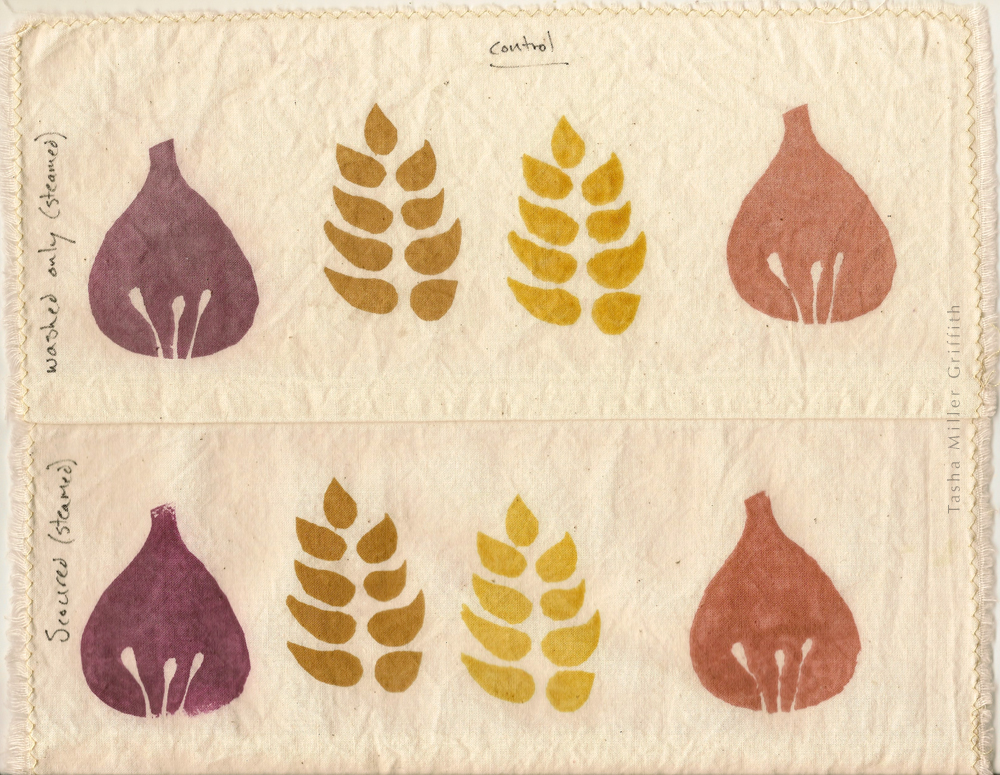
Below are samples from the same batch (as close to identical as possible), after a couple of weeks in the sun. More dye can bond with the fibers in the scoured samples, which means not only are the colors deeper to begin with, but they last longer. I got similar results with samples that were washed multiple times. I can also see the same effect on wool and silk fabrics that were either hand washed, or scoured using the method below.
Do I Have to Scour Everything?
Short answer: It’s up to you.
If you can’t or don’t want to scour your fiber before dyeing, wash it as thoroughly as you can, and know that while you probably won’t get the best possible result, you will still get color to attach.
Fabrics and yarns that are already bleached (stark snow white instead of a softer “natural” color) have been intensely scoured at the factory where they were made, and usually don’t need scouring again. You should still wash them thoroughly (in a hot water, long cycle if cotton or linen, or by hand if wool or silk), to get rid of any starches, sizing, oils etc. that may have been added.
I can’t talk about all of this without encouraging us all to think more broadly about where the materials we are using come from, especially if we are buying them new rather than secondhand. Bleached fabric or yarn might be easier for us to work with at home, but where was it processed, what chemicals were used to scour and bleach it, and what precautions were taken to protect the workers and the local environment from overexposure to those chemicals? One of the big reasons I started working with natural dyes was to give myself creative options that I really felt good about. Being more involved in the process from fiber to garment means that I am responsible for a lot of decisions that it’s easy to not even think about in a consumer society—and that I am taking back the power and the freedom to decide for myself how the textiles that touch my body every day will be made.
To Scour Protein Fibers
I adapted this method (my current favorite) from Kristine Vejar’s book The Modern Natural Dyer.
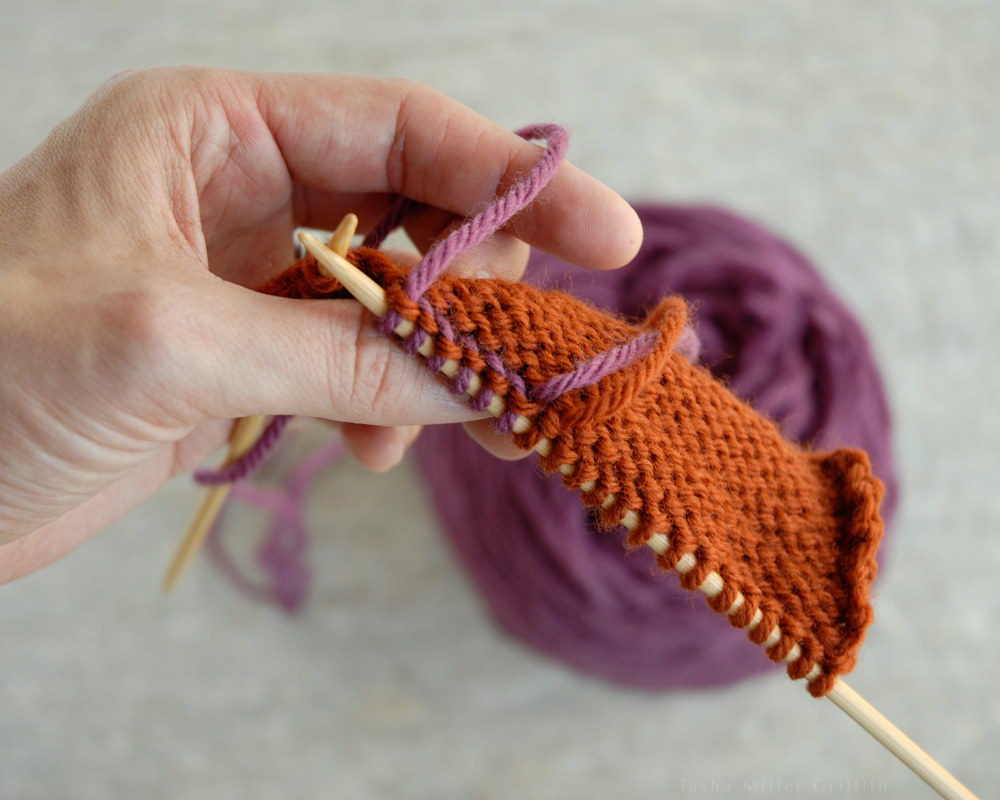
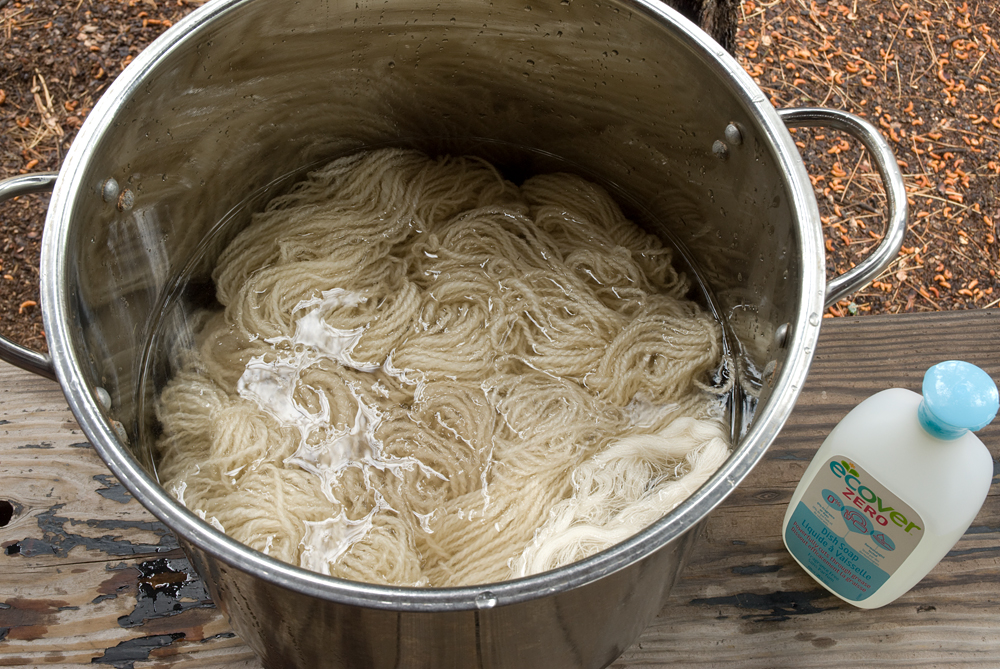
1. Pour an inch or so of hot water in the bottom of your pot. Add pH neutral detergent* at a percentage of 0.5% of your weight of fiber—equivalent to about ½ teaspoon for 500 grams of fiber or just a few drops for 100 grams. Stir to dissolve the detergent. Add enough additional warm water so that the fiber will have some room to move.
2. Add your fiber, and more warm water to cover, if needed.
3. Slowly bring the water up to around 180° F (just below a simmer). Many sources say that boiling can damage silk, and it will felt wool. Hold at around 180° for about 30 minutes. Stir the fabric every 5 to 10 minutes throughout the process, bringing sections from the bottom to the top, and redistributing any clumps or tight areas that form, so the scouring water has a chance to get to every part of it.
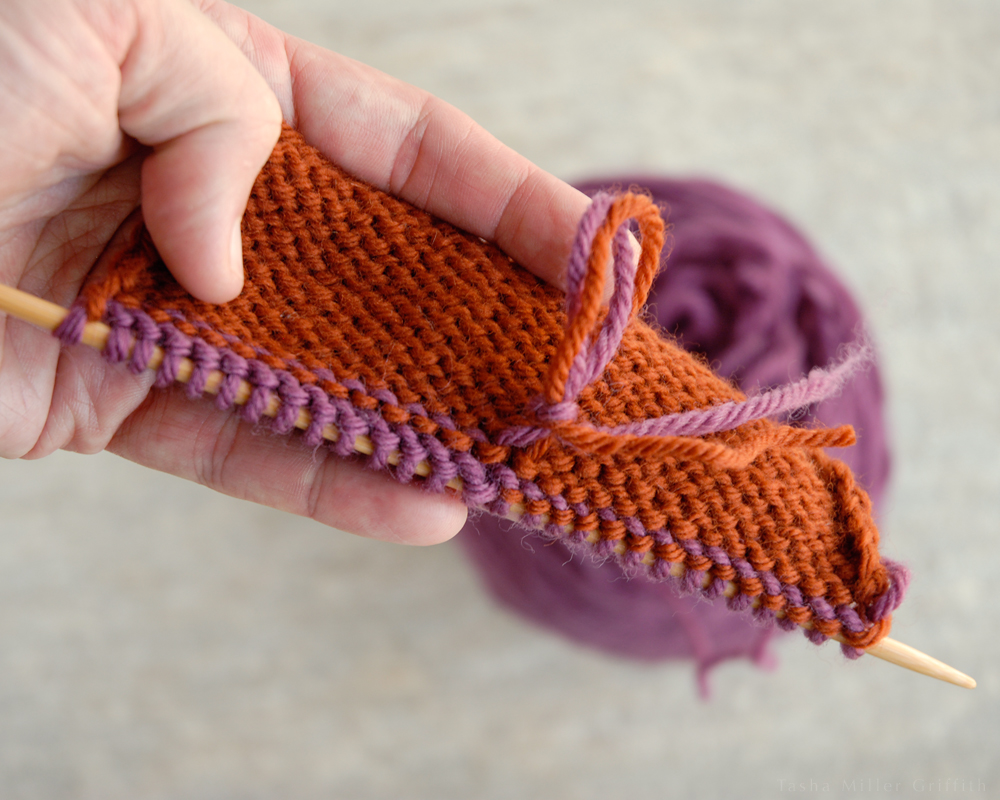
4. Take the pot off the heat, and let it cool down until you can put your gloved hands in the water comfortably.
5. Gently rinse the fabric in a couple of changes of water at the same temperature as the cooled-off scouring bath.
Why This Way?
*Detergents: Protein fibers are slightly acidic (human hair is too), and can be damaged by alkaline solutions, which is why it’s important to use a pH neutral or slightly acidic detergent. (A lot of laundry detergents work in part by being alkaline, so they aren’t recommended.) Dish detergent works, and I have successfully scoured a fair amount of wool and silk fabric using Ecover brand Zero (unscented). But if your fiber is greasy and you need more than the small amount suggested here, it can take a ridiculous amount of rinsing to get rid of the dish soap suds. Lately I have been using a detergent designed for cleaning wool, like Unicorn Beyond Clean or Kookaburra Scour.2
Wool and other animal fibers are almost always thoroughly washed (also called scouring) before they are processed into roving, yarn, and fabric. A lot of that processing relies on the addition of small amounts of oil to make it go smoothly, and the carding/spinning oil is the primary thing we want to remove by scouring wool yarn or fabric again before dyeing, along with any leftover lanolin, etc.
Note: Most types of wool are naturally prone to felting, which occurs with moisture and agitation, and is accelerated by heat and temperature shocks. In other words, the conditions needed for scouring and dyeing are also conducive to felting, so treat your wool gently. Raise and lower the temperature of whatever bath the wool is in slowly, and stir it only as much as needed for the solution to get to all the fibers, turning the yarn or fabric around gently. You can also dye wool as it comes off the sheep, before it is spun or woven, but be aware that the fibers are especially prone to felting before they have the twist of yarn to organize and protect them, so be extra careful!
Silk, which is extruded by silkworms as they make their cocoons, includes a gummy substance called seracin as well as fiber. Both of these components are proteins, and both absorb dye. Most silk fabrics and yarns are sold either “de-gummed” with the seracin removed, or with it left in on purpose to make the fabric crisp. I am not a silk expert, but I have had good results using the same gentle scouring above with silk fabrics.
To Scour Cellulose Fibers
This method is also adapted from The Modern Natural Dyer. I usually use a little less soda ash than the recipe in the book, and it seems to be enough for unbleached cotton fabric. I haven’t been able to see a difference adding detergent to this scour, the soda ash alone works really well, and rinses out easily.
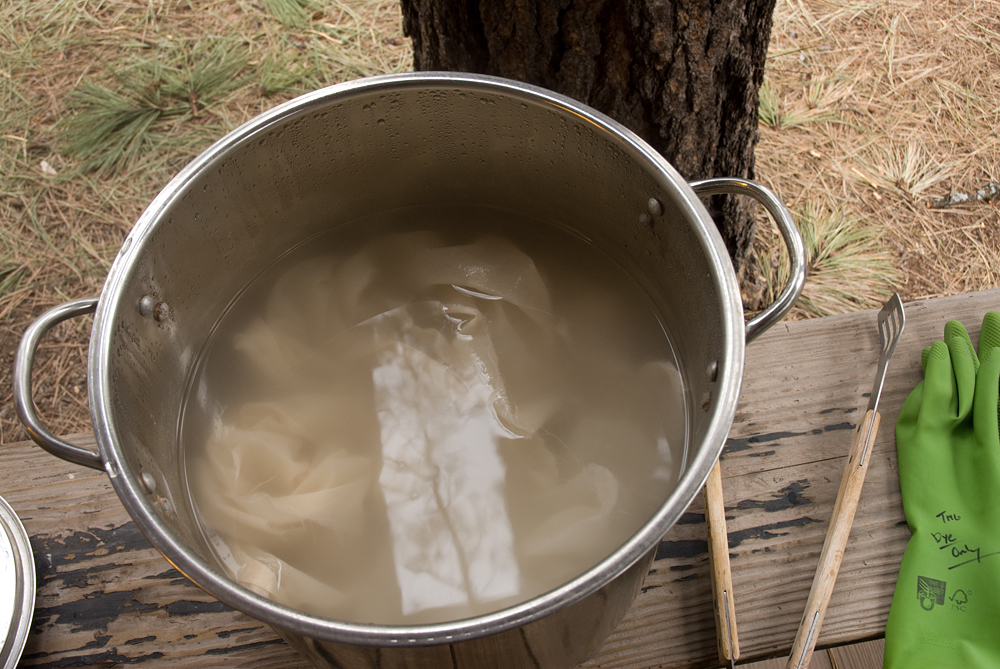
1. Pour an inch or so of hot water in the bottom of your pot. Add soda ash at 4% of your weight of fiber—equivalent to about 1 teaspoon for 100 grams of fiber. Wearing gloves, stir the water to dissolve everything. Add enough hot water so that the fabric will have some room to move.
2. Add your fabric, and more hot water to cover, if needed.
3. Bring the water up to a simmer (this may take a while if the pot is large), and let it simmer gently for about 30 minutes (with the lid ajar so it doesn’t boil over). In my experience, having the pot at a rolling boil just pushes sections of your fiber out of the water, especially if you are scouring fabric. Stir the fiber every 5 to 10 minutes throughout the heating and simmering, bringing sections from the bottom to the top, and redistributing any clumps or tight areas that form, so the scouring water has a chance to get to every part of it.
4. Take the pot off the heat, and let it cool down until you can put your gloved hands in the water comfortably. Squeeze out the fiber and set it aside (the pot lid is a good place to put it). The water will probably look cloudy and slightly brownish. If it looks very dark and dirty, you may need to scour this fiber again with a fresh bath.
Be a good citizen, and add a little vinegar to the water in the pot to help neutralize the alkalinity before you pour the water down the drain, especially if your drain goes to a septic system.
5. Rinse the fabric in a few changes of warm to hot water.
Why This Way?
Cotton isn’t washed before spinning and weaving, because the natural waxes it contains don’t interfere with those processes. But they definitely interfere with dye reaching the fiber, which is why cotton needs a little more intense scouring than wool does before dyeing. Cellulose fibers respond well to alkaline conditions, but can be damaged by acids. They aren’t damaged by boiling or by quick changes between hot and cold conditions, which makes them easy to handle during scouring.
Soda ash is sodium carbonate, an alkaline salt. It occurs naturally where lakes evaporate, and is used for everything from water softening and adjusting the pH in swimming pools to making glass. The fact that it’s quite alkaline is what makes it work so well for scouring (recall that soap is traditionally made by combining a strong alkaline substance with fat). That also makes irritating to your skin and eyes, so wear gloves when handling the fiber in this bath, and don’t hold you head directly above the steaming pot.
Linen and hemp are bast fibers—this means they grow in the stalk of the plant. Pectins hold the whole stalk together, as well as the fiber bundles that make up linen threads. Some of the pectin needs to be dissolved in order for the fiber to be workable (this happens during processing), but if too much breaks down (as can happen in a harsh scouring) the fibers get weak and break easily. I asked Cassie Dickson3, a linen expert who grows and processes a lot of her own fiber, if she scours her linen before dyeing and she said that she does. Currently I’m recommending taking it a little gentler with linen than cotton, start with a little less soda ash and see how you like the results.
By the way, if you are wondering whether this kind of scouring is good for difficult household laundry, the answer is: if the difficulty is oily (like pillowcases that spent a few too many nights with someone’s greasy hair) it works amazingly well! If I have scoured some fabric and it still seems like the bath has cleaning power, I will sometimes add a pillowcase or a kitchen towel while the pot is still hot, or add and reheat it later once I remove the fabric I’m going to dye.
Notes
1 A lot of my experiments (and frankly obsession) with natural dyes has centered around using them to screen print designs on fabric. I’ll be using these samples as illustrations, but not explaining this process in detail here. It’s just too much for this format, and I’m still actively trying out various ideas and changing my mind frequently about what is the best practice and what is possible. (I am teaching everything I know about it though.)
2 For more about detergents and scouring wool, see “Scouring: Which Product is Which?” by Beth Smith, PLY Magazine issue 22, Autumn 2018 (The Power Issue).
3 See “Ready for Retting”by Cassie Dickson, PLY Magazine issue 20, Spring 2018 (The Flax Issue).
Resources
If you don’t want to wait for me to finish my explanations to go further, I certainly don’t blame you!
I was fortunate enough to take a workshop with Catharine Ellis last summer, and I have the greatest respect for her work. She has a new book with Joy Boutrup called The Art and Science of Natural Dyes: Principles, Experiments, and Results which is by far the most useful, practical, and comprehensive natural dye how-to book I’ve ever seen. If it’s out of your budget, may I suggest asking your local library to get a copy?
Catharine’s blog is full of fascinating and useful information too.
I also like the books The Modern Natural Dyer by Kristine Vejar (mentioned above) and Harvesting Color by Rebecca Burgess.
I read the PDF Maiwa Guide to Natural Dyes dozens of times when I was first starting to figure all of this out. It’s condensed but well-researched.