Slow — What it Means to me Now


How I think about slowness, and about my life list of things I’d like to make, has changed pretty dramatically lately. I’ve been wanting to talk about it here, and Slow Fashion October has given me the perfect reason.

It started when I learned to spin. Then a little later, I realized how much I really could make, and how little I really needed. That feeling built, fed by the other things I was doing and reading, until the vast universe of possibilities suddenly felt expansive instead of overwhelming.


indigo handspun
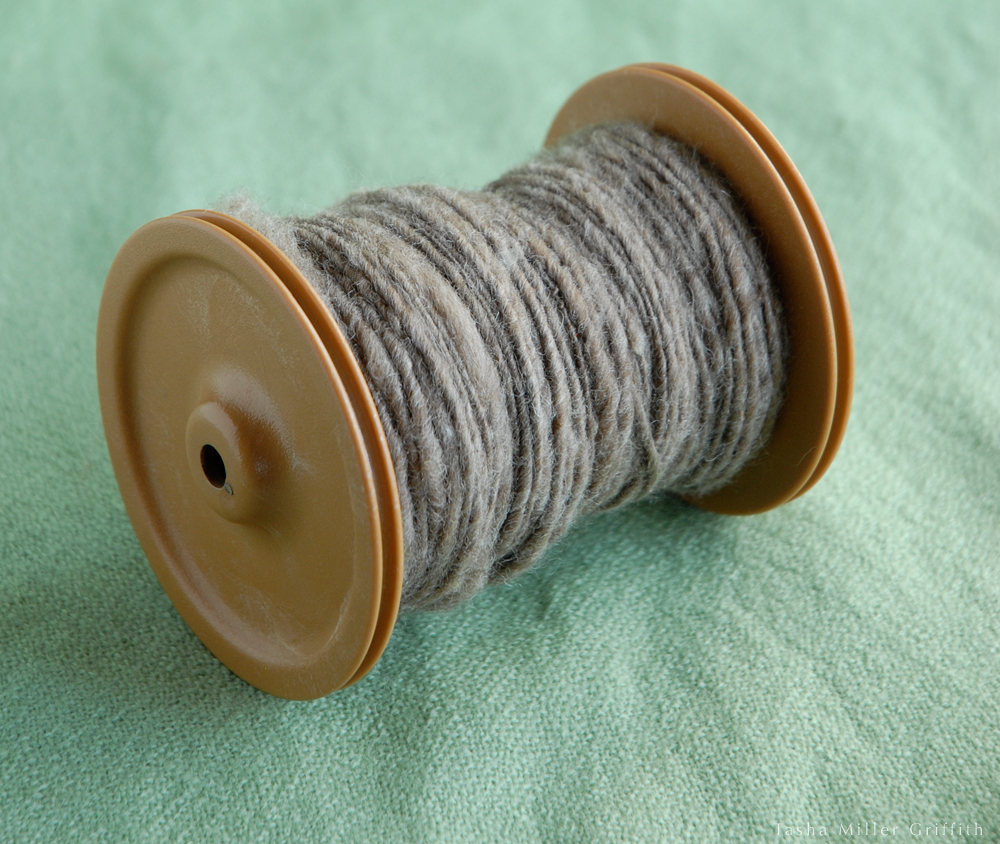
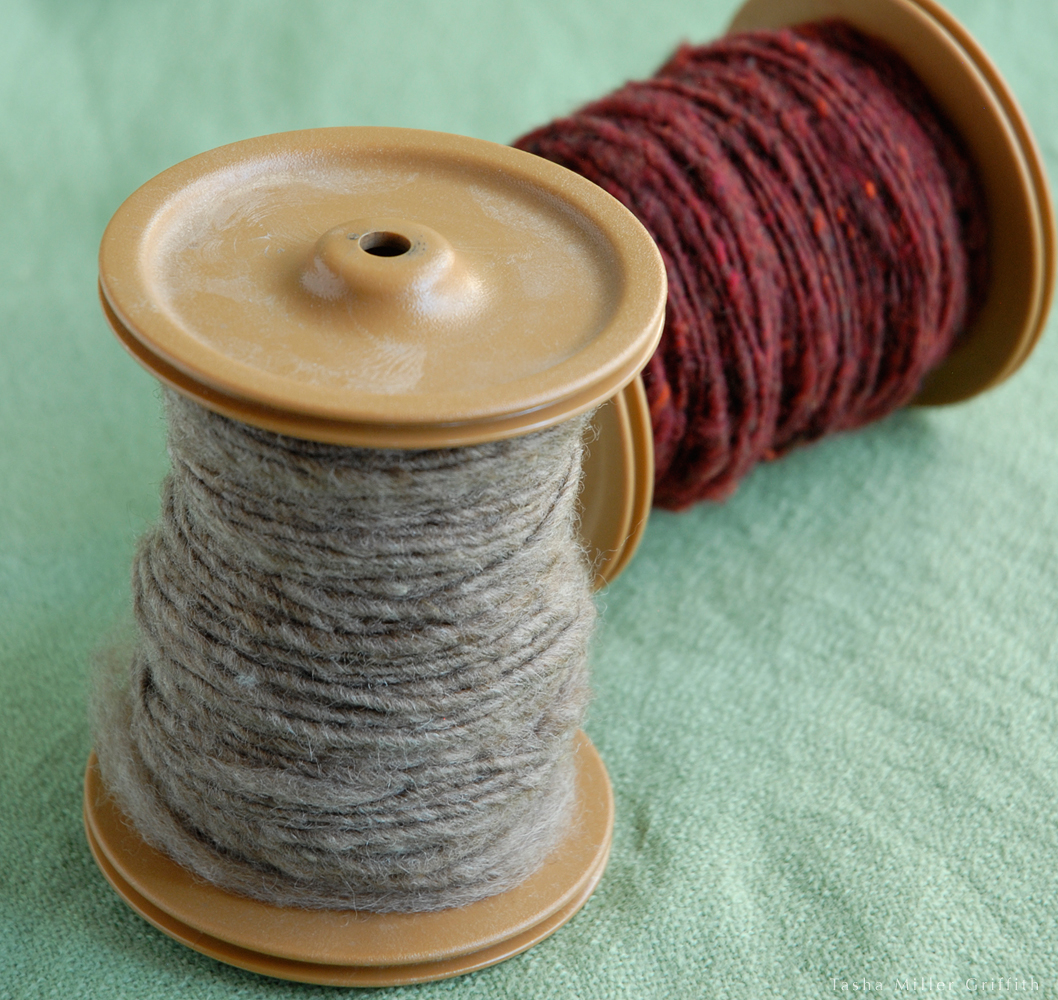
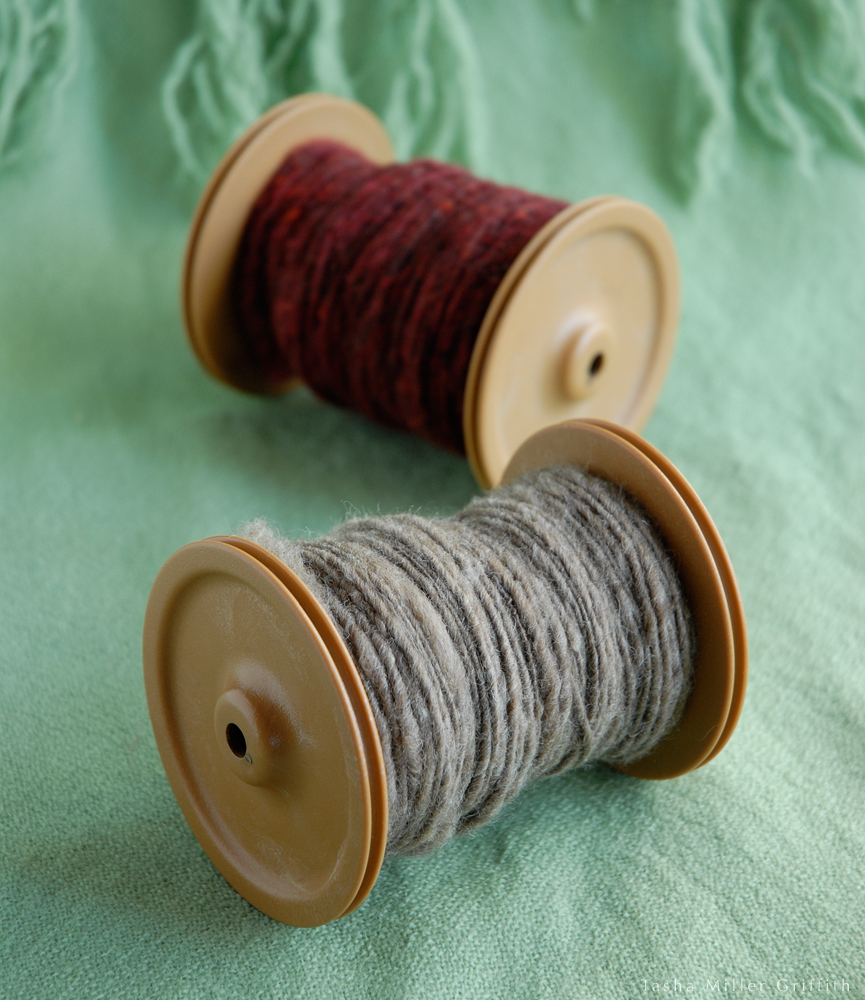
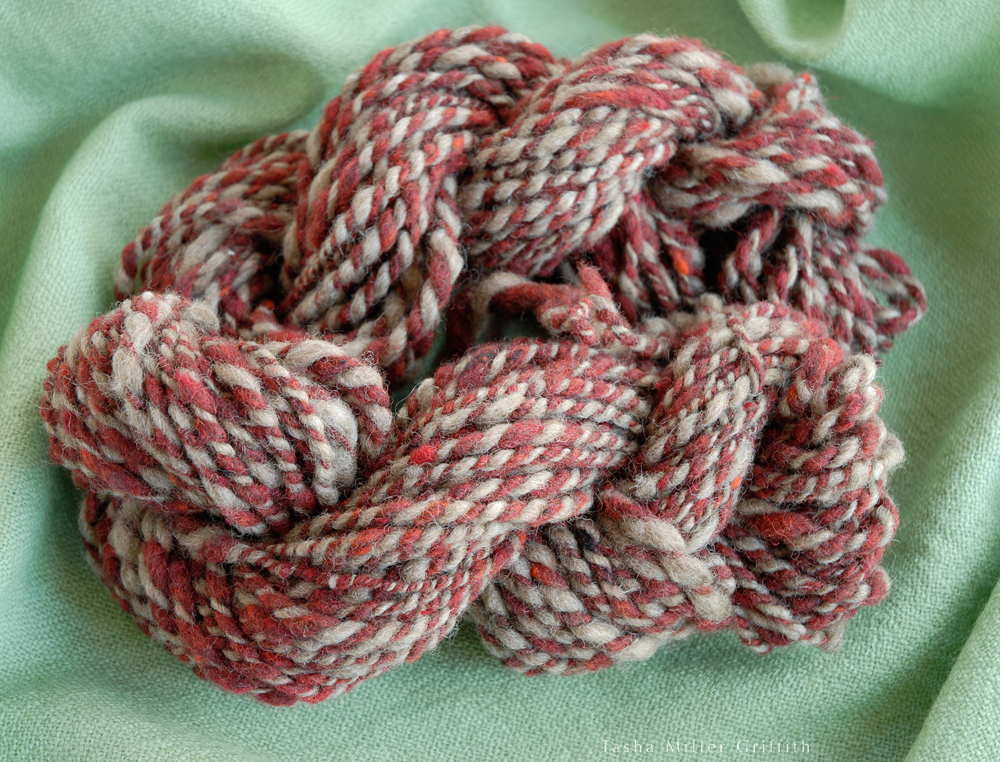
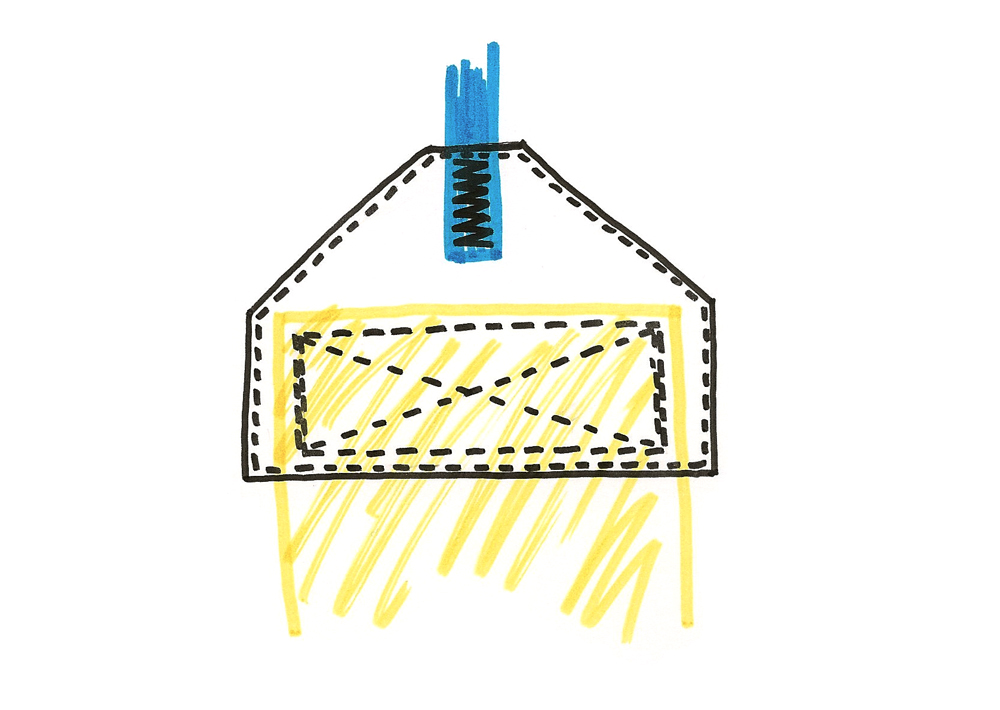
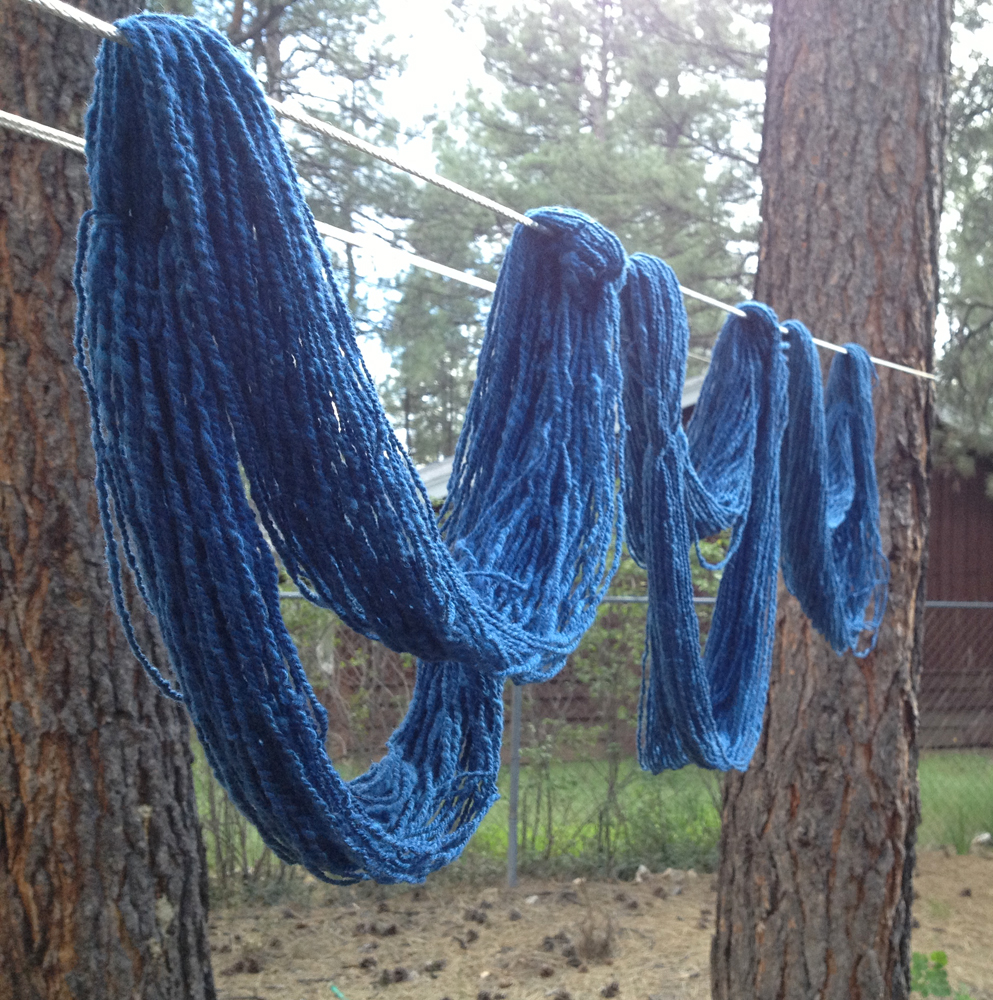
This is apparently the only picture of my second batch of handspun before knitting.


You wouldn’t think that learning to spin would speed up my knitting, but it kind of did. The two batches of handspun I’ve made so far have gone pretty much straight to the needles, partly because I was so curious to see what I would learn by making something from my own yarn. So one thing was obvious from the start: I can spin all the yarn I need to knit with. In fact, if I spun even a little bit every day, I would end up with much more yarn than I usually consume.


tasha's quaker yarn stretcher 3
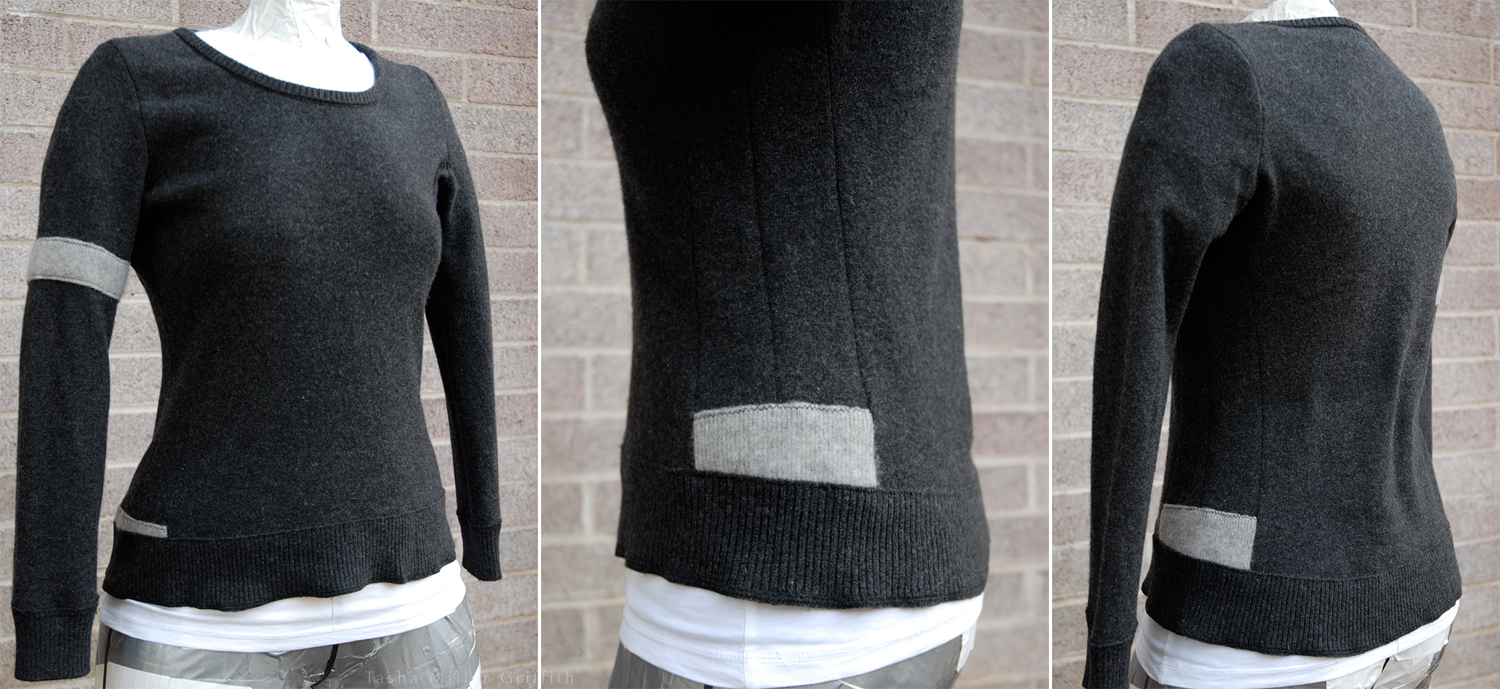
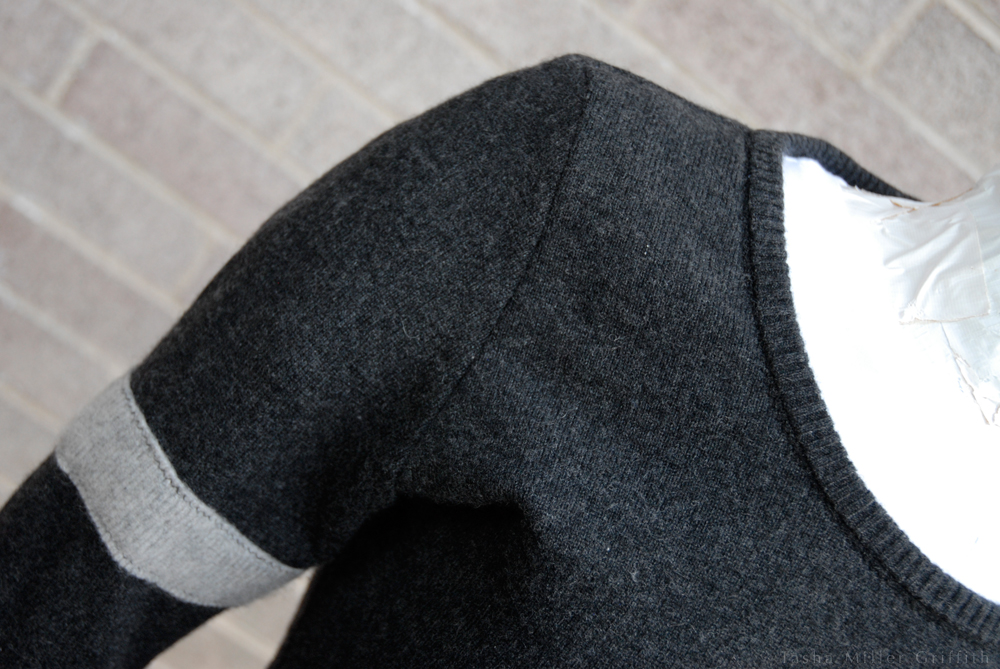
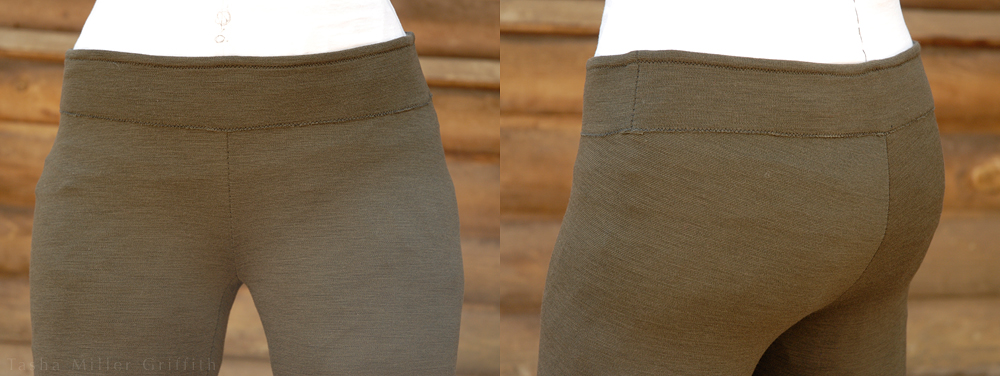
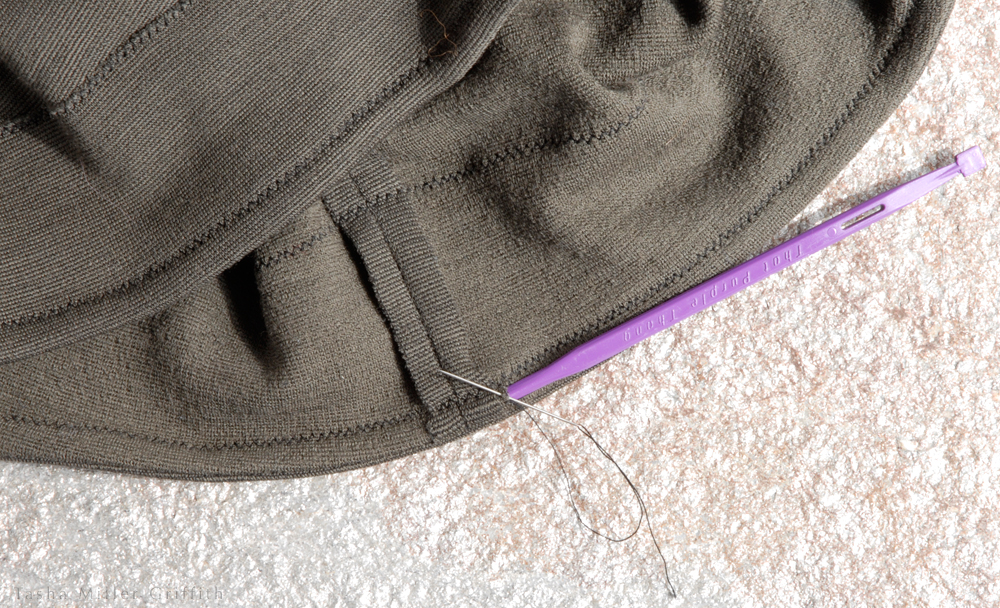
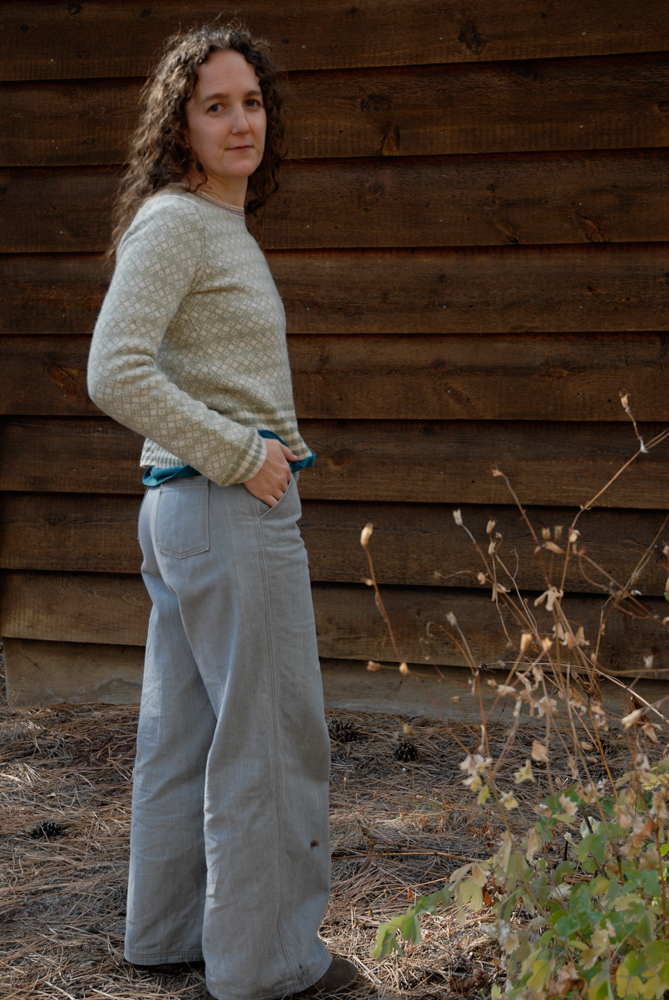
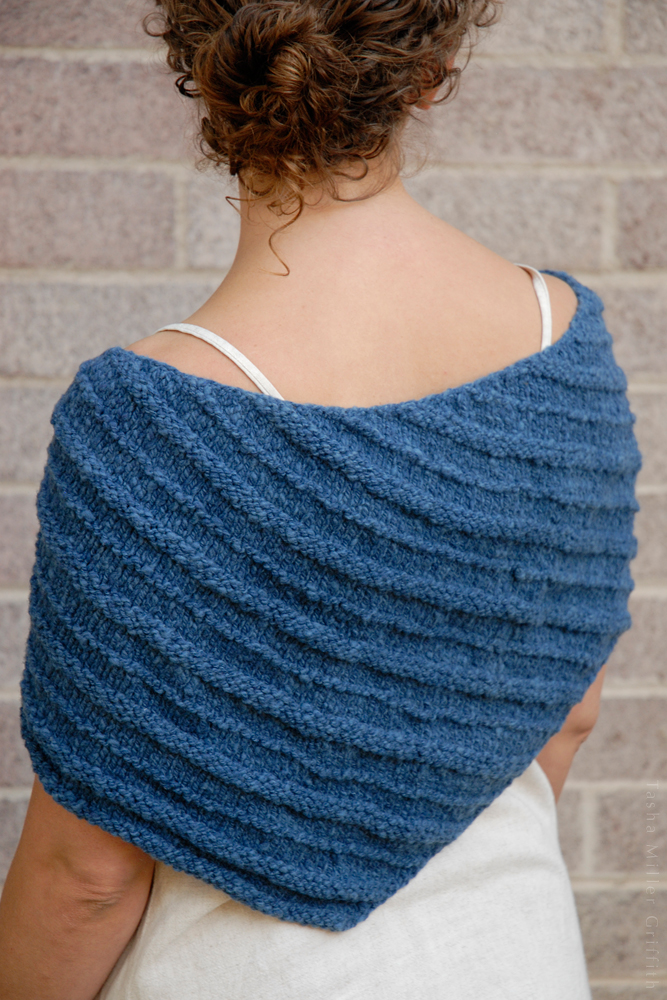
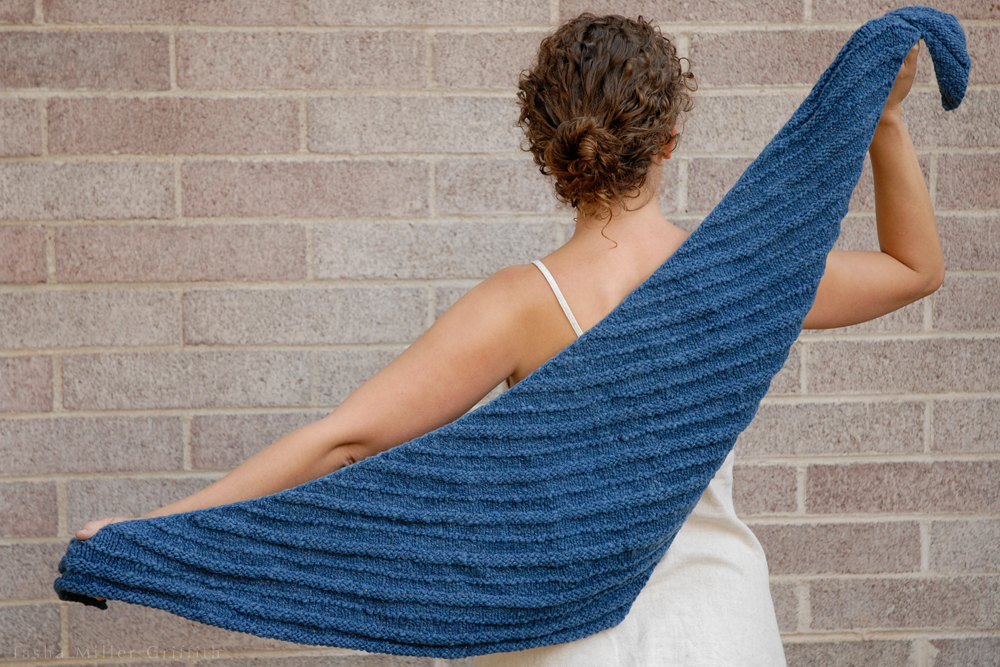
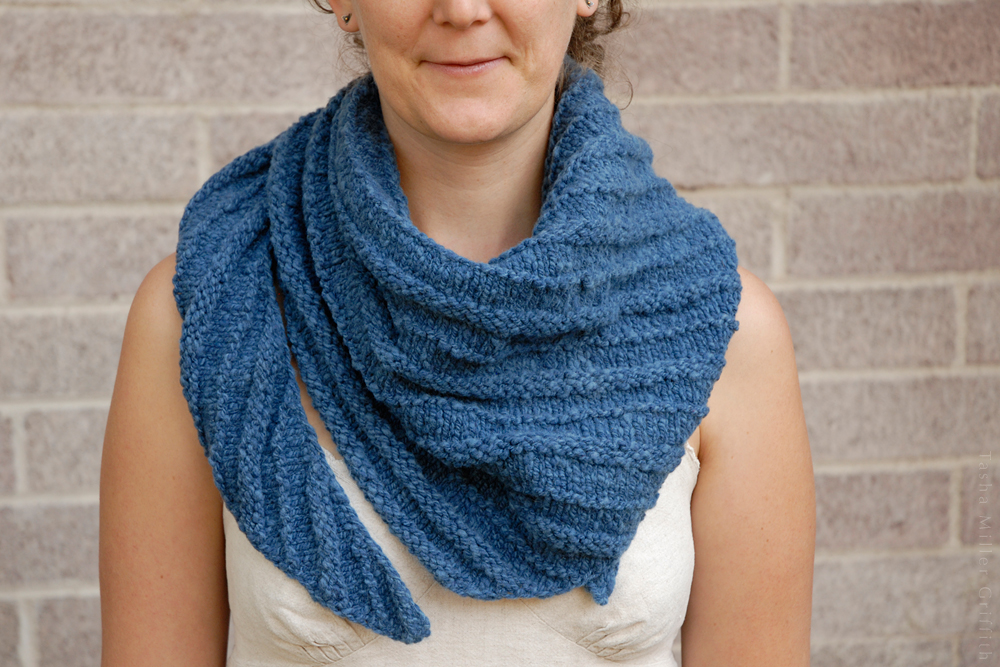
It became a Quaker Yarn Stretcher Boomerang, a fantastic fit for the yarn.  I’ll post Details are now on Ravelry, but for now I want to focus on the thoughts.


I already have a pair of fingerless gloves, and a pair of dreamy mittens, and that’s really all my hands need. Between (ahem) making them and the ones my grandma wove, I’m approaching more fantastic scarves/shawls than I can actually wear. And then, I can’t imagine I need more than four good sweaters. Actually, my ideal would probably be three sweaters I absolutely love, and one to throw on when the going might get rough. Right now I have the rough one, a thrifted one I think is OK (but Bryan is not a fan of), and some other kind of makeshift stuff. But those got me through all last winter just fine. And my SFO goal is to re-finish one that will hopefully become one of the loved ones. I could make another one next winter or the winter after, and that would be more than fine. There’s actually plenty of time for me to find the perfect fleece, wash it, comb it, spin it …

So need, or maybe it would be more accurate to say lack of need, is a big part of this shift in my head. I find it incredibly helpful and freeing, and it goes something like this: if I already have most of what I really need for this winter, I’m free to spend my time making something really special (no matter how long it takes) or trying something new (ditto).

What I don’t know how to explain (in fact I’m not sure I’m explaining any of this very well) is why spinning in particular set me free from the desire to make all the things, but here I am. Of course, if I didn’t spin it would still be perfectly valid (maybe even more so) to say, “I have the capacity to make so much more than I will ever need.” In fact I think maybe every maker should say this, and see how they feel about it.

I know that time always seems short. I have struggled and struggled with that myself. But I’m coming closer to peace with it, and for me anyway, it doesn’t really have anything to do with productivity, with figuring out how much I can “fit” into a given time, how much I can accomplish or make. Ultimately, a good life isn’t about how much we do. It’s about what we do, what’s memorable, how we shape and enjoy our experiences.


tasha's quaker yarn stretcher 2


In theory when we decide to sew or knit something instead of buying it, we’re taking more time about it and being more thoughtful. But somehow pursuing a craft can also pull us into a spiral of wanting to make more and more, of making something just to finish it and go on to making something else, because we have so many ideas. Thinking about everything I’d like to make leaves me perpetually unsatisfied, as it always must, since I can think of about a dozen new ideas per day. Framing my making around what I need allows most of those ideas to pop up, get admired, and then just float away. Lovely though ideas are, they should not all be added to a perpetually growing list of things I “must” make.

Ironically, giving up on making all my ideas for the realms I usually work in (mainly clothing) may leave me time to take on things in my wildest crafting dreams. Try making shoes? How about a quilt from those passed-down handwoven scraps? Well if I’m content with what I have to wear for the moment, why the f#^k not?!


tasha's quaker yarn stretcher 4


I’ve been thinking a lot lately about all kinds of ideas around slowness. I listened to an interview with William Powers and I’m convinced I need to read his new book New Slow City. One thing he talks about is taking time to fully have an experience, just focusing on what you’re doing instead of already planning the next thing you’re going to do after it. I want to do craft like that. This week, I’ve been in the final stages of refinishing a treadle sewing machine cabinet, a project I have probably a months’ worth of total work hours sunk into. Just doing that, and thinking about nothing but that, running my hands over the velvety smooth wood and mulling over all the steps that got me there, it was so incredibly satisfying. Much more so than finishing four little projects and for each one just thinking “oh good, that’s done,” and moving on.

Letting go of a lot of my ideas does feel like somewhat of a surrender, but it feels like the kind when the heat of the day won’t let up, insects drone on, and finally there is nothing for it but to peel off whatever clothes are handy and throw yourself into the nearest body of cool water. Or the end of a long winter day, when nothing feels better than to pull warm cozy blankets all around you, and let your whole body relax.


tasha's quaker yarn stretcher


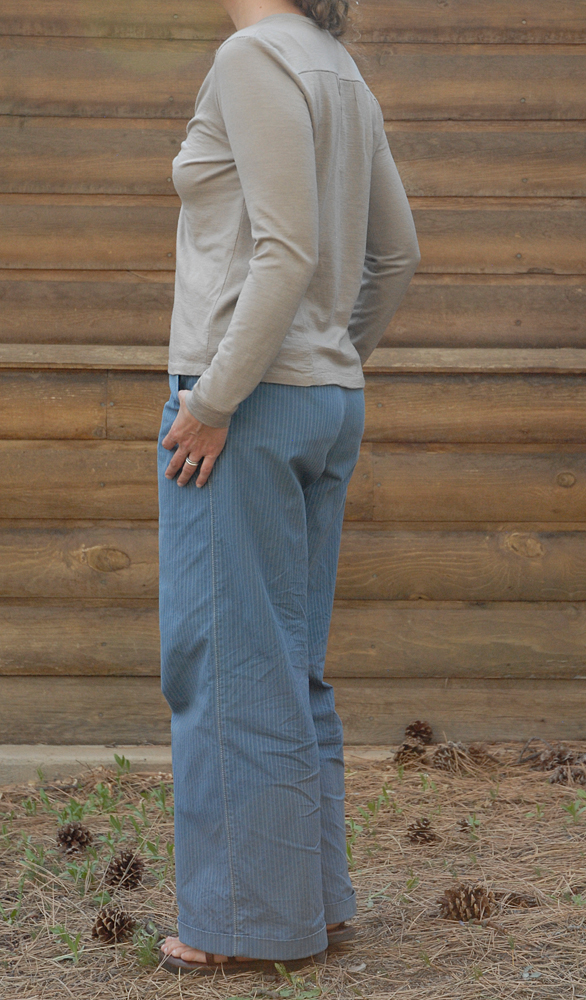
So here’s what slow fashion means to me right now: it means I will make just a few things at a time, and I will make them with my whole heart. It means I will allow ideas for things that I don’t need to float away, and concentrate on the projects that mean the most to me and those that will be the most useful. It means I will give myself space to enjoy the processes, the parts that bring me the most joy (like spinning) without worrying about what’s next on the list. And I think it will mean that the more I make in this slow way, the more I will wear my heart on the outside, all over my body.

Anybody else want in? The water’s fine …


Four Upcycled Winter Tops

In which I think about the difference between fit and flatter, ways to seam knits for a pear shape, and the pros and cons of sewing with recycled sweaters.


Last fall, I knew I could use some more long-sleeve cozy tops for the coming winter, and I decided to see if I could find some “fabric” (in the form of large garments) at our local thrift stores, figuring that it would be cheaper than ordering quality wool knit, and I would be more willing to experiment if I wasn’t super attached to the materials.

Many things still take longer than I think they will, so I just finished the last of these a couple of weeks ago … luckily they still work as light sweaters for spring, and I’m now set for next fall/winter. Some people would probably call these light sweaters at any time, but for my winter wardrobe they’re shirts, something soft and warm that goes under a bigger sweater. (If it’s winter, I’m pretty much always cold. Heck, if it’s Texas in Spring but I’m inside and the is AC on, I’m still probably cold.) I’ve switched pretty much exclusively to wool (or cashmere etc.) and silk for winter wear, and I just love it that way, so those were the fibers I was looking for.

One of the biggest problems I’ve found with trying to upcycle tops for me out of existing tops, is that for there to be enough fabric to cut a new garment, the original sweater must be truly huge. Yet in the past, trying to reshape something without treating it as fabric and cutting new shapes has been a recycling nightmare that eats up way more of my time than the results are worth …

The first top I found this time was a women’s size large, with a pretty awful turtleneck, but in a nice brown cashmere. There just wasn’t enough fabric to dramatically reshape it, but it definitely needed a new neckline, and some ease around the hips (not a surprise to my pear-shaped self). I decided to take a wedge of the cable pattern from the old neck, cut a slit at center back, and splice it in.


brown winter top alterations


This worked—and I learned a few things. Probably the most obvious thing is that the wedge can’t be too large, unless you want it to ripple like a little peplum. I ended up folding in the sides and sewing them down again to make a flat wedge. It doesn’t look perfect, but I was experimenting. If I did this again I’d also add a little more pull-in factor to the neckline, probably with some slightly stretched clear elastic in the neck seam. But the biggest issue with this shirt is that it just isn’t that flattering. It fits OK, but I’m aiming for better. This one found a good use as my new winter sleep shirt.


brown winter top on form


The next top I found to use was a little bigger, at least big enough to cut out new pieces from it. My favorite part about this one is the fabric; it’s Merino, and just the perfect amount of stretchy, cozy, soft and wooly. If I could buy a bolt of this I probably would. This top came out quite a bit shorter than I’d like (again due to lack of fabric—by the time I cut the old sweater apart and put the pieces for my regular knit top pattern on it, this is what I got), but I’ve been wearing it all the time.

I played with the ribbing on this one a little more, cutting and sewing lengths from the original hem ribbing and treating it more like elastic, stretching it to sew around the neckline. That worked well, the ribbing on these sweaters has a tighter structure, and I suspect some added stretchy fiber that makes it behave quite differently from the rest of the garment. Sewing ribbing on things reminds me of the late 80’s, when my mom would order fabric by mail to make tops for us, along with coordinating ribbing in various colors. I wish I’d had a little more of the matching ribbing for this project, as it is the tiny hem on the bottom has to be encouraged to lie flat as it’s drying, otherwise it will flip up, and I had to baste it on before sewing to keep those little bits in place.


tan winter top on form


I’d been thinking how, in order to fit my figure better, I really need more seams, even in a knit fabric, than just one at each side. I love princess lines, but I thought that traditional ones would be more structure and more of a closely fitted, formal look than I want in a knit top. I was thinking of making a curved panel at each side, when I realized that I already have a top/sweater like that, it just fits a little looser than I’d want for this. So, I tried it on and pinned out the extra to get a fit I liked, traced a new pattern from the old one following those modifications, and cut it out.

This berry colored top was my most frustrated moment in this batch of upcycling. It came from a men’s XXL sweater in “cotton (90%) cashmere (10%)” which I went for despite the fiber content, going on color and the fact that I could definitely treat this one as a “muslin.” At first I was kind of miffed that even starting with a sweater this big, I couldn’t cut the sleeves long enough and I had to piece the side panels … but as soon as I gave up wanting it to work out “right” and embraced the experimentation and improvisation of working with recycled materials, suddenly it was fun again.

I really like the ribbing on the side panels, but the double sleeve ribbing came out wonky no matter how you look at it, the back neck has too much ease, making it slide off one shoulder sometimes (again with the 80’s), and the whole thing has all the baggy/low-recovery properties of thick cotton knit. However, it’s good to have at least one top that I don’t really care what happens to, and I brought it on the road for that purpose, it’s great to throw on in the truck etc.


berry winter top on form


I’m also having an ongoing thought process about the difference between fit and flatter. I want things to fit well, as in to harmonize with my shape—but maybe not to hug every curve. Sometimes if I aim for enough ease to really skim my hips it ends up emphasizing my pear shape instead, in a way I don’t find flattering, especially if I don’t also add ease around the bust. Also, if I curve a back seam in enough to fit close around my waist, the amount of curve required to flare it back out again over my hips is not really workable or looks a little crazy.

With that in mind, I cut the last shirt a little less curved in at the waist and out at the hips in back. I also added a side seam, mostly so that I could cut set-in sleeves (doesn’t save as much fabric as I thought it would vs. raglan) and set them in flat, then sew the side seam and underarm in one go, which apparently I like so much better than setting in knit sleeves in the round that I’ll do extra pattern tracing to get it.

I’m so happy with this last top. I dig the length, the slight high-low hemline, the side panels, and even the lighter accents (piecing again). And the bottom ribbing! This is every single millimeter of the ribbing at the hem of a men’s XL cashmere sweater (a bit frightening) and it’s just right. I flipped it over so that the original seam is at the bottom, so if anything it flares out a bit at the hem rather than cupping in. It hugs in just enough to feel cozy without riding up too much—like the dream of what ribbing could be on my figure. I’m still undecided about the extra fabric around the small of my back. It’s definitely a bit baggy there, but is that a bad thing?


grey winter top on form


Since I had to piece in a little lighter grey scrap at the side panels, I decided I should also add some to at least one arm to make it look purposeful. I also decided, after the berry ribbing, to make a real effort at getting the two knits to play well together, rather than sticking them under the machine together and hoping for the best. I tried sewing with tissue paper under the bottom layer (inside the sleeve) and it actually worked really well. However, I’m not in love with trying to position the paper around the free arm inside the sleeve, or with picking out tiny bits of tissue from the seam, so further experiments are still necessary.


grey winter top detail


I may have to go for another round of cozy top upcycling at some point, I’m getting kind of fond of the built-in matching ribbing. Although, I think I should resign myself to the need for an extra sweater for every couple finished tops, one to one just doesn’t quite work. And then, since I can’t be nearly as efficient with layout as I could with the same amount of raw fabric, it feels a little wasteful to cut up a shirt which is really perfectly good as it is … unless it has holes in it etc. So there’s a Holy Grail of thrift shopping, as if finding huge sizes in quality fibers wasn’t hard enough, now I need two or three that all coordinate with each other or with another one for extra fabric, preferably damaged! Maybe I’ll just order some nice fabric next time …


Our Relationship with the Tangible World, or How I Learned to Spin


first handspun yarn 1

You may be able to guess what this is … yeah baby, my first bobbin of handspun yarn!


So it’s like this: My beautiful, wonderful cousin came to visit me (with my beautiful wonderful auntie) and when she went back home, she left her spinning wheel here for me to borrow while she’s at college this spring. Amazing!

I’ve been thinking vaguely about learning to spin for, um, the past two decades give or take, ever since I first practiced weaving with my grandmother. But it just seemed to take so long, like it would add so much time to my whole knitting/weaving process, so I wasn’t ready to commit. Needless to say, that was before the infinite list.

In my new post-infinite-list world, starting to spin seems like the perfect choice; an expression of surrender and adventure all at the same time. Since there’s no way to ever finish all the knitting I’d like to (or weaving for that matter), I might as well make some frickin’ yarn!


first handspun yarn 3


Spinning is pretty amazing (I’ll talk more about that in a minute), but one of the best parts about it so far is an accidental discovery. In an effort to keep my immediate-onset spinning obsession from taking over my whole life (remember, I’m supposed to be focusing this year), I decided on some rules: I wouldn’t read about spinning except during times when I would normally read something else, and I wouldn’t sit down to spin at odd times during the day. Instead, I would wait until just before bed. So every night at 10 pm, I give myself permission to stop whatever I’m doing, shut off the computer, and spin for up to half an hour before getting ready to sleep.

Oh people, this has been life-altering. A lot of the work I’ve been doing lately has been very abstract: putting my ideas out there to various people and institutions, basically a whole lot of online research and laboring for hours composing messages, many of which are never answered at all. I do hope that good things will come of it, but it’s basically a frustrating process that leaves me floating in inconclusiveness, and for the most part, kind of grouchy.

Then at the end of the day, I put all that aside and sit down to learn, to make something real, to interact with the tangible universe. I’m reminded of this quote from Anaïs Nin about letterpress printing (which I found, like a lot of my deep-thought quotes these days, via Brain Pickings):


The relationship to handcraft is a beautiful one. You are related bodily to a solid block of metal letters, to the weight of the trays, to the adroitness of spacing, to the tempo and temper of the machine. You acquire some of the weight and solidity of the metal, the strength and power of the machine. Each triumph is a conquest by the body, fingers, muscles. You live with your hands, in acts of physical deftness.
You pit your faculties against concrete problems. The victories are concrete, definable, touchable. A page of perfect printing. You can touch the page you wrote. We exult in what we master and discover. Instead of using one’s energy in a void, against frustrations, in anger against publishers, I use it on the press, type, paper, a source of energy. Solving problems, technical, mechanical problems. Which can be solved.


Although later this spring I will return this wheel to its rightful owner, I fully intend to keep this night practice going with knitting, or drawing, or something else. At 10 pm the computer shuts off, and I make something real for a little while before bed.

Some things you may be wondering: yes, the spinning wheel tempts me all day when I look at it, but in a sweet way of something to look forward to. And yes, if we’re going out at night or I think we’ll have guests staying late (I’m not really a late-night person and tend to crash hard if kept up past my bedtime) I find a half an hour earlier in the day to spin. Yes, this is in addition to the hour I still try my best to find every day for personal projects. I’m discovering that the more up-in-the-air my day’s work is, the more real-world-project time I need to stay happy.  I’m also a firm believer in taking the time your life will allow for the things that are really important to you. And yes, when I wake up at night lately I find myself thinking about twist in fiber, which I like much better than mulling over my worries!


first handspun yarn 2


Another thing that’s been beautiful about this process (although it sounds funny) is watching myself learn. I suppose I’ve absorbed the mantra I’ve told all my beginning knitting students: “You can do this! Anyone can do it if they just decide to practice it.” I do absolutely believe that this is true, that skill in handcraft is available to anyone who’s willing to start where they are (which a lot of times means training your hands from scratch) and keep practicing. It’s a gift we get just for being human, but it does take work.

Anyway, I’m cheating at learning spinning—the process is brand new to me but the feel of fibers and their qualities, the look and feel of yarn I’d like achieve, these things I already know. Not that I didn’t have lumps and bumps (you can see them!) and moments of beginner’s frustration which I had to push past, of course I did, and do still. But it’s been a long time since I learned something truly new to me, and maybe because of my teaching experience, but this time I’ve been able to let go of the outcome (a really healthy attitude for a first project in any material, I feel) and enjoy it. I’m a little surprised and pleased every time I sit at the wheel and notice that my technique is a little bit better, the yarn is coming out a little more even, or I just figured out some tiny thing that no one told me, it’s there in the materials and my hands to be discovered. When I first started I couldn’t spin from the imperfectly-carded batts of wool leftover from my early felting days, or treadle with one foot, but now I can do both.


first handspun yarn 4


If you’re not interested in being seduced into the wild world of spinning, stop reading now.

Three compelling reasons to spin:

Spinning is fast! For some reason I always assumed it was the slowest part of the fiber-to-garment process, but it’s clearly not, due to being a more-or-less continuous flow, rather than a stitch-by-stitch motion. It’s fairly shocking how quickly a newbie like me can make enough yarn to knit something out of.

You can make yarn that you can’t buy, and the other people doing so are interesting folks!  This, realized while reading Ply Magazine, was one of the final straws for me: I could see myself wanting just such a yarn for such a project, but it wouldn’t exist commercially … I started reading Ply because of an article about how twist protects the fibers in yarn from wear (by Deborah Robson), and ended up reading every. single. thing. in the Twist Issue, even though at that time I had no plan to become a spinner. The way the articles are presented; with differing opinions, and explorations by people digging around the fundamentals of their craft, captivated me. The intricacies of how yarn is made are interesting even if you’re working with the yarn and not making it … but as I read I also became more and more convinced that if this is how spinners think, they are my people, and I must become one.

Spinning is amazing! There’s something very fundamental about it, an immediate sense of how old and how intrinsic this process is, which draws me in. The rhythm is soothing, and at this point in my learning anyway, it works best if I can concentrate on what’s happening and be present without many words in my head—a lot like meditating, or dancing with someone. Plus you make real yarn from a pile of wool! If that doesn’t seem amazing, then you’re just not paying enough attention.

I have just two tips so far for other would-be beginning spinners:

Read the book The Intentional Spinner by Judith MacKenzie McCuin. Although it doesn’t have the variety of perspective you get from reading Ply, she lays out answers to a lot of the basic questions I had with clear photos, fascinating descriptions of fiber, and even ideas for making tools you need using a cardboard box and old knitting needles!

Try not looking for a second while you’re spinning. I know it sounds crazy, but I tried it after reading an article by Carson Demers in which he said (among other things) that looking up at least part of the time you’re spinning (or knitting!) is much better for your body. And it turns out that (also like dancing with someone) if you take your eyes off what you’re trying to do, even for a couple of seconds, you become instantly so much more aware of all the other information available to your body—in this case what your fingers can tell about the twist and diameter of the yarn you’re making by feel.

Ok three tips: just try it! Or try something else you’ve been meaning to do, and save it as a treat until the end of the day. I really can’t recommend it enough.

Some Thoughts About Sewing Leggings


I’ve been wearing leggings more these past two winters.  I love how warm they are under my skirts.  The fit though, often leaves something to be desired, so I decided to try making my own.  Good decision!  These are totally the comfiest pair I own.  I’m more than a little behind on sharing them, but the plus side of that is I can already report that I took them with me on our spring and summer travels last year, and they served me really well as a base layer under dressier clothes when the weather at shows was chilly, for hiking, and as PJs when camping in cooler weather.


green wooly leggings 4


I used the Espresso pattern from Cake.  I love that it’s designed so that you transfer your measurements in both length and width right to the pattern to make your own custom size.  Overall the amount of ease the pattern added worked great for me.  These fit just how I’d like them to: not too tight or constricting, not to loose or wrinkly, but like a second soft wooly skin.  The only problem I had with the way this pattern is drawn out is that it doesn’t allow for curves between the booty and waist.  One look at my body would tell you that a straight vertical line in this area isn’t going to cut it.  After a couple of iterations I ended up taking a huge curving dart out of the center back seam, from the waist down to nothing at the widest point.  But since the fabric is stretchy and I basted the seams together first, it wasn’t hard to do.  (I highly recommend basting the seams if you’re making your first pair.  Long straight stitches are just amazingly easier to pull out than zigzag.  Once I had the fit I wanted, I trimmed the seam allowances to match the new seams, pulled out the basting, and sewed the seams with a narrow zigzag.)


green wooly leggings 2


Once that was settled, I tried them on and marked with pins where I wanted the waistband to sit.  I just don’t like constriction, especially elastic, around my natural waist, and I tend to cut the waistbands of trousers and skirts so that they sit just below my belly button.  I knew that I wanted the leggings to sit a little below that, so they’d layer well with the rest of my wardrobe.


green wooly leggings 3

I would NEVER wear only these in public, or show you my booty in leggings on the internet.  And I just need to get this off my chest, because I keep wanting to say it to young women I see on the street: leggings aren’t pants!  But somehow, I’m OK with you seeing the fit on the dressform, even though the whole point of this dressform is that it’s as close to my actual shape as possible … go figure. 


I decided to add a wider waistband, which I hoped would make the top more stable and also give it a little more recovery.  I cut two pieces about an inch less wide than the leggings are at the top, and 3″ deep.  I sewed those pieces together, and then to the inside waist of the leggings, also including clear elastic in the top seam.  Then I flipped the waistband to the outside and zigzagged it in place just over the raw edge, and again at the top just under the seam allowance.  I didn’t want the bulk of another turned-under edge at the bottom, and it’s worked out pretty well, the fabric has fluffed up only slightly around the cut and sewn edge.

But, they didn’t stay up.  To be clear, I don’t blame the pattern at all for this, since I was off on a choose-your-own-waistband adventure by this point in the process, all learning around the waistband issues is my own responsibility.  And I did fix it; after considering taking things apart and/or adding more elastic, I decided to try a thin ribbon drawstring, a trick that’s worked for me in the past on a strapless elastic top.  Since I already had a small channel at the top of the waistband from the topstitching, I cut a tiny hole there at each side of center front on the inside, and reinforced it with a little hand stitching around.


green wooly leggings 5


Then I used a little safety pin to thread the ribbon around.  When I’m wearing these, I tighten the ribbon to the fit I want, and tie it in a firm bow.  Sometimes by the end of the day, I get ever-so-slightly irritated by the one fairly tight, unmoving place around my hip.  But would I gladly trade that for leggings that stay up all day, exactly where I want them, with no dropping crotch?  Yes, yes I would, quite happily.  And when I make another pair, I may experiment with some stronger elastic at the top.

This fabric is mostly wool, with a little stretchy stuff, from The Fabric Store LA.  They have the best selection of fine wool knits I’ve found (also where I got the lovely stuff for these tops).  It’s a bit vague on the site whether or not their swatching service is up and running, but it totally is, just call them and tell them what you’re looking for.  Last time I got a generous selection of organic wools and leggings-appropriate fabrics.  I went with the pattern recommendation of minimum 5% lycra/spandex added, and chose this green with black, double layer knit.  This is about as thick a fabric as I would use, as you can’t avoid a few wrinkles around the knees, etc., but they’re wonderful to wear!  I love the slightly plush inside of this fabric, it makes the leggings even cozier and comfier.


green wooly leggings 6

Putting a little tab of ribbon at the back is another idea of Steph’s I like!


I’m definitely a sew-your-own-leggings convert.  A fit this good is hard to argue with.  After years of knowing that the only way to get pants/trousers to fit my legs & booty was to make my own, I’m kind of surprised that it wasn’t more obvious what a difference custom-fit leggings would make … but there you have it.  Plus they only take a yard of fabric (on me), have only one main pattern piece, and once you have the fit down they would make up lightning fast.  What’s not to love?

Update: for what I figured out about elastic at the waist in next versions, and making these from repurposed sweaters, click here.


Thoughts about Sewing, Empowerment, and Body Image


As we near the end of Me-Made-May, it seems like a good time to share some thoughts about sewing, empowerment, and body image. Although I get a huge boost of self-sufficiency when I’m wearing the clothes I made, I actually don’t think much about sewing as it relates to how I feel about my body. Except for when I’m making pants. I originally wrote these thoughts as part of a proposed series on the Colleterie, which didn’t get off the ground, but it seems a shame not to get them out into the world. I thought about a lot of this again just recently when I was working on my trousers.


blue stripe trous and wool knits 4


I’m lucky that when I was growing up, my parents always stressed that I’m just fine the way I am. I’ve never had a really negative image of my body. But I have always had trouble finding pants that fit at all, or were remotely comfortable. I would describe my figure in a nutshell as small and pear shaped. When I’m good about exercise, my thighs get firmer, but they don’t exactly shrink. In fact, in High School, when I was doing lots of power yoga every week, and in the best shape I’ve ever been, I just about gave up wearing pants altogether. It wasn’t worth it; they were just too uncomfortable. I have a vivid memory of sitting in class wishing I could just grab the top thighs of my jeans and yank upwards, and that the seams would pop down the sides, releasing my legs.  I never actually tried it, but after that I stopped wearing jeans.


grey pants side


Since then I’ve explored my style, how it relates to my body, and to how others see me, through my sewing—starting with long skirts. As you know if you’ve read this blog for a while, I’ve also been working on and off for years on pants that actually fit me. It wasn’t until I was making the purple pair that I realized how much not being able to find clothes that fit or flatter could affect my conceptions about my body. Those purple pants aren’t perfect, but they show off my shape and are comfortable—a miracle to me. When I’m standing in front of a dressing room mirror and no pair of pants I try on looks good or feels right, I think that encourages me to feel like I need to change, like my body is not right. I was fairly amazed at how, looking at my legs in these new me-made pants, it was so much easier to say, “I love my body! It’s so cute and curvy!” It’s not my body that needs to change—it’s the pants. From my hair to my thighs, I’ve had the best experiences with my body when I realize not only that I can’t change something, but that I shouldn’t be trying to change it, that the beauty the universe gives me is for me to embrace and to work with, not to fight. And I can only do that if I’m willing to think outside the box, to take the time and develop the skills I need to get what I really want and need.


purple cords side


To me sewing, and making anything, is all about empowerment. Since I sew, I can break free from the consumer culture that gives me limited choices, while at the same time encouraging me to find fault with everything, in order to sell me more cheap stuff. Sewing is a way out of that cycle, and also a way in to a deeper and better understanding of my own body and taste, my personality, my unique self. Perhaps the best part is that this kind of freedom is available to anyone who wants it, anyone who’s willing to can their own jam or sew their own jeans.  Let’s go get it, people!


Things I’ve Sewn: Blue Stripe Trousers


blue stripe trous and wool knits 1


So, after talking about these tops last time, it’s time to talk about the pants!  They’re more of a trouser style (which is good since folks on both sides of the pond can agree what “trousers” means, right?).  I bought this fabric last summer at Nob Hill Fabrics in Albuquerque.  I wasn’t 100% sure about it for trousers, but it looked promising.  In truth, I am not 100% sure about it for trousers now.  But, after the untimely demise of my fantastic purple corduroys (so sad!) I really needed a new pair of pants nice enough to wear at shows (in public where I am supposed to look somewhat professional, or at least not like a bum off the street).  The odds of my finding a pair to buy that fit and that I like are close to zero, so I pulled out the blue fabric.


A pattern epiphany

While I was cutting it, something pretty cool happened.  As I looked at the back waistband pattern, I got a sudden flash of insight: this piece is trying to take in too much curve, and it would be much better as two pieces, with a seam in the middle as well!  So I traced it into two pieces which matched the existing width at the bottom of the waistband, and took in a little more at the top.  If you do this, don’t forget to add seam allowances to the edges at the new seam!  This approach fit the shape of my body so much better that I ended up doing the same thing on the front, so that I now have four waistband pieces instead of two.  A step forward in fit.


pants waistband back pattern pieces


Fitting

This is the next evolution of the traced from-existing-pants-and-extensively-altered pattern I used to make the grey pair.  The main problem with those is that they are a little tight around the crotch seam, especially when I sit down.

I will say that I’ve gotten a lot better at diagnosing what needs fixing in the fit of my trousers in the last year or two.  At first, the fact that every part of the fit affects every other part made it nearly impossible for me to tell what I should change.  But now, after fitting a few pairs, when I try some on I can feel which seams need more or less fabric in order to be comfortable and fit my shape.  So I already knew (from wearing the grey pair) that I needed to let out the front inseam a fair amount.  I wanted to cut the fabric outside of the pattern to make sure I would have enough in that area, so I decided to trace with thread the outline of the pattern.  That way I’d be able to see where my new seam is in relation to the pattern, and transfer my changes back to it for next time (I can always add more paper to the pattern using this method).  This worked great, I could see right where the pattern line was as I worked on the fit.


blue stripe trous cutting inseam


So, I let out the front inseam until it felt comfortable, and then played around with the crotch seam and back inseam to get the look and fit I wanted.  I want the trousers to show that I have a bum, without hugging it too tight, and then drop into a wide leg somewhat reminiscent of 30’s style.  I got pretty close!  To be honest, I may have overdone it on the amount of added room around the inseams, these feel so comfortable that they border on I’m-wearing-my-pajamas-outside.  But when I put them on and sit down it’s sooo nice!


blue stripe trous and wool knits 3


Those back pockets

The back welt pockets are pretty sweet, yes?  This is something I’ve really been wanting in trouser-style pants.  I have one old pair of thrifted Gap wide-leg pants that has them, with little flaps on top too, and I love them.  I almost skipped them for this pair though, just because I was running a little short on time before we left for Texas, and I really needed to get these trousers done.  You know how sometimes, these decisions are made for you, just by the circumstances?  Well, as I got close to finishing the fit, two things became inescapably apparent: I could not figure out any way to get the tips of the back darts to look good (hidden by patch pockets in earlier pairs), and under some conditions, you could see the line of my undies through the fabric.  So, pockets it was, and since patch pockets don’t go with the trouser style I wanted … I basically just kept those Gap pants next to my sewing machine and figured out the steps from looking at them inside and out as I went.  Fortunately, I didn’t hit any major snags.  I have to admit, when I first tried the trousers on after finishing the pockets, my reaction was “no one told me they would look THAT cool!”  I have a few tweaks to make next time, but overall, those back pockets are probably my favorite thing about this make!


blue stripe trous and wool knits 5


Fabric verdict

I had a hunch when I went to add the pockets that it wasn’t the fabric being pulled tight that was showing my undie-lines, it was the fabric being just a little thin and just a little clingy.  I was right.  Now that the pockets are in, you can see that there’s plenty of room for them.  Sometimes you can see a shadow from the pocket lining, but that’s much better!

While this fabric turned out fine, next time I will look for some with just a little more body for making trousers.  I wouldn’t want it to be stiffer, just thick and soft enough to hold its own and skim over curves a little more.

And, did you notice it wrinkles like all get out?  I swear, I pressed the trousers before setting up to take photos, but 10 minutes of adjusting the camera, kneeling by the tripod in the sun and moving around, and it was pointless.  I do think that wrinkles are less noticeable in real life than they are on camera though.


blue stripe trous and wool knits 7


Have I mentioned before that fitting and sewing trousers is a journey, not a destination?  (Hint: yes.)  I’m glad to get these under my belt, and to have a new pair to wear in public this spring.  Happy May Day to all!


Make Your Own Retro Pro-Style Camera Strap


dad's camera strap finished 2


How to make your own camera strap, using the same hardware and webbing you’d find on one at the photography store, and practically anything you want for the strap!

When I got my new (used) camera, I just carried it around in the crook of my arm for quite a while, because I knew exactly what I wanted for a strap, and I couldn’t find it in any camera shop we visited.   The new camera is heavy (by my standards anyway) and I did not want a thin strap that would dig that weight into my neck all the time, I wanted a wide soft strap that would cup around my shoulder and hold the weight there.  I got this idea from Cat Bordhi (have I mentioned that she’s a mad genius?) specifically from knitting one of her mobius sling bags (in A Second Treasury of Magical Knitting), and it stuck with me.


camera strap on


You will need

I got the 3/8″ webbing and hardware to go with it from SewingSupplies on Etsy.  She made me a package deal like this one, which includes enough supplies to make two straps (each end of a strap takes one piece of webbing, one slider and one keeper).  I’m assuming that your camera has a ring or loop which 3/8″ webbing will fit through (most do, but some small point-and-shoots don’t.  You might be able to substitute something lighter, I would take your camera to the fabric store and see what you can find).

You will also need sturdy material for ends of the strap, where the strap meets the webbing.  I used Ultrasuede (faux suede leather) for my strap (above), and some scraps of real leather on a strap for my dad (the one at the top of the post).

If you want your strap to be adjustable, you’ll also need one slider and one loop of hardware, in a size that works with your strap material.

My strap is cut from a length of soft cotton textile woven about 2  3/4″ wide, which was in my mom’s stash.  I suspect that my parents brought it back from somewhere in their travels in the 1970’s, but neither of them remembered where, and they both said I could use it, so I did.  Dad’s strap is one his mom (my grandmother the weaver) made, which I put new ends and a slider on.  I found some similar straps by searching for “handwoven band” or “handwoven strap” on Etsy.  You could also start with a belt, or a guitar strap or anything else you like, as long as it’s sturdy enough to hold your camera and thin enough to sew through (which leather belts aren’t.  You might be able to use rivets though …).


Prepping the pieces

Cut pieces for the ends from faux leather or leather, a bit wider than your strap (allow extra width if your material is thick, so that it can come together and cover the edges of the strap), continuing that width for about an inch, and then tapering to an end to cover the webbing.  See below to visualize how the ends cover the strap and the webbing.  You will need two leather end pieces for each end of the strap (four total).


camera strap transparent


Cut a piece of the 3/8″ webbing about 7  1/2″ long for each end of the strap.  If you cut the ends of the webbing on a slant, it will make it easier to thread them through the slots on your camera.  I like to sear the cut edges of the webbing (to keep them from fraying) by passing them quickly through the blue part of a candle flame.

Either figure out where you would like your camera to rest on your body and cut the strap to that length (accounting for the ends and webbing) or plan to make your strap adjustable.  I knew exactly how long I wanted my strap to be (so that the camera would rest on the top of my hip), but I made Dad’s so he could adjust it (keep reading for how to do that).

If your strap fabric is prone to fraying/spreading out all over the place, you may want to stitch over the ends before putting everything together.  You can even use that stitching to gather in the end of the strap a bit, which I did for Dad’s strap.

Heavy duty stitching

Sewing the strap is actually pretty simple, it’s all about how to join two things which you really don’t want to come apart.  My camera is the second-most expensive and precious piece of equipment I own (sewing machine being #1 ) and as I said it’s kind of heavy, so I definitely want some heavy duty stitching here!  Basically you’ll do this by adding extra stitches to reinforce the critical areas.

A good way to attach straps for extra strength is to sew a rectangle-and-X pattern (I just realized I have no idea if there’s an official name for this … but here’s how to do it anyway).  Sew a rectangle just inside the edges of the strap, basically as big as you can inside the area where the strap and end overlap while catching all the layers (illustrated above).  When you get to the point where you started (this is the point with the curved arrow, where the illustrated stitches change from yellow to blue below), sew to the opposite corner.  Keep going, overlapping the stitches on one side, then diagonally back to the other side.  Overlap one side’s stitches again, to come back to where you started.


camera strap square and bar tack

Another way you can add stitches to an area that will get stress is to make a bar tack (that is the real name for this one) by using a wide stitch and a short stitch length.  Just keep in mind that every time you make a stitch it also makes a hole in the material, so don’t make the stitches so close together that the holes touch and make a weak place where the material could tear.

I used a mini version of the rectangle-and-X to attach the webbing to the ends.  A bar tack would work well too.  As usual, it’s a good idea to try out your planned techniques on some scraps to see what works.

Once you’ve attached the strap and webbing to the ends, I like to sew around the edge of the ends to keep everything neat.  Bury the thread ends wherever you can, and you’re done.


camera strap in progress


Leather 

I’m not a leather sewing expert, but I can give you a couple of tips if you decide to use real leather for the ends.  Although it’s more difficult to sew than the faux stuff, it’s wonderfully strong and malleable.  First, you will definitely need a leather needle.  The main difficulty is getting the machine to punch through the leather, and everything that would normally make your machine want to skip stitches (sewing over different thicknesses of materials, etc.) does so even more.  Go slowly, go over skipped stitches again or pick up the foot and go back.  Use the hand wheel if necessary, get the weight of the machine on your side.  Try switching between a regular foot and a zipper foot to sew around the edges of the ends.  I still ended up with some skipped stitches and broken/restarted threads to hide, but I was overall pleased with how my machine handled the leather and all the layers.


Adjustable straps

It’s not much harder to make an adjustable strap, you just have to wrap your head around how it works.

I’m such a visual learner, I need to draw it or better yet, lay out all the pieces to see how they’ll go together, as below.  One side is a simple length of strap that goes through the loop and back to the end.  The other side goes from the end, through the slider, through the loop, and back through the slider (inside the first pass).

Sew the strap end down so that there’s a short loop of strap inside the slider, covering the raw edge with the extra suede piece.  You can use the rectangle-and-X method again.


dad's camera strap layout


dad's camera strap finished 1

Special thanks to Bryan’s first 35mm camera for modeling.

A note if you’d like the strap to hug your shoulder like mine: I used two lengths of the strap fabric so that I could separate them to either side of my shoulder.  It turns out that it works even if I don’t separate them—I think as long as your strap is fairly wide and soft it will work to wear it on your shoulder.

Make any strap you want!  Nice, right?


Turning a Lotion Bar into Handmade Salve


For some reason, people give me these lotion bars.  It’s true that I have super dry skin, but the consistency of the bars doesn’t really work for me, it leaves a sticky film on my fingers.  However, I just love homemade salve.  I use it for lip balm, minor burns, on my dry fingertips before bed, etc.  The ingredients of the bars and the salve are about the same (a combination of oils and beeswax, and sometimes a few other ingredients like shea butter), except the salve has a higher proportion of oil.  So …

Basically all you have to do is heat the lotion bar until it melts, add more oil, and cool it again.  I’ve tried this a few times and the mixture has always stayed emulsified.

A re-used glass jar is a good vessel for heating. The ideal container would have a pouring lip (which this one doesn’t). It only took a little brute force to get my lotion bar inside.


lotion bar to salve 1


I melt it gently, in a pot with water over low heat.  It might not be necessary, but to insulate the jar from the direct heat, I put an old dishrag in the bottom of the pot. The bar will take a while to melt, but you don’t have to watch it the entire time, just remember to come back and check every so often, until it’s completely melted.

To figure out how much oil to add, you really just have to let the mixture cool and try it out, as it depends on how much is in the bar to begin with, and the finished consistency you like.  Err on the side of a little less than you think to start with, you can always add more.

You can add olive oil, almond oil, or any other oil you like that’s good for your skin.  I’ve used jojoba oil for the last few batches, since I had some from another project.  Stir the oil into the mixture, so that it’s distributed throughout (I used a wooden skewer).

The first time I did this, I let the jar cool down all the way to test it.  Then it occurred to me that it would be much faster to cool a small amount in a little measuring spoon.  Wait until it’s completely cool to test, and keep in mind that a hard skin forms on the surface, so break through it and smear the salve between your fingers, on your lips etc. to test the texture and absorbency.


lotion bar to salve 2


As soon as you get in as much oil as you want, the salve is done!  If you’d like, you can pour it into smaller containers for storage and use while the salve is still liquid (using a funnel or very carefully).

Every time I do this, I’m pretty excited about the almost effortless batch of lovely new jars of salve around the house.  If you want to, you can even make fun labels for them, like we did for the salve we made at my craft retreat two years ago.


lotion bar to salve 3


I find the best way to get the salve off the teaspoon, or out of a jar I’d like to use again, is to just keep rubbing it off with one dry fingertip after another.

Here’s to upcycling!


Free Yourself to Make Something Ordinary


garment bag stitching


Now that I’ve told you a little more about why we travel most of the summer, I can also share some things I’ve made for our trips.


Our clothes spend a fair amount of time in a “closet” consisting of a thin strip of wood between the shelves we have built into our truck.  It’s much better than keeping them in a suitcase, but still not ideal since they are unprotected.  At the end of last summer, when we unpacked the clothes from truck to house, I noticed that one my jackets was significantly more faded on one side than the other.  Maybe hanging it with the same side to the skylight for the whole summer was not the best idea?  The same thing happened to Bryan’s jacket, so I’m pretty sure that extra UV light on one side was the problem—combined with the fact that it was warm last summer and the jackets didn’t come off the rack very often.  I had been thinking vaguely for a couple of years about making some kind of garment bags to protect our clothes from getting dirty/scratched up as we move things in and out of the truck, especially as I have started to take more me-made garments on the road.  This was the final straw, I had to do it.


garment bags hanging 2


I decided to make two, each half the width of our “closet.”  One would be slightly longer than my summer dresses, and the other just long enough to protect shirts and pants.  I traced a plastic hanger for the shape of the sides, and left a split in the front to close with a zipper.


This was the perfect scrap/thrift store shopping project.  Since it didn’t matter exactly what the garment bags looked like, as long as they worked, I could use practically anything.  I used the last of some heavy canvas from old curtains that came with our house, plus another small curtain (made out of some great textured blue-green fabric) that I bought at Goodwill.


garment bags hanging


This may seem like a strange project to wax poetic about, but here’s the thing: as I cut myself loose from trying for aesthetic perfection, not caring what anyone would think of my topstitching or pieced fabric, sewing felt more like sculpting; using what I had on hand, and my hands, and just making something almost like I was pulling it out of the air.  I was free to use my creativity in any way I wanted, to use whatever I could find, odds and ends of colored thread, salvaged zippers (really nice ones actually)—and I started to see an unexpected beauty in my intentionally imperfect stitching, one that I hope comes through in these photos.  I was free to do whatever I wished, and yet cared enough to add little touches and experiments.  I was trying things, enjoying the process, and making something useful as I went.  With enough practice behind me to be comfortable with fabric and thread, I was able to just play, and it felt pretty magical.


garment bag snaps


garment bag corner stitching


Around the same time, as we both worked on various projects for the truck and Bryan’s display before the summer season, he was refinishing the director’s chair that he uses in the booth.  He did a really nice job, dissembling and sanding the chair before applying the new finish.  After all that, I decided it needed a new bag to protect it from getting scuffed all over again as it’s loaded in and out.


disassembled chair

Chair in the process of disassembly—we’re looking through where the seat would be.


I went back to the thrift store looking for something to line my chair cover with.  I loved searching through the housewares section, looking at everything as a material instead of a finished product (always my favorite kind of shopping), and letting the serendipity of what I found help shape my project.  I decided on two vintage towels for padding the front and back, and a second-hand piece of fabric to round out the outside.  I think the green stripes with my other leftover fabrics make it look like something for sailing.


When I announced that I was going to spend our penultimate evening in Flagstaff sewing (this chair cover), I got an enthusiastic “Ok!” from my notoriously goal-oriented husband.  Remind me to try this trick again next year . . .


chair bag stitching


It’s weird, but having all these me-made covers on our travels this season has been quite a boost to my morale.  Every time I see them, or touch them, I’m reminded that I have a spring of creativity and ingenuity which I can use to make whatever I want, and whatever I need.  That’s pretty much all I need to feel good about life in general.


How about you—have you done any creative and/or freeing projects lately?