Enoughness, Wardrobe, Mending


old silk cami after detail


Are you ready for a radical anti-consumerist statement? Here goes: I have enough clothes. Now, this isn’t a terribly original radical idea, even among other makers & sewists (for one, Felicia wrote eloquently about it last summer). But it’s an idea that I’ve been rolling around my head for a year or so now, mulling over where I’m going with it, and I think I’ve made some progress.

Roughly six years ago, without really telling anyone about it, I decided that I would get the clothes I needed in my wardrobe by making them instead of buying them. At the time, I needed quite a bit. For winter wear I remember having a total of two long sleeved knit shirts, both plain cotton not-great-fitting ones from the thrift store. Situations like that were part of the reason I went handmade; I was frustrated looking for ready-made clothes I liked that I could afford, and tired of feeling like most of what I wore didn’t suit my personality or my life. Me-Made-May was also essential in getting me going in this direction. Before we move on, I want to acknowledge that it is a great privilege to be able to choose warmer and better-looking clothes. While I’m not always sure what to do with that knowledge, it seems important to say it, and I do think that just acknowledging it helps me be more grateful and mindful of what I have, and encourages me to take care of things and not take them for granted.


old silk cami before

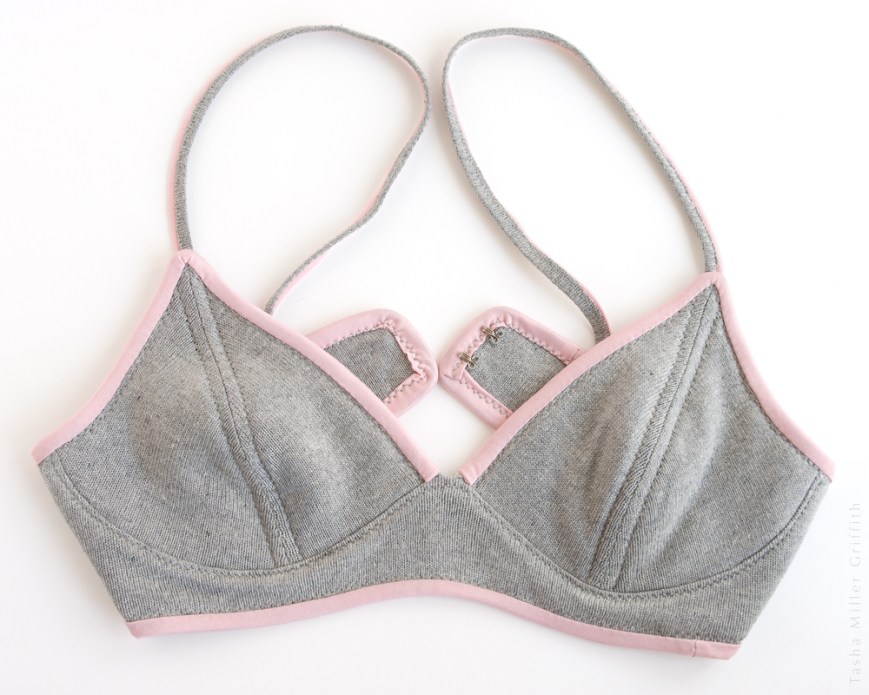
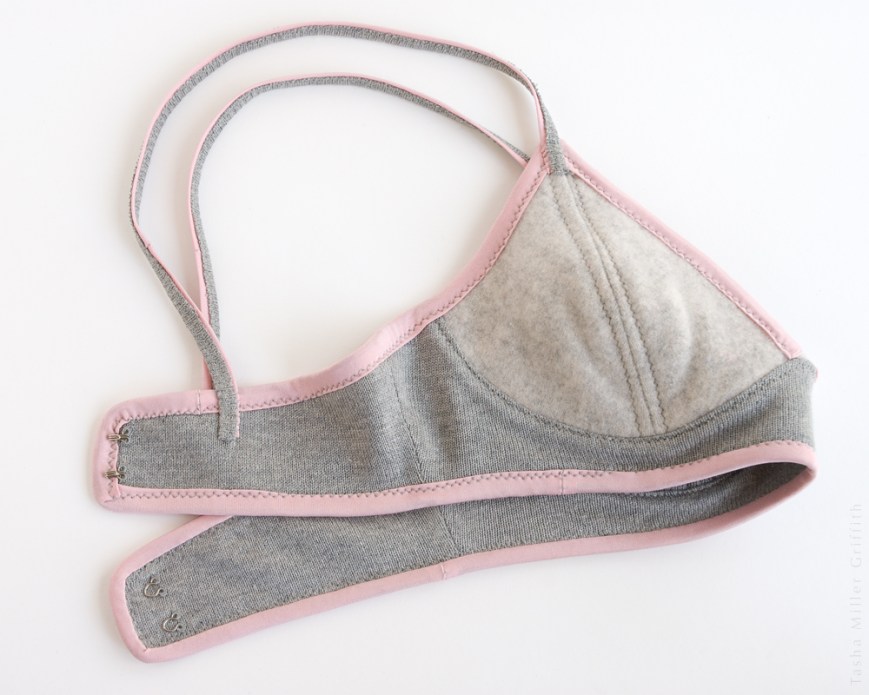
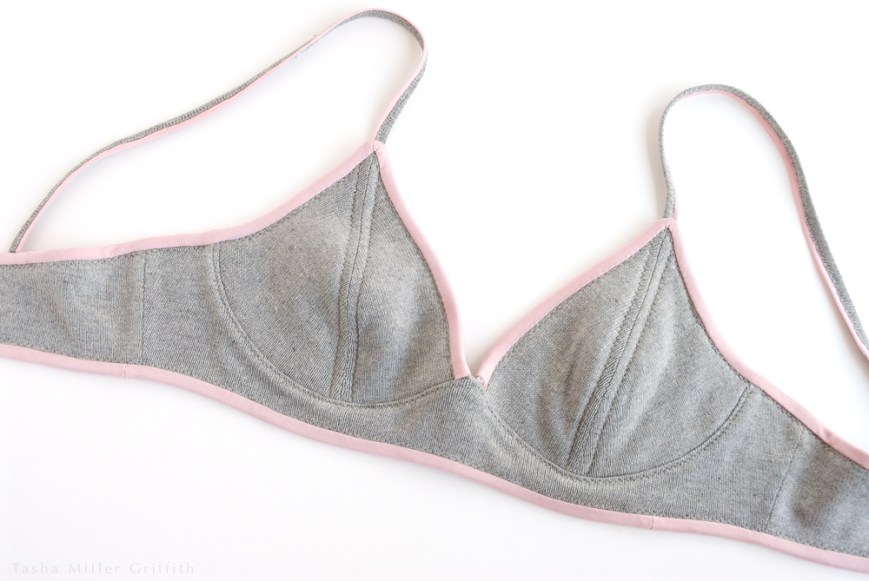
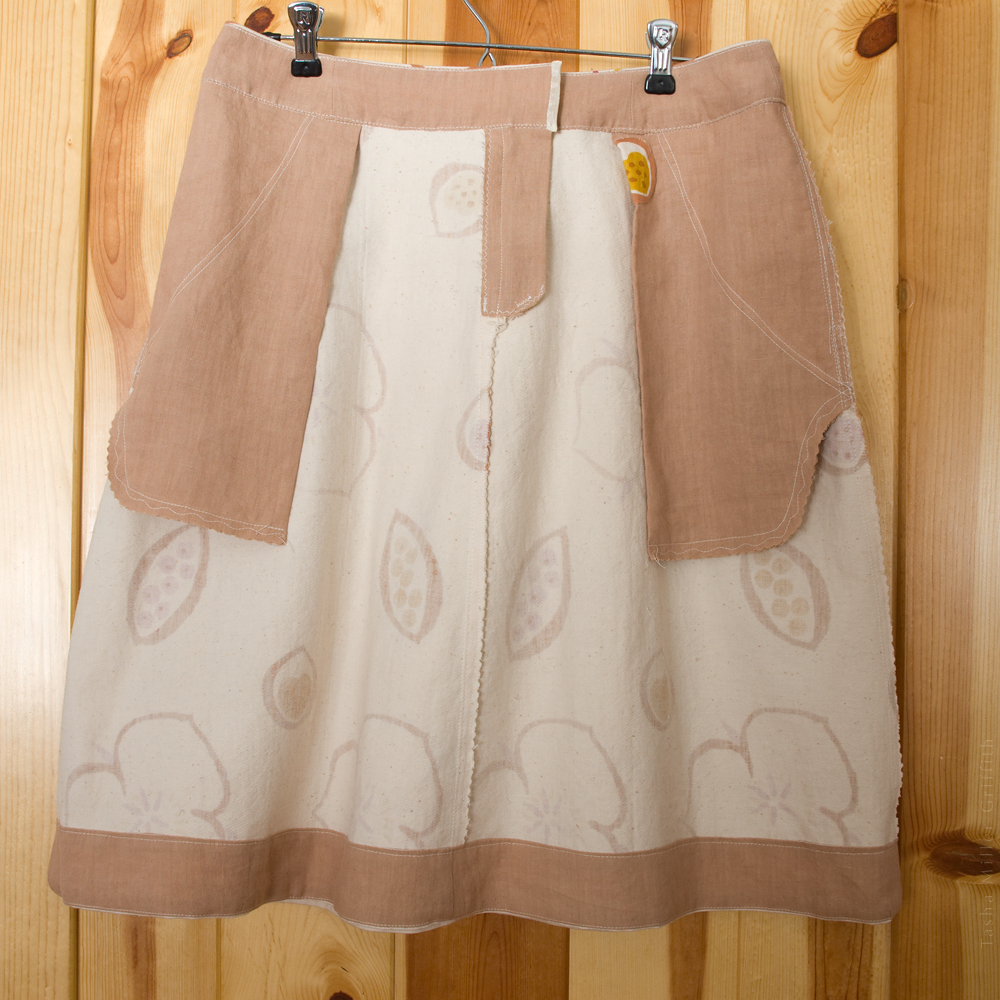
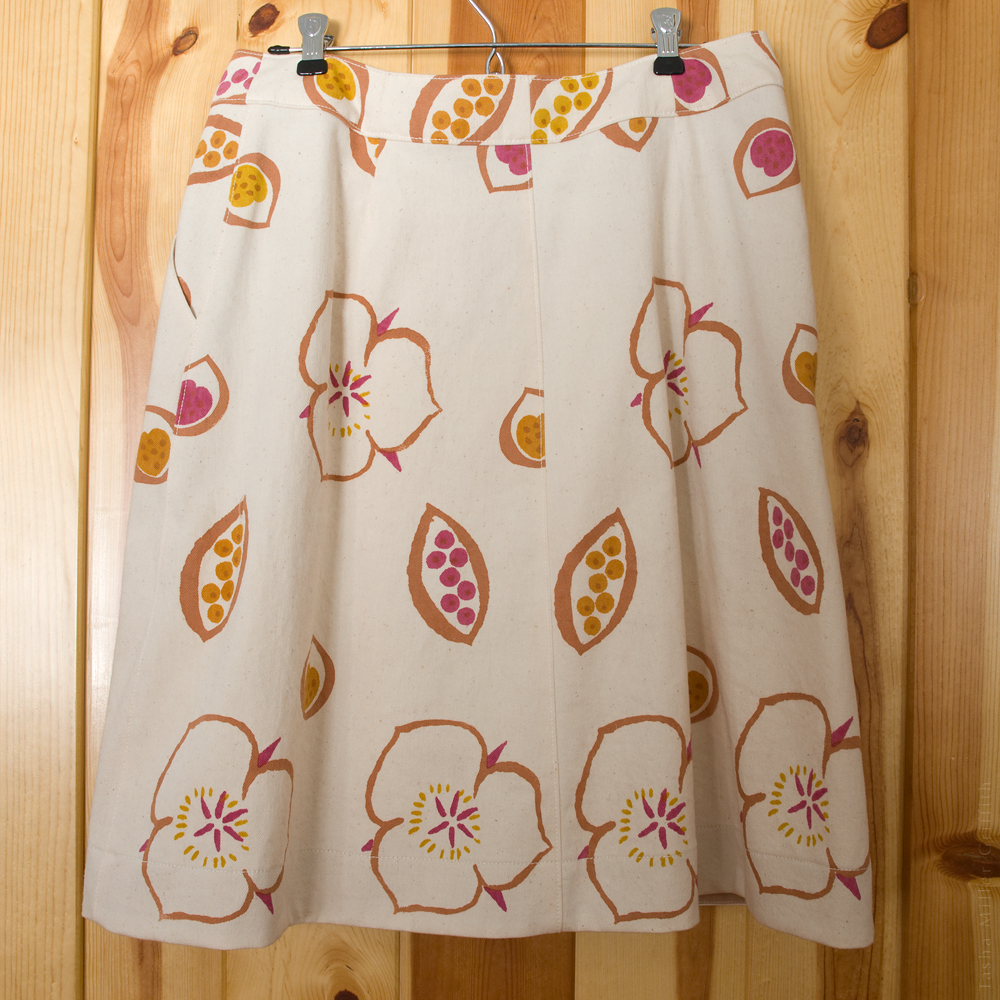
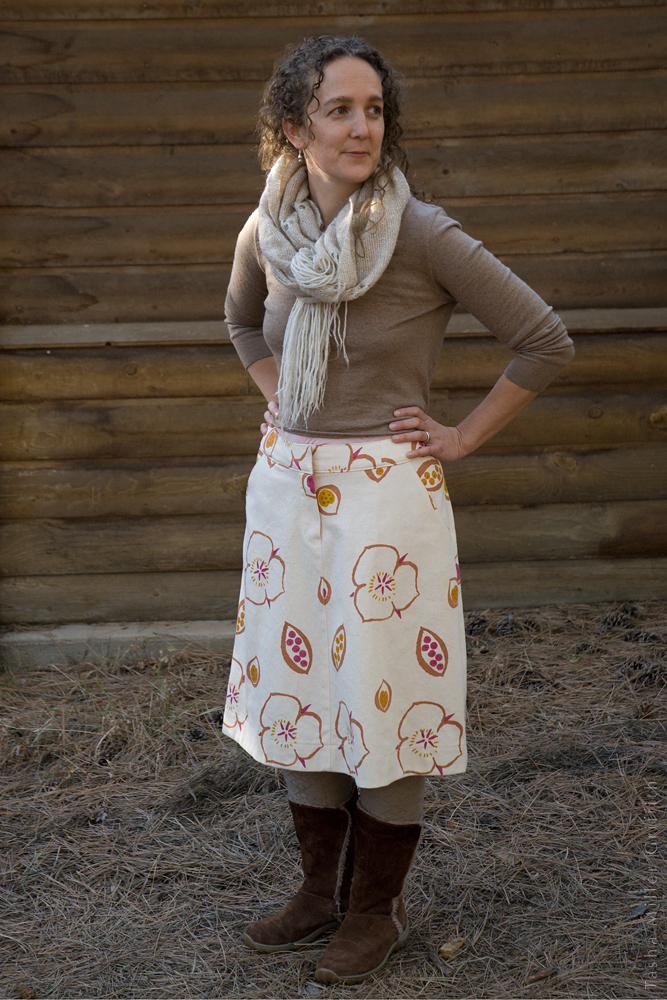
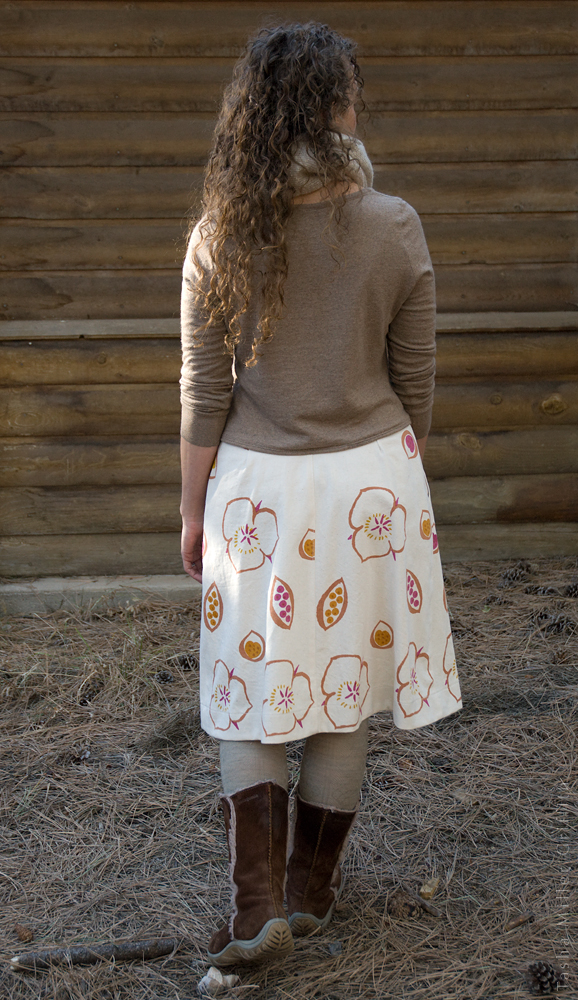
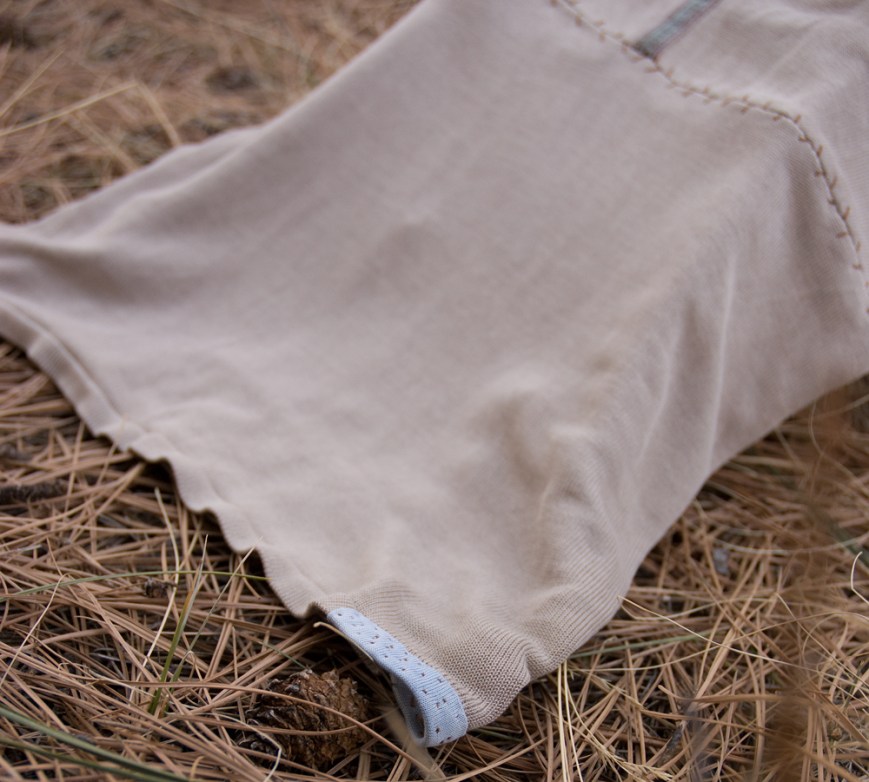
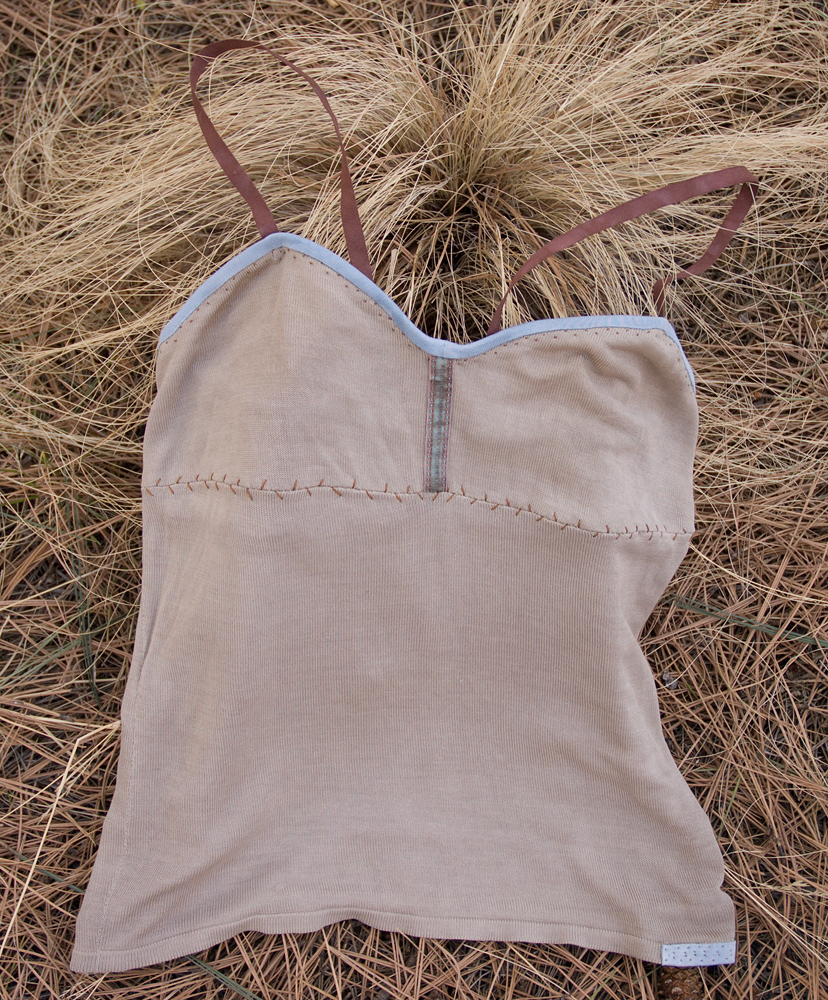
This was an old silk cami with a shelf bra inside, made from a thrifted top. As you can see, it had a lot of wear and had already been patched once. But there was still enough sound fabric between the body and the shelf to reconstruct a different cami (below). It’s certainly arguable that this was too much work, too much hand stitching, for a garment which realistically is made from worn fabric and has a limited life expectancy. And yet, it gave me a lot of freedom to experiment, and a functional garment …

old silk cami after


So back then, I just started sewing garments, beginning with what I needed most, and then moving to the next-most-needed thing. It worked—I slowly but surely built a wardrobe of clothes I love, which covers just about any situation in my life. The new things have been mostly me-made, with a few lucky thrifted/gifted pieces mixed in. It certainly helped my progress that I already knew how to to sew (and knit), that I was already thinking about how my style reflects the way I want to be seen, and that I had a fair amount of fabric stashed away (although I certainly acquired more for specific projects).

Because I came into my personal wardrobe sewing revival from a place of making what I really needed, it was unavoidably obvious when I got to the point of not needing much. It’s been a gradual but ultimately fairly profound shift for me; from having a new garment in progress most of the time, to focusing more on slower projects, mending, and keeping my wardrobe in good shape.


layers of sock darning

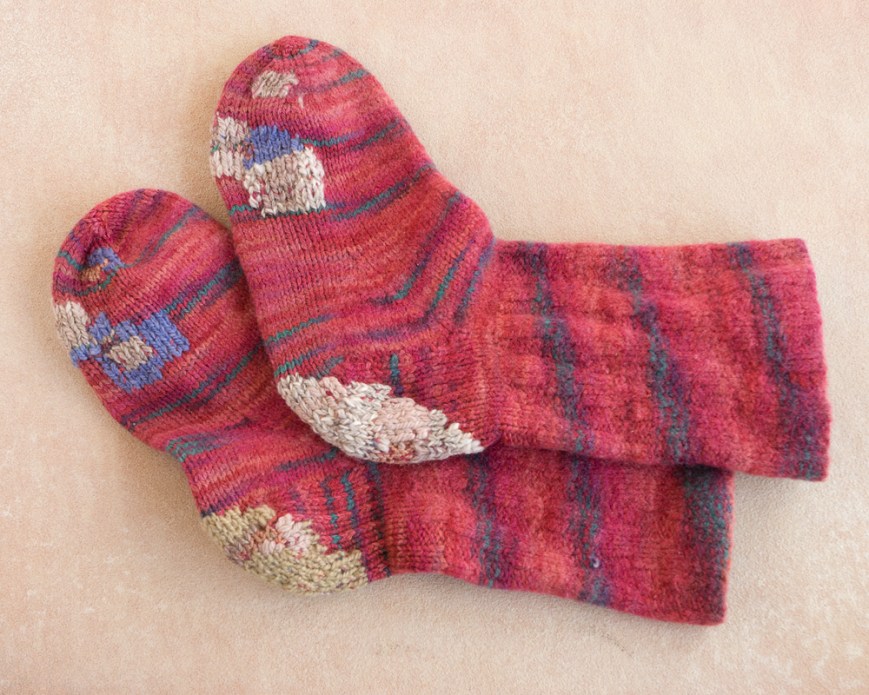
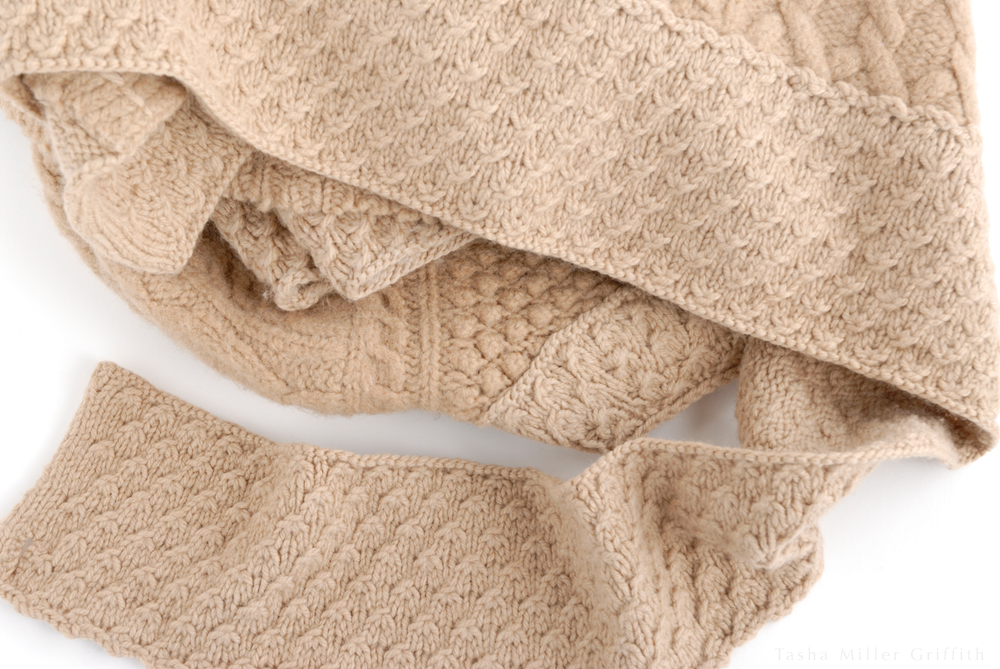
These handknit socks I got from a friend quite a while back are my longest-running mending project. I just can’t give them up. All but one pair are still going.


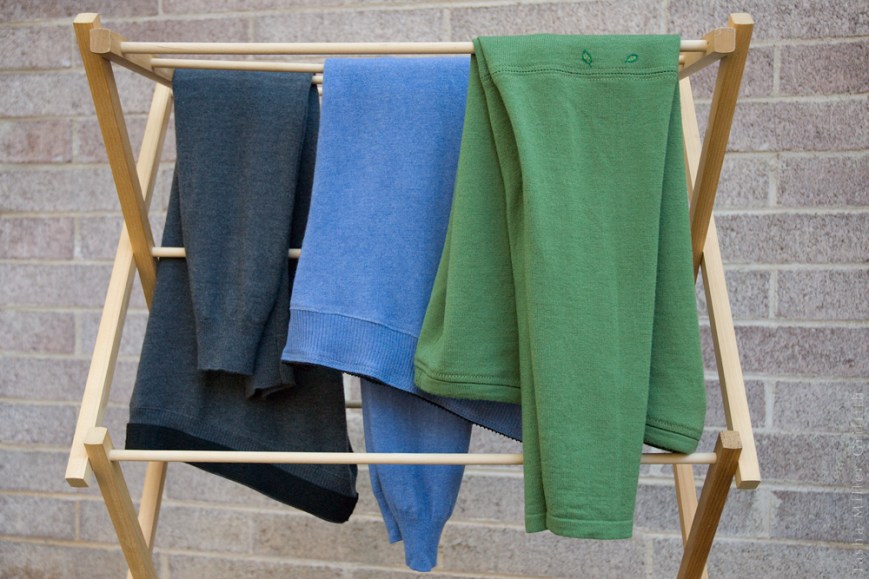
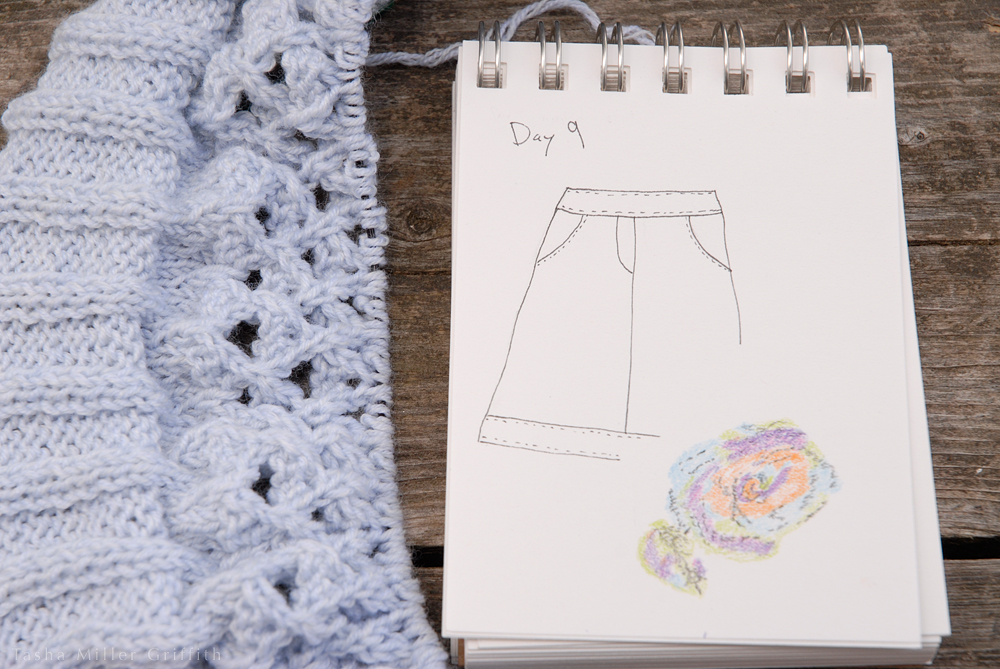
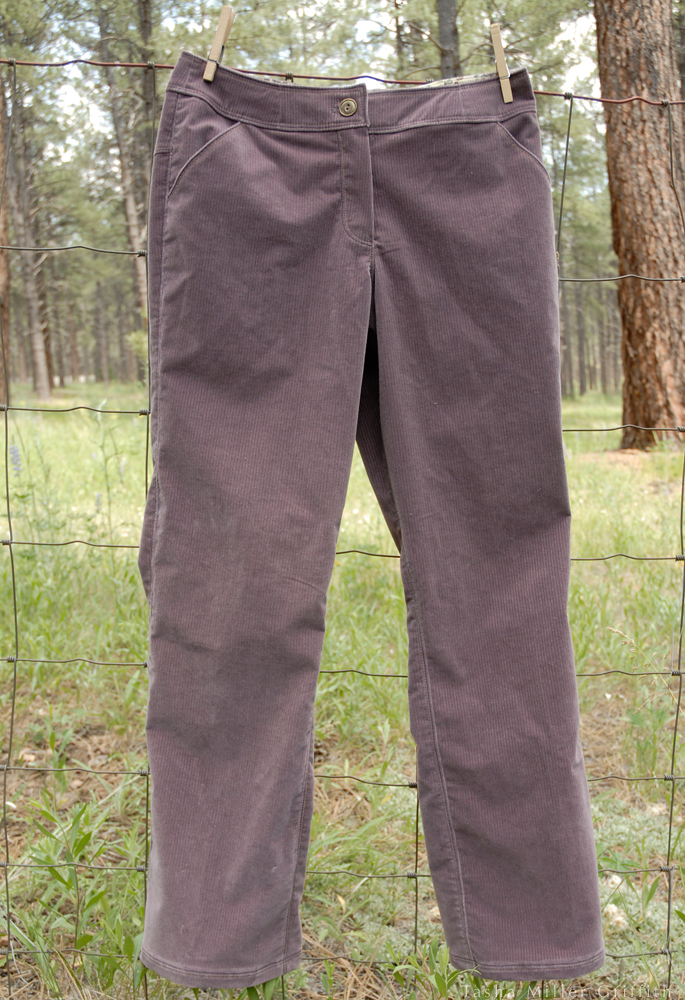
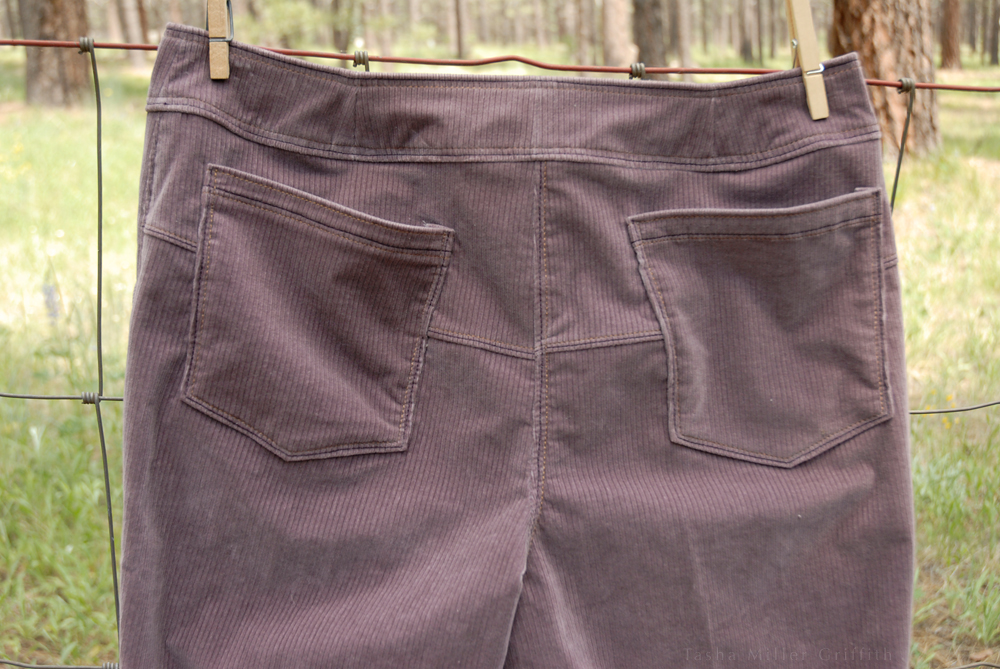
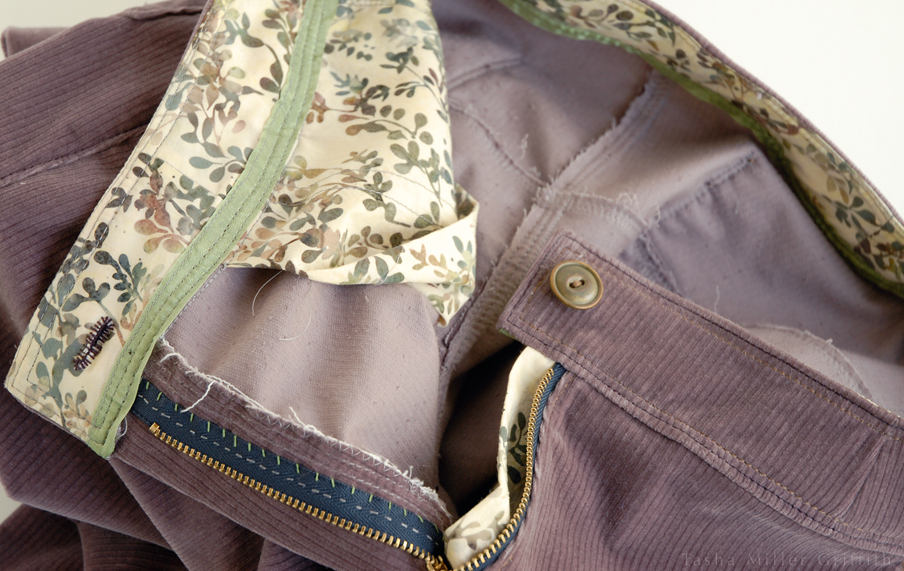
At first, I was a little conflicted about all this. I thought I might miss sewing things from fresh fabric, or maybe more truthfully that I would miss dreaming things up to sew out of fresh fabric. But, as Jess pointed out, there’s no reason not to keep dreaming. After all, just a small percentage of the garments I imagine ever get sewn, no matter how much I’m actually making. Also, it turns out that for me anyway, it’s just as satisfying to dream up ways to re-make things that have been languishing in the back of my closet or in the “try again” basket. And it’s not that I am making nothing new. Right now I am knitting socks (the world’s slowest pair since I’m only working on them when traveling, plus I keep changing my mind and ripping out the heel …), spinning yarn which will become a sweater in its own sweet time, and plotting a new shirt from my natural-dye-printed fabric. And, I’ve just realized that neither my newer purple corduroys nor my blue cotton pants are really presentable for outside wear anymore—there will always be things to make!

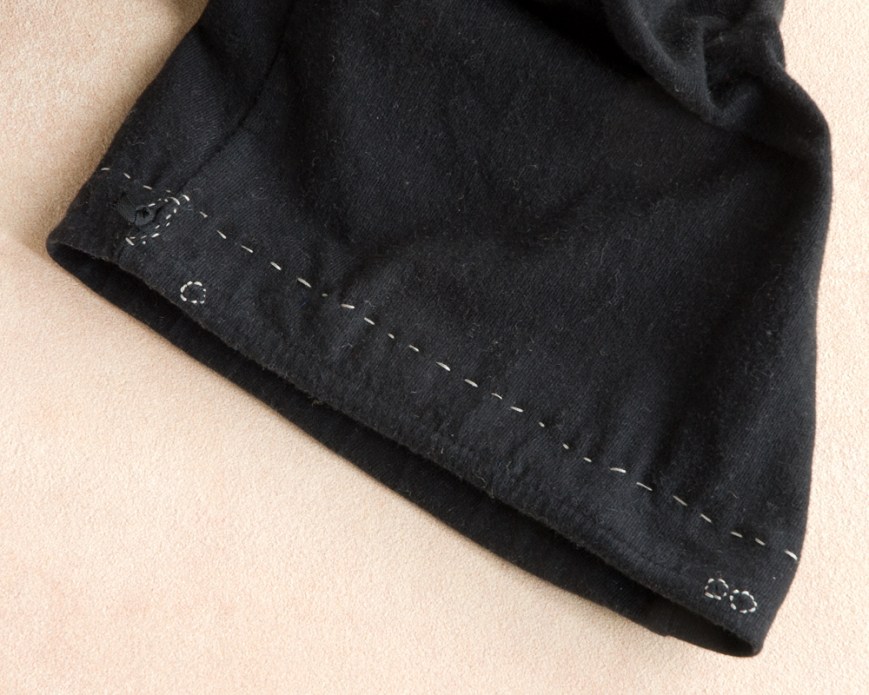
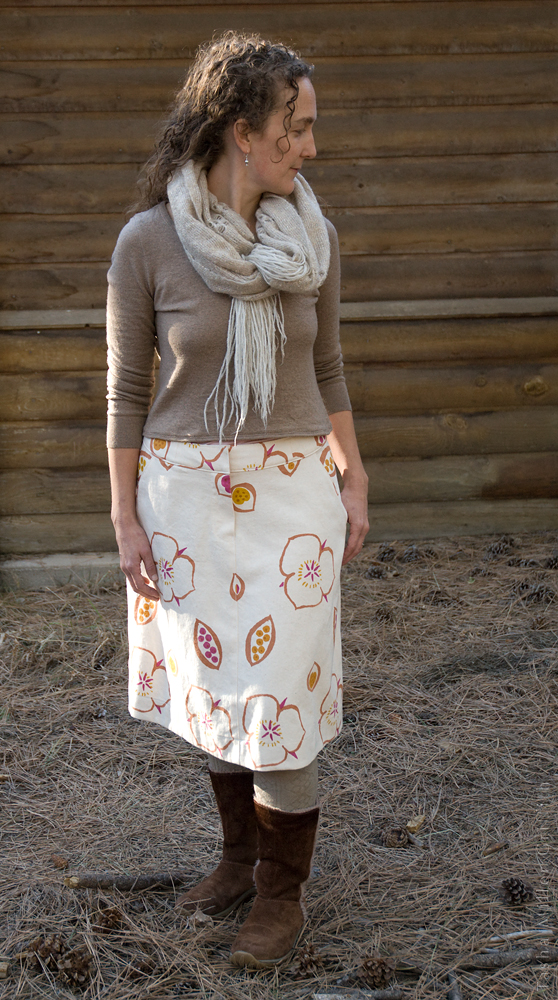
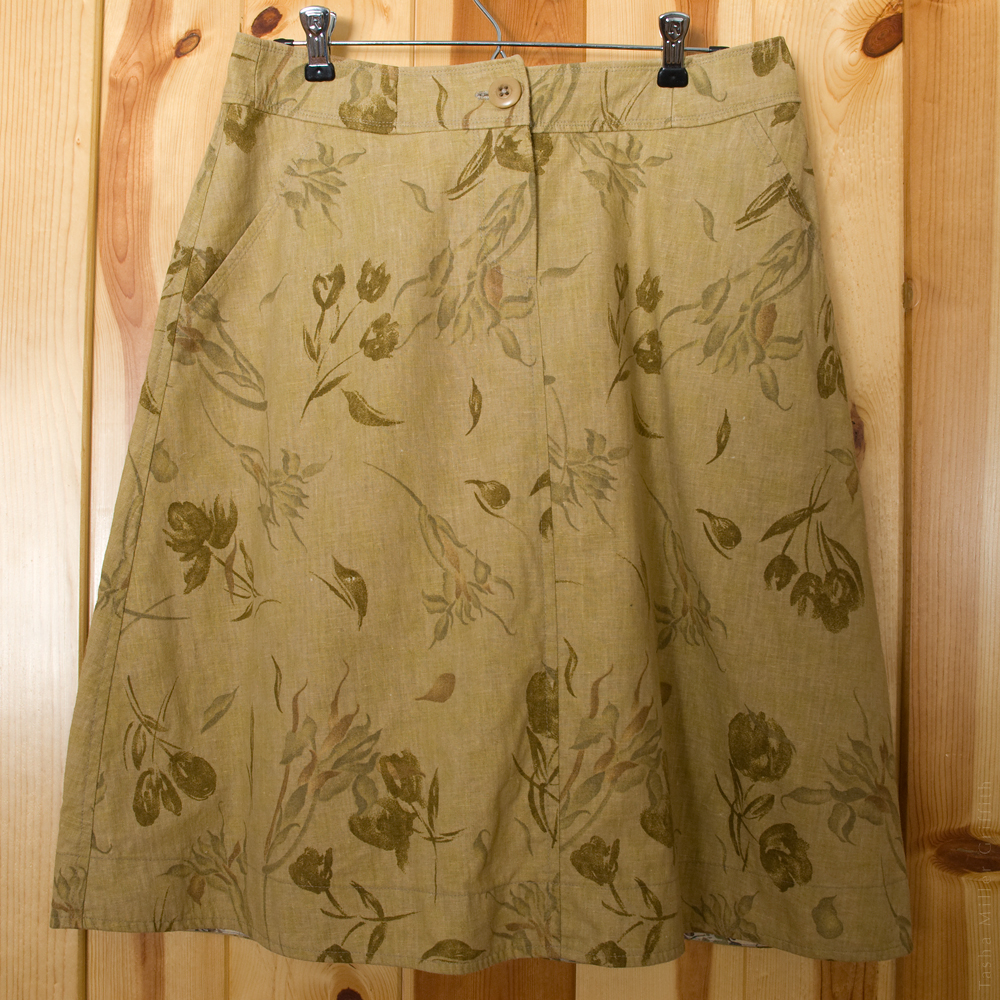
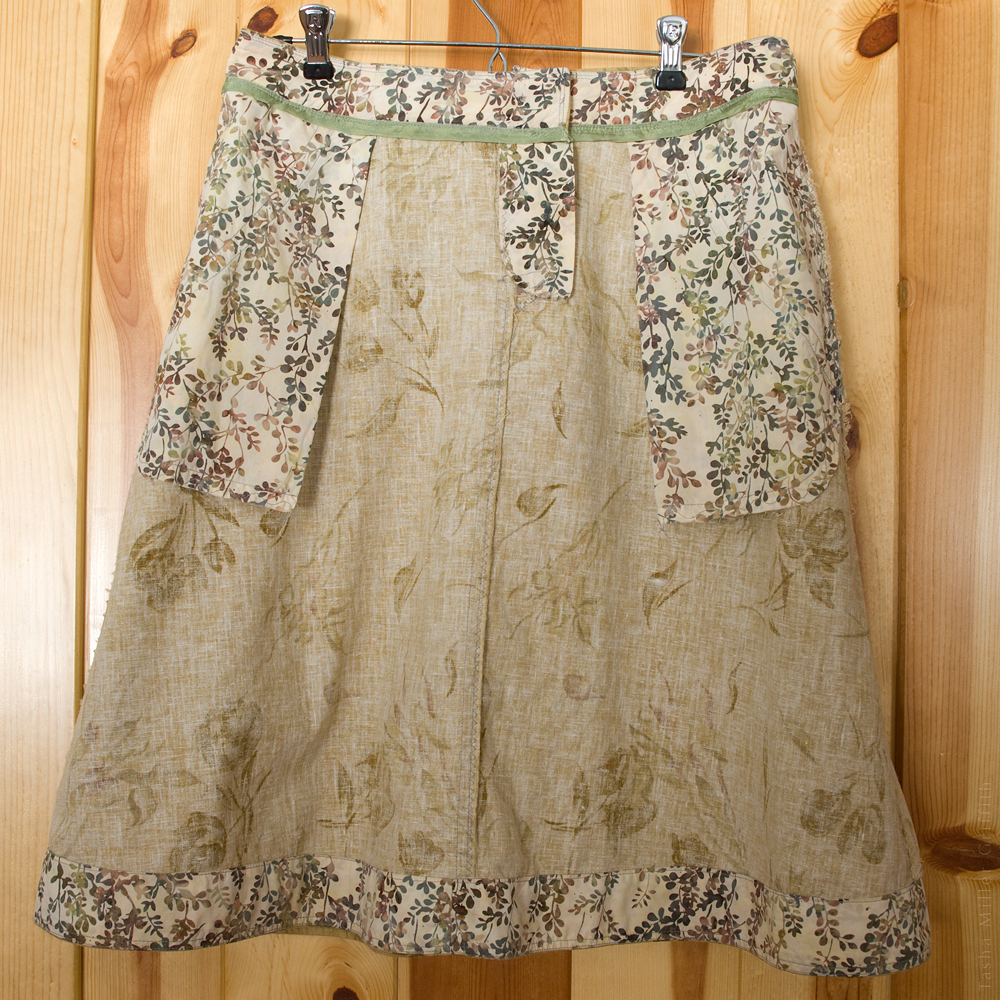
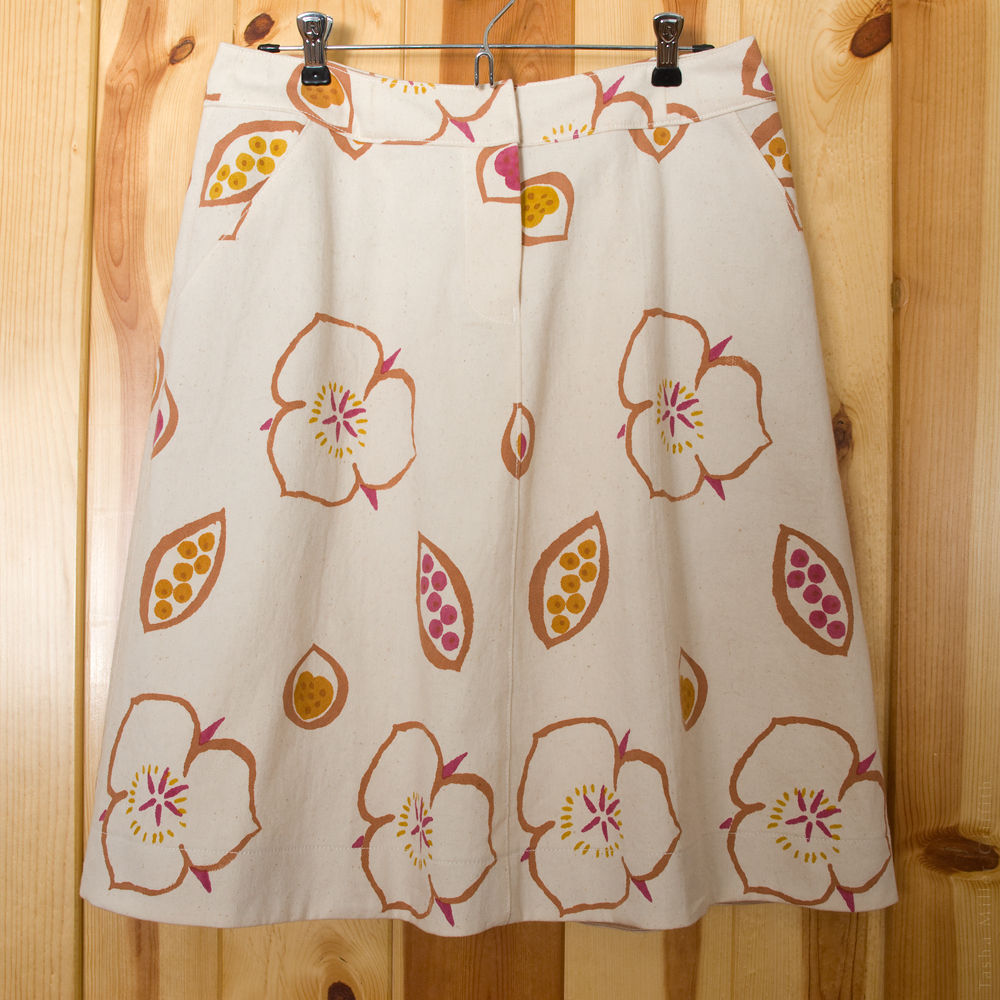
But for the most part, my sewing lately has been directed towards keeping my existing wardrobe going, making it better, and adding in the next level of that message I want to send when people see what I’m wearing. At some point it occurred to me that while I know I’m wearing handmade, anyone who sees my clothes (especially if they don’t sew) will just assume that I bought them somewhere, like “everyone” does. In fact, many a sewist’s goal has been to make clothes that look “just as good” as store-bought ones. Well, I’ve decided that I’d actually like people who see me on the street to think to themselves, “Hey, I wonder if she MADE that … or someone did …”—in a good way, of course! I’m interested in adding more hand stitching, more hand-dyed fabrics (and eventually handmade fabrics?!), and definitely interested in wearing visible mending proudly on the outside of my clothes.


black handstitched pjs 1

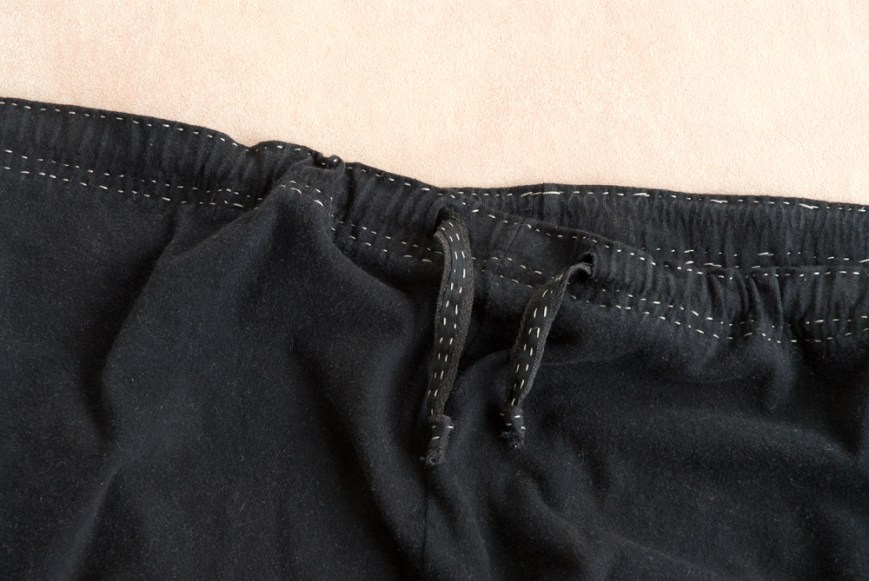
Rather than making a new pair of PJ pants when I needed some recently, I decided it made more sense to revamp a pair that Bryan wasn’t wearing. That meant getting rid of crumbling elastic, and adding enough hand stitching that they felt like “my new comfy beautiful PJs” rather than “this hand-me-down thing I’m stuck with.”

black handstitched pjs 2


This downshift in sewing fits in really well with other shifts in my life over the past couple of years. A lot of my creative energy has been and is now going into thinking about natural dyes, fibers, and fabric printing. As I’ve taught those skills more widely, I’ve been working hard to learn all I can and improve my process. (It’s the biggest, deepest, best rabbit hole of research and experiments I’ve ever been in.) I’m teaching mending more too, so it’s been perfect timing for me to take on mending my own wardrobe as more of a deliberate project, seeing how far I can push things and what I will learn by continuing to choose “fix it” over “rag bag.” As much as I am devoted to other textile arts, it pops into my head over and over again that mending is probably the most valuable, most potentially world-changing thing I could do, show, or teach. (Come join me! New classes recently added.)

I think it’s also worth noting that I’m more comfortable in this stage of my evolution as a maker because of the type of maker I am. While I certainly try to master the skills I take on, every textile technique I learn about fascinates me, and I’m always ready to expand my horizons. So spending less time sewing ultimately means I’ll have more time for dyeing, spinning, maybe some weaving, or to try something else entirely new—a bonus in my book.

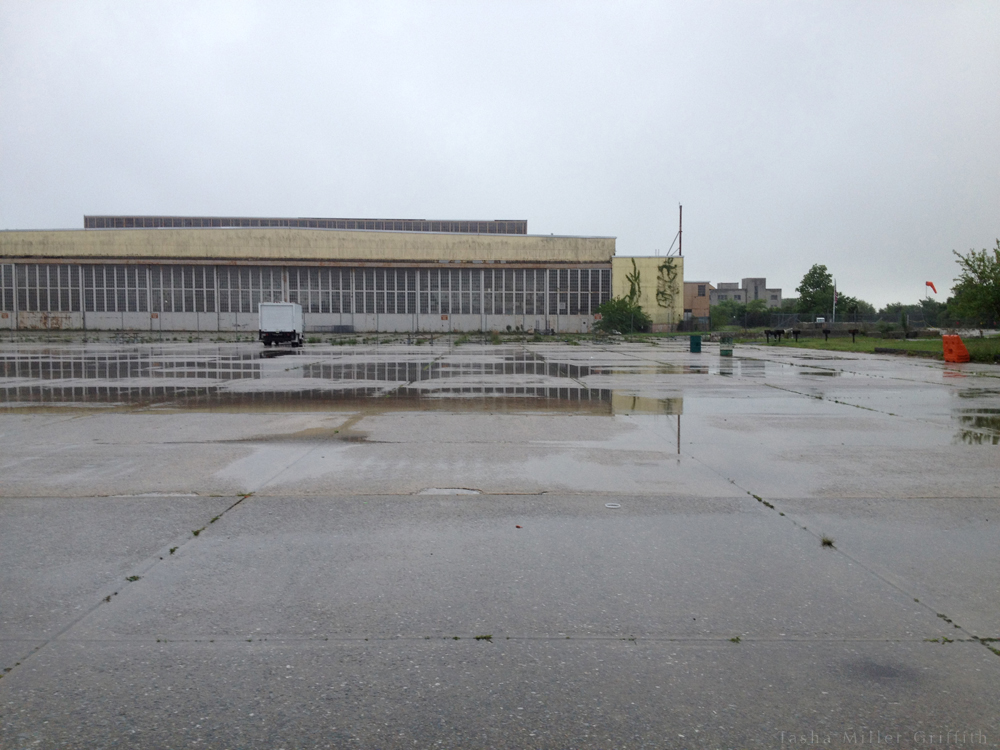
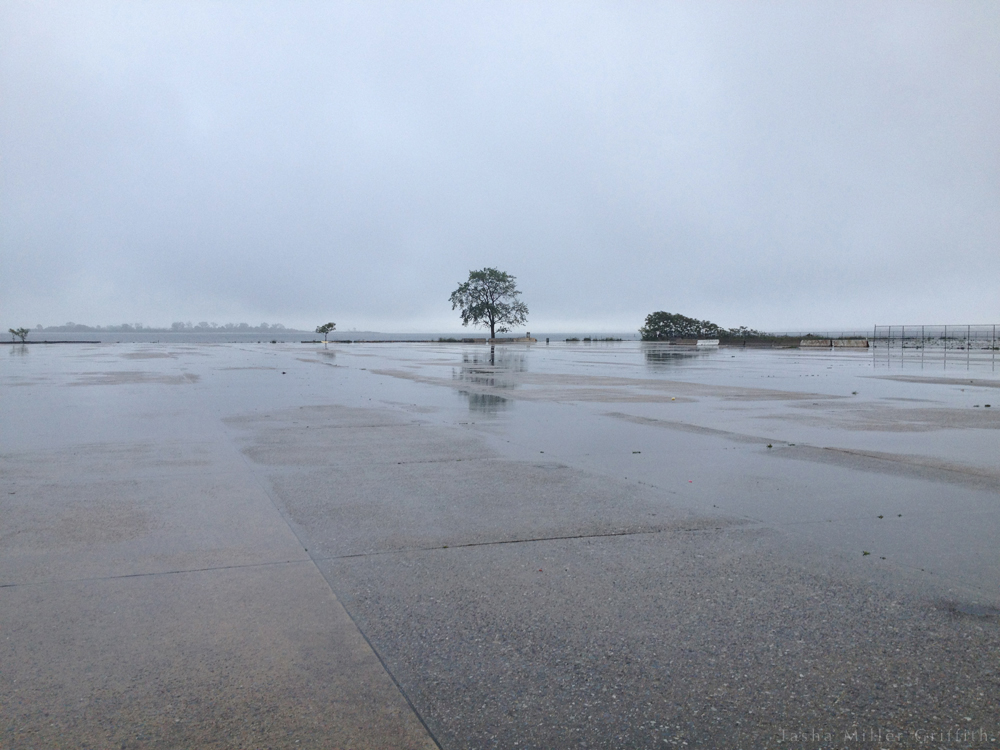
This blog has evolved with me, and I want it continue to do so. I have plans to start sharing some of what I’ve learned about natural dyeing here, as well as whatever else comes up. So for now, a happy season to you, whatever yours may be. (The monsoon rains just started here, and I am so very grateful!)


black handstitched pjs 3


A Silk Watson Bra

You may have noticed that I’m not big into bandwagons, and if I am going to jump on one, I like to wait until it’s safely parked back in the barn and everyone else has left first … I actually bought a copy of this pattern right when it came out and it seemed like everyone in my sewing-internet-world was talking about it, but then in more my typical style, I decided to think about it for quite a while before actually making it.


silk watson bra 1


What was/is really exciting to me about the Watson Bra pattern is that someone else already did all the hard work of figuring out the exact curves of each piece to make a smooth cup shape, make it fit into the band, etc. (thanks Amy!), and that it’s specifically designed to be made without underwires, which is exactly what I wanted.

What I was less excited about is the fact that it called for mainly synthetic stretchy stuff; lots of kinds of elastic and power mesh, etc. As you may also have noticed, I’m so over it with all of that, and I’m trying to use all natural materials whenever it’s even remotely feasible. And one of the things that kept popping into my head whenever I looked at all this cashmere felt I have around* was, “this would really be perfect in a bra!” Since you know, it’s substantial but flexible, and insanely soft on the skin. But could I really make a bra using all natural fabrics? Maybe without even elastic?

It turns out the answer is a resounding yes! Not only can it work, but it did work beautifully on the very first try (some luck involved). Using my measurements of approximately 31 ½” underbust and a 1” difference between full and upper bust, I decided to make a size 34A, erring on the side of a slightly smaller size since my materials weren’t super stretchy and I didn’t want it to come out too loose. I made a couple of alterations to the pattern; adding ½” to center front since I knew that would fit my frame better, and straitening out the bottom line of the band to allow for the possibility of using an existing hem when upcycling garments for fabric (although I didn’t do that this time). I also added to the seam allowance in the center of the outer cup pieces, so I could grade it with the inner seam allowance to avoid a noticeable ridge there.


silk watson bra 2


The grey fabric is from a silk knit top that had worn out around the underarms and cuffs but still had plenty of life in the body. The pink binding is leftover fabric from making these camis (very thin silk knit), cut 1 ½” wide, sewed ¼” from the edges, and turned under. And the inner cups are indeed felted cashmere scraps*—oh yeah! I sewed it all together with a simple zigzag stitch, and sewed the straps on by hand.

According to my notes I made this back in February, which means I can now safely report that it works as well in real life as I’d hoped. The only alterations I’ve made since then are to move the back attachment point of the straps closer to center back (typical for me if the straps are slipping off my shoulders at all), and to tack down the bindings at center front with some tiny hand stitches, since the edges pulled up a bit after a few wears and washings, revealing the cup layers.


silk watson bra 3


I thought this might be a wearable muslin version, but instead it came out near perfection in fit and function. It does everything a want a “real bra” to do: provide a smooth and socially acceptable silhouette under a single other layer of clothing, and add a little bit of support. It’s also so comfortable I forget I’m wearing it, which is key for me. I thought about making another one (I even have another old silk top or two with some features that might be really fun to incorporate) but the truth is I don’t need it right now. This one, plus my more bralette-type past attempts at upper-body lingerie, are covering all my wardrobe needs. So, I’m officially checking “make real bra” off of my bucket list goals, and moving on!

I’ve been thinking a whole lot about what it means to have “enough” as I get closer to actually filling the gaps in my wardrobe. This post by Felicia has only broadened my sense that this is a really important thing for us all to be thinking about. A whole post about it here is likely coming … I’d love to know your thoughts at any time.


Previous makes


*Thanks to all the Fiddleheads hats I’ve made over years now, I have an entire giant plastic bin of small bits of luscious felted cashmere knits, which I could never throw out despite the fact that there’s way more than I’ll use in one lifetime (unless maybe, a giant intricate patchwork cashmere blanket—don’t even think about that, self!). Which is why I’ve started sorting them into groups of pleasing colors and offering them to fellow makers in my Etsy shop. I’ll continue to sort and list more batches as they sell. If you’d like some and you have color requests, just give me holler, here or there!

Cheers!


DIY Fabric Shower Curtain


fabric-shower-curtain-2


Hello everybody, it’s been a little while! I’m a firm believer in blogging whenever you can and feel inspired, not on a pre-ordered schedule, and I also think that most blogging apologies are a waste of time and just make you feel bad. Still, it’s been much longer than I meant it to be, and I’d like to echo Molly’s sentiments on Orangette: if I ever decide to leave this space for good, I’ll tell you so. It seems only fair. The way she puts it at the end of that post is so good.

The first reason for my losing track of online things was one of the better ones: for the second time ever, we hosted our annual family and friends craft retreat at my house last month. The first time we hosted it, two years ago, was when I had an inspiration—the infinite to-do list—that started a big difference in my thinking.

I have to say, I was pretty proud of myself this time. I felt calm and relaxed in the lead-up, and I even slept well before and during at least the first part of the week—proof that I’ve made progress as a human lately, and let go of some anxiety, even the good kind that’s more like excitement. (If you need this too, may I highly recommend the book The Three Marriages by David Whyte, which is full of deep insights about things in general, and came into my life at exactly the right time. You can also listen to a good interview with him from On Being.)

It was one of those times when being calmer and going slower actually ended up meaning that I got more done. We cleaned off the back porch, for instance, which probably hadn’t been done in the two intervening years …

And I made a new shower curtain! Well, “made” might be exaggerating somewhat. I took a length of wide fabric, hemmed it, installed some grommets, and there we go.


fabric-shower-curtain-1


I’d like to apologize to all of our previous guests for the old shower curtain, a cheap vinyl thing with one ripped eyelet, which someone bought right as we were moving into our house a decade or so ago, and had been there in various states of nastiness ever since. Incidentally, I also figured out that if I actually took the vinyl thing down, soaked it in the tub with vinegar and dish soap, and took a scrub brush to it, it came out clean—enough better that I decided to save it in case I need a waterproof something.

Back to the new curtain though: I’ve been slowly moving more and more away from synthetic materials and towards natural ones for all kinds of reasons. I got another push that way when I found out that polyester and nylon clothes shed tiny synthetic fibers in the wash which eventually find their way into the oceans, enter the food chain when they’re eaten by small critters, and never break down. I first heard about this on Science Friday a while back (but cannot now find the specific program). It came up again recently on Root Simple. This was one of those last-straw moments. I’m convinced, I’m done with that, and I’ve been trying harder not to buy any synthetic fabrics.

So I wanted a natural fiber shower curtain, and as I was looking for one and researching options, it occurred to me that I had in my stash some wide cotton fabric which was basically what I was looking for—lightweight but tightly woven. And with stripes!

I measured the old curtain to figure out what length would work best (a little shorter than standard turns out to be good for my tub) and if one width of the fabric would be enough (it was, but you could always add a seam if not).

I made a deep hem on the bottom, and a narrower one at the top. The hardest part was hammering in the grommets. Typically for me, I liked the “wrong” side of the fabric better since it’s a little more textured and subtle, so I put that on the outside.


fabric-shower-curtain-3


I had a few questions, but figured it was worth trying to see what would happen. Would plain cotton keep the water inside my shower? Yes it did! Would a deep hem be enough to weigh down the bottom? It was! To be on the safe side as far as mildew, I’ve been wringing the curtain out after I shower, and then spreading it out as much as possible to dry. So far, it’s working really well, and it’s so much nicer to look at than the old one, it’s fairly ridiculous. I also like the idea that I can take this one down, put it in through the washer, and hang it to dry in the sun once a month or so, which should actually be easier than cleaning the vinyl one.

If you wanted a sheer curtain, or a liner for a more decorative fabric on the outside, I suspect that silk organza would be amazing (although I haven’t tried it, not having that much on hand). Something so thin but crisp and tightly woven should dry almost instantly, and look beautiful. Oh printed silk …

Anyway, I hope this give you all some ideas!

It feels good to be writing here, and I intend to do it again soon.


fabric-shower-curtain-4


Hand-Stitched Badges for Me-Made-May

A beginning embroidery primer, with free patterns.


For the last few years, May has found us around Washington DC. We usually do two art shows there, and in between stay with some dear friends and ride the Metro to visit the sites of our nation’s capitol. The whole time we’re surrounded by so many people (especially from my middle-size-town perspective). Since it’s Me-Made-May, I spend even more time thinking about what those people are wearing than I normally would. It’s easy to get a little bummed out when I look around and consider that, of the hundreds of strangers I can see at any given moment on the subway platform or at a monument, perhaps none of them are wearing anything handmade. But it also got me thinking that maybe they just haven’t considered it, that if they knew there was a whole movement going on, that folks around the country and the world were encouraging each other and posting about their handmade wardrobes at that very moment, maybe it would encourage a few of them to at least think about it.

So I wanted to bring something that said I was participating in Me-Made-May, and/or that I had made part of my outfit, off the internet and onto my physical person where all those strangers could see it. I started to talking to Zoe about it, and she liked the idea too. I owe her big thanks for her support, bouncing ideas around, and of course for putting on this challenge for us again this year! Since MMM is all about stitching, and I’ve been doing a lot of hand-sewing and embroidery lately, here’s what I ended up with:


embroidered mmm badge


You can make them too! I designed these little badges with embroidery beginners in mind, and I’ll walk you through some parts that might be confusing, so even if hand-sewing isn’t usually your thing, you can handle it. If you’re already further along in your embroidery journey, feel free to skip down and glance through the photos, then print the pattern and get started.  Click the link below to get the pattern:

MMM-badges-pattern


materials & tools

You’ll need some felt, and some embroidery floss, thread, or fine yarn.

Wool felt is an ideal material to start stitching on, since it’s forgiving, doesn’t ravel, is thick enough to not need backing, and you can hide ends and extra stitches in the thickness.

The Me-Made-May badge is stitched here in variagated cotton floss, and the “I MADE this!” one in wool thread.  There’s more about the specific threads I used at the end of this post.

You’ll also need a few basic sewing tools: a sharp needle with a long eye, and a small sharp scissors. I always wear a thimble like this one when I’m hand stitching.

Finally, you’ll need a scrap of tissue paper and a fine-point pen to transfer your design to the felt.


thread types

Let’s talk for a minute about the differences between cotton and wool, and floss and thread, for stitching. Wool threads designed for embroidery are often labeled “crewel” (a type of embroidery) and are usually made up of two single strands (called plies) twisted together. This plying is integral to the structure of the thread, and it’s not meant to be separated.


embroidered mmm badge 9


Cotton floss often comes in a loosely twisted bundle of threads, which can be separated to make various thicknesses. This is called “strandable” floss. If you look closely (maybe with a magnifier), each strand of this kind of floss actually has its own two-ply structure. Some cotton threads have a non-strandable structure as well.


embroidered mmm badge 8


Just like in sewing or knitting, the different properties of wool and cotton fibers make a difference to how they work in embroidery. Wool’s crimpy, elastic nature means that it plumps up, filling gaps and making it easier to embroider a smooth satin stitch or a plush knot. Cotton is denser, smoother, and less elastic, meaning you may need more thread to cover the same area, and the stitching will have a tighter, flatter look.


getting started

Put a little piece of tissue paper over the printed pattern you want to make. You can use scraps of tissue, and iron them flat if necessary. Using a fine-point pen that won’t bleed, trace the pattern carefully, including the circle around the edge. Make a single line for thinner shapes and letters, and draw around the outline of thicker shapes. Pin the tissue to your felt, with the pins outside the circle. You’ll stitch right through the tissue and the felt to make the design.


embroidered mmm badge 1


I tried several methods of transferring the patterns to my felt, and this one worked the best. An iron-on transfer pen (not a pencil) also works, but it makes thick permanent marks that are a little fiddly to apply, and must be covered with stitching.

To thread the needle, I use the techniques I shared in this Seamwork article about hand-stitching. I found that it helps to fold over the end of the wool thread, and to wet the end of the cotton floss.

To begin, take a long stitch on the back through the thickness of the felt, coming up near where you want to start. Let a little bit of thread remain on the back surface. You can trim it off later to neaten things up. If possible, take your first stitch as a backstitch to anchor the thread.


embroidered mmm badge 5


General embroidery tips:

  • Stitch in good light! It’s unbelievable what a difference this makes.
    Test out your stitches and thread on a scrap before you start, especially if you are experimenting with new stitches and/or aren’t sure what thickness of thread to use to get the look you want.
  • How even your stitches look depends mainly on how even the tension is between one stitch and the next. Start off slow and even.
  • When moving from one letter or shape to the next one, take a stitch through the thickness of the felt to keep it hidden. To keep long stitches from pulling the next part of the embroidery out of shape, push the needle straight through to the back of the work, then take a long stitch into the felt, coming out on the back near where you want to start again. Then bring the needle up to the front in your next spot.


the stitches

Most of the text in these patterns is made with backstitch. I explain this stitch in that Seamwork article, and in even more detail in this post.


embroidered mmm badge 2


Backstitch tips:

  • Put your needle in right at the end of the last stitch for a solid line.
  • Look ahead at the section you are stitching, and decide whether to divide it into two stitches or three, etc.
  • Think about the path of the thread when you come to corners and curves. Remember that where the needle goes in is the beginning of the current stitch, and where it comes out is the end of the next stitch.


embroidered mmm badge 3


For the scallops around the edge of the Me-Made-May badge, I used a simple straight stitch. Follow the individual lines on the pattern for a looser look that shows off the separate threads, or fill in the whole scallop shape, depending on the thread you’re using and the look you’re going for.


embroidered mmm badge 6


I filled in the thicker lines of text with satin stitch, which is basically a row of straight stitches very close together, so that they look like a solid surface. It’s easier to keep these stitches even and plush-looking if you work them over a base of another stitch. For these patterns I outlined the satin stitch sections in backstitch first.


Straight & satin stitch tips:

  • Backstitch around the outline of all the text, and finish all other parts of the design that use the pattern as a guide, then remove the tissue pattern before you fill in the satin stitch. You’ll be able to see exactly where the stitches are more clearly, and pulling off the tissue will be easier.
  • Cut carefully around the outer circle of the design. Leave the outside of the tissue pinned to the felt for reference and later cutting (you may actually want a few more pins at this point to hold it smoothly). Tear out the part under the badge itself. Pointed tweezers are an ideal tool for pulling out tiny/stubborn pieces of tissue.


embroidered mmm badge 7


  •  I find it easier to keep an even tension if I put the needle all the way through to the back at the end of each stitch, and bring it up again close to the stitch I just made on the same side of the shape I’m stitching. This method is slower to work than the more common technique of taking the needle under on one side of the shape and up on the other side in one stitch. But, it uses less thread and is easier to control, especially when you’re starting out.
    • Stitch as close to the foundation backstitches as possible for a full look. You can even push the foundation stitches to the side with the needle to make more space and keep the line of stitches even.


    embroidered mmm badge 10


    • If your satin stitch comes out a little lumpy, it can help to put the eye of your needle into a row of stitching and move it gently back and forth.


    embroidered mmm badge 11


    • When making satin stitch around curves (like on the D in “MADE”) it helps to make the stitches inside the curve as close together as possible, and fan them out a bit on the outside of the curve, a technique that’s illustrated in detail on Needle ‘n Thread here.


    The round knots around the outside of the “I MADE this!” badge are colonial knots. They’re a variation on a French knot where you loop the thread in a figure eight around the needle before pushing it back into the fabric. I like these because they hold a larger, more textural shape, and can’t come undone as you’re making them. They look especially plump in wool threads.  There are more pictures and explanation about colonial knots on Sarah’s Hand Embroidery Tutorials.


    embroidered mmm badge 13


    finishing

    When you come to the end of a section of thread, bury it through the felt for a short distance and come out on the back. You can trim the ends close, since some thread remains in the thickness to keep your stitches from pulling out.


    embroidered mmm badge 4


    Once all your stitching is complete, cut out the felt circle, once more going carefully around the shape you traced.


    embroidered mmm badge 12


    Sew a pin, a clip, or a magnet to the back, and it’s ready to go meet the world.


    embroidered mmm badge back


    supplies

    I used handmade felt, because I have lots of scraps of it laying around. Use what you can find near you, but if you possibly can, use real wool felt rather than the synthetic stuff. Wool is just so much lovelier to work with, and it will hold up to wear much better. Mine was 2-3mm, or around 1/8” thick.  Weir crafts sells a variety of felt online, including some that’s handmade and some that’s made in USA.

    I discovered two things while looking for threads for this project: there are probably as many small companies and indie dyers making embroidery threads as there are making knitting yarn, and I personally am just not interested in using floss in flat colors. My mom has been into embroidery for as long as I can remember, and a quick dig through just part of her stash resulted in many more beautiful options than I could use.

    For the Me-Made-May badge, I chose two colors of variegated cotton “painter’s threads” from Tentakulum; 121 “Cezanne” and 125 “Matisse.” They’re made in Germany, and available through embroidery suppliers in the US, including Artistic Artifacts. DMC also makes a couple of ranges of variegated floss, which are a lot more common, at least where I live.

    For the “I MADE this!” design, I used some amazing fine crewel wool thread, dyed with natural pigments by Renaissance Dyeing, out of France; color numbers 0309, 1622, 1708, and 2000. Single colors are available in the US through Hedgehog Handworks.  Photos do not do these colors justice; they are good enough to eat!  Any crewel wool or very fine yarn that you like would be a good substitute.


    embroidered mmm badge 14


    In case you’re wondering, while I had plenty of materials to choose from right in front of me, I did do a little searching to see what I could come up with for organic/traceable threads. Renaissance Dyeing looks good on the sustainability front; they use all natural dyes and local wool, it’s just that they’re far away from me. Organic Cotton Plus also sells a line of organic cotton embroidery floss which is grown & spun in Peru and dyed in the USA.

    Personally, I think I’ll be using a lot of the yarn scraps I have lying around, especially for larger designs.  And I think it would be well worth it to buy (or spin!) some natural colored thread, and drop a tiny skein into every dye pot I try.  It takes so little, why not?


    resources

    All you have to do is start searching on Instagram, Etsy, or wherever you get your internet eye candy to find amazing examples of beautiful modern embroidery.  I particularly like Katherine Shaughessy’s crewel work, she has two books with a fun modern aesthetic, and sells supplies and patterns (with some free ones) on her site Wool & Hoop. Yumiko Higuchi also does some of my favorite embroidery. She likes to to mix wool & cotton threads, and her book just published in English (Simply Stitched) does a great job of taking advantage of the properties of both, as well as being full of inspiring designs.

    If you make one of these, I’d absolutely love to see it!  Share it using #mmmay16, #handstitched, or email me a photo. And of course, I’m here to answer questions if I can.

    Happy stitching!


    Solved: Leggings


    The best thing about making a pledge or taking a challenge may be that it pushes us to find out what’s possible if we stay within certain boundaries. For example: this winter, I found myself in need of some new warm leggings, and a couple of challenges I had in one form or another meant I needed to be creative about how I got them. The results were so good—almost certainly better than whatever I would have come up with without the challenge.


    upcycled leggings 1


    One of my wardrobe goals is to have enough of the right clothes for winter so that I’m cozy (in other words not always cold and therefore slightly grouchy). For the coldest months, it turns out that means wearing an extra warm layer under pants or a long skirt pretty much every day. I’ve already figured out that wool and silk are much warmer than cotton knits (plus I love everything else about wool). I’m still following my fabric-buying pledge from #1year1outfit (until a full year has gone by this summer), which meant I couldn’t hop online and order lovely wool fabrics from New Zealand, even if they are organic. There are a few totally beautiful made-in-USA wool knits out there, but let’s be honest, I also have a budget. I can’t afford to splurge on every project, and I don’t want to for something like this where I frankly don’t care too much what it looks like, as long as it feels good and works well.

    I was thinking about going to the thrift store for something else, and somehow I got the idea that maybe if I found a big enough fine-gauge men’s sweater, I could make leggings out of that. Such, such a good idea!

    My layout works like this: I cut off the waistband of the sweater, including a little bit above it for seam allowance, and save it for the waistband of the leggings. I flip the sweater inside out and trim off the seams as closely as I can to separate the front from the back. (After making so many hats from reclaimed cashmere, I am an expert at deconstructing sweaters.) Then I remove the sleeves, in this case leaving the sleeve seams intact as much as possible. The front and back often have fairly different shapes (and a lot of times different grainlines) so I separate them completely at the shoulders after the sleeves are off, and cut from them separately. I cut the top potion of the leggings pattern from the front and back of the sweater, however they best fit. The lower leg comes from the sleeves, utilizing the sleeve cuff as the ankle.


    sweater to leggings drawing


    I used the same Espresso Leggings pattern as my first custom fit pair—there’s no going back from custom fit! The lower arm of the sweater was actually a little smaller than the original cuff on my pattern, but it stretched to fit over my ankle just fine. I laid the folded leg pattern over the sleeve, and started to cut where the leg became smaller than the sleeve.

    For sewing, I joined the lower leg to the upper leg flat, pressed the seam open, and sewed down the seam allowances for a non-bulky join. Just don’t forget to add a seam allowance to the upper and lower leg when you’re cutting.

    As I sewed the inside leg seams, I just merged my seamline into the original seam of the sleeve when I got to that point.


    upcycled leggings 2


    Working on these, I thought a lot about stretch and recovery in knits. All the sweaters I used had about the same horizontal stretch as the fabric I bought for the very first pair; with 4” stretching to about 7”, or 1.75%, so I could use the same size pattern. The sweaters had almost no vertical stretch though, which made the first pair of sweater-cut leggings feel a bit shorter on top than I wanted, so I slashed the pattern and added ¼” vertically above and below the crotch point.

    I ended up cutting the ribbing for waistband much shorter than the top of the leggings, since it could stretch much further. The ribbing alone wasn’t quite enough to hold the leggings up, although I loved how it looked. For the charcoal pair, I added wide elastic on top (it may possibly have come off a pair of Bryan’s boxers with worn fabric). This holds up the leggings no problem. The elastic has the recovery needed, but it actually won’t stretch as far as the ribbing, so I had to cut it a little longer. This can make the waist look a little wrinkly by itself, but it all stretches out smooth on the body.

    For the second blue/periwinkle pair, I wanted to see if I could use slightly less wide/firm elastic, so I tried some of the bra-band kind from my stash, which is soft on one side, inside the ribbing. That works too, leggings stay up with no problem.


    upcycled leggings 3


    The third green sweater had a narrow hem instead of ribbing at the waist. I decided to use that as a casing for narrow elastic, cutting two sections from the waistband and catching the elastic in the seams. After wearing this pair a couple of times, the jury is still out on whether it could use slightly wider elastic/more pull inside the casing … but if so it would be easy enough to unpick the little vertical seams at the top and sew it in.


    upcycled leggings 4


    Overall, I’m super happy with how these turned out! I answered a few leftover questions from the first-ever pair; like would elastic be enough to hold them at the low-waist level I like (a resounding yes!) and would they work in 100% wool (a big yes again!). Despite the fact that the pattern recommends fabrics with Lycra or Spandex, I like the all-wool version much better (the green and grey pairs are Merino, and the periwinkle is cashmere). These float like a warm soft cloud just touching my skin. They feel amazing and don’t bind in any way. If I were dancing on stage in them, I might care that the knees look a little baggy by the end of the day, but since these are under-layers only, I don’t at all.

    So I’m officially set on leggings for a few winters at least! We’ll see how these hold up. They should be fairly easy to patch if needed, since I have the pattern and scraps. I consider the used sweaters a sustainable material source, especially since I can utilize ones that have small stains or holes in them (the little stitched leaves on the green pair are covering former holes in the original sweater). Making leggings this way keeps me within my pledge and my budget. Plus they’re awesome.

    If you want to try this, go for it! For my fairly-small-but-very-pair-shaped figure, I need to start with a men’s extra-large sweater to cut the pieces as illustrated. Of course, you can patchwork them a little more if needed. The green sweater was in really good shape (except for the holes), so I got it even though it was a little smaller. I ended up piecing in wedges at the inner thigh to make up for not having quite enough width across the sweater body. It worked fine, but it was a little mind-bending to make sure all the pieces had the right shape and seam allowance, so I don’t recommend it for your first try.

    Happy stitching!


    upcycled leggings 5


    Every Day


    Here’s what I made with my special natural-dye printed fabric as part of my one Year, one Outfit project: an every day skirt.  In fact I designed the print with this skirt in mind.  Keep reading for some skirt-construction details, as well as thoughts about what I figured out and where I’m going with #1year1outfit after this.


    1year1outfit skirt 2


    For the pattern, I copied a skirt my aunt gave me ages ago.  It’s one of those items that I probably would never have picked on my own, but once it was in my wardrobe I wore it non-stop.  I can’t describe it better than to say that it’s the perfect shape for biking in: wide enough for easy movement but not so wide that it flips up in the breeze.


    me with early plane 2The original skirt at the Udvar-Hazy Center during Me-Made-May ’12 (I made the pink top).


    This skirt seemed appropriate for practically every activity.  The large-scale, colorful print also seemed to go with everything I owned, and was part of my inspiration while thinking about how to print my fabric.  Maybe needless to say, I’ve worn it so much it’s literally falling apart, and had to be retired after finishing the pattern.


    mmm'14 day 9Pretty much the only time I document what I’m wearing is during MMM.  Here are the essential elements of the skirt from 2014, when I decided to draw my outfits.  Also pictured: the beginning of this sweater.


    Although I was pretty sure the pattern would make a wearable skirt on the first try, I knew there would inevitably be some little things I’d want to change.  And I would have to be certifiably nuts to cut into my carefully printed fabric without trying out my new pattern first.  So I made one from stash fabric, green floral linen/cotton blend I bought ages ago and turned out to be great for this.


    1year1outfit skirt 7


    And I did in fact have a short laundry list of things to tweak for the second version, including the length.

    Judging by the amount I wore this test version before the weather got cold, I’ll wear the snot out of both these. I just have to convince myself not to treat the natural-printed one as too precious. I’m also super curious about how the dye will hold up in real life, so hopefully that will help!


    1year1outfit skirt 8This is my favorite thing to do with quilting cottons that I apparently couldn’t resist buying in the past.  I quite like these two fabrics together, especially since you can occasionally see the facing when worn.  This project made me consider making a lot more faced hems.


    Once the pattern was tested, I was confident enough to cut out my printed fabric, but then hit a few delays, mainly in figuring out what other materials to use.  My original plan was to source the fabric as sustainably and “locally” as possible per my pledge, but to worry less about where the notions came from.  I’m a firm believer in one step at a time, in breaking things down so that I move towards my goals without feeling totally overwhelmed by the hugeness of what I’d like to accomplish.  Still, after seeing the beautifully creative ways that Nicki crafted her totally local clothes (she made her own clay to make buttons!) I was inspired to dig a little deeper.

    There seems to be just one organic sewing thread on the market, Scanfil, which is made in Holland and available lots of places online.  I’d seen it around the web but hadn’t tried it.  After all, Holland is not exactly local to me, and I assumed it would be more expensive.  In fact, it turns out that it costs barely more per yard than the Mettler thread I normally get.  And that thread is made in Germany … so I got some of the organic stuff to try.  It’s silky smooth and soft.  I think it breaks a little more easily, but I had no problems running it through either sewing machine.  For topstitching I used it doubled (two spools) with a 3mm length, and I really like the results, kind of subtle but shiny.  If you try this, I highly recommend tightening the bobbin thread the way you would for buttonholes.


    1year1outfit skirt 4


    I usually just use a thin, firmly-woven fabric for interfacing, and I’ve been looking for a new source since I ran out of the perfect interfacing fabric (origin: total mystery) found in my mom’s stash.  I got a swatch of every fabric I thought might work from Organic Cotton Plus, whether made-in-USA or not, but ended up rejecting them all and using another bit from my stash.

    While I was at it, I ordered a zipper made with organic cotton tape.  The only difference I can see is that unusually, the zipper matches my fabric perfectly.


    1year1outfit skirt 6Guts.  I think I’m finally getting the hang of making the inside fly guard thingy like it’s supposed to be.  This lining fabric is a super soft linen, also from stash.  The cute little pocket applique is due to an unfortunate moment while rotary pinking …


    I should say that the skirt fabric itself is quite nice (I linked to the fabric I bought in the printing post, but as of today it doesn’t appear on the Organic Cotton Plus site, they must be out).  It has a twill weave.  It’s on the thinner end of what I would consider for this project, and very soft and drapey for a cotton.  It was also crooked when I got it, but easy to pull straight (check out how I do that in this article I wrote for Seamwork), even after printing (phew!).

    I had this skirt shape in mind I was printing, and knowing that fabric I print tends to be sparser in design than commercial fabrics, I included a section of dense motifs at the bottom of the yardage, and took full advantage of that to cut all the small pieces for the waistband, etc.


    1year1outfit skirt 5


    So there you go, my finished project!  Since I joined the #1year1outfit challenge late, I knew I wouldn’t make a whole outfit by the end of the year, but I really wanted to see how I could integrate making more conscious choices about the new fabrics I buy with what I already do.  And in that sense I succeeded!  I’m wearing my skirt below with things I previously made from secondhand garments (this shirt and this camisole if you’re curious), a scarf woven by my grandma, and mended socks.


    1year1outfit skirt 1


    Moving forward, I’ve decided to keep going with my no-new-fabric-unless-sustainable-and-made-in-USA pledge, at least until July, which will make it a full year.  Even though at some point I’d like to add in some of the wonderful artisan fabrics from around the world I found during my fabric research, I do think that being on this materials “diet” is really helpful in encouraging me to be thoughtful in my choices, and creative with what I do with them.  I’ve loved being part of one Year, one Outfit, and it’s really fit in well with a lot of the other things I’ve been thinking about, and helped me move forward in directions I’d like to go in.

    I have enough of this delicious wool yarn from Mountain Meadow to knit a sweater, and that is totally next on my list of sustainable/local-ish/slow fashion garments to make.  It will probably be next fall before it’s done, but that’s fine with me.  In the meantime I’ll continue to work from stash, and search for more local fabric options, and I will definitely keep you updated!


    1year1outfit skirt 3


    Sustainable, American-Made Garment Fabric — I Found Some …


    Updated 3/2021:

    I have a few more sources to add to this list—hooray!


    black imperial fabric 2


    Since Karen asked, and since I feel like we’re really on the cusp of something here—a growing interest in how our fabrics are made and where they come from which I very much want to be a part of—these are the suppliers of traceable, sustainable fabrics I’ve found so far.

    Fabrics Made in USA

    Organic Cotton Plus is probably the most comprehensive source I have so far. They have a big “Made in USA” section of organic cotton fabrics grown and processed here. They carry lots of undyed and colorgrown fabrics, both knit and woven.

    Alabama Chanin is all about sustainable and handmade, and they sell American made organic cotton jersey in quite a few colors, the same fabric used in their collections.

    Huston Textile Co. uses vintage weaving equipment and partners with Fibershed and Lani’s Lana wool ranch as well as other US suppliers to make local cloth in CA. “Our mission is to provide the highest quality, small-batch and bespoke cloth while sourcing natural fibers from the US to make a truly high-quality American-made product reminiscent of the golden age of textiles.”

    Vreseis is the shop of Sally Fox, the pioneer of colorgrown cotton in the US. Everything she does is done with so much thoughtfulness. She’s now raising sheep and wheat to make a true biodynamic farm. Her shop offers a few fabrics, as well as yarns and fiber.

    A Verb for Keeping Warm has a small but growing collection of local fabrics, including some from Sally Fox. They also carry some special imported sustainable fabrics, like Khadi cloth from India and naturally dyed batiks. Plus of course their own range of naturally dyed yarns, some of which are made with US wool too!

    Tuscarosa Mills is a new company which uses “American organic and Supima cotton, Organic European flax and sustainably grown European hemp to weave fabric in Pennsylvania. We use modern Rapier looms combined with American design, skill, and labor to make quality biodegradable fabric, which serves society and respects our planet.” I’m so excited to see another new US mill committed to sustainable fabrics!

    O! Jolly! is a smaller knit-fabric-making operation. Their commitment to sustainability comes through a little more in this interview on Ginger Makes (where I found them). They offer natural-colored and dyed cotton and wool knits, most grown and processed in the US, with specific locations listed.

    Honey Be Good also specializes in organic fabrics and has a “Made in USA” section, which as of writing has a lot of wooden buttons and a few fabrics.

    Fibershed is all around amazing, and has a really helpful affiliate directory where you may be able to find people growing fiber and making yarn and fabric right near you! 

    Fabrics Made Elsewhere

    Offset Warehouse carries fabrics from all over, and they are quite transparent about where each fabric comes from and how it was made, if it is certified organic or sustainable, etc. They carry some truly beautiful and low-carbon handwoven/handprinted fabrics from around the world.

    Loom & Stars sells handwoven and printed fabrics made in India. “Providing the sewing community with artisan-made fabrics in natural fibers, and inspiring you to create a thoughtful, sustainable wardrobe.”

    Gaia Conceptions makes a line of women’s apparel with sustainable fabrics, and offers some of their fabrics for sale, including an organic cotton farmed, ginned and milled in NC, and the option to get your fabric naturally dyed!

    Simplifi Fabric has a pretty big section of “eco” and organic fabrics. Some list where they are made and some don’t, and a few are made in the US.

    Life Giving Linen sells GOTS and OEKO-TEX certified linen fabrics, as well as linen accessories.

    greenfibres is a UK source for organic undyed fabrics, clothing, and household goods.

    Hell Gate Fabrics is a venture from Sonja of Ginger Makes, bringing us fabrics made mostly in Japan, where labor and environmental practices are much better than in many other countries producing textiles. She plans to expand her selection of organic fabrics as her suppliers do.

    FABSCRAP “These fabrics are recovered from high-end designers in New York City, sold as a sustainable alternative to destruction.” Their online store offers surprise packs of fabric sorted by color and fiber content at very reasonable prices.

    More Ideas

    halfmoon ALTELIER also has a big list of sustainable fabric sources with some based around the world.

    Many of the participants in One Year, One Outfit did their own research and listed resources near them. You can find them here.

    If you’re a nerd like me you can also browse the GOTS listings to find businesses making all kinds of things certified under Global Organic Textile Standards wherever you live. I haven’t made any amazing discoveries by doing this yet, but you never know …


    striped imperial fabric 1My idea was to photograph these fabrics in a way that felt fresh and personal, giving you an idea of what it’s like to wear them, and how fabric like this might be all we need. But yes, I am wearing clothes underneath.


    More of the story of the fabrics in these photos: Sometimes, you just ask the right question to the right person, and then there you are. Remember when I was fed up with the NYC garment district, joined up with One Year, One Outfit, and vowed to contact Imperial Stock Ranch because they had made a fashion collection using fabrics from wool grown on their ranch and entirely made in USA? Well, I did. Jeanne Carver, who owns the ranch along with her husband, wrote me back. She had some fabric left from the collection. She offered to sell it to me, so I could offer it to you. I still have a little bit left. Please contact me if you are interested.

    The story of the ranch is amazing, and way too much to tell here. Check out this article if you’re curious, which also has some nice pictures of Jeanne and her sheep.

    All in all, the list of sustainable fabric sources is not as sparse as I thought it would be going in. One thing is clear to me: we make a difference when we choose to buy our materials with some thought and care as to how they’re made! The more demand there is for sustainable fabric, the more of it there can be. 

    Back into My (Slow) Groove


    sewing kit with thimble


    Hello and happy October 1 everyone!  We’re home, and Bryan’s big exhibit is open.  I’m getting back into my own routines and creative practices.  I have a backlog of stuff to share with you, but I wanted to start with two very October-first-related items:

    1.  The new issue of Seamwork magazine comes out today (the menswear issue—cool huh?) and I have a tutorial in it about how to sew your own leather thimble!  It’s coincidentally perfect for:
    2. #slowfashionoctober which also starts today!  I think this is a great idea and I’m excited to see what everyone comes up with.  I’ll definitely be writing more about “slow” and how I feel about it this month.  And I’ve also decided to use it to tackle maybe the slowest-ever project—a sweater that my mom knit for my grandmother, which I’ve tried to make over so I can wear it, but it needs more help.  I have a plan, so we’ll see how that goes.

    Stay tuned, and hope you’re looking forward to October plans as much as I am!


    tea dyed fisherman in progress


    Treadle Magic


    I’ve been wanting to write about sewing on my mom’s antique treadle machine when I was a kid, and now on the one from Bryan’s family that I’ve been restoring, for what feels like forever.  Sewing on these machines is something like magic, and I kept dreaming about sharing that with more modern sewists.  As of today, it’s happened!  Any minute now, the August issue of Seamwork magazine should be up, and with it, this treadle article of mine, which I’m super excited about.

    So excited, in fact, that I also made my first-ever YouTube video as a companion, to show you how the bobbin winder works in motion (it’s a thing of beauty):


    Are you excited yet? Do you have a treadle sitting in your garage? Let’s get it out! I’d love to help answer any questions that might get some of these beauties back into service, so ask away and I’ll do my best.

    Also, stay tuned, I have a couple more treadle extras in the works for the coming weeks.

    Have a great weekend!


    Maybe I’m Over It

    Over the purple corduroys, the NYC garment district, the whole thing.

    I’ve been to New York City twice ever, both times since I’ve had this blog.  Both times I went to the garment district, and I haven’t written a thing about it either time. The first time, a couple of years ago, it was just crazy and overwhelming. We had the truck with us, and let me just say I will never, ever, drive any vehicle to NYC again if I can possibly help it, much less one that qualifies as quasi-commercial and definitely oversize. The truck is fine in Chicago, but as it turns out, not all at fine in New York.


    floyd bennett field camping 3Our truck in the parking area for camping at Floyd Bennett Field, by far the most post-apocalyptic National Park Service site I’ve ever been to.  It’s staffed by friendly New Yorkers who, when they find out it’s your first time in the city, will tell you everything, starting with “So there’s five boroughs …” to making sure you have quarters for the bus.  I am not making any of this up!


    Anyway, we went to NYC again this past winter, along with traveling to an opening of Bryan’s work at the Griffin Museum of Photography outside Boston. I actually have a dear cousin who lives in Brooklyn, so we made a side trip to go and see her (completely vehicle-free, with only the luggage we could carry). I thought it would be much better and I would love it. It was better without worrying about the truck, but I was still overwhelmed. I’m the kind of person who naturally absorbs most of the stimulus coming at me in a given day, and likes to have a while to process it. There is a whole lot of stimulus coming at you all day, every day in New York—before you even get to the shops full of ceiling-high mounds of fabric in every color.


    nyc street view


    The garment district, while fascinating, is not geared for a thoughtful experience. It’s fast-paced. There are millions of choices packed together, but not a lot of background on any of them (any, really, beyond the fiber content and maybe a country of origin). I’ve tried to be more conscious about my fabric choices for a while now, but I knew I wanted some fabric to make another pair of pants, and it seemed ridiculous to be surrounded by what felt like all the fabric in the entire world, and go home with nothing for my project. So after some debate, I chose something purple and stripey and soft, brought it home, and a couple of months later, cut it out.


    over it purple pants 1


    And I got exactly what I deserved for picking fabric I had no background on, no relationship with, and so no idea what to expect—it behaved terribly. There’s some stretch in this stuff, which I’ve avoided in wovens in the past, and I’m going right back to avoiding it like the plague. It kept stretching as I was sewing it, throwing off my alignment and topstitching, moving the pockets around even though I basted them in place, etc. Plus, it’s weirdly clingier around my bum than the non-stretch fabric I’ve used in this pattern before.


    over it purple pants 2


    Don’t get me wrong, these aren’t the worst pants ever.  I like the color, and they fit me reasonably well, which is enough to almost certainly ensure they’ll get wear when the weather gets cool again. And, they have the nicest inside waistband and zipper tab of any pants I’ve made so far, so I learned something there.


    over it purple pants 3


    But, the whole experience just brought home what I hadn’t been able to articulate. In my head, before I went there, the garment district was a mythical paradise of fabric. But it turns out; it’s not my Mecca. It may sound a little blasphemous to say so, but I don’t think the garment district even has the fabric I want. I think I’m over it.

    So what, exactly, is the fabric I want, you may reasonably ask? Well, what I really want is unreasonable to ask for in our current culture. I want fabric that not only do I know where it comes from, what labor conditions went into it, and how the fiber was cultivated in the environment where it grows, but I want to feel good about the answers to all those questions. I want to buy some fabric now, see it how it wears, and in 5 years, when I like what I find, buy some more of that exact same fabric. I want fewer, but better choices.


    floyd bennett field camping 2


    I have tried before to find some fabric closer to these ideals. I went on an online quest for organic wool a couple of winters ago (when I eventually bought this lovely stuff from New Zealand).  I had a few interesting conversations with fabric store owners through email. Mostly what I learned is that they don’t know any more about the origins of their fabrics than I do.  Often times even by writing to their suppliers, the most information we could possibly get was what factory the fabric came from.

    At that same time I wrote to Mountain Meadow Wool, an American yarn company I feel really good about supporting, and suggested they think about making some knit fabric out of their American Merino. I got a really nice response back … but since then some blankets and finished knit goods have appeared in their line-up, no fabric yet … I do get it, I see why market research would indicate a much bigger market and profit by skipping the fabric and going right for finished goods.   Imperial Stock Ranch took it one step further and produced a high-fashion collection. But knowing that they are taking high-quality wool, sustainably grown in USA, all the way from sheep to fabric also in-country, and that none of that fabric is available for sewists to buy (that I know of, I’ll write them too, we’ll see)—it makes my fingers itch. I think it’s phenomenal how much single-breed, known-origin, small-farm-type wool yarn is available to knitters right now, and I know there’s a niche for fabrics made from the same materials.

    The fabric for my first pair of purple corduroys was organic cotton & hemp, but made in China (under supposedly good working conditions). The biggest problem with it was that it didn’t hold up to wear long enough to be called well-made. How sustainable is anything that has to be replaced every couple of years, or less?

    The best news in thinking about all this, is that there are other sewists out there on similar quixotic journeys to find (or make!) sustainable fabrics, and thanks to the magic of the internet, I can find them. And there is a lot going on right now.

    I’m throwing my lot in with one Year, one Outfit, a project on this is moonlight to source “fibershed” textiles in your area, and make them into an outfit by the end of the year. Although I may not make a whole outfit by the end of 2015, I’m pledging not to buy any new fabric for (at least) that time, unless it meets (at least!) these minimum requirements: 100% made in the USA, sustainably grown also in USA, and not dyed with synthetic dyes, bleached, or processed in other ways that use toxic chemicals. At the very least, it will be a kick in the bum to do my homework, and some experimenting!


    one year one outfit logo


    While I’ve been thinking about this, some other thoughtful bloggers have also been researching and sharing around similar topics. This post of Zoe’s about organic cotton and whether it’s really better got me thinking about the fabric I really want to find. The other bloggers in the one Year, one Outfit project have done some good research. Mari’s post about what she’s found available in the Southeastern US was really interesting, and there are people around the world taking part and sharing what they find, there might be someone near you.  Then just the other day, Ginger posted about a designer making sustainable sweater knits available to home sewers! If you’re curious, I also definitely recommend listening to this 2010 interview with Rebecca from the fibershed project, which I also linked to from one Year, one Outfit.

    Phew!  So, do you want in on some crazy back-to-basics fabric hunting? Interested in dyeing/printing your own textiles (because I think that’s going to be a big part of it)?  Stay tuned, updates will definitely be coming!