If You Want to Help Sew Masks

Me binding straps onto a big pile of face masks.

Just a few weeks ago (it feels like months or years, probably you can relate), I saw one person helping another fix a car in the grocery store parking lot. “Now that’s a useful skill,” I thought, “How often does a textile-related emergency come up that I could help with?” Well, here we are—in a way I certainly never thought possible.

If you have been wondering about sewing masks to help with the shortage caused by the COVID-19 pandemic, here is what I know, and some resources. I’ve been working with a wonderful new nonprofit in my hometown, Threaded Together, to make these.

There’s a bounty of confusing information and patterns out there, and also confusion about how well fabric masks actually work. The bottom line for me on this is that healthcare and emergency workers are actively asking us for them, therefore they are needed. As I understand it, many homemade masks are being used as an outer layer of protection over another mask, and in non-critical-virus situations, to help preserve the supply of N95 masks. And as a last resort.

The material we’re making them from is a wrapping that hospitals use to cover surgical instruments. Most medical centers should have some. There is at least some evidence that it is really good at blocking particles, which is great news. (It’s also important to keep in mind that part of what makes the actual N95 masks so effective is that they are carefully fitted to provide an airtight seal around the face, which ours are not.)

We at Threaded Together (mostly Tina) have come up with a way to make these that is quick and hopefully easy to understand. Ours are based on a pattern put out by Providence, and a surgical mask from our local hospital. We are using two rectangles of fabric 9 x7” each, two strips for ties 36” long by 1” wide, and two pieces of pipe cleaner 4” long, twisted together, for the wire above the nose. There is a short video of Tina showing how to make one on Facebook, Instagram, and YouTube.

We’ve also been making a single-layer style with elastic around the ears. You may have noticed that elastic is nearly impossible to find at the moment, but some folks are getting creative using hair ties, and our friend Darcy thought of using knit fabric (like a T-shirt) for ties, which still has some stretch.

If you are looking for people to who can sew masks, or to coordinate with other sewists, Days for Girls has been stepping up for this project in a big way, and they have chapters around the country.

Frankly, sharing these efforts with family and friends who are medical professionals scares the living daylights out of me. How have we come to this point that I have help to offer them?! And also, being able to do something helpful feels amazingly better. I’m so thankful to all in our community who have offered their time, materials, and equipment, who have bought us lunch, made us playlists, or just waved at us through the window.

I seem to be hovering somewhere between brokenhearted and uplifted, as I guess are many of us these days. May you and yours be well and healthy, and kind to each other.

Spring 2019 News

Two issues of Taproot magazine, opened to the articles I wrote.

Hi all! Here are a few fun things in my world happening now and coming up soon:

The info for my spring and summer workshops is up! I have new classes at Textiles West (in Colorado Springs) in May, and at the Intermountain Weavers Conference (in Durango, CO) in July. Plus, screen printing with natural dyes at Flag Wool Festival, embroidery and an introduction to natural dyes at Coconino Center for the Arts, and a return to both John C. Campbell Folk School and North House Folk School later in the summer! Check out all the details over here.

Also, pictured above, I have an article in the current issue (31 :: REVIVE) of Taproot magazine! It’s a tutorial for sewing and embroidering a cloth bag to hold your clothespins. And because (although it seems inconceivable) I don’t think I ever mentioned it here, if you happen to see a copy of issue 28 :: GRAIN anywhere, my favorite method for mending knits is in there.

I have a clear intention of being more present in this space in 2019, and offering more content here. At least in the short term, it’s looking good …

Enoughness, Wardrobe, Mending


old silk cami after detail


Are you ready for a radical anti-consumerist statement? Here goes: I have enough clothes. Now, this isn’t a terribly original radical idea, even among other makers & sewists (for one, Felicia wrote eloquently about it last summer). But it’s an idea that I’ve been rolling around my head for a year or so now, mulling over where I’m going with it, and I think I’ve made some progress.

Roughly six years ago, without really telling anyone about it, I decided that I would get the clothes I needed in my wardrobe by making them instead of buying them. At the time, I needed quite a bit. For winter wear I remember having a total of two long sleeved knit shirts, both plain cotton not-great-fitting ones from the thrift store. Situations like that were part of the reason I went handmade; I was frustrated looking for ready-made clothes I liked that I could afford, and tired of feeling like most of what I wore didn’t suit my personality or my life. Me-Made-May was also essential in getting me going in this direction. Before we move on, I want to acknowledge that it is a great privilege to be able to choose warmer and better-looking clothes. While I’m not always sure what to do with that knowledge, it seems important to say it, and I do think that just acknowledging it helps me be more grateful and mindful of what I have, and encourages me to take care of things and not take them for granted.


old silk cami before

This was an old silk cami with a shelf bra inside, made from a thrifted top. As you can see, it had a lot of wear and had already been patched once. But there was still enough sound fabric between the body and the shelf to reconstruct a different cami (below). It’s certainly arguable that this was too much work, too much hand stitching, for a garment which realistically is made from worn fabric and has a limited life expectancy. And yet, it gave me a lot of freedom to experiment, and a functional garment …

old silk cami after


So back then, I just started sewing garments, beginning with what I needed most, and then moving to the next-most-needed thing. It worked—I slowly but surely built a wardrobe of clothes I love, which covers just about any situation in my life. The new things have been mostly me-made, with a few lucky thrifted/gifted pieces mixed in. It certainly helped my progress that I already knew how to to sew (and knit), that I was already thinking about how my style reflects the way I want to be seen, and that I had a fair amount of fabric stashed away (although I certainly acquired more for specific projects).

Because I came into my personal wardrobe sewing revival from a place of making what I really needed, it was unavoidably obvious when I got to the point of not needing much. It’s been a gradual but ultimately fairly profound shift for me; from having a new garment in progress most of the time, to focusing more on slower projects, mending, and keeping my wardrobe in good shape.


layers of sock darning

These handknit socks I got from a friend quite a while back are my longest-running mending project. I just can’t give them up. All but one pair are still going.


At first, I was a little conflicted about all this. I thought I might miss sewing things from fresh fabric, or maybe more truthfully that I would miss dreaming things up to sew out of fresh fabric. But, as Jess pointed out, there’s no reason not to keep dreaming. After all, just a small percentage of the garments I imagine ever get sewn, no matter how much I’m actually making. Also, it turns out that for me anyway, it’s just as satisfying to dream up ways to re-make things that have been languishing in the back of my closet or in the “try again” basket. And it’s not that I am making nothing new. Right now I am knitting socks (the world’s slowest pair since I’m only working on them when traveling, plus I keep changing my mind and ripping out the heel …), spinning yarn which will become a sweater in its own sweet time, and plotting a new shirt from my natural-dye-printed fabric. And, I’ve just realized that neither my newer purple corduroys nor my blue cotton pants are really presentable for outside wear anymore—there will always be things to make!

But for the most part, my sewing lately has been directed towards keeping my existing wardrobe going, making it better, and adding in the next level of that message I want to send when people see what I’m wearing. At some point it occurred to me that while I know I’m wearing handmade, anyone who sees my clothes (especially if they don’t sew) will just assume that I bought them somewhere, like “everyone” does. In fact, many a sewist’s goal has been to make clothes that look “just as good” as store-bought ones. Well, I’ve decided that I’d actually like people who see me on the street to think to themselves, “Hey, I wonder if she MADE that … or someone did …”—in a good way, of course! I’m interested in adding more hand stitching, more hand-dyed fabrics (and eventually handmade fabrics?!), and definitely interested in wearing visible mending proudly on the outside of my clothes.


black handstitched pjs 1

Rather than making a new pair of PJ pants when I needed some recently, I decided it made more sense to revamp a pair that Bryan wasn’t wearing. That meant getting rid of crumbling elastic, and adding enough hand stitching that they felt like “my new comfy beautiful PJs” rather than “this hand-me-down thing I’m stuck with.”

black handstitched pjs 2


This downshift in sewing fits in really well with other shifts in my life over the past couple of years. A lot of my creative energy has been and is now going into thinking about natural dyes, fibers, and fabric printing. As I’ve taught those skills more widely, I’ve been working hard to learn all I can and improve my process. (It’s the biggest, deepest, best rabbit hole of research and experiments I’ve ever been in.) I’m teaching mending more too, so it’s been perfect timing for me to take on mending my own wardrobe as more of a deliberate project, seeing how far I can push things and what I will learn by continuing to choose “fix it” over “rag bag.” As much as I am devoted to other textile arts, it pops into my head over and over again that mending is probably the most valuable, most potentially world-changing thing I could do, show, or teach. (Come join me! New classes recently added.)

I think it’s also worth noting that I’m more comfortable in this stage of my evolution as a maker because of the type of maker I am. While I certainly try to master the skills I take on, every textile technique I learn about fascinates me, and I’m always ready to expand my horizons. So spending less time sewing ultimately means I’ll have more time for dyeing, spinning, maybe some weaving, or to try something else entirely new—a bonus in my book.

This blog has evolved with me, and I want it continue to do so. I have plans to start sharing some of what I’ve learned about natural dyeing here, as well as whatever else comes up. So for now, a happy season to you, whatever yours may be. (The monsoon rains just started here, and I am so very grateful!)


black handstitched pjs 3


A Silk Watson Bra

You may have noticed that I’m not big into bandwagons, and if I am going to jump on one, I like to wait until it’s safely parked back in the barn and everyone else has left first … I actually bought a copy of this pattern right when it came out and it seemed like everyone in my sewing-internet-world was talking about it, but then in more my typical style, I decided to think about it for quite a while before actually making it.


silk watson bra 1


What was/is really exciting to me about the Watson Bra pattern is that someone else already did all the hard work of figuring out the exact curves of each piece to make a smooth cup shape, make it fit into the band, etc. (thanks Amy!), and that it’s specifically designed to be made without underwires, which is exactly what I wanted.

What I was less excited about is the fact that it called for mainly synthetic stretchy stuff; lots of kinds of elastic and power mesh, etc. As you may also have noticed, I’m so over it with all of that, and I’m trying to use all natural materials whenever it’s even remotely feasible. And one of the things that kept popping into my head whenever I looked at all this cashmere felt I have around* was, “this would really be perfect in a bra!” Since you know, it’s substantial but flexible, and insanely soft on the skin. But could I really make a bra using all natural fabrics? Maybe without even elastic?

It turns out the answer is a resounding yes! Not only can it work, but it did work beautifully on the very first try (some luck involved). Using my measurements of approximately 31 ½” underbust and a 1” difference between full and upper bust, I decided to make a size 34A, erring on the side of a slightly smaller size since my materials weren’t super stretchy and I didn’t want it to come out too loose. I made a couple of alterations to the pattern; adding ½” to center front since I knew that would fit my frame better, and straitening out the bottom line of the band to allow for the possibility of using an existing hem when upcycling garments for fabric (although I didn’t do that this time). I also added to the seam allowance in the center of the outer cup pieces, so I could grade it with the inner seam allowance to avoid a noticeable ridge there.


silk watson bra 2


The grey fabric is from a silk knit top that had worn out around the underarms and cuffs but still had plenty of life in the body. The pink binding is leftover fabric from making these camis (very thin silk knit), cut 1 ½” wide, sewed ¼” from the edges, and turned under. And the inner cups are indeed felted cashmere scraps*—oh yeah! I sewed it all together with a simple zigzag stitch, and sewed the straps on by hand.

According to my notes I made this back in February, which means I can now safely report that it works as well in real life as I’d hoped. The only alterations I’ve made since then are to move the back attachment point of the straps closer to center back (typical for me if the straps are slipping off my shoulders at all), and to tack down the bindings at center front with some tiny hand stitches, since the edges pulled up a bit after a few wears and washings, revealing the cup layers.


silk watson bra 3


I thought this might be a wearable muslin version, but instead it came out near perfection in fit and function. It does everything a want a “real bra” to do: provide a smooth and socially acceptable silhouette under a single other layer of clothing, and add a little bit of support. It’s also so comfortable I forget I’m wearing it, which is key for me. I thought about making another one (I even have another old silk top or two with some features that might be really fun to incorporate) but the truth is I don’t need it right now. This one, plus my more bralette-type past attempts at upper-body lingerie, are covering all my wardrobe needs. So, I’m officially checking “make real bra” off of my bucket list goals, and moving on!

I’ve been thinking a whole lot about what it means to have “enough” as I get closer to actually filling the gaps in my wardrobe. This post by Felicia has only broadened my sense that this is a really important thing for us all to be thinking about. A whole post about it here is likely coming … I’d love to know your thoughts at any time.


Previous makes


*Thanks to all the Fiddleheads hats I’ve made over years now, I have an entire giant plastic bin of small bits of luscious felted cashmere knits, which I could never throw out despite the fact that there’s way more than I’ll use in one lifetime (unless maybe, a giant intricate patchwork cashmere blanket—don’t even think about that, self!). Which is why I’ve started sorting them into groups of pleasing colors and offering them to fellow makers in my Etsy shop. I’ll continue to sort and list more batches as they sell. If you’d like some and you have color requests, just give me holler, here or there!

Cheers!


DIY Fabric Shower Curtain


fabric-shower-curtain-2


Hello everybody, it’s been a little while! I’m a firm believer in blogging whenever you can and feel inspired, not on a pre-ordered schedule, and I also think that most blogging apologies are a waste of time and just make you feel bad. Still, it’s been much longer than I meant it to be, and I’d like to echo Molly’s sentiments on Orangette: if I ever decide to leave this space for good, I’ll tell you so. It seems only fair. The way she puts it at the end of that post is so good.

The first reason for my losing track of online things was one of the better ones: for the second time ever, we hosted our annual family and friends craft retreat at my house last month. The first time we hosted it, two years ago, was when I had an inspiration—the infinite to-do list—that started a big difference in my thinking.

I have to say, I was pretty proud of myself this time. I felt calm and relaxed in the lead-up, and I even slept well before and during at least the first part of the week—proof that I’ve made progress as a human lately, and let go of some anxiety, even the good kind that’s more like excitement. (If you need this too, may I highly recommend the book The Three Marriages by David Whyte, which is full of deep insights about things in general, and came into my life at exactly the right time. You can also listen to a good interview with him from On Being.)

It was one of those times when being calmer and going slower actually ended up meaning that I got more done. We cleaned off the back porch, for instance, which probably hadn’t been done in the two intervening years …

And I made a new shower curtain! Well, “made” might be exaggerating somewhat. I took a length of wide fabric, hemmed it, installed some grommets, and there we go.


fabric-shower-curtain-1


I’d like to apologize to all of our previous guests for the old shower curtain, a cheap vinyl thing with one ripped eyelet, which someone bought right as we were moving into our house a decade or so ago, and had been there in various states of nastiness ever since. Incidentally, I also figured out that if I actually took the vinyl thing down, soaked it in the tub with vinegar and dish soap, and took a scrub brush to it, it came out clean—enough better that I decided to save it in case I need a waterproof something.

Back to the new curtain though: I’ve been slowly moving more and more away from synthetic materials and towards natural ones for all kinds of reasons. I got another push that way when I found out that polyester and nylon clothes shed tiny synthetic fibers in the wash which eventually find their way into the oceans, enter the food chain when they’re eaten by small critters, and never break down. I first heard about this on Science Friday a while back (but cannot now find the specific program). It came up again recently on Root Simple. This was one of those last-straw moments. I’m convinced, I’m done with that, and I’ve been trying harder not to buy any synthetic fabrics.

So I wanted a natural fiber shower curtain, and as I was looking for one and researching options, it occurred to me that I had in my stash some wide cotton fabric which was basically what I was looking for—lightweight but tightly woven. And with stripes!

I measured the old curtain to figure out what length would work best (a little shorter than standard turns out to be good for my tub) and if one width of the fabric would be enough (it was, but you could always add a seam if not).

I made a deep hem on the bottom, and a narrower one at the top. The hardest part was hammering in the grommets. Typically for me, I liked the “wrong” side of the fabric better since it’s a little more textured and subtle, so I put that on the outside.


fabric-shower-curtain-3


I had a few questions, but figured it was worth trying to see what would happen. Would plain cotton keep the water inside my shower? Yes it did! Would a deep hem be enough to weigh down the bottom? It was! To be on the safe side as far as mildew, I’ve been wringing the curtain out after I shower, and then spreading it out as much as possible to dry. So far, it’s working really well, and it’s so much nicer to look at than the old one, it’s fairly ridiculous. I also like the idea that I can take this one down, put it in through the washer, and hang it to dry in the sun once a month or so, which should actually be easier than cleaning the vinyl one.

If you wanted a sheer curtain, or a liner for a more decorative fabric on the outside, I suspect that silk organza would be amazing (although I haven’t tried it, not having that much on hand). Something so thin but crisp and tightly woven should dry almost instantly, and look beautiful. Oh printed silk …

Anyway, I hope this give you all some ideas!

It feels good to be writing here, and I intend to do it again soon.


fabric-shower-curtain-4


Origins, Materials, and Connections


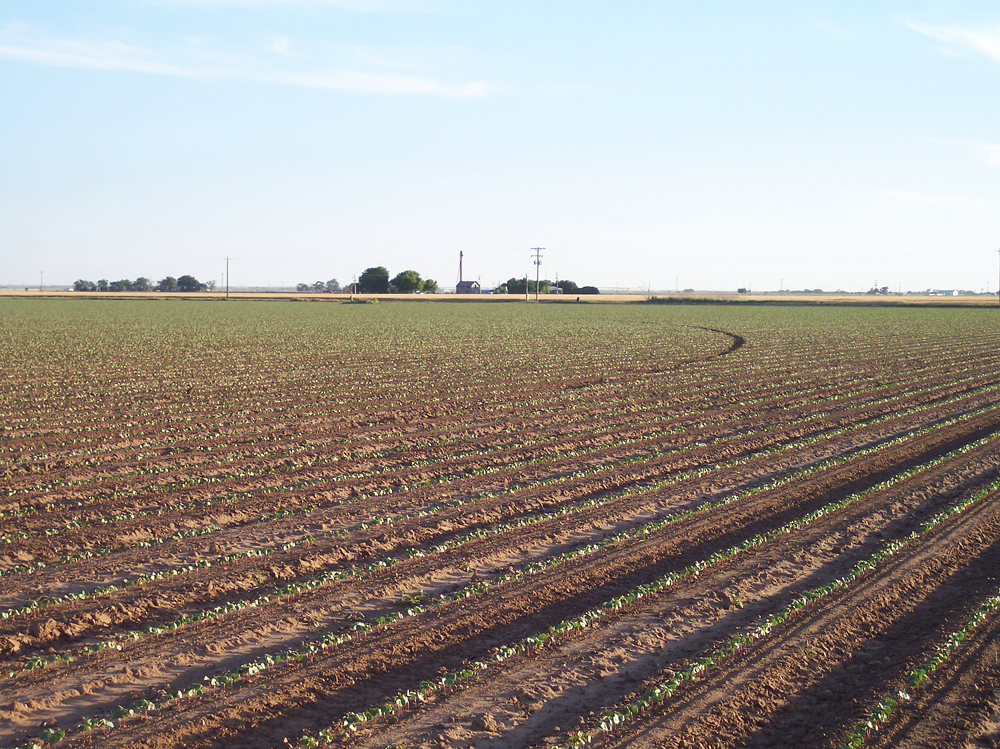
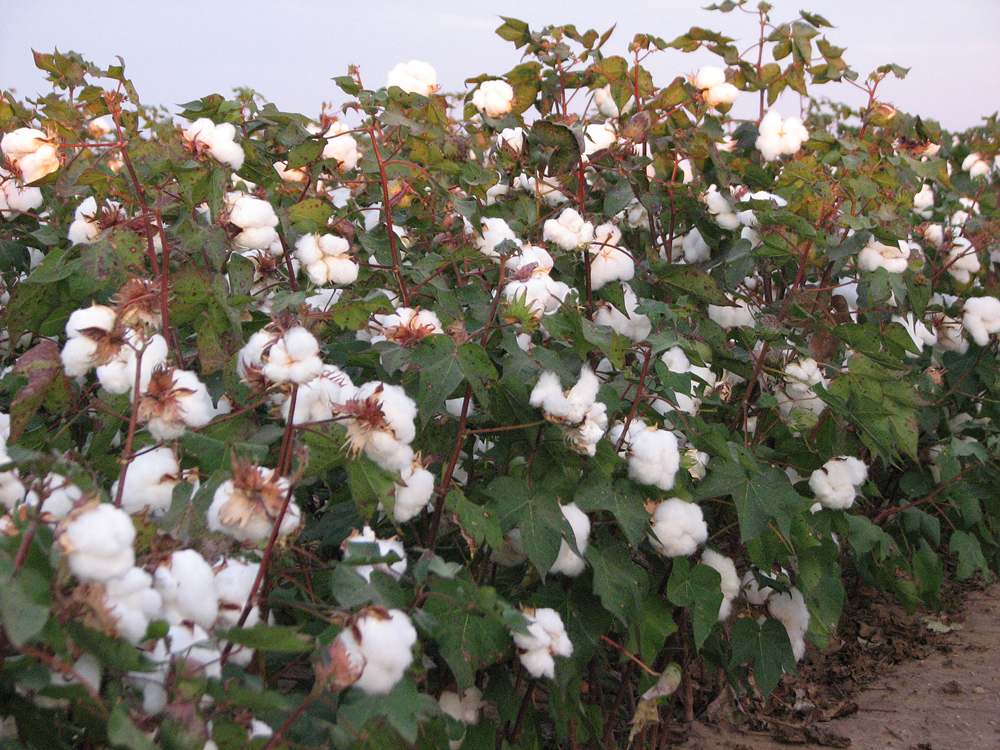
This spring, I explored cotton growing in the US—I interviewed organic farmers in Texas, read some fascinating history, and pulled seeds out of a cotton boll to try spinning them myself. Most of that research went into an article for Seamwork, which comes out today. It also ties in well with what I’ve been thinking about around the one Year, one Outfit project, which was the reason I bought local(ish) cotton fabric in the first place, and got curious about where it came from. I’m coming up on a full year since I jumped into that project, and I’d like to talk a little more personally here about what I’ve gotten out of it so far.

For #1year1outfit I pledged to buy new fabric only if it was made in the US, and the fiber was organically grown or otherwise considered sustainable. It’s easy to see a choice like that as restrictive, claustrophobic, or even self-righteous. But like a lot of similar times, I found that I was more creative because of the limitations I had set. I learned a lot, because the project encouraged me to look more deeply into everything from the environmental impacts of textile production to what it’s like to be a cotton farmer. But the best thing I got out of it was a feeling of connectedness and participation with the people, plants and animals that make what I do possible.


TOCMC cotton 1

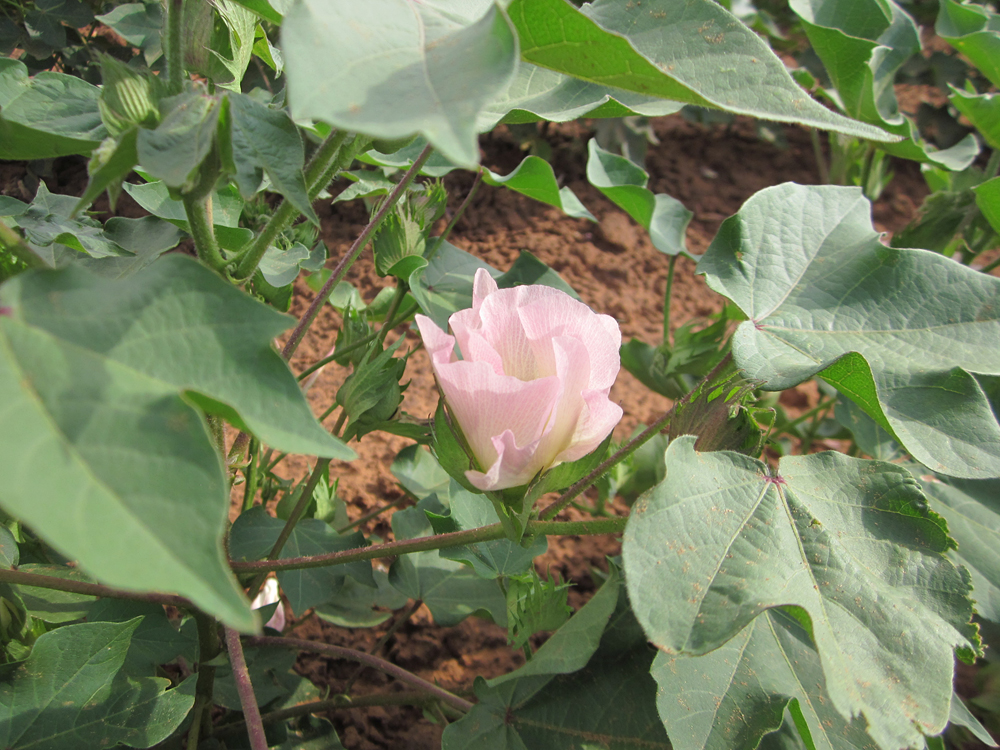
I’d like to sincerely thank Kelly Pepper of the Texas Organic Cotton Marketing Cooperative, who was so helpful in connecting me with farmers, answering questions, and also lent me the use of more great photos of cotton growing than I could use for the article. All photos in this post are courtesy of TOCMC.


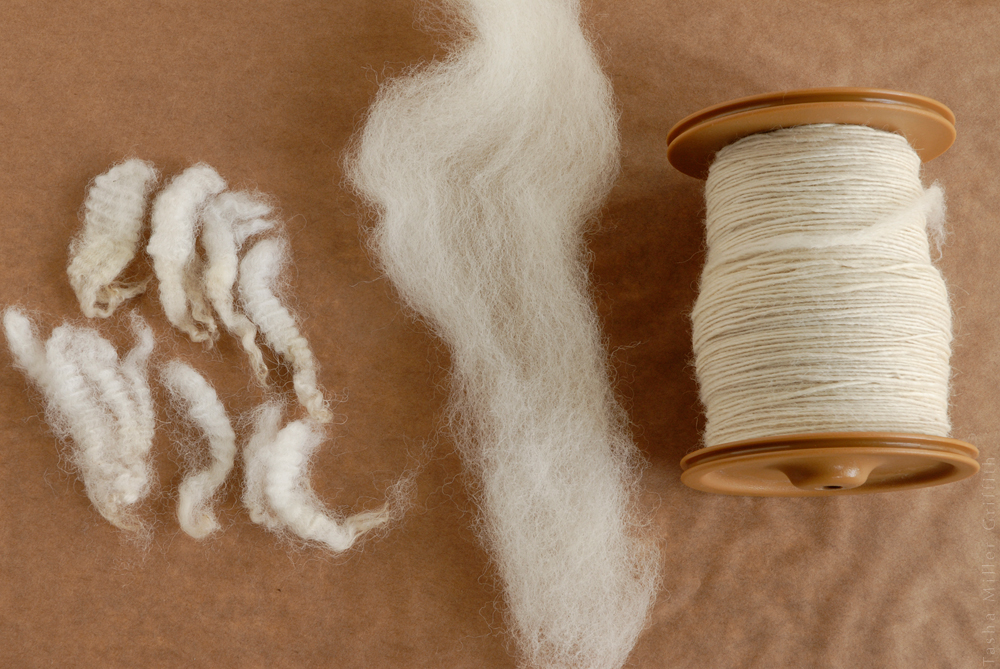
I read Environmental Impact of Textiles by Keith Slater (borrowed through interlibrary loan). It was full of statistics and graphs as I expected, but also contained insights about the contrast between processing fibers by hand and by machine that I didn’t expect at all. Slater points out that tools for turning fiber into fabric by hand are relatively easy to make, and often operate on human power, burning little or no carbon in the process. Selecting the best quality fibers by hand takes more time and so is more costly, but it results in a better product, less waste, and less energy used. In contrast, the machinery needed to process fibers (“millions of tiny particles of flexible units”) at the speed necessary to satisfy demand must be “massive, complex, and expensive,” use huge amounts of energy, be environmentally costly to make, and concentrate the impacts of production (from noise to waste) in one place.

I learned that one of the most environmentally problematic areas in textile production is dyeing and printing (as well as other chemicals used in manufacturing and finishing fabrics). Most of these substances are toxic and/or carcinogenic, especially the first synthetic dyes developed in the 19th and 20th centuries, and used to be released freely into waste water. Thankfully, at least in the developed world, we now have regulations to protect our water and our textile workers, as well as some less-harmful dyes that have been developed more recently.

Textile production is a relatively small part of worldwide manufacturing and resulting environmental impacts, totaling less than 1% according to Slater, including transportation, machinery, and everything else he could find to calculate. Still it’s an area where we, the consumers, have a lot choice in what we buy, and I believe, we can have a big impact.

Ultimately, what I took away is that nothing comes from “the store,” or goes “away” when we’re done with it, even though our consumer culture very much wants us to believe that it does. Everything has an origin, and is part of a cycle of people and things that includes us, whether we’re aware of the rest of it or not. I want to know my place in that cycle, and respect the other participants in it—both the humans and the animals and plants, the communities and soils that make my life possible.


TOCMC cotton 2


I just finished reading an amazing book by Robin Wall Kimmerer called Braiding Sweetgrass. It’s kind of heartbreaking, actually, since she spells out what we in the Western world and in the US specifically have done to both the native peoples and the native landscape, and it’s inescapably tragic. But, she also offers a lot of hope, and a vision of how the world could be if we behaved as though we were part of it, participating in and nurturing the ecosystems around us, instead of pretending that we’re somehow separate from the rest of the universe. Of all the beautiful, powerful, potentially life-changing books I’ve read in the last year or two, this is the one I most wish everyone would read, the one that I think might be have the most potential to move hearts into action.

Braiding Sweetgrass reinforced my belief that our choices matter, the little things matter, and also that so very often when we do the best we can for the world around us, it ends up being the best thing for us too, bringing more joy and connectedness to our lives. I believe that a big part of the satisfaction which many of us feel is missing from our lives comes from a lack of participation with the world around us, and that part of how we can bring ourselves into a healthy relationship with the universe we belong to is to participate in its natural cycles as makers and creators. To me, this is the best part of using local and traceable materials; I can visualize the system I’m part of, the fields and farmers who grew the fiber that I’m now sewing and wearing.


TOCMC cotton 3


After this experience, I can’t go back to using anonymous, supposedly source-less materials—it would just feel so hollow. My year of #1year1outfit is over, but I’ve been changed by this project, by realizing the deeper connections that are possible. Although I may want to work with fabrics or yarns that no one is making near me (or even in the US), I can’t see myself choosing anything that I don’t know how and where it was made, that I can’t picture how it connects me to other hands, and fields, and creatures.

When I started this project, figuring out where my materials came from and tracing things back to the source seemed daunting and confusing. And it’s still true that taking any finished product (even fabric) and figuring out who made it can be nearly impossible. At this point, I’m looking at it more from the other side: what do I know is being made well, and what can I do with it? I’m looking for materials available with origins I trust, and they seem like more than enough to fuel my creativity for quite a while.


A few more Resources:

Through TOCMC I found out about Adele Stafford who is doing amazing work hand-weaving and making garments with US fibers, and writing so poetically about it at Voices of Industry.

Sally Fox has been experimenting with growing naturally colored cotton and biodynamic agriculture since the 1980s. She has fabric and yarn at FoxFibre, and pictures on Instagram.

My list of sources for sustainable fabrics is here.

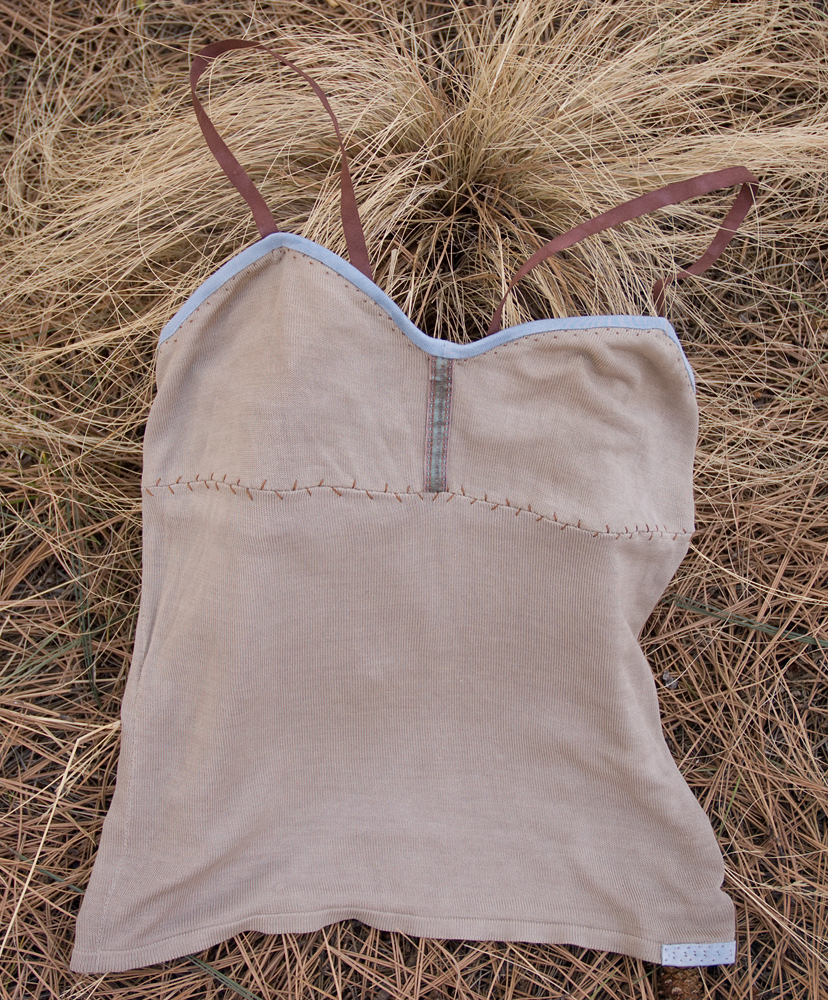
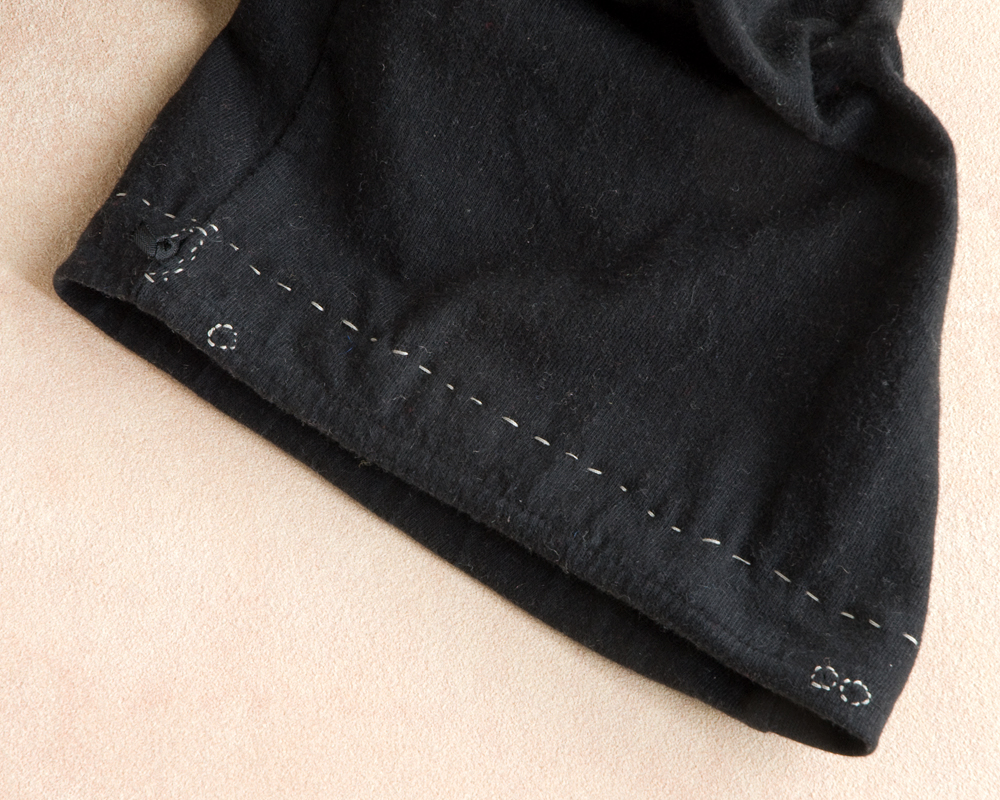
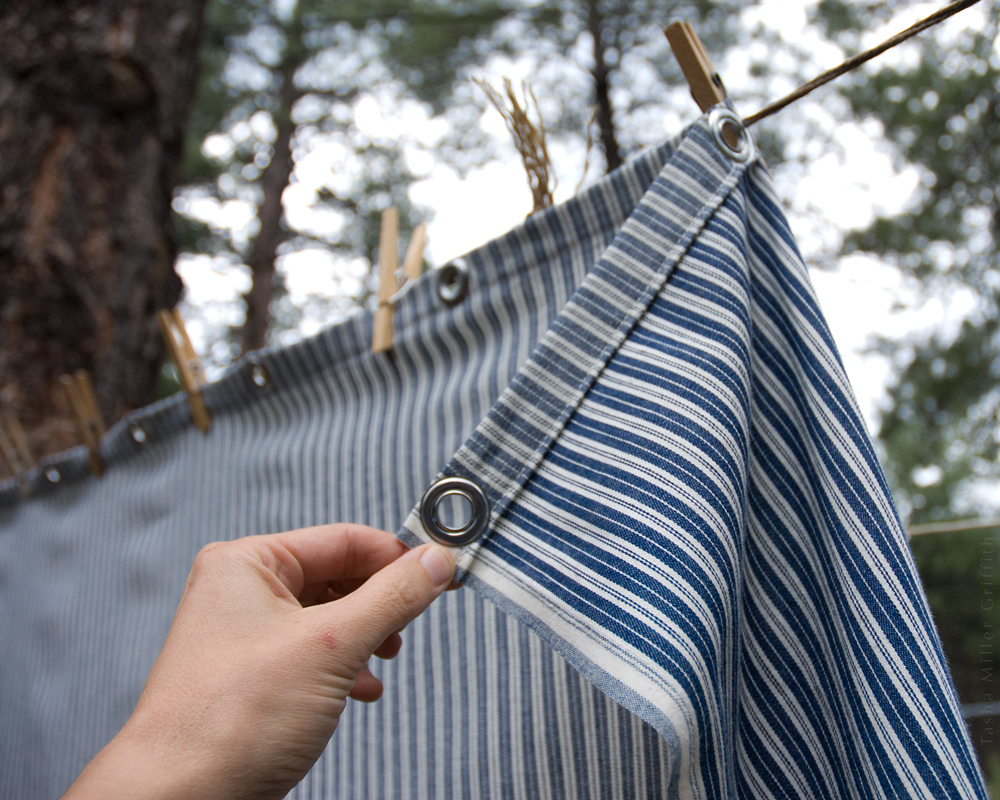
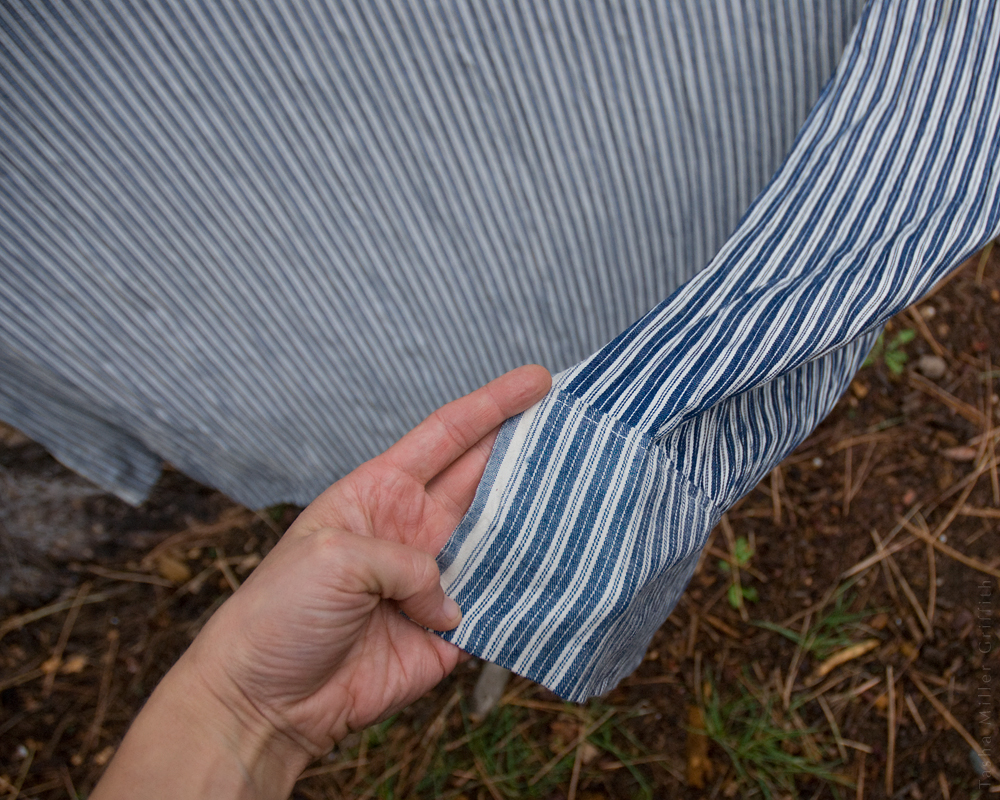
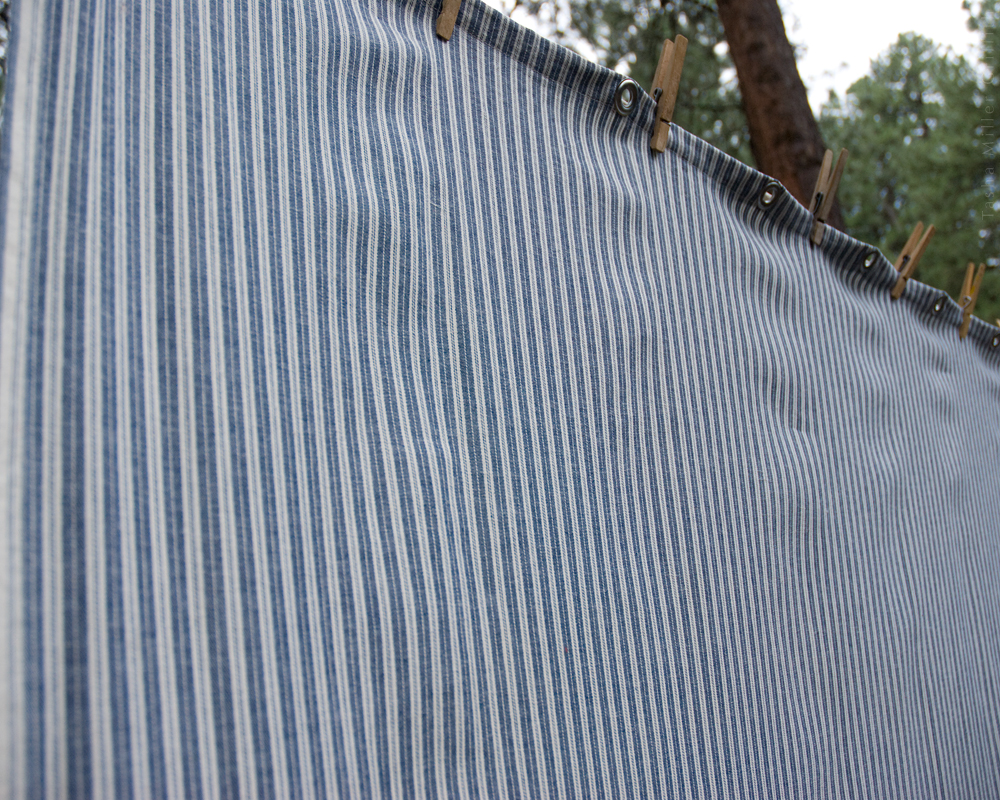
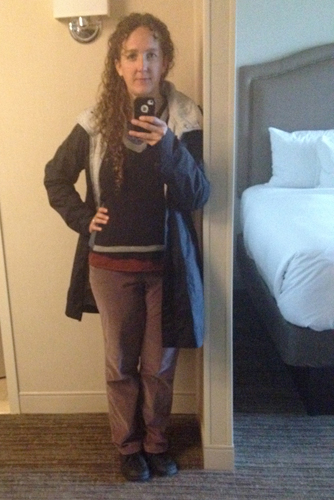
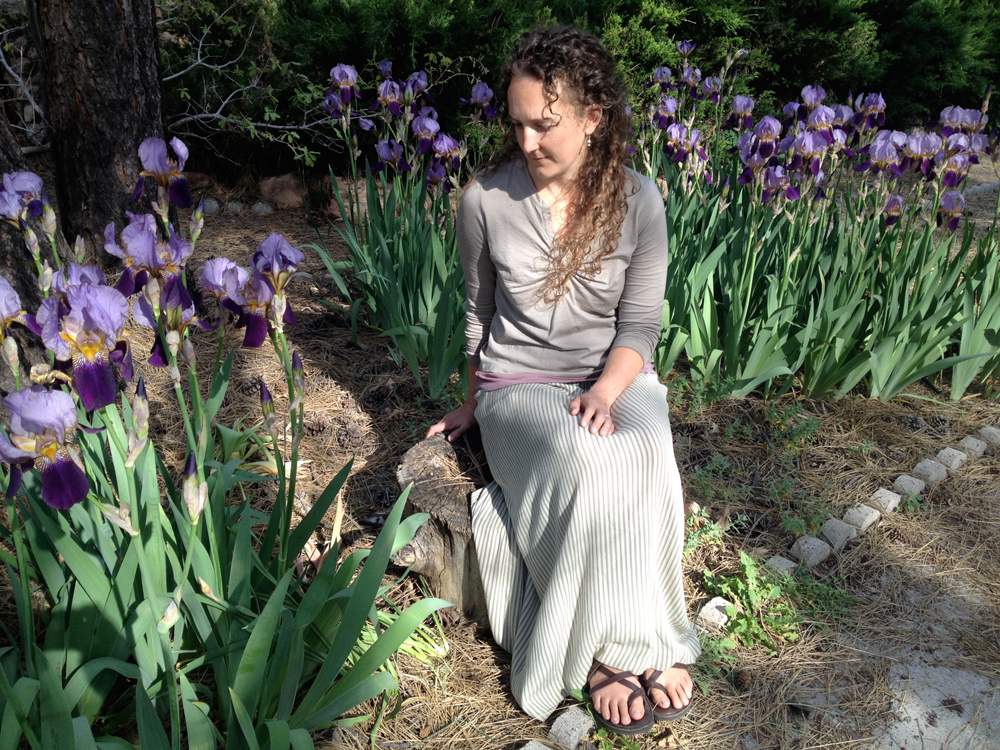
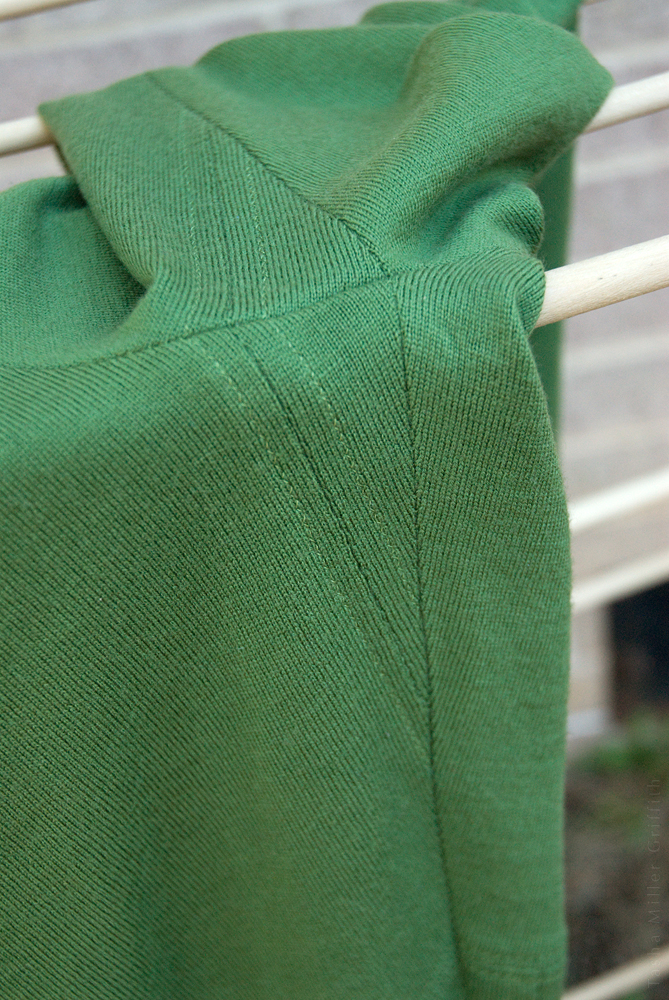
The fabric I printed for one Year, one Outfit is here, the skirt I made from it is here.


No Wardrobe is an Island

Thoughts on MMM’16

I wanted to give myself a real challenge this Me-Made-May, and I succeeded! I decided to endeavour (love that British usage) to wear only clothes I’ve made for the month, with a few exceptions noted at the beginning: socks, jackets, and raincoat. Trying to follow through with this plan made for my most thought provoking MMM in several years.

At the beginning, I felt liberated. Even though I’ve pledged to wear mostly me-made the last couple of Mays, getting by on only MM stuff felt like cutting a cord (despite the deliberate exceptions). I was not just making do with scraps thrown my way, but existing on only what I had made from whole cloth.

It also occurred to me that wearing clothes I didn’t make is anonymous—it’s not satisfying, but sometimes it’s a welcome cloak of invisibility.

As May began and the weather stayed cold at home, I found I missed some fairly ridiculous parts of my non-MM wardrobe—notably the big shapeless thrifted wool sweater I’d been throwing on over my PJs for tea and yoga first thing in the morning. I guess some kind of large, warm, not at all precious, natural-fiber layer is now an essential wardrobe component for me in cool weather …

On the 5th I realized that my plan had totally failed to account for days when I really needed to just wear grubby work clothes. Although an oversight, because my life definitely does have those days, I didn’t feel bad about it. It’s conceivable that one day my clean-the-truck clothes might be all old me-mades … but that day is not here yet, and that’s fine with me.


05mmm16

I did make two of these items …

We hit the road for two art shows in the DC area about a week in, as we have done for the last few years. This time, it was cold (like record-setting, 25 degrees colder than normal cold) and rainy practically the whole time we were there. I had enough me-made layers, I just wore them over and over …


21mmm16

A typical show-day outfit. I’m wearing my favorite cashmere top, the upcycled sweater, a jacket, and a raincoat. I was going to roll up one pant leg so you could see that I’m also wearing wool leggings underneath, but I forgot.


Then after travel and the first show, I totally ran out of clean pants. I discovered I would rather break my pledge and wear an old pair of Bryan’s than freeze in a skirt, especially since we were going for a walk in Rock Creek Park. I also discovered that I am really used to custom fit, especially in waistbands. Any places that rub or sit wrong seem totally unacceptable. This is probably a sign that I could not go back to ready to wear—even if I wanted to.

I wore the “Me-Made-May” badge on my bag or clothing almost every day—and didn’t get asked about it once. But still I hope that some folks saw it and were curious. I also wore the “I MADE this” badge a few times (attached to something I made and was wearing). That one is more direct, and when I wore it I got comments and/or questions from friends, acquaintances, and waitresses, which was great! But I also discovered that I’m just not up for being the face of the handmade movement whenever I’m out in public. I’m naturally a shy person, and with the added stresses of travel, being in strange places, and dealing with whatever came up, a lot of days it was just not happening. While, for whatever reason, having the MMM one on felt fine.


19mmm16

If you made a badge and didn’t see a comment from me about it, please leave me a message here or tag me on Instagram—I’d love to see them, and I was in no way keeping up with all the hashtags last month!


I’ve been thinking a lot lately about how making my own choices is wonderful, but it’s not enough. I also need to find ways to share more of those choices with larger communities. (Some things that are pushing my thoughts that way: this post from Jess on Wardrobe Ecology, and this amazing interview with Rebecca Solnit from On Being.) I’d like to continue to explore ways I can make a more public statement, without feeling like I’m “on stage” too much of the time. And I’d still like to wear the “I MADE this” badge from time to time … we’ll see what happens!

Overall, as the month went on, I realized another important thing: I don’t really want to make my whole wardrobe. Don’t get me wrong—I’d like to be capable of making whatever I need to wear. But as far as the actual content of my closet at any given time, I don’t want that to exist in a vacuum of only self-made, any more than I think any of us can really live a good life without friends and community to belong to. I know it’s vital to have friends along the way—people who give us a place to rest our heads, deep conversations and connections, and sometimes a place to dry out our tents in their back yard. I want to celebrate that as the joy and blessing it is. In sort of a similar way, I also want to celebrate the special parts of my wardrobe that I didn’t make, especially those made or given to me by folks I love.


31mmm16

The last day of #mmm16, with our irises having a great year.


So, a lot to think about! As always I’m grateful to Zoe for putting this on, and for all her encouragement! It really is a great time to pause and reexamine life through the lens of what we make and wear, and I’m glad it happens every year because I wouldn’t go to the trouble all by myself! Between now and next May, I’ll be thinking about more ways to share my love of handmade without freaking myself out, and how to celebrate my mostly-me-made wardrobe with a pledge that reflects where I’d like it to go.

How about you? Anyone who hasn’t already shared their thoughts from MMM on a myriad of other platforms is welcome to do so here … In the meantime I hope you’re all enjoying the start of summer! (It went from cold straight to hot for us, but, I’ll take it!)


News April 2016: Flag Wool and Me-Made-May

Hi everyone!  Just a couple of quick things today.

First off, I’m teaching at my hometown wool festival Flag Wool and Fiber again this year, and it’s coming up: June 4 & 5.  I’ll have a brand new class on modern free-form embroidery, and I’ve really been enjoying researching and brushing up my stitching skills for that. I’m also doing a “Knitter’s Toolbox” class that’s intended to take your knitting to the next level. Click through to the festival’s site to read more about both classes.


knitter's toolbox


Second, it’s almost Me-Made-May!  After some debate I’ve decided to pledge to wear only me-made (not just -altered or -repaired) garments this year, with a few exceptions: raincoat (not about to try making one when I have an almost-new one), socks (not enough me-knit ones yet), and then there’s a jacket which I would love to finish by May … but it might very well not happen, so I left myself a little wiggle room (if it’s cold enough for a jacket I’m wearing one, me-made or not).

We’ll see how this goes.  I’m not sure that I’ll feel more self-sufficient wearing only things I cut from scratch rather than things I altered or fixed so I could wear them, and I’m pretty sure there are a couple of garments I’ll miss wearing.  But this pledge seemed like the next logical step in the wardrobe direction I’ve been headed, and I’m curious to see how I end up feeling about it and what I’ll discover.  I’d also like to share (most likely on Instagram) a little more of my MMM than I have in the past couple of years.  Even though that can be hard on the road, I’m going to try.

And launching soon, a project which is actually a fusion of the two items above—I hope you’ll stay tuned!

Solved: Leggings


The best thing about making a pledge or taking a challenge may be that it pushes us to find out what’s possible if we stay within certain boundaries. For example: this winter, I found myself in need of some new warm leggings, and a couple of challenges I had in one form or another meant I needed to be creative about how I got them. The results were so good—almost certainly better than whatever I would have come up with without the challenge.


upcycled leggings 1


One of my wardrobe goals is to have enough of the right clothes for winter so that I’m cozy (in other words not always cold and therefore slightly grouchy). For the coldest months, it turns out that means wearing an extra warm layer under pants or a long skirt pretty much every day. I’ve already figured out that wool and silk are much warmer than cotton knits (plus I love everything else about wool). I’m still following my fabric-buying pledge from #1year1outfit (until a full year has gone by this summer), which meant I couldn’t hop online and order lovely wool fabrics from New Zealand, even if they are organic. There are a few totally beautiful made-in-USA wool knits out there, but let’s be honest, I also have a budget. I can’t afford to splurge on every project, and I don’t want to for something like this where I frankly don’t care too much what it looks like, as long as it feels good and works well.

I was thinking about going to the thrift store for something else, and somehow I got the idea that maybe if I found a big enough fine-gauge men’s sweater, I could make leggings out of that. Such, such a good idea!

My layout works like this: I cut off the waistband of the sweater, including a little bit above it for seam allowance, and save it for the waistband of the leggings. I flip the sweater inside out and trim off the seams as closely as I can to separate the front from the back. (After making so many hats from reclaimed cashmere, I am an expert at deconstructing sweaters.) Then I remove the sleeves, in this case leaving the sleeve seams intact as much as possible. The front and back often have fairly different shapes (and a lot of times different grainlines) so I separate them completely at the shoulders after the sleeves are off, and cut from them separately. I cut the top potion of the leggings pattern from the front and back of the sweater, however they best fit. The lower leg comes from the sleeves, utilizing the sleeve cuff as the ankle.


sweater to leggings drawing


I used the same Espresso Leggings pattern as my first custom fit pair—there’s no going back from custom fit! The lower arm of the sweater was actually a little smaller than the original cuff on my pattern, but it stretched to fit over my ankle just fine. I laid the folded leg pattern over the sleeve, and started to cut where the leg became smaller than the sleeve.

For sewing, I joined the lower leg to the upper leg flat, pressed the seam open, and sewed down the seam allowances for a non-bulky join. Just don’t forget to add a seam allowance to the upper and lower leg when you’re cutting.

As I sewed the inside leg seams, I just merged my seamline into the original seam of the sleeve when I got to that point.


upcycled leggings 2


Working on these, I thought a lot about stretch and recovery in knits. All the sweaters I used had about the same horizontal stretch as the fabric I bought for the very first pair; with 4” stretching to about 7”, or 1.75%, so I could use the same size pattern. The sweaters had almost no vertical stretch though, which made the first pair of sweater-cut leggings feel a bit shorter on top than I wanted, so I slashed the pattern and added ¼” vertically above and below the crotch point.

I ended up cutting the ribbing for waistband much shorter than the top of the leggings, since it could stretch much further. The ribbing alone wasn’t quite enough to hold the leggings up, although I loved how it looked. For the charcoal pair, I added wide elastic on top (it may possibly have come off a pair of Bryan’s boxers with worn fabric). This holds up the leggings no problem. The elastic has the recovery needed, but it actually won’t stretch as far as the ribbing, so I had to cut it a little longer. This can make the waist look a little wrinkly by itself, but it all stretches out smooth on the body.

For the second blue/periwinkle pair, I wanted to see if I could use slightly less wide/firm elastic, so I tried some of the bra-band kind from my stash, which is soft on one side, inside the ribbing. That works too, leggings stay up with no problem.


upcycled leggings 3


The third green sweater had a narrow hem instead of ribbing at the waist. I decided to use that as a casing for narrow elastic, cutting two sections from the waistband and catching the elastic in the seams. After wearing this pair a couple of times, the jury is still out on whether it could use slightly wider elastic/more pull inside the casing … but if so it would be easy enough to unpick the little vertical seams at the top and sew it in.


upcycled leggings 4


Overall, I’m super happy with how these turned out! I answered a few leftover questions from the first-ever pair; like would elastic be enough to hold them at the low-waist level I like (a resounding yes!) and would they work in 100% wool (a big yes again!). Despite the fact that the pattern recommends fabrics with Lycra or Spandex, I like the all-wool version much better (the green and grey pairs are Merino, and the periwinkle is cashmere). These float like a warm soft cloud just touching my skin. They feel amazing and don’t bind in any way. If I were dancing on stage in them, I might care that the knees look a little baggy by the end of the day, but since these are under-layers only, I don’t at all.

So I’m officially set on leggings for a few winters at least! We’ll see how these hold up. They should be fairly easy to patch if needed, since I have the pattern and scraps. I consider the used sweaters a sustainable material source, especially since I can utilize ones that have small stains or holes in them (the little stitched leaves on the green pair are covering former holes in the original sweater). Making leggings this way keeps me within my pledge and my budget. Plus they’re awesome.

If you want to try this, go for it! For my fairly-small-but-very-pair-shaped figure, I need to start with a men’s extra-large sweater to cut the pieces as illustrated. Of course, you can patchwork them a little more if needed. The green sweater was in really good shape (except for the holes), so I got it even though it was a little smaller. I ended up piecing in wedges at the inner thigh to make up for not having quite enough width across the sweater body. It worked fine, but it was a little mind-bending to make sure all the pieces had the right shape and seam allowance, so I don’t recommend it for your first try.

Happy stitching!


upcycled leggings 5


News Jan 2016


Arizona Fiber Arts Retreat, Things I Forgot to Mention, and More

 
Lately I haven’t been doing as good a job as I’d like keeping you all, lovely readers, updated when I have something going on outside of this blog.  I haven’t wanted to stick random announcements into tutorials or thoughts that will (hopefully) be read long after the news is relevant, but I also don’t want to pepper you with little posts for each bit of “look at this!” type news.  So I’ve decided to do a periodic news round-up when warranted.  Because this is the first one, there’s some overdue stuff as well as some newer items.


Old News

I wrote a few more articles that came out in Seamwork magazine this fall, and the latest one in the December issue.  Although I mentioned some of them in passing, I didn’t really point them out.  There’s one on how fabric is woven, and how to use your knowledge about that to improve your sewing.  It draws on what I learned when my grandma taught me how to weave, and uses a toy loom that belonged to my mom as an example.  The latest article is about five essential hand stitches, and it’s just what it sounds like, a tutorial on my most-used stitches.  I’ve been inspired by all the hand sewing and visible mending going on lately, and I’m happy to add to it!  Maybe my favorite article so far is the one on wool.  It was a total blast to research it, and I’m really happy with how it came out.  It covers some of the history and science of wool, and how to use that knowledge when you’re sewing with it. It also features my favorite (super easy) hand-wash method for all your lovely woolens.

As always, you can read any of the articles in Seamwork for free online.  I’ve also added links to the ones I’ve written in my category page (you can also get there by clicking “Sew” under “Tutorials + Inspiration” at the top of my site) so they’re included with the rest of the sewing info I’ve shared.


wool prep thumbnail


To wrap up the older news, I joined Instagram this fall, and also never mentioned it here outright.  My inclination at this point is to avoid anything that involves more “screen time”, but there was so much going on there, especially in the fiber arts world, that I decided to try it out.  And I think I like it.  It’s nice to have a place to share quicker projects, things in progress, and thoughts that won’t become their own blog posts.  And there was some surprisingly deep conversation going on there during #slowfashionoctober!  Still I’m determined to use it sparingly.  If you too are on this exciting/elitist/beautiful/frustrating/inspiring platform, do come say hi, I’m @frenchtoasttasha.


New News

The winter gathering at Arcosanti has a new name: Arizona Fiber Arts Retreat, and I’m teaching there again this year.  It’s coming up January 22 and 23, and as of this writing there are still spaces in both my classes.  One is on 3D wet felting, and one is making felt cuffs and beads (pictured below) while learning to use attachments, prefelts, and shaping in your felt making.  Click over to their new website for details and to sign up.  Observant readers of this blog may notice my digital fingerprints on the AFAR site, and indeed I’ve been spending a fair amount of time working on that lately.  It’s a bit surreal to be the one in our group with the most web skills, but there you have it!

Knitting classes are also starting up again at Purl in the Pines in Flagstaff.  The first session of my beginning knitting series is this Saturday (complete beginners welcome), along with a “knitting skills lab” where you can get all your questions answered and learn some new techniques.  If you’re interested, head on over to their class page for details.  It’s still snowing like crazy as I type this, but if the forecast holds, the roads should be clear by the time classes start.


Felt Cuffs with Tasha


I have a more contemplative post for the new year in the works too, but (appropriately enough) it’s taking a while to distill my “Slow” thoughts for that one.  In the meantime, if there’s anything you’d like to see in this space, or for classes etc. in 2016 feel free to let me know!