A Silk Watson Bra

You may have noticed that I’m not big into bandwagons, and if I am going to jump on one, I like to wait until it’s safely parked back in the barn and everyone else has left first … I actually bought a copy of this pattern right when it came out and it seemed like everyone in my sewing-internet-world was talking about it, but then in more my typical style, I decided to think about it for quite a while before actually making it.


silk watson bra 1


What was/is really exciting to me about the Watson Bra pattern is that someone else already did all the hard work of figuring out the exact curves of each piece to make a smooth cup shape, make it fit into the band, etc. (thanks Amy!), and that it’s specifically designed to be made without underwires, which is exactly what I wanted.

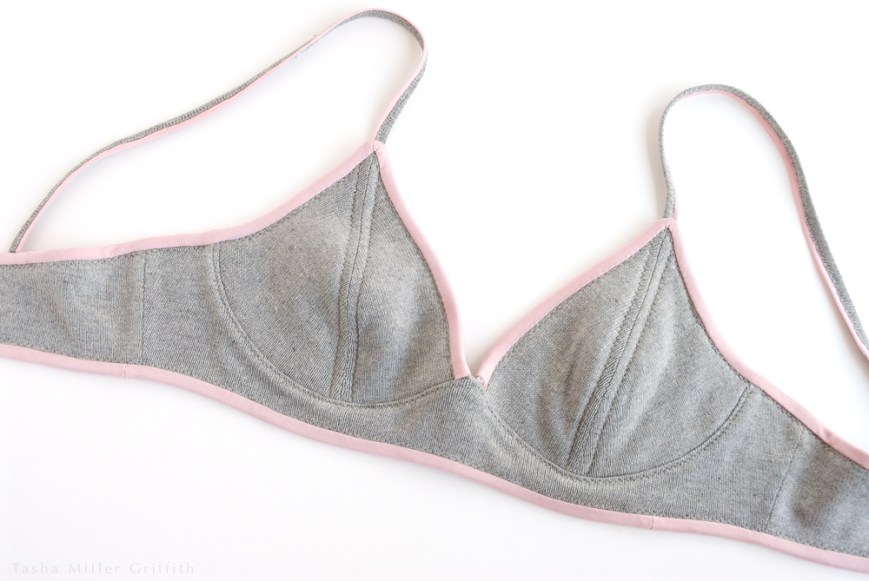
What I was less excited about is the fact that it called for mainly synthetic stretchy stuff; lots of kinds of elastic and power mesh, etc. As you may also have noticed, I’m so over it with all of that, and I’m trying to use all natural materials whenever it’s even remotely feasible. And one of the things that kept popping into my head whenever I looked at all this cashmere felt I have around* was, “this would really be perfect in a bra!” Since you know, it’s substantial but flexible, and insanely soft on the skin. But could I really make a bra using all natural fabrics? Maybe without even elastic?

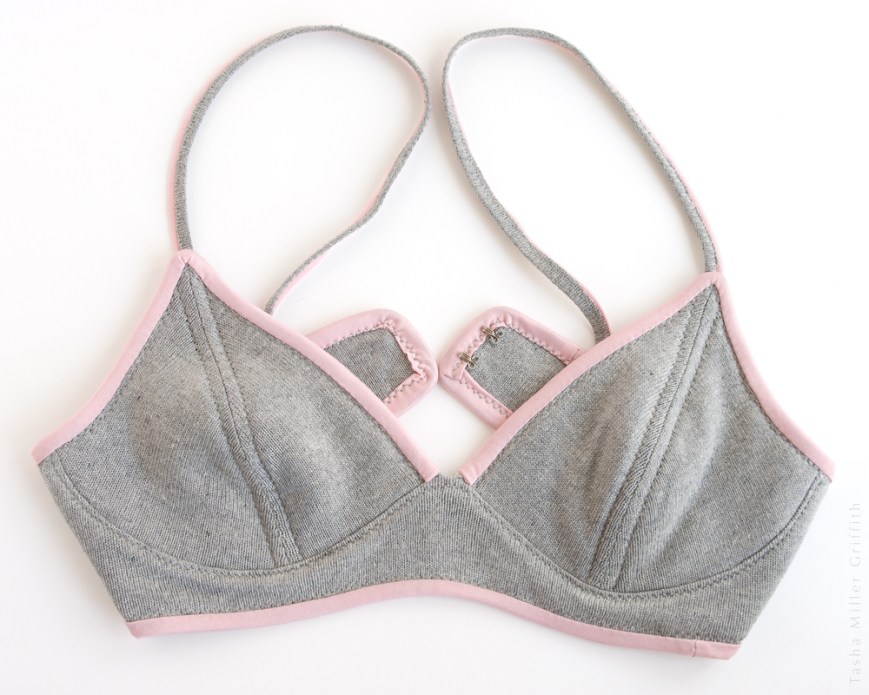
It turns out the answer is a resounding yes! Not only can it work, but it did work beautifully on the very first try (some luck involved). Using my measurements of approximately 31 ½” underbust and a 1” difference between full and upper bust, I decided to make a size 34A, erring on the side of a slightly smaller size since my materials weren’t super stretchy and I didn’t want it to come out too loose. I made a couple of alterations to the pattern; adding ½” to center front since I knew that would fit my frame better, and straitening out the bottom line of the band to allow for the possibility of using an existing hem when upcycling garments for fabric (although I didn’t do that this time). I also added to the seam allowance in the center of the outer cup pieces, so I could grade it with the inner seam allowance to avoid a noticeable ridge there.


silk watson bra 2


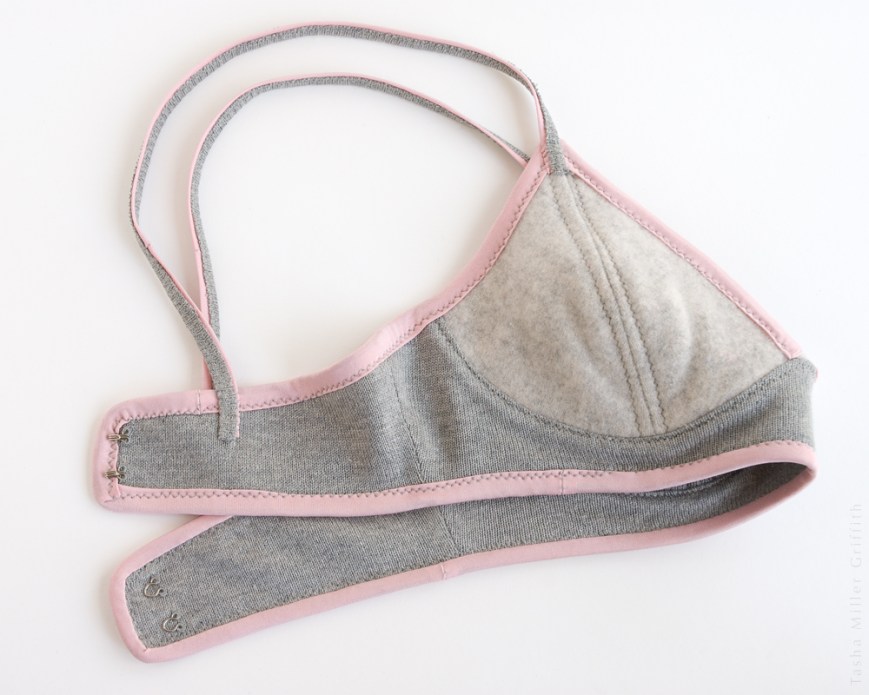
The grey fabric is from a silk knit top that had worn out around the underarms and cuffs but still had plenty of life in the body. The pink binding is leftover fabric from making these camis (very thin silk knit), cut 1 ½” wide, sewed ¼” from the edges, and turned under. And the inner cups are indeed felted cashmere scraps*—oh yeah! I sewed it all together with a simple zigzag stitch, and sewed the straps on by hand.

According to my notes I made this back in February, which means I can now safely report that it works as well in real life as I’d hoped. The only alterations I’ve made since then are to move the back attachment point of the straps closer to center back (typical for me if the straps are slipping off my shoulders at all), and to tack down the bindings at center front with some tiny hand stitches, since the edges pulled up a bit after a few wears and washings, revealing the cup layers.


silk watson bra 3


I thought this might be a wearable muslin version, but instead it came out near perfection in fit and function. It does everything a want a “real bra” to do: provide a smooth and socially acceptable silhouette under a single other layer of clothing, and add a little bit of support. It’s also so comfortable I forget I’m wearing it, which is key for me. I thought about making another one (I even have another old silk top or two with some features that might be really fun to incorporate) but the truth is I don’t need it right now. This one, plus my more bralette-type past attempts at upper-body lingerie, are covering all my wardrobe needs. So, I’m officially checking “make real bra” off of my bucket list goals, and moving on!

I’ve been thinking a whole lot about what it means to have “enough” as I get closer to actually filling the gaps in my wardrobe. This post by Felicia has only broadened my sense that this is a really important thing for us all to be thinking about. A whole post about it here is likely coming … I’d love to know your thoughts at any time.
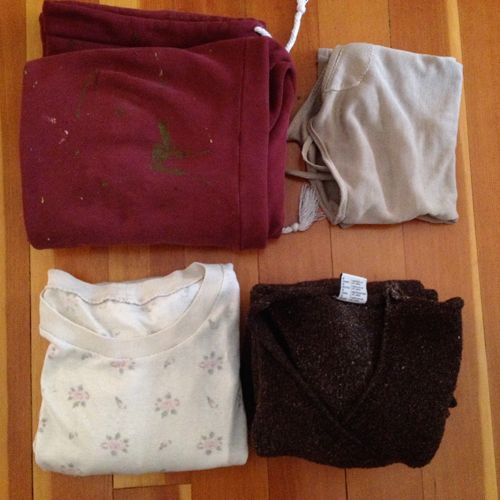
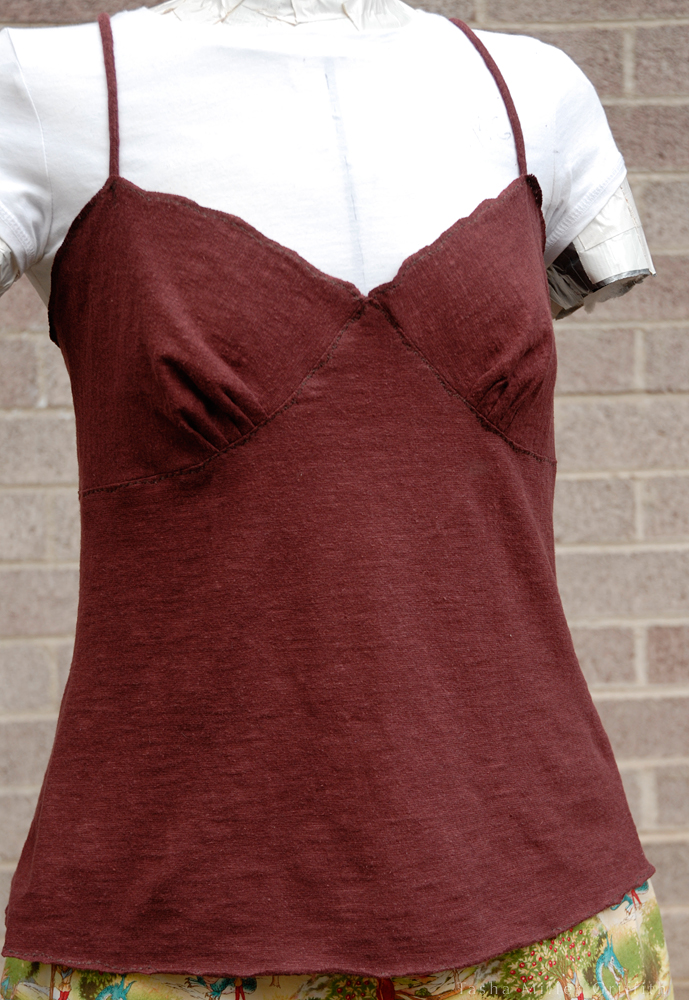
 

Previous makes


*Thanks to all the Fiddleheads hats I’ve made over years now, I have an entire giant plastic bin of small bits of luscious felted cashmere knits, which I could never throw out despite the fact that there’s way more than I’ll use in one lifetime (unless maybe, a giant intricate patchwork cashmere blanket—don’t even think about that, self!). Which is why I’ve started sorting them into groups of pleasing colors and offering them to fellow makers in my Etsy shop. I’ll continue to sort and list more batches as they sell. If you’d like some and you have color requests, just give me holler, here or there!

Cheers!


No Wardrobe is an Island

Thoughts on MMM’16

I wanted to give myself a real challenge this Me-Made-May, and I succeeded! I decided to endeavour (love that British usage) to wear only clothes I’ve made for the month, with a few exceptions noted at the beginning: socks, jackets, and raincoat. Trying to follow through with this plan made for my most thought provoking MMM in several years.

At the beginning, I felt liberated. Even though I’ve pledged to wear mostly me-made the last couple of Mays, getting by on only MM stuff felt like cutting a cord (despite the deliberate exceptions). I was not just making do with scraps thrown my way, but existing on only what I had made from whole cloth.

It also occurred to me that wearing clothes I didn’t make is anonymous—it’s not satisfying, but sometimes it’s a welcome cloak of invisibility.

As May began and the weather stayed cold at home, I found I missed some fairly ridiculous parts of my non-MM wardrobe—notably the big shapeless thrifted wool sweater I’d been throwing on over my PJs for tea and yoga first thing in the morning. I guess some kind of large, warm, not at all precious, natural-fiber layer is now an essential wardrobe component for me in cool weather …

On the 5th I realized that my plan had totally failed to account for days when I really needed to just wear grubby work clothes. Although an oversight, because my life definitely does have those days, I didn’t feel bad about it. It’s conceivable that one day my clean-the-truck clothes might be all old me-mades … but that day is not here yet, and that’s fine with me.


05mmm16

I did make two of these items …

We hit the road for two art shows in the DC area about a week in, as we have done for the last few years. This time, it was cold (like record-setting, 25 degrees colder than normal cold) and rainy practically the whole time we were there. I had enough me-made layers, I just wore them over and over …


21mmm16

A typical show-day outfit. I’m wearing my favorite cashmere top, the upcycled sweater, a jacket, and a raincoat. I was going to roll up one pant leg so you could see that I’m also wearing wool leggings underneath, but I forgot.


Then after travel and the first show, I totally ran out of clean pants. I discovered I would rather break my pledge and wear an old pair of Bryan’s than freeze in a skirt, especially since we were going for a walk in Rock Creek Park. I also discovered that I am really used to custom fit, especially in waistbands. Any places that rub or sit wrong seem totally unacceptable. This is probably a sign that I could not go back to ready to wear—even if I wanted to.

I wore the “Me-Made-May” badge on my bag or clothing almost every day—and didn’t get asked about it once. But still I hope that some folks saw it and were curious. I also wore the “I MADE this” badge a few times (attached to something I made and was wearing). That one is more direct, and when I wore it I got comments and/or questions from friends, acquaintances, and waitresses, which was great! But I also discovered that I’m just not up for being the face of the handmade movement whenever I’m out in public. I’m naturally a shy person, and with the added stresses of travel, being in strange places, and dealing with whatever came up, a lot of days it was just not happening. While, for whatever reason, having the MMM one on felt fine.


19mmm16

If you made a badge and didn’t see a comment from me about it, please leave me a message here or tag me on Instagram—I’d love to see them, and I was in no way keeping up with all the hashtags last month!


I’ve been thinking a lot lately about how making my own choices is wonderful, but it’s not enough. I also need to find ways to share more of those choices with larger communities. (Some things that are pushing my thoughts that way: this post from Jess on Wardrobe Ecology, and this amazing interview with Rebecca Solnit from On Being.) I’d like to continue to explore ways I can make a more public statement, without feeling like I’m “on stage” too much of the time. And I’d still like to wear the “I MADE this” badge from time to time … we’ll see what happens!

Overall, as the month went on, I realized another important thing: I don’t really want to make my whole wardrobe. Don’t get me wrong—I’d like to be capable of making whatever I need to wear. But as far as the actual content of my closet at any given time, I don’t want that to exist in a vacuum of only self-made, any more than I think any of us can really live a good life without friends and community to belong to. I know it’s vital to have friends along the way—people who give us a place to rest our heads, deep conversations and connections, and sometimes a place to dry out our tents in their back yard. I want to celebrate that as the joy and blessing it is. In sort of a similar way, I also want to celebrate the special parts of my wardrobe that I didn’t make, especially those made or given to me by folks I love.


31mmm16

The last day of #mmm16, with our irises having a great year.


So, a lot to think about! As always I’m grateful to Zoe for putting this on, and for all her encouragement! It really is a great time to pause and reexamine life through the lens of what we make and wear, and I’m glad it happens every year because I wouldn’t go to the trouble all by myself! Between now and next May, I’ll be thinking about more ways to share my love of handmade without freaking myself out, and how to celebrate my mostly-me-made wardrobe with a pledge that reflects where I’d like it to go.

How about you? Anyone who hasn’t already shared their thoughts from MMM on a myriad of other platforms is welcome to do so here … In the meantime I hope you’re all enjoying the start of summer! (It went from cold straight to hot for us, but, I’ll take it!)


News April 2016: Flag Wool and Me-Made-May

Hi everyone!  Just a couple of quick things today.

First off, I’m teaching at my hometown wool festival Flag Wool and Fiber again this year, and it’s coming up: June 4 & 5.  I’ll have a brand new class on modern free-form embroidery, and I’ve really been enjoying researching and brushing up my stitching skills for that. I’m also doing a “Knitter’s Toolbox” class that’s intended to take your knitting to the next level. Click through to the festival’s site to read more about both classes.


knitter's toolbox


Second, it’s almost Me-Made-May!  After some debate I’ve decided to pledge to wear only me-made (not just -altered or -repaired) garments this year, with a few exceptions: raincoat (not about to try making one when I have an almost-new one), socks (not enough me-knit ones yet), and then there’s a jacket which I would love to finish by May … but it might very well not happen, so I left myself a little wiggle room (if it’s cold enough for a jacket I’m wearing one, me-made or not).

We’ll see how this goes.  I’m not sure that I’ll feel more self-sufficient wearing only things I cut from scratch rather than things I altered or fixed so I could wear them, and I’m pretty sure there are a couple of garments I’ll miss wearing.  But this pledge seemed like the next logical step in the wardrobe direction I’ve been headed, and I’m curious to see how I end up feeling about it and what I’ll discover.  I’d also like to share (most likely on Instagram) a little more of my MMM than I have in the past couple of years.  Even though that can be hard on the road, I’m going to try.

And launching soon, a project which is actually a fusion of the two items above—I hope you’ll stay tuned!

Me-Made-May and Putting My Best Self Forward


mmm15 sleep top 2

Hi guys!  This year I’ve decided to give myself a harder challenge for Me-Made-May, and it’s definitely leading to some good thoughts about how dressing handmade pushes me towards making and wearing more of what really reflects me and how I’d like to be seen, rather than just wearing what I happen to have.

I wrote a piece about all this for Zoe, the lovely host of mmmay, and it’s on her blog today, so do head over there if you’d like to read more about what I’ve been thinking and making (the top at left) in preparation for May.  Here’s my pledge for this year:

“I, Tasha of Stale Bread into French Toast, sign up as a participant of Me-Made-May ’15. I endeavour to wear only garments I have made, altered, or repaired, for the duration of May 2015. The only purposeful exception will be my raincoat, which isn’t any of the above, but I will definitely wear if the need arises. Everything else is included!”  Gulp!

There’s still time to sign up and participate yourself, I highly recommend it, and you can make a pledge no matter how many or few handmade things you have to wear … I hope you’ll do it with me!


DIY Crib Rail Covers for Teethers — A Tutorial


So apparently, small teething children will chomp down on wooden crib rails like beavers.  I really had no idea until, visiting our dear friends at the end of the summer, I saw the evidence first hand, little teeth marks right through the wood finish.  My friend the mama was thinking about ordering some covers for the crib rails, but I knew we, ok I, could easily make some, and I would get to sew!  In August, after months away from my sewing machine, this seemed like a gift from the universe, plus it would be so useful and cute for friend mama and her little one!  I’m going to share my notes and method, which should work for any crib, below.  This is a fairly quick project, so if you are still looking for a gift for a young family, it could be a good one.


crib rail protectors onTo make up for only having quick snapshots of this project (did I mention there was a baby involved?) I’m making it my illustrated post for this month.


First things first, I measured the crib.  I wanted the covers to go around the whole rail easily, so I added a little extra ease to my measurements.  The back rail is against the wall, apparently too awkward an angle for little one’s head to chew, so I didn’t worry about that one.

crib rail protector mathI know that the quilt batting (which I want here for padding) will shrink a little bit, probably not enough to affect the width, but for the length I’ll include a bit extra.  I usually use 1/2″ seam allowances, which I did for the width.  I decided to use 1″ seam allowance on each end for the length, since that is where I am likely to want more wiggle room.  To figure out how much fabric I need, I made another diagram, since I’m really a visual thinker.

crib rail protector fabricSo here are the supplies I got, including a little extra fabric for shrinkage, since it’s 100% cotton:

Two yards fabric (Modern Bliss design #13662 by Robert Kaufman)

One yard super wide cotton quilt batting, for two layers of batting in each cover

Eight yards of totally beautiful soft cotton ribbon for ties

All of this came from Stitchin’ Post in Sisters, OR.


When getting ready to sew, don’t forget to preshrink your fabric!  Wash the fabric and dry it the same way you (or the recipient) plan on treating the finished project.  I also put the ribbon through wash and dry, in a lingerie bag, just in case it was going to bleed any dye, etc., since a baby might be chewing on it.  I didn’t pre-shrink the batting.  The package it came with says it will shrink 3%, which will give the covers a bit of that puffy quilted look once they are washed.  After washing, I ironed the fabric and ribbon to get rid of wrinkles and make it easier to measure and work with.

Cut or rip the fabric and batting into strips 10″ wide (or the width you picked for your crib), and then divide them for the length of the covers, as in the diagram above.  Take one fabric section with its corresponding batting to the crib, make sure the size seems close, and decide where you want to put the ties and how long they should be.  We decided on 7″ for each tie, which divided fairly neatly into 8 yards, 20 ties with two sides each.  I just cut the ends of the ties at a diagonal to keep them from fraying, and left the other end, which will be sewn inside the cover, squared off.

I pinned the ties to one side where I wanted them to go, and then with the fabric off the crib, folded it in half to match and pin the matching tie. It’s helpful to leave just a bit of each tie sticking out beyond the fabric, so you’ll be able to see where they are when you’re sewing.

Make a fabric stack for each cover, with two layers of batting on the bottom, then one layer of fabric (right side/public side up) with the ties pinned in place (I pinned them in the middle too, so that they wouldn’t shift around and get caught while sewing).  Then top with the other side of the fabric, right side down towards the ties.

crib rail protector sandwichHold the whole sandwich together with a few pins, and sew down each long side with a straight stitch, 1/2″ from the edge—our planned seam allowance.

Each time you come to one of the ribbon ties (which you’ll know because the ends are sticking out) sew over it, then back up and sew forward again, so that there are three lines of stitching holding each tie in place.  Blend back to your seam allowance line, and keep sewing to the next tie.

crib rail protector sewing ribbonOnce you have sewn down both sides, turn the whole thing inside out and tada!  The batting is on the inside and the ties are on the outside.  I had thought I would trim the batting from the seam allowances, but when I got to this stage it didn’t seem necessary.  I just pressed everything in its new orientation, smoothing things out and using the iron with steam.

Check the size of the cover on the crib, the fold the ends to the inside to get the length you like.  I decided to stitch them closed by hand, using a ladder stitch which picks up a little fabric from each side.  It just looks better, and I can also add a line of stitching near the ends when quilting so that the hand stitches won’t take much strain.  The white UFO near my fingers in the photo is the head of a pin . . .


crib rail protector sewing ends


All that’s left is the quilting!  I don’t usually quilt; I’m too obsessed with the properties of different fabrics, their drape as a 2-D material wraps a 3-D body, and the possibility of walking around all day protected and flattered by garments I made.  I do see how quilting is perfect for something like this though, and I don’t mind the quilted look, but it does bug me when the stitching totally contrasts with the fabric, especially when I like the fabric as it is.  I decided to use the diagonals in the print as guides for my quilting stitching, and not to worry about them being exactly all the same.  It gave the covers more of a modern look, which the mama and I loved.  I did check the batting instructions, which said to quilt no more than 8″ apart, and make sure the maximum distance between my lines was not more than that.  I quilted to one end, checked the measurements and then did a second round.  I didn’t have access to a walking foot, so I spread the fabric and batting sandwich outward from the foot with my hands as I went, and it worked just fine.


crib rail protector finished


I just loved making these, mostly because at the time I was thrilled for the chance to take a project from idea in my head to finished object in my hand!  I’m sure I could have looked up someone else’s directions, but I didn’t want or need to, and I love how my version came out.  I played with the balance between making something as good as I can, because it’s for my best friend’s baby, and going with the flow, letting it be a bit inexact and show its handmade-ness, because it’s the real world, and because I always think handmade things are the most beautiful.

If you try this project, I hope you’ll agree, and have as good a time as I did!  Happy week everybody!


Carving a Handmade Rubber Stamp

This will be the first post of a couple about making stamps and using handmade stamps and objects to print on fabric.  For some reason, once you add the words “on fabric” to any art technique, I am suddenly interested . . . but of course you can also use hand carved stamps on paper, and even clay!  My aunt Barb taught me to make stamps, she uses hers to make beautiful collage-type art, in her handmade books (where I found this design which she let me use in an earlier post), and in her pottery work.  We talked about a feature of her art to go along with this how-to, but it’s a busy season for both of us, so we’ll save that to look forward to later.


For today, how to carve a stamp!  You will need a tool called a linoleum cutter (seen in the second picture), which you can get at most art stores, and some kind of block to carve.  Lately I’ve used two kinds, pink stuff called “Speedy-Carve” from Speedball, which I got at the chain art and crap store here, and brown “Eco Karve Printing Plate” from Inovart (made of recycled material!), which I ordered from Blick along with the paint.  The pink kind is a little softer, slightly easier to carve, and much easier to see to see your pencil designs on because of the lighter color.  It’s a little thin for bigger stamps, which can get floppy if you don’t attach them to anything.  I liked carving and printing with the brown stuff, and it’s thicker, and easier to see what you have carved out than the pink, but it can be hard to see your transfer design on the darker surface.  When I started making stamps we used a whitish carving block, which as far as I can tell from the scraps was also made by Speedball.  It’s not my favorite, little bits of it can crumble away while you’re carving, where you’d rather they didn’t (you can kind of see this in the inside corners of the star stamp).  In any case, you can probably find a material near you to try it out.

Now that you have your materials, you need a design.  I have been into five-petaled flower designs lately, and I liked the artwork on the posters for the cherry blossom festival we saw in DC earlier this year, so I decided on a cherry blossom stamp.  You can draw on the rubber carving stuff, but I find it easier to draw on paper and transfer the design.  It’s easier to erase your mistakes or start over, and the design when you stamp it will be the same as you drew it, instead of a mirror image (because it’s flipped once when you transfer it and again when you stamp).

It helps to use a soft pencil and make thick lines.  You can get a fair amount of detail in your stamps, but don’t go crazy with fine lines for the first one you make!  Once you have a design you like, flip the paper over onto the carving block, hold it still, and rub it with something hard and flattish, like a spoon or a bone folder, to transfer the design onto the rubber.  You’ll get more out of your carving blocks if you place the design on a corner instead of right in the middle.


Time to carve it out!  I think it’s easier to cut out the section of rubber around your design with a razor knife before you carve it.

The idea is to cut out everything that you don’t want to print, from around the design that you do.

Loosen the head of the linoleum cutter and put the smallest carving tip (sharp side goes out – watch out, it’s sharp!) in the curved slot that opens on one side of the ball as you loosen.  The previous sentence probably makes zero sense unless you are looking at the tool, but that’s Ok.  Start carving; each one of the tips for this tool acts like a sharp scoop, use them point or scoop down to carve out pieces of rubber that you don’t want.  I like to start with the smallest tip and go carefully around the edges of the design, it helps keep me from accidentally slicing through it with the bigger cutters.

Cut away from inside corners to both sides.  It’s helpful to turn the block, as well as the tool, while carving around curves.

Once you get the design outlined, switch to the larger V shape tip, and use it to cut around your outlines, making a deeper channel.  Then, use the scoop to carve out large sections that you don’t need.  Cut away from your design at a steep slope on the edges of your stamp, to keep them from printing.  Then go back with the smallest V tip and clean up any leftovers.  You can see this process progressing clockwise around my flower stamp above.

Try out your stamp with an ink pad and paper, you’ll get to see how it’s coming out, and any areas you don’t like will be helpfully colored with ink, so you can see where to carve them off.  Some little bits of messiness are part of the charm of a handmade stamp, but you can decide how much of that you want.


You can carve just about anything into a stamp!  I made the one above while hanging out with a friend, to stamp on the re-used boxes and envelopes that I send orders in (it also appeared on KP’s blog as part of her recycle package challenge).


If you’d like to jump- start your handmade stamp collection, talktothesun on Etsy sells some great-looking ones (not my shop, I just like it)!

Have a question?  A stamp carving tip? A material you like?  Leave it in the comments, I’d love to hear what you think!


Next time: use your stamps (and other stuff) to print on fabric.


Grateful Giveaway Part 1

Hello!  I am back at home, and feeling pretty good about things.  First of all, I just spent a week with some of my favorite women in the world, making all kinds of amazing things and stretching myself to a rare extent (more about this a little later).  If that’s not enough to be grateful for, I came back to flowers and a love note from my amazing husband.  Overall, I’m feeling pretty good about the life I’ve chosen.  So I thought I would share the love by giving away two of my Fiddleheads hats (and two more to come later)!


I have these extra hats because of a bad situation which is slowly resolving.  A long time ago now I sent some of my wares, including these hats, which were a brand new idea at the time, to a store in another state which turned out to be scamming artists and taking the money for their own pockets.  The slightly better part of the story is that artisans, communicating through Etsy, figured out what was going on, and the shop was shut down and contents seized by the attorney general of MO.  The much better part is that after much, much time in bureaucratic limbo, I was finally notified that they had “determined some of these goods to be” mine (maybe because they had my name and phone number on the tags?).  And after so much time had gone by that I had given up again, I received a box in the mail with a fair number of bags (appearing on Etsy this fall) and hats inside!  I doubt I will ever get any money out of this, but getting my unsold stuff back feels like a huge win.


When I first started making these hats, I didn’t realize how stretchy they would be, and I had more sizes.  Bryan always laughs at me for forgetting things I’ve made, I forgot that I used to make four sizes instead of three, and I forgot that I started out writing all the fabric tags myself!  I now think these two would fit around 3 – 9 months, on average of course.  As you can see there’s a classic blue and pink, each one with two tones, and more texture in the lighter color.  They are made from all recycled cashmere, making them super soft, eco-friendly, and washable.  I have made every one of the now many many of these that are around the country and the world, and I still love this design.

One of these would make a perfect gift for someone having a baby soon, as it should still fit when winter rolls around up here in the Northern hemisphere.


All you have to do to win is leave a comment!  Tell me which hat you would like and (yes this is for my marketing, small biz needs it too) what change having one of these would bring to your life/experience.  Open to anyone around the world, so tell your friends!  I will close the contest in just over a week, at 9 am Friday June 6 Arizona time.  I’ll choose a random winner for each hat and ship them out soon thereafter.

Hope you’re having a grateful week!