New DIY Kits on Etsy, Plus the Hats are Back …


Hello all!  I’ve been using my computer time for the last week or so working on brand new stuff … if you can call ideas that have been rattling around in my head for a year or more “brand new” … but they now exist, in real life!  Or at least on the internet.


SRCR title page blog


Brand new: instructions and materials so that you can make the some of the scarves and blankets I’ve been making the last couple of seasons from cashmere ribbing!  I’ve laid it out for you, with lots of tips on sewing the ribbings, plus directions for three projects.  Make one of these, or make a totally new design of your own!

The color combos I found in the ribbing box are pretty great.  Get these now if you love them—there’s more good stuff in there, but the next batch will be different.


4 ribbing colors 1014


Plus, Fiddleheads hats are back for fall.  There are some new, incredibly cute pictures of children who shall remain nameless modeling them.  It’s worth a click just to see them all.  And—sigh—I think I said I wasn’t going to do this, but then I suddenly needed to, so I did—I modeled the adult size myself.  The kids are SO much cuter!


two friends


I’ll be back soon, with more cool stuff!


Recycled, Naturally Dyed Silk Camisoles

Plus My Favorite Method for Sewing Knit Fabric Straps, and Self-Fabric Binding with Elastic


pink silk cami dyed hanging
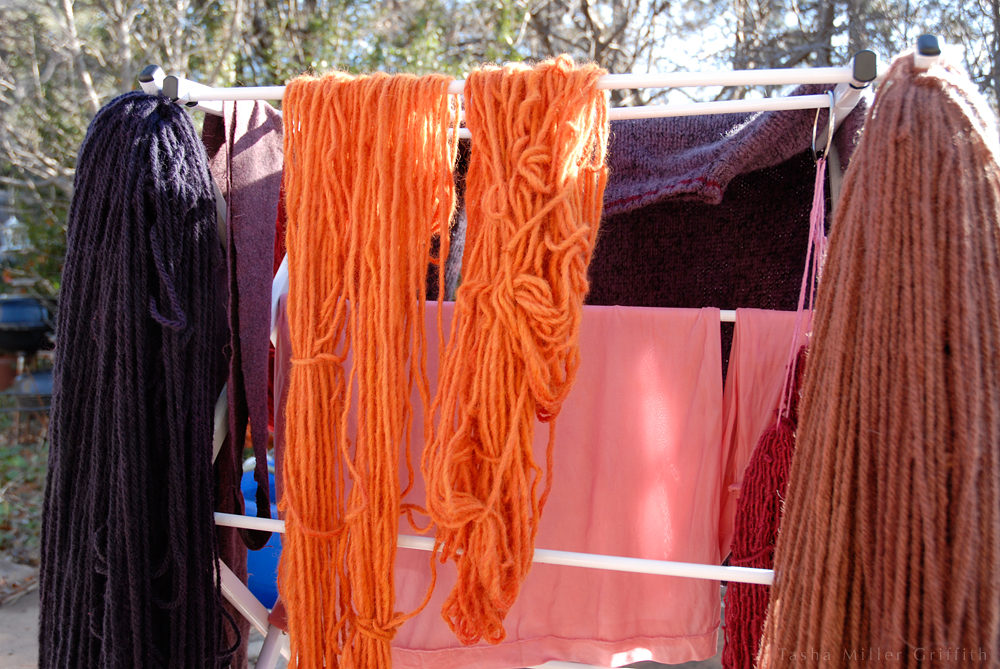
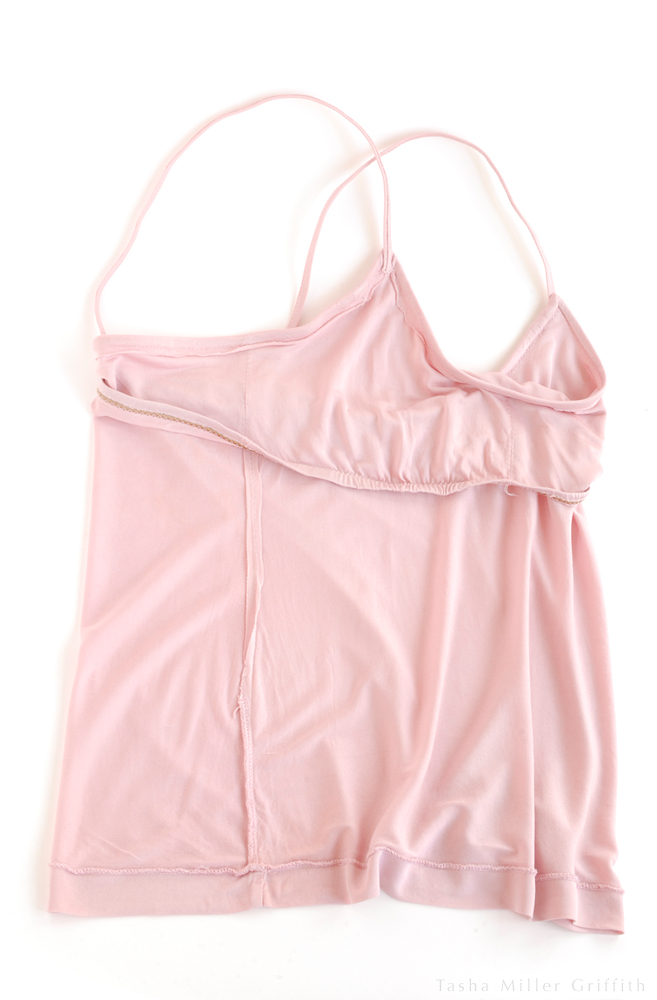
The pink top before re-purposing, hanging with other materials dyed the same day.


Last fall, my friend Zuni invited me over for a day of dyeing with natural materials at her house.  I have an informal craft exchange going with some of my fiber friends, and it’s fantastic to have Zuni as part of this group.  All the mess and calculations for dyeing stay at her house, and we just bring home the colorful finished products.  The day in question, one of the dye materials was indigo.  Most of the craft exchange members tend to dye yarn.  I’m pretty militant about not letting my yarn stash exceed the capacity of one big plastic bin (after, ahem, seeing what happened to my fabric stash), plus I sew more than I knit, and I’ve sewn for longer, so I tend to be the one who shows up with odds and ends of fabric or garments to re-purpose.  This time it was a silk long underwear top.  I inherited two of these from my grandma’s stash.  The fabric is really lovely, but I hardly ever wore the tops, they were kind of baggy for layering, and looked awkwardly like underwear when visible—picture your classic long undies, but maybe a bit looser.

I think I had a class that morning, because I came to the indigo day partway through, at which point we literally just dropped the top into the dye bath.  Indigo doesn’t need a mordant, but I learned something important: dyeing something without soaking it in water first leads to splotchy fabric!  Funnily enough, a slightly mottled fabric was what I pictured when I envisioned how this would come out … although maybe not quite that spotty!   I also think not wetting first may have led to some of the color not being bonded with the fibers, and then rubbing off.  This was all an experiment though, and I was just happy to have a dyed piece to work with.

My plan was to cut the top up and make something I would definitely wear: a lovely silk camisole (tank top, vest, whatever you want to call it) for a winter-time first layer.  I used the same pattern as for my summer tanks, which after many alterations, bears almost no resemblance to the starting point: Kwik Sew 3524.

Click on any of the pictures for more detail.


blue silk cami on form


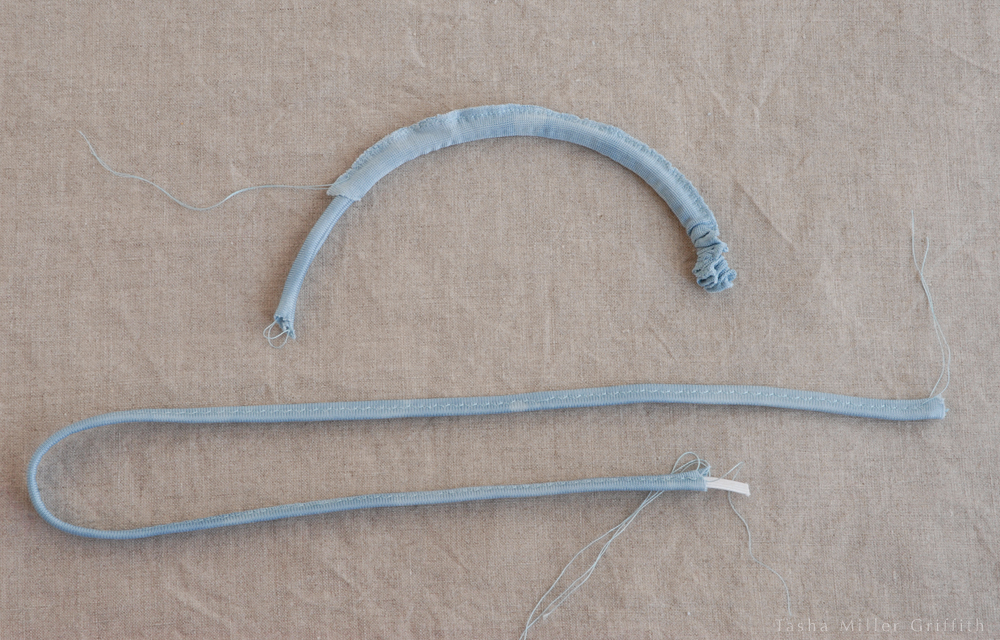
A couple of things that came out really well: the straps and the elastic binding at the top.  I’ve used this method for straps on a couple of (not blogged) other tanks, and really like it.  Basically I just sew a tube of fabric, using a narrow zigzag stitch since it’s knit fabric.  I turn the tube with a wire, and then slide a piece of elastic through it, using a bodkin or a safety pin.  Then I stitch through all the layers.  The added elastic gives the straps more stretch, recovery, and sturdiness than they would have if they were just made from the fabric.  This seemed essential when working with practically transparent silk!


blue silk cami straps


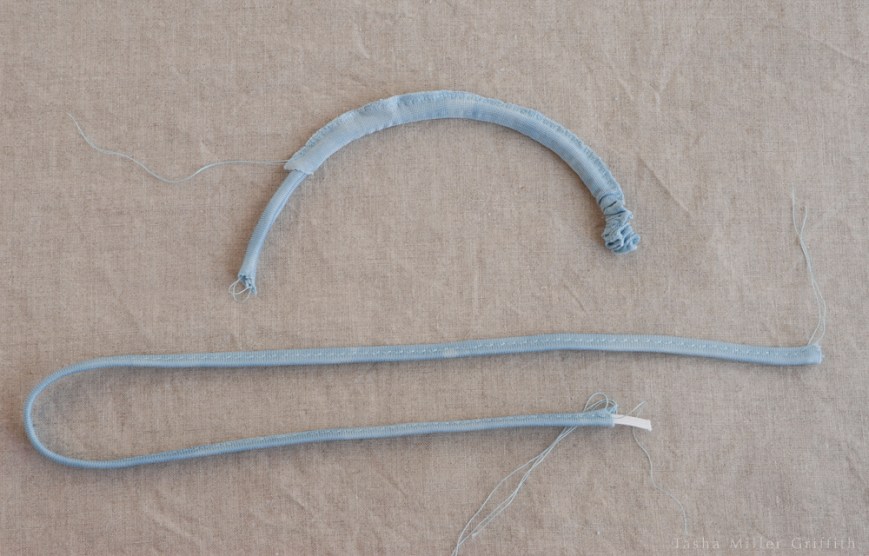
For these straps, I used 1/4″ elastic, and cut the fabric strips for the straps 1″ wide.  You need a little more than the elastic measurement for the fabric tube to fit around it, especially once the seam allowances are also tucked inside, and a bit for the seam allowances themselves.  Sewing through the fabric and the elastic holds everything smoothly in place.  I roll all of the seam line to one side of the elastic before sewing, which becomes the bottom of the strap, and the top looks clean.

My favorite thing about these camis (other than the feel of the silk on my skin, or maybe the color) is the way the edging fits at the top.  I used another fabric strip, and plain 1/8″ elastic.  I didn’t stretch the elastic at all when pinning and sewing it on, and the slight negative ease in the pattern (I checked—it’s about 88% of my body measurement at the upper chest) turns out to make just exactly the amount of stretch I want at the top.  It just hugs against my skin, without gaping or digging in.


blue silk cami binding closeup
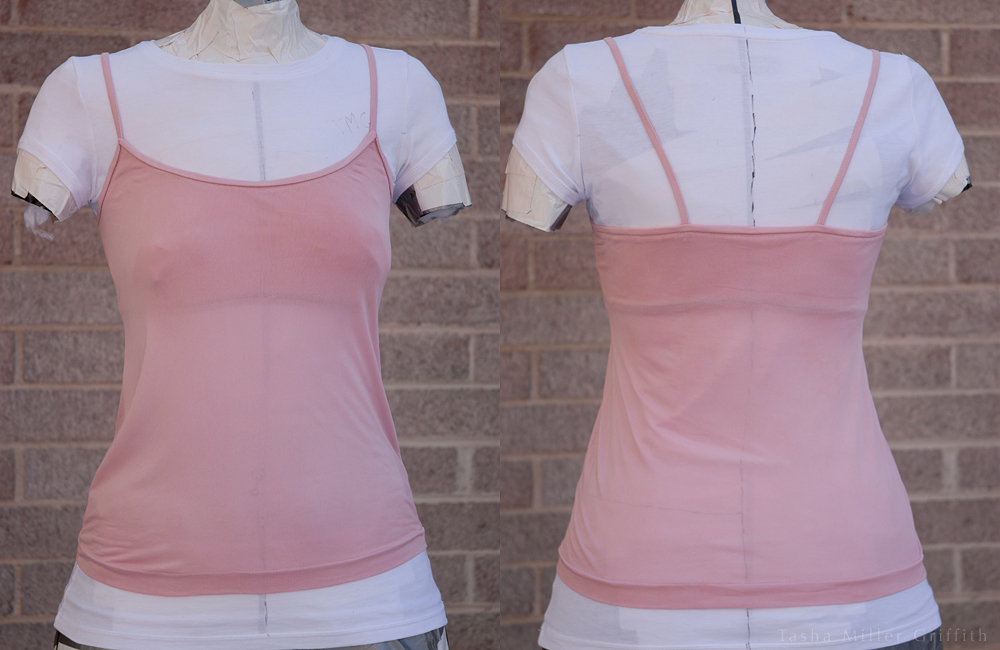
This dress form is a copy of my body in duct tape, and the binding fits just as nicely on me.


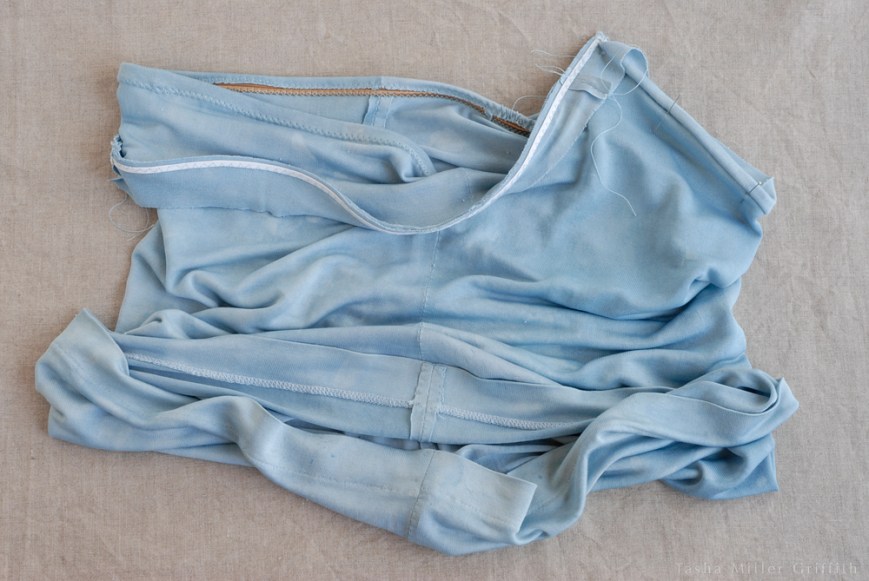
Below you can see in more detail how the pieces of the binding went together.  After sewing through all the layers, I rolled the binding strips to the inside, and sewed again just outside of the first seam.  The part at the top with the bronze colored elastic is the built-in shelf bra, which I attached at the same time, in the first seam of the elastic and binding.


blue silk cami inside


For the blue one, I cut the original top completely apart, and used as much of the width of the original hem as possible.  I didn’t want the seams to show at the bottom, so I tacked them down by hand.

Not long after I finished the blue cami, Zuni invited as over again, this time to dye cochineal and purple.  I’m not that huge a fan of pink, unless it’s cochineal, and then I’m all over it.  The particular shades that come from those little bugs really float my boat.  So, excited by my first success, and learning from mistakes, I thoroughly soaked the second top in water and brought it over.  I was also careful to stir while it was dyeing, and the result was an even, beautiful coat of color!

If I could have, I would have cut both tops wider at the bottom.  You can see a little pulling, and stretching in the fabric around the hips.  For the pink top, I decided for maximum width, to keep the hem and bottom of the original side seams intact, and taper my new seam in.  Below you can see this, as well as the construction of the shelf bra and what the binding looks like from the inside.

With this method of binding, I like sewing the straps in at the end by hand, catching just the inner layers.  That way I can try on and adjust them exactly, plus I think it’s more secure and less likely to distort the fabric than trying to catch them in the seam under the binding.


pink silk cami inside


I got some good practice sewing with delicate petals of silk making these, and it seems less intimidating now.

The other fantastic thing about this project is that, when those long undies were just sitting in my drawer, I thought that maybe someday I would dye them and make them into something useful.  In the same way that maybe someday I’ll spin enough yarn to knit with, maybe someday my studio will be completely clean and neat … things that I dream about, but may never happen.  But this one did!  I’m trying to acknowledge and appreciate this as a victory, rather than just rushing right on to the next project, as I am apt to do.


pink silk cami on form


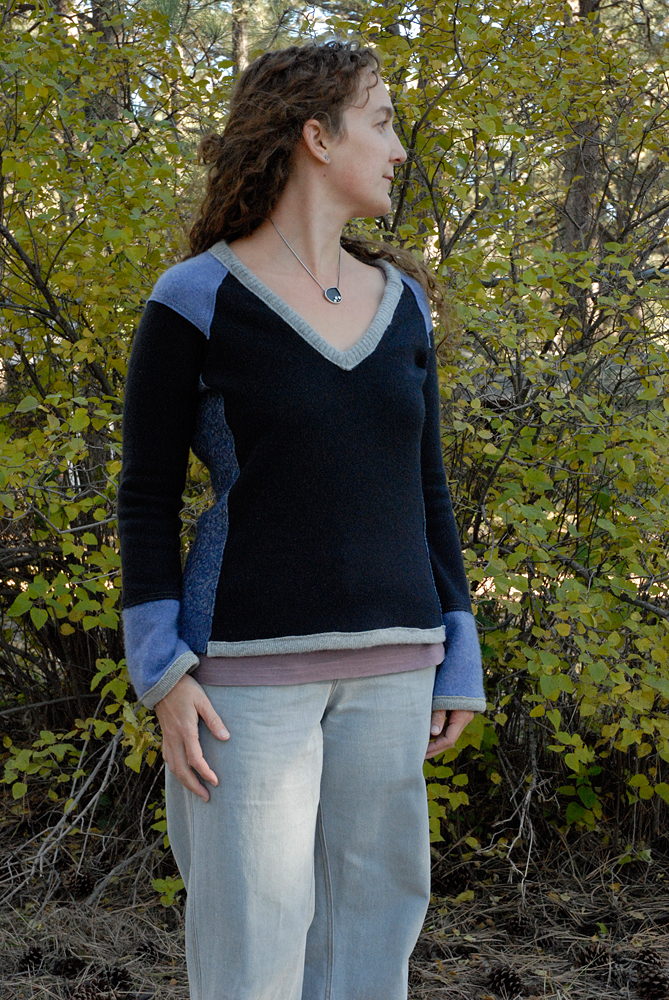
Plus, I just love having these in my closet!  In fact, combined with two silk camis I already had (one is an earlier take on the recycled silk shirt idea, and one is the original I used to copy my woven tank pattern), I have just enough to wear one almost every day.  That inspired me to pack away most of my summer tanks, shirts and dresses for the first time ever.  I always carefully clean and store my winter woolens over the summer (mainly to protect them from the scourge of moths) but putting away the summer clothes never seemed that important, especially when I still used my cotton tanks as winter layers.  The silk ones are noticeably warmer though, even as thin as they are.  And I love that my summer clothes are getting a break from being on the hanger, and how much more space there is in my winter closet.

Take time to celebrate your victories, people!


A New Me-Made Upcycled Sweater


blue upcycled sweater looking side


Hello all!  I’ve been making and mending just about as much as physically possible around here (in between making hundreds of these little fuzzy hats) ever since I got back to my studio a few weeks ago.  Not much has made it up to the blog yet, and I decided to just start with the thing I’m most excited about: my new sweater!  I really, really need some more sweater layers for this winter, and I’ve had a plan to make a couple of upcycled ones from various bits and pieces since the spring.

So, here’s the first one!  The main part of it came from a deep navy blue, super soft, slightly felted, merino sweater that some friends gave me (on the right below).  The fabric is lovely, but the shape was classic sweater that doesn’t work for me—baggy on the sides, gathered in at the bottom—in other words the least flattering possible design for a small pear-shaped girl such as myself.  I also have this knit top which I love the shape of, it has princess lines (flattering—yay!) and interesting side panels, it fits me well and since it seems to be on its way out (the problem with thrift store finds) I had already traced a pattern from it.  So . . .


sweaters on line


piecing sleeveThe biggest lesson I have learned so far when recycling/refashioning something old into something new, is to treat the something old as fabric.  Unless the alterations you want to make are super duper simple, take the whole thing apart and press it flat and see what you’ve got, and it will be so much less frustrating.  You do end up with some odd shaped pieces of fabric, which can lead to interesting piecing and seams.  I folded the pattern for the new sleeve to accommodate the fabric from the old sleeve, leaving me two parts to cut from another fabric. I just have to remember to allow for seams when I cut the pieces to add on.  I had allowed 1/4″ seam allowances, so I cut the top and bottom sleeve pieces 1/2″ longer than the lines where I cut the middle piece, so there would effectively be a seam allowance on both sides.  Make sense?  I have screwed up the math on that before . . . but not this time.

It probably won’t surprise you if I point out that I have a lot of scraps of cashmere lying around here, plus old sweaters friends have given me, etc.  I chose a dusky purple for the extra sleeve pieces and extra at the back, which also didn’t quite fit on its corresponding piece of ex-sweater.

flat sockI chose the purple because it matched my material for the sides: socks!  My mom was nice enough to buy me these super soft alpaca socks at a fiber festival.  I loved the knitted pattern, I love knee socks, I carefully followed the instructions, which were to machine wash and line dry.  That’s my default washing mode anyway, so I thought I was good to go . . . but by the second wash they had shrunk to the point where fitting over my calves was no longer an option.  (Short strange tangent: this opened up sock reminds me of those animal pelts you see in museums, as if socks ran wild and were hunted for their fur.)  Once pressed flat, there was just enough material in each sock leg (including the ribbing) for one side panel of my sweater!

I experimented with sewing the seams flat, and I really like how it came out.  I overlapped the two pieces I was sewing together by 1/2″ (the same seam allowance as if I had sewed the seam 1/4″ from each edge, see what I mean?), feeling with my fingers for the edge of the layer underneath, and pinning in place.  I sewed a narrow zigzag close to the edge of the top layer, and then again about 1/4″ away, using parts of my machine foot against the edge as guides.  I used a walking foot, which I nearly always do for knits.

This method turned out to be only just slightly trickier for the curved seams connecting the sides to the front and back, so I did it there too.  I really like the slightly deconstructed look this gives it.


flat knit seams


I didn’t do the flat overlapped seams running down the sleeves, it would have been too much scrunching the sleeve up under the machine.  I did do it to attach the sleeves to the body though, and because of the raglan construction (not having to put in the whole sleeve in the round) it was pretty easy.

For the neckline, I kept the “v” of the original blue sweater, although in future I might add in some there just to make it a little cozier.  I knew that a section of scrap cashmere ribbing wouldn’t do anything much to keep the neckline from stretching all over the place, so I attached 1/4″ clear elastic first, stretching it to ease in the extra fabric and get the neck to lie flat, especially across the top of the shoulders.


sweater neckline


blue upcycled sweater back(By the way, I think the colors are truest in the two pictures above.  I’ve had trouble getting my white balance and purples to get along.)

So, I zigzaged on the ribbing at the hems and bottom of the sleeves as well, and there you have it.  I actually cut pieces for another purple section around the bottom, but I decided that I really liked the sock ribbing as the hem, and I liked the length when I tried it on, it allows another layer to peek out below.  And winter is coming, so I’m going to be wearing lots of layers!

I think the saddle shoulders may be my favorite part.  I’ve got plans for another franken-sweater using something I knit years ago.  I’m really pleased with how this came out, and looking forward to a DIY cozy winter!


blue upcycled sweater front


I’m in a Fashion Show at Flagstaff Photography Center


FPC Fashion show poster

Look, my name is on this poster!


I know what you’re thinking, I’m too short to be a model – but it’s not like that!  Actually, there’s an eclectic show at FPC this month, celebrating fashion, photography, and the intersection between art and what we wear, and featuring some of my work!


4 bags photo fashion


If you are in town, come by, I will be there this Thursday night for the fashion forum, and Friday during First Friday art walk.  I have a lovely selection of one of a kind purses, scarves, and wallets in the show, all made from recycled and handmade materials and totally unique!  Plus the work of four different photographers, and some totally wild and amazing macramé masks made by Sheree.


4 scraves photo fashion


If you’re not near Flagstaff, I’ve also been working feverishly on my latest project, which will be available worldwide, very soon if all goes well!


Half My Wardrobe in Detroit, and What I Did About It

Not as much as I would have liked.  But, contrary to the impression you may have gotten from this space, I did squeeze in a little sewing for myself the last time we were home.  When we leave the truck somewhere in art show land (otherwise known as the Midwest) and fly back home to get some r&r (or maybe embark on some crazy giant new project) I leave a bunch of my summer wardrobe out there.  This last time, I kind of did it to myself on purpose, packing even fewer of my summer tops than I reasonably could have fit in my luggage, hoping that it would motivate me to sew some new ones.

First, I finished a top I had been working on during the visit home before this one.  I wear a lot of tank tops in the summer, and I have been thinking about how to make some woven ones as well as the usual knits.  This one is a copy of a silk top, the cups of which I found flattering and comfortable.  During Me Made May, I fell in love with linen all over again, specifically this one mm green linen skirt, which is getting to the super soft and drapey stage of life.  I had this natural linen leftover from a long-ago project and thought I would try it out.


I lined only the cups, with thin soft cotton, catching them in the midriff seam and folding under and hand sewing the other sides, I like how it came out.  The original top has a scalloped satin stitch on the edges, and I decided to try something similar.  I also had some thick linen thread which I loved with the fabric, but no amount of coaxing and bigger needles would convince my machine this was a reasonable thing to work with, so I ended up using a narrow zigzag to hold in on the surface.  Both of the edge treatments are softer and more subtle after a few washings.  I made the straps using a thin piece of fabric from the selvage edge, wrapping it around a thin ribbon.


I wanted to make sure it came out long enough, and I may have overdone it, but the tunic length is working alright so far.  Funny how I don’t notice things in the original (like the back riding up) until I copy it.  Sigh.  I’ll also check out the front wrinkles before I make another one.

Next, I pulled out some pink knit leftover from another top to make a tank for yoga, of which I desperately needed more.  I had some narrow fold over elastic in my stash which should have been perfect, but for some reason every step of this project fought me tooth and nail and used up WAY more of my precious sewing time than was reasonable for something so simple and small!  I ripped a lot of seams.  I tried adding a self-fabric section for the hem which absolutely refused to look decent with any type of stitching.  Plus, when I tried the top on it seemed too tight and clingy, and I already have one round of tops made from this pattern (a heavily modified Kwik Sew 3524) which are NOT too tight and clingy!  Finally I realized that if I ripped the stitching from the little bit of elastic I had used as a test, I would have just enough to put around the bottom as well.  Which I did, and without even trying it on again, put it in my closet and wore it to yoga the next day (keep reading for a picture).  The top stitching on the elastic is beyond wonky.  But I needed it, I made it, and I was wearing it, and some days that just has to be enough.

After that, I made a pair of dainties, partly because I didn’t have much time left and they were cut out already, and partly to prove that my beloved Bernina and I do actually have a good relationship with knits.  Which in fact we do.


On our “real” return home for the fall a couple of weeks ago, I decided to make one more tank top before moving on to fall/winter sewing. I had a tee shirt with a hole in it that I had been meaning to convert into a wearable top for ages.  Unfortunately, it was cut so far off the grain of the knit that I couldn’t just use the the original hem, as Zoe suggests, and I had to cut the back and front shelf liner in two pieces each to get them to fit.  But I did use white top stitching, which I liked on the original shirt.


I liked this picot edge elastic, but it was not exactly soft, so I sandwiched it between the layers, sewing it to the liner first with a zigzag, and then the top layer with a twin needle.  For the straps I used a similar idea to the ribbon wrapping, but using plain elastic, zigzag, and the twin needle again.  This time everything went smoother, and start to finish, including experiments, took less than three hours.  That’s more like it!


See me being all zen about the pink top.  See how much clingier AND drapier it is than the blue one?  Crazy fabric difference.  I checked and the previous versions have stretched out with wear as well.  I might make the next one just slightly wider to start with.

Next up for my sewing, pants!  What are you making for the coming season? How do you figure out what fabric will do before you sew it?  I’m, um, still figuring that part out apparently. . .


Grateful Giveaway Part 1

Hello!  I am back at home, and feeling pretty good about things.  First of all, I just spent a week with some of my favorite women in the world, making all kinds of amazing things and stretching myself to a rare extent (more about this a little later).  If that’s not enough to be grateful for, I came back to flowers and a love note from my amazing husband.  Overall, I’m feeling pretty good about the life I’ve chosen.  So I thought I would share the love by giving away two of my Fiddleheads hats (and two more to come later)!


I have these extra hats because of a bad situation which is slowly resolving.  A long time ago now I sent some of my wares, including these hats, which were a brand new idea at the time, to a store in another state which turned out to be scamming artists and taking the money for their own pockets.  The slightly better part of the story is that artisans, communicating through Etsy, figured out what was going on, and the shop was shut down and contents seized by the attorney general of MO.  The much better part is that after much, much time in bureaucratic limbo, I was finally notified that they had “determined some of these goods to be” mine (maybe because they had my name and phone number on the tags?).  And after so much time had gone by that I had given up again, I received a box in the mail with a fair number of bags (appearing on Etsy this fall) and hats inside!  I doubt I will ever get any money out of this, but getting my unsold stuff back feels like a huge win.


When I first started making these hats, I didn’t realize how stretchy they would be, and I had more sizes.  Bryan always laughs at me for forgetting things I’ve made, I forgot that I used to make four sizes instead of three, and I forgot that I started out writing all the fabric tags myself!  I now think these two would fit around 3 – 9 months, on average of course.  As you can see there’s a classic blue and pink, each one with two tones, and more texture in the lighter color.  They are made from all recycled cashmere, making them super soft, eco-friendly, and washable.  I have made every one of the now many many of these that are around the country and the world, and I still love this design.

One of these would make a perfect gift for someone having a baby soon, as it should still fit when winter rolls around up here in the Northern hemisphere.


All you have to do to win is leave a comment!  Tell me which hat you would like and (yes this is for my marketing, small biz needs it too) what change having one of these would bring to your life/experience.  Open to anyone around the world, so tell your friends!  I will close the contest in just over a week, at 9 am Friday June 6 Arizona time.  I’ll choose a random winner for each hat and ship them out soon thereafter.

Hope you’re having a grateful week!

Recycled Elisabethan Shirt


Note the “s”, we’re not talking the era of Queen Elizabeth I today, but rather fabulous upcycled clothing made by my friend Beth!  She has been my confidant and mentor in the world of recycled fashion for a while, and when we saw her last week at the Fiesta Arts Fair in San Antonio, I decided it was high time to add a piece from her Elisabethan line to my own wardrobe.

I totally love this shirt!   The design is what makes it for me, those flattering and interesting curvy seams, and the fabric choices.  Me Made May is coming up fast, and while I didn’t make this shirt, it exemplifies what MMM is all about; making choices that reflect who we are and who we want to be.  It’s sustainable, made in USA, and did I mention fabulous, and comfortable?  Head on over to the Elisabethan site for lists of stores and shows where you can get your own!