A New Slow Sweater, What it Says, and the Idea of Knitting “And”


MMHenley 3


You know how sometimes you see someone, a stranger, and without meaning to, you imagine that whatever they’re wearing and whatever car they drive are the things they have chosen out of all possible options, that these things say something meaningful about their personality and their life? And then you look at yourself, your car, and maybe your clothes, and realize how many other circumstances played a part? I feel like we who make our own wardrobes move slowly (slowly, please cut yourself some slack, it’s going to be a process) towards the point where at least for what we wear it’s true: our clothes say exactly what we want them too. (My car is another story, I don’t know about yours. It does say that I would rather duct tape the mirror back on and buy better food than other possible options …)

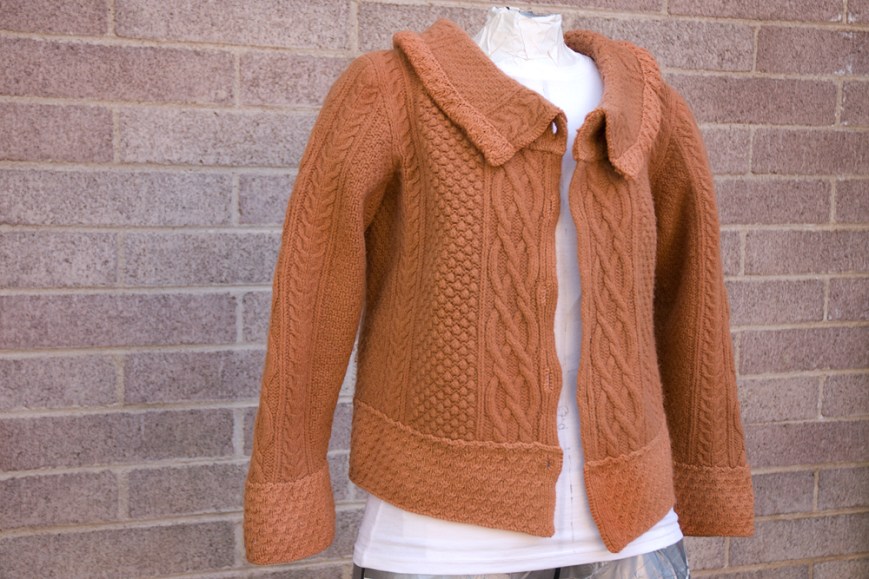
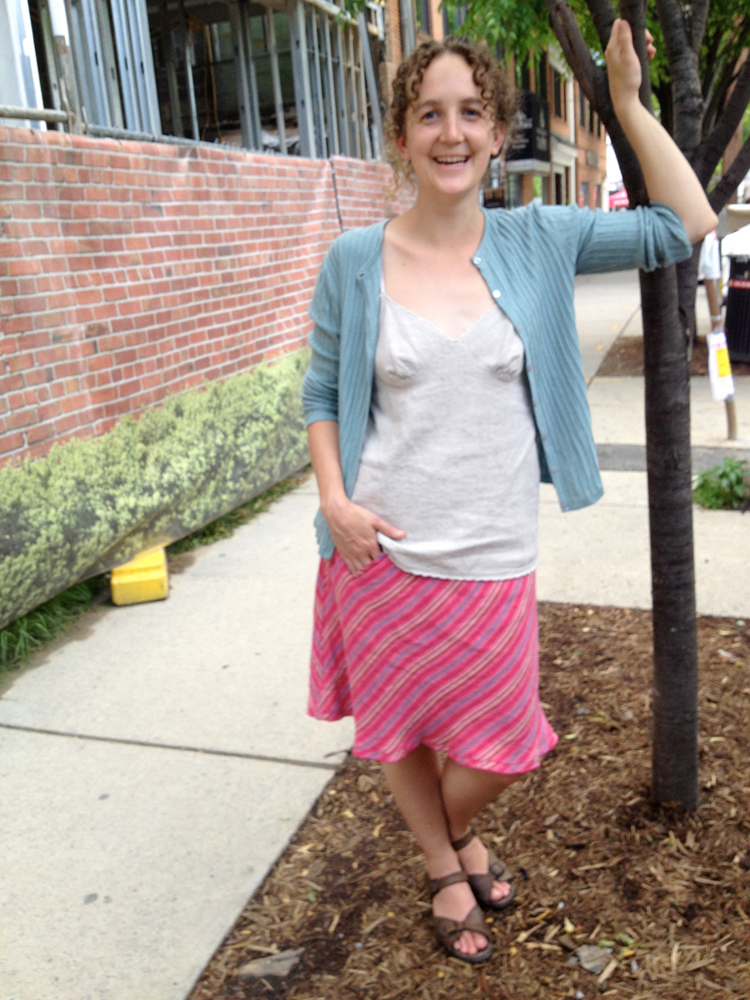
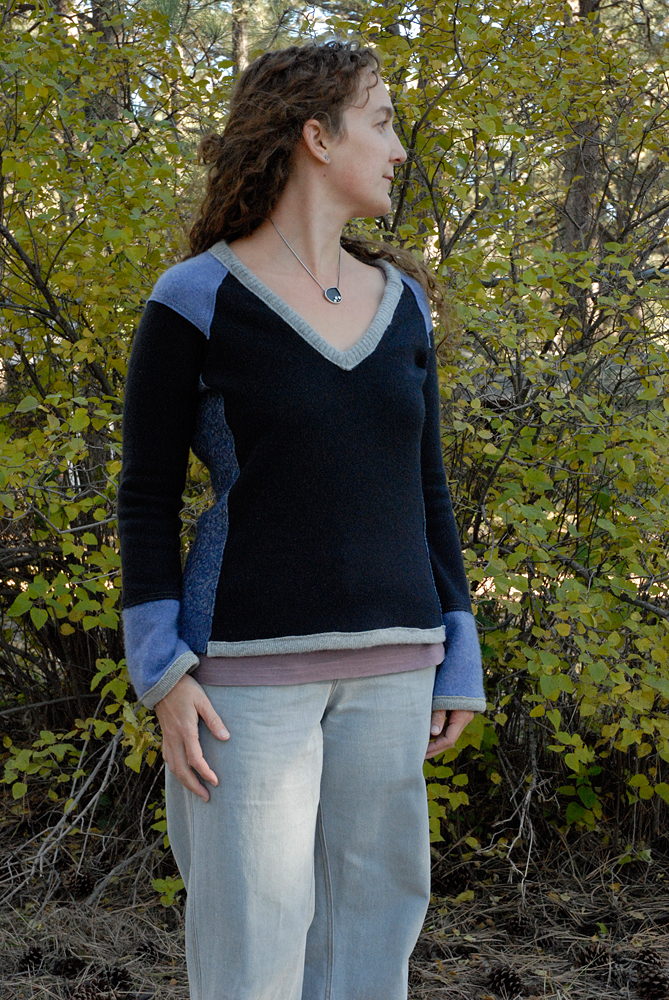
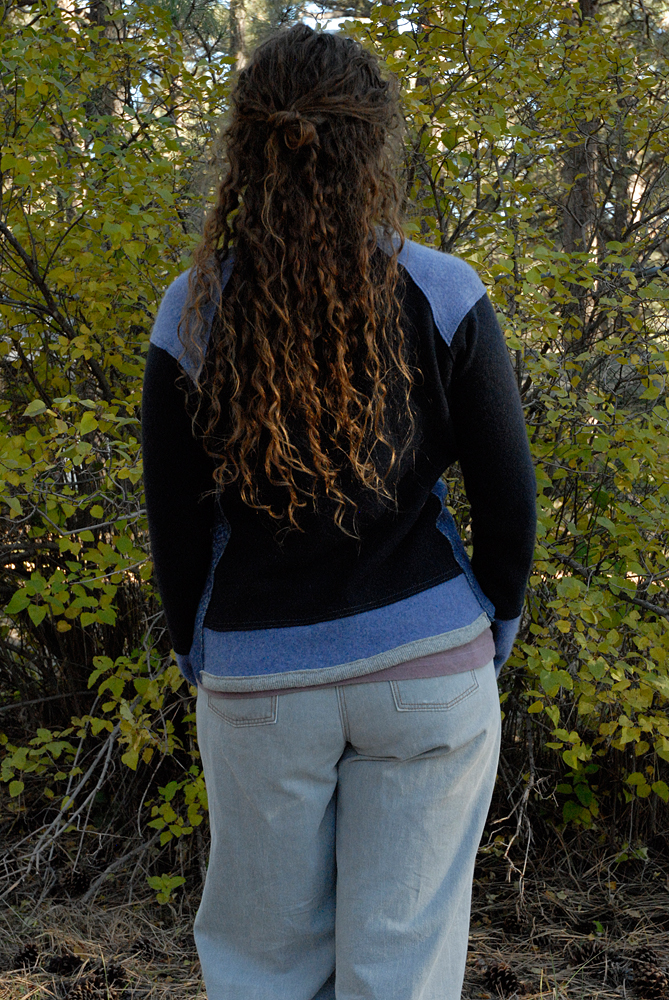
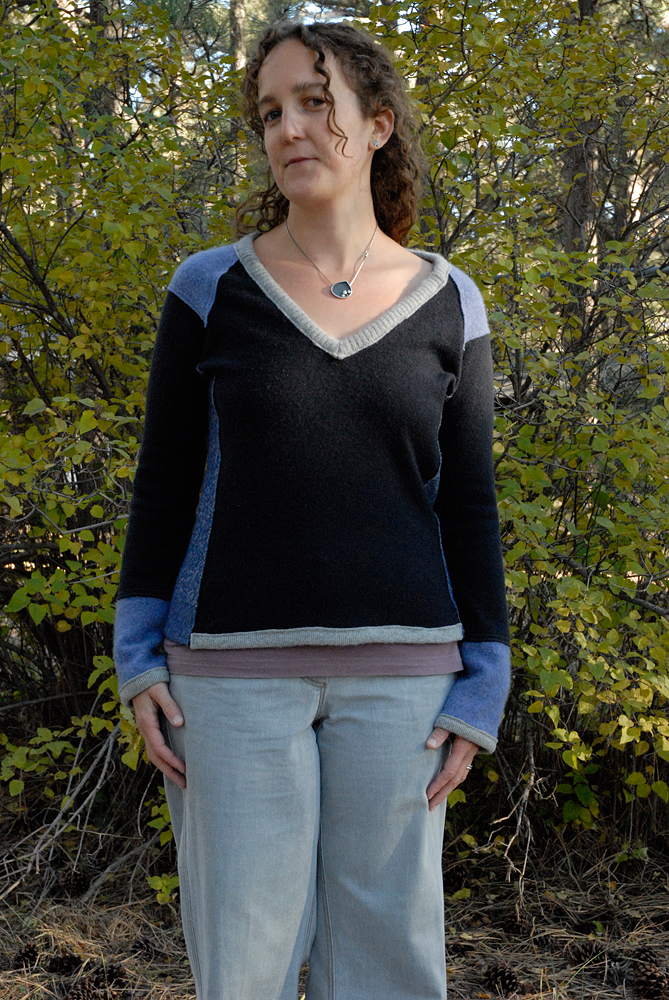
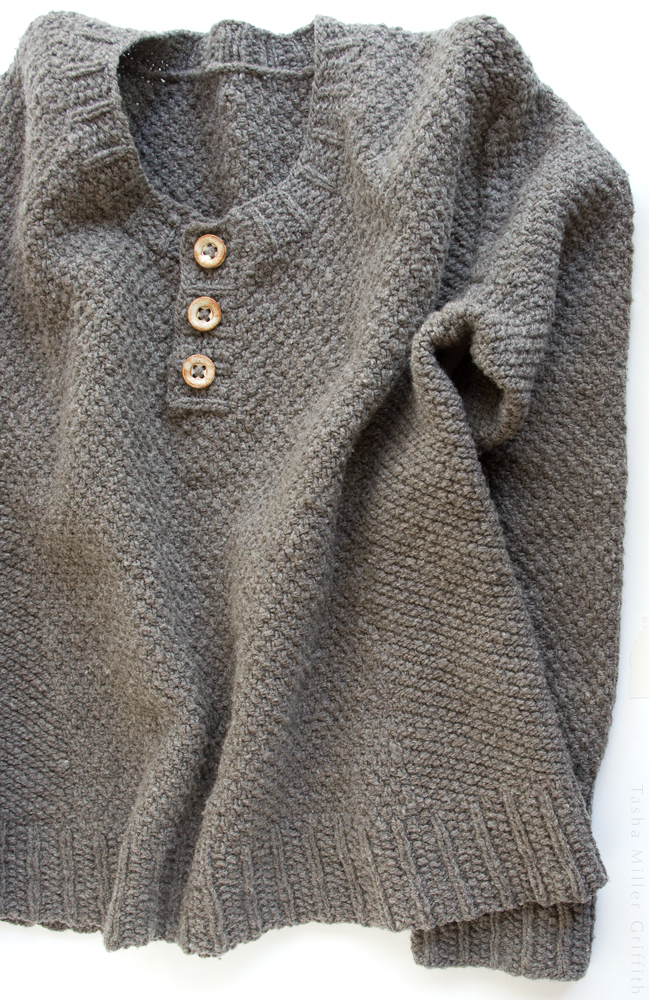
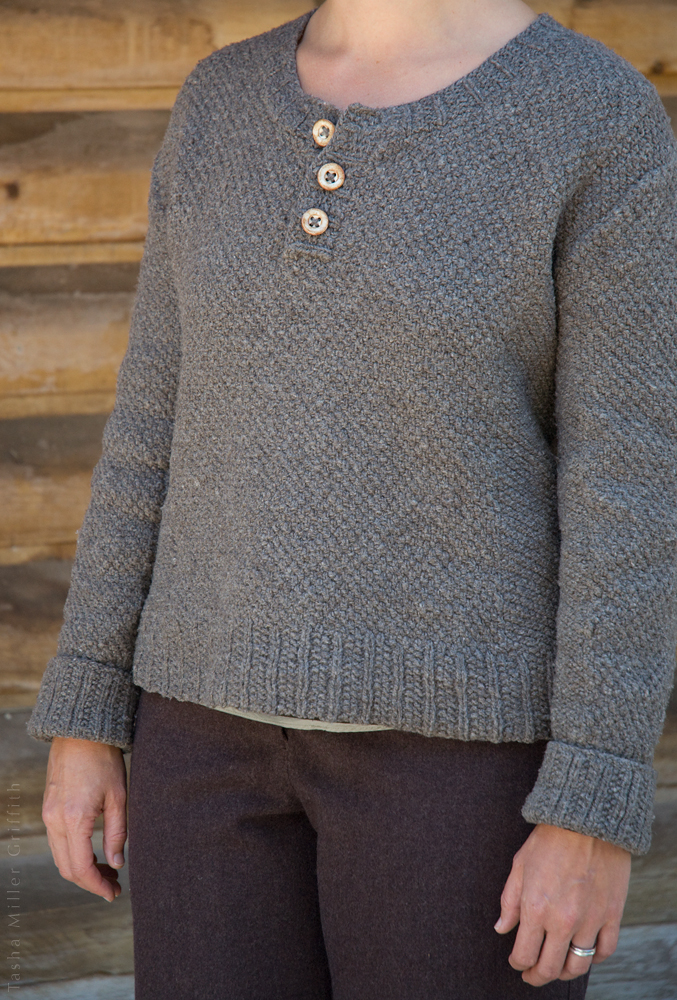
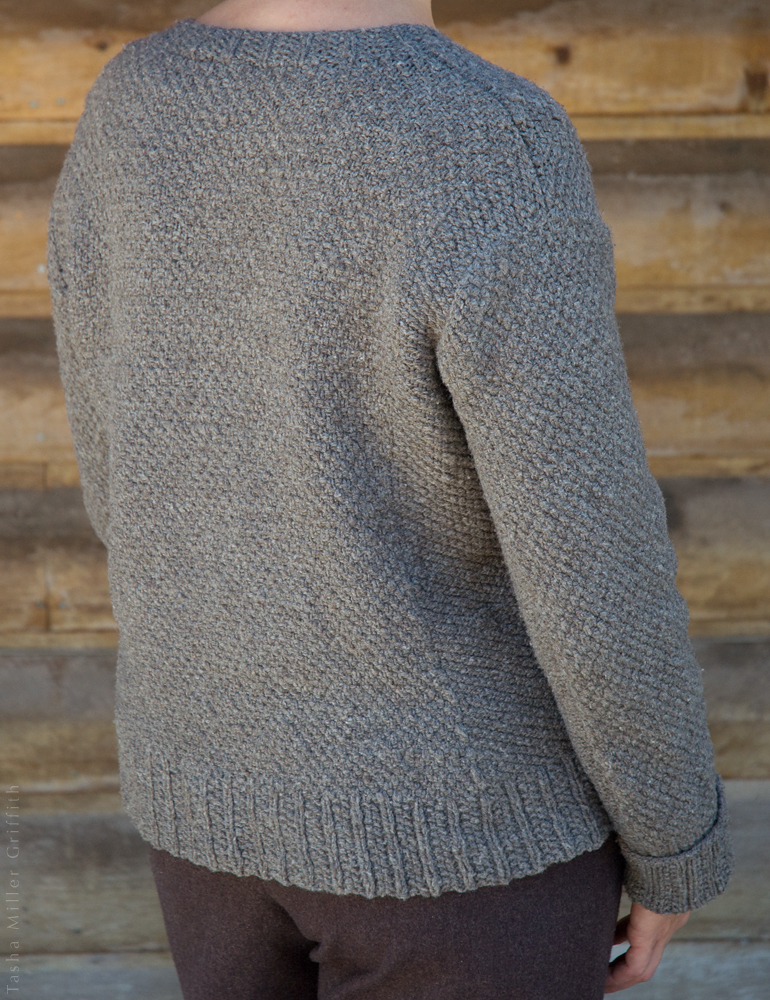
This sweater feels like a step towards what I want to say with my knitting. It’s made with Mountain Meadow Wool (they’re a woman-owned company using US wool from the West, committed to eco-friendly practices) in a sheep-grown color (“natural dark gray”) which I love. I feel like the message that real wool is beautiful and good comes through, even if you saw me and assumed I bought this sweater (although if you saw my car you’d know I couldn’t afford it). You can also see that I love texture and value detail, and hate being cold.


MMHenley 1


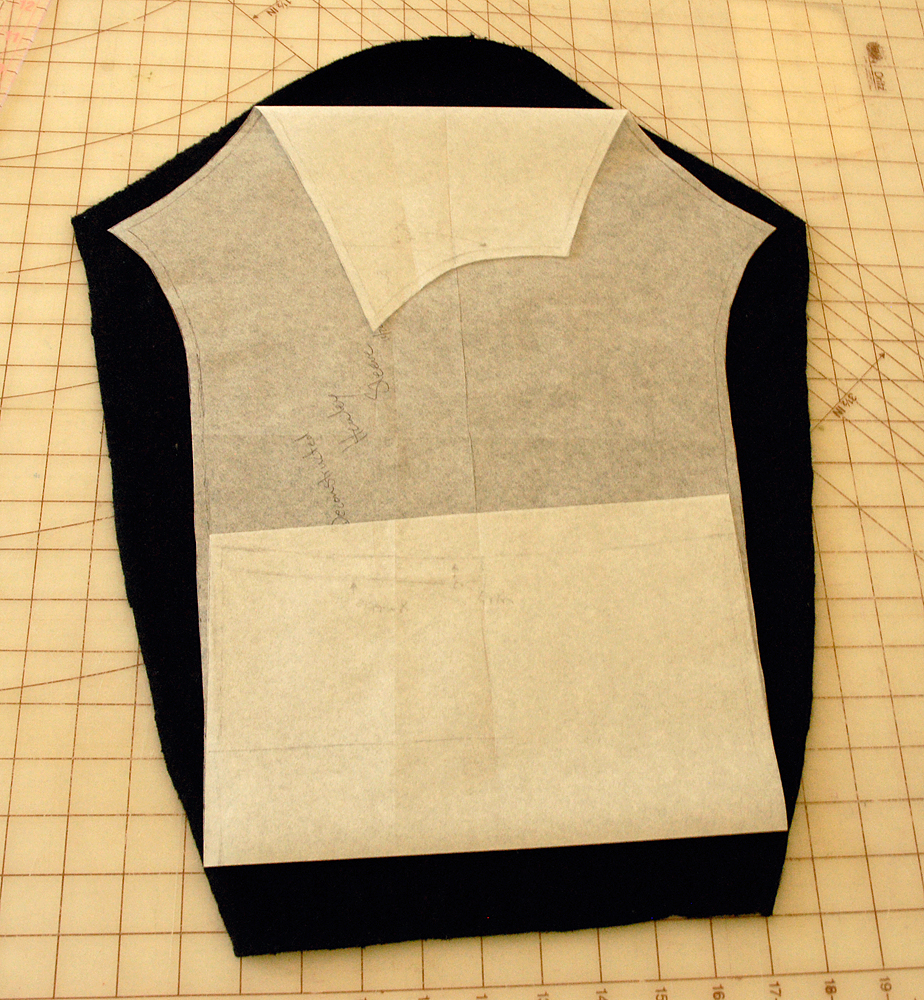
I’m pretty sure this was supposed to be my One Year, One Outfit project for 2016. I started planning it in late 2015, started knitting as spring came around, and brought it with me on the road last summer, but it took until this spring to finish. This was a long knit for a whole lot of reasons. The textured stitch patterns just take longer; there was more stopping and checking and thinking than with plain stockinette or one pattern all over. Sweaters are big, and pretty soon I wouldn’t necessarily take this one everywhere I went. Making something only loosely “inspired by” a pattern (the Cotswold Henley by Meghan Babin) takes a lot of thinking, and measuring, and planning, and sometimes ripping out and knitting again. All totally worth it, but time consuming, and sometimes I ended up not knitting because planning the knitting was daunting and I was too tired or overwhelmed.

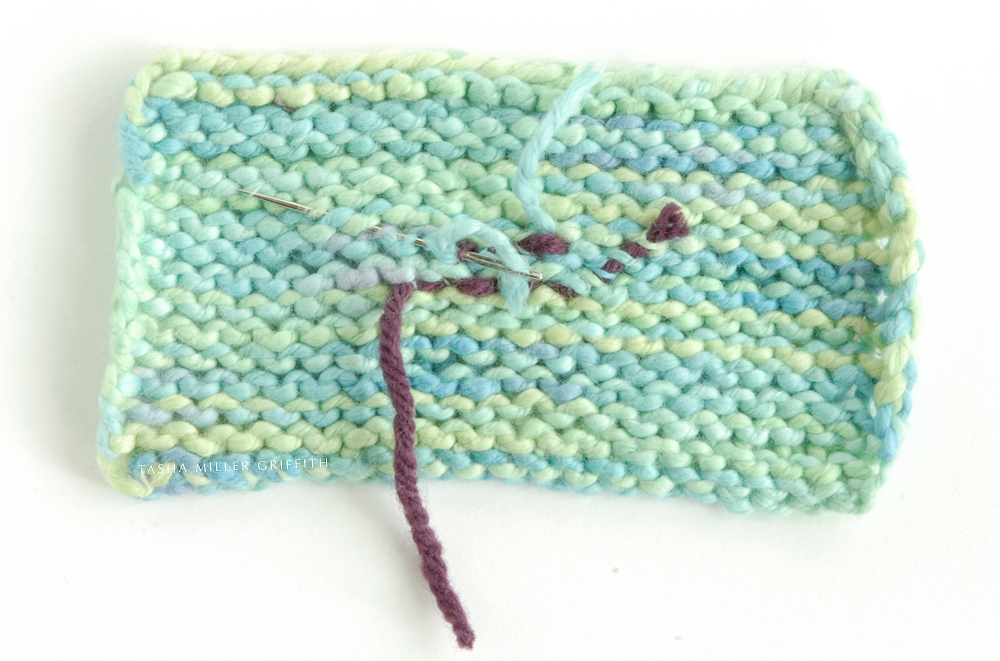
When we got home in the fall, I really wanted to keep making progress on it, so at first I decided I would work on the sweater before bed, instead of spinning, until the sweater was done. I love spinning before bed, and it has to be said that I did not love knitting the sweater during that time as much. Sometimes I would just skip it. After a while I realized that, although I’m not the kind who likes having a bunch of projects in progress, this was a false choice—it’s actually healthy for me to have a little knitting and a little spinning going on at the same time. I also realized something about how I like to work that I kind of already knew; knitting is an “and” activity for me. I love knitting while traveling, knitting while hanging out with friends, and knitting at meetings, but I really don’t love sitting quietly by myself and knitting. I’d rather do something else with that time. So I went the other way; I started spinning at night again, and hauling an extra tote bag full of sweater-in-progress with me to social events and anywhere else I could see that I might have some down time. That worked much better, and before long the sweater was actually done!


MMHenley 2


I believe that it’s done and that I knit it, but I’m having trouble believing that I get to keep it, if that makes any sense. In other words, I got pretty much exactly what I wanted. Of course there are a few things I’ll change in the next version, but there always are. I’ve decided that just shows that I’m still on a journey.

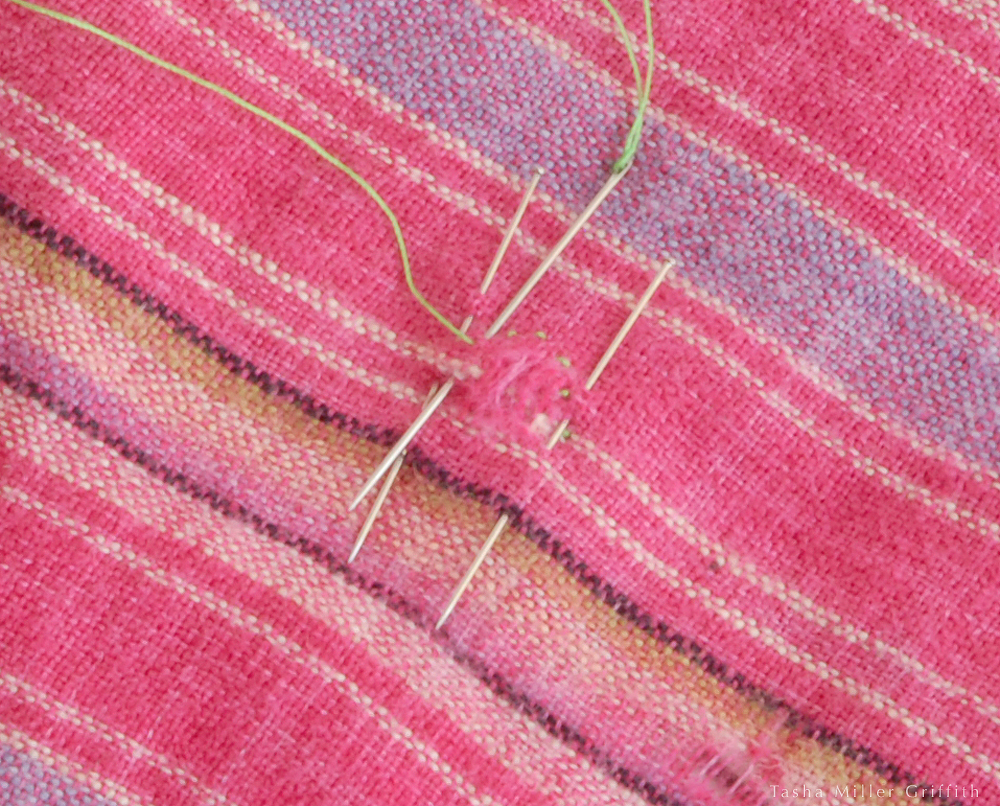
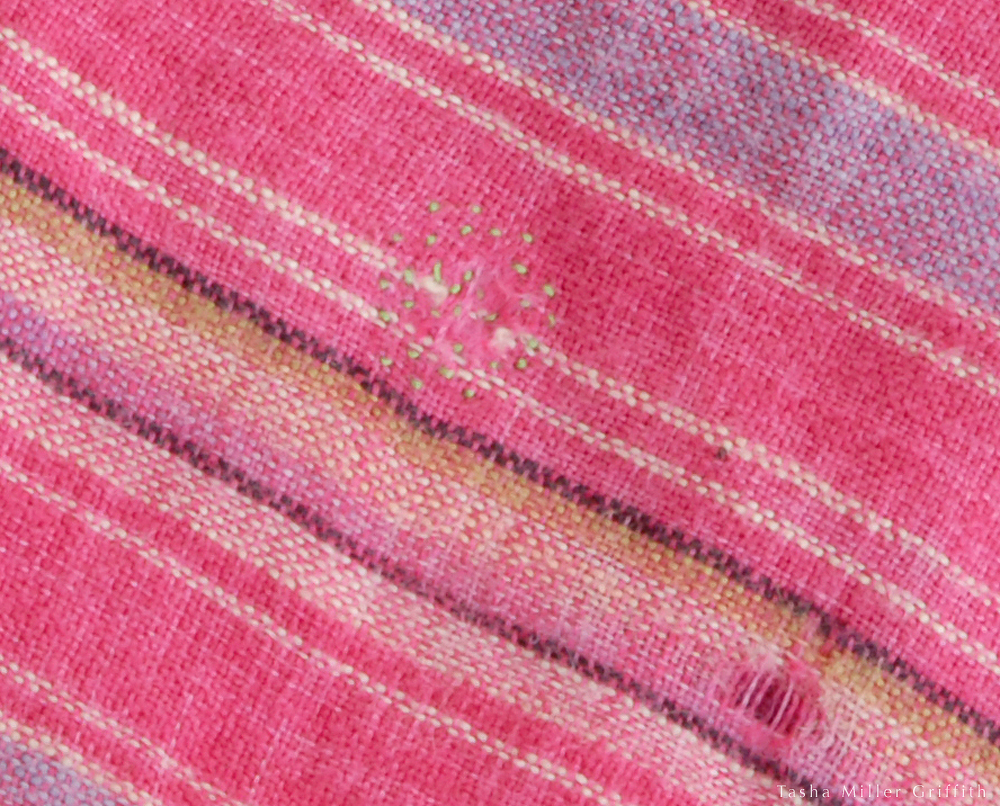
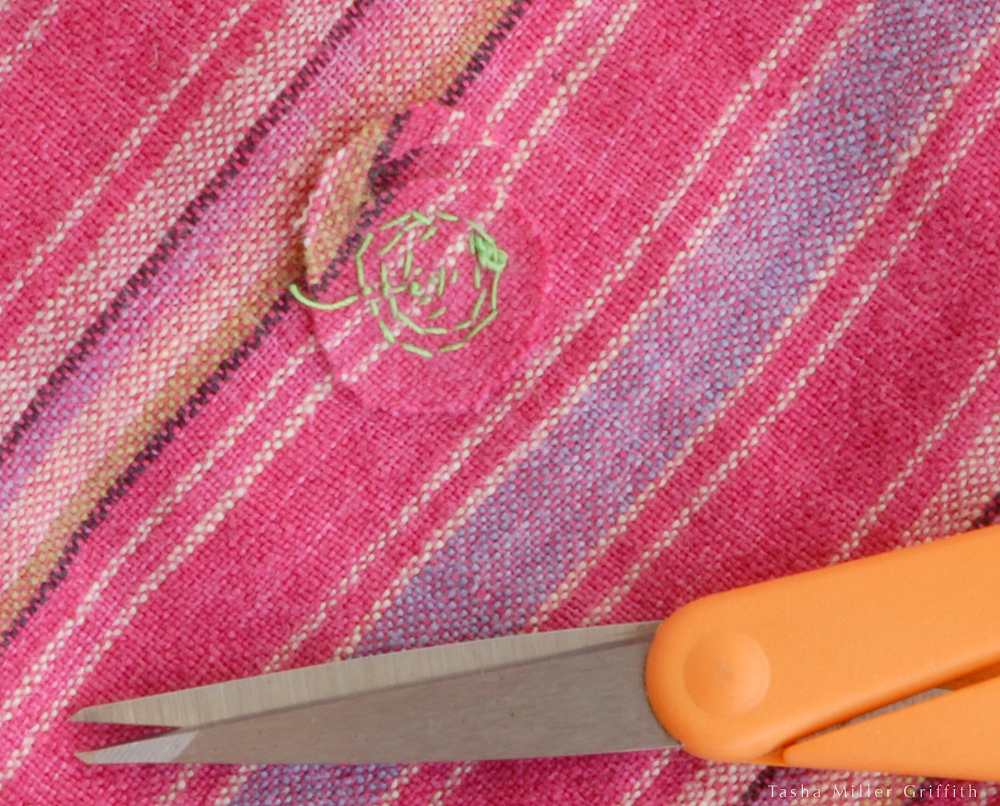
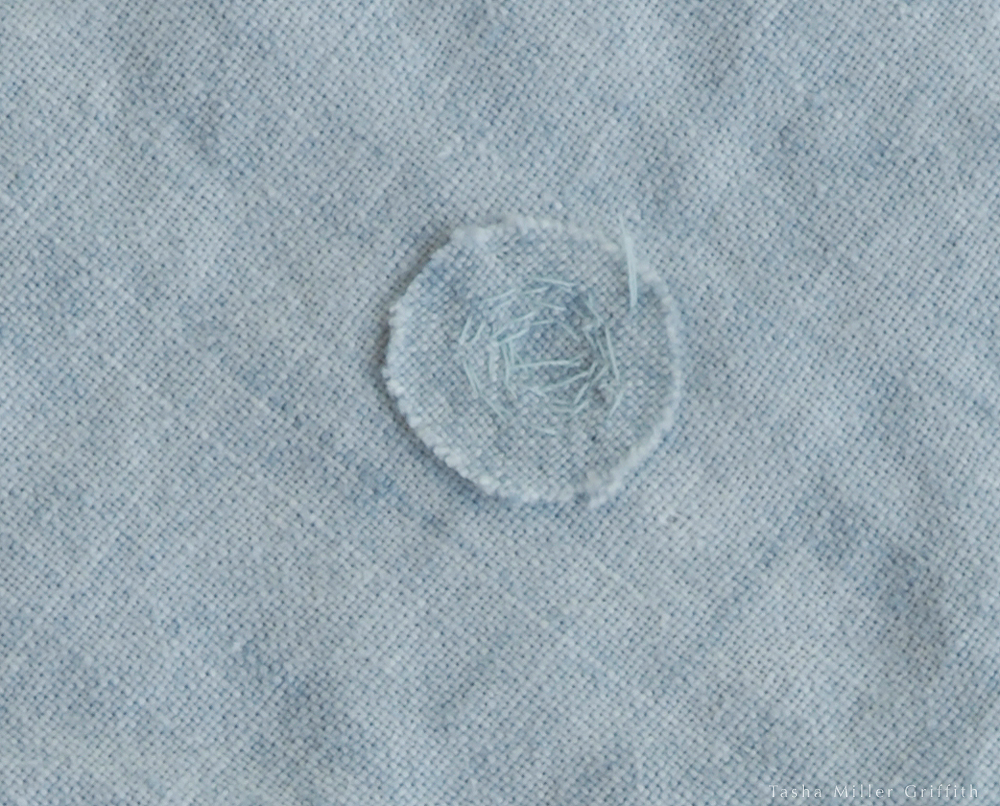
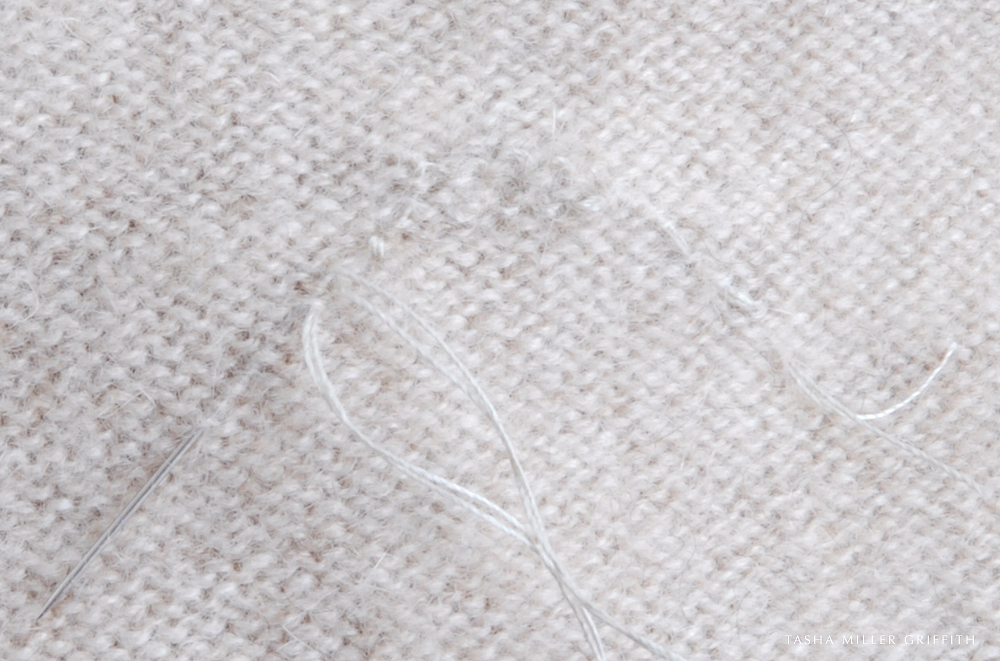
I started wearing it as soon as the last seam was sewn, and it went on quite a few outings this May, and into June in our variable mountain weather. The yarn has pilled some, but I’m hoping that how brilliantly it held up to being ripped out and re-knit (ahem) multiple times in certain sections means that the pills will be temporary and not terminal. I drafted Bryan to take the photos of it on me on the last cool day we’re likely to have until fall, and then carefully packed it away. Getting it out when the weather turns again is going to be such a treat!


MMHenley 4

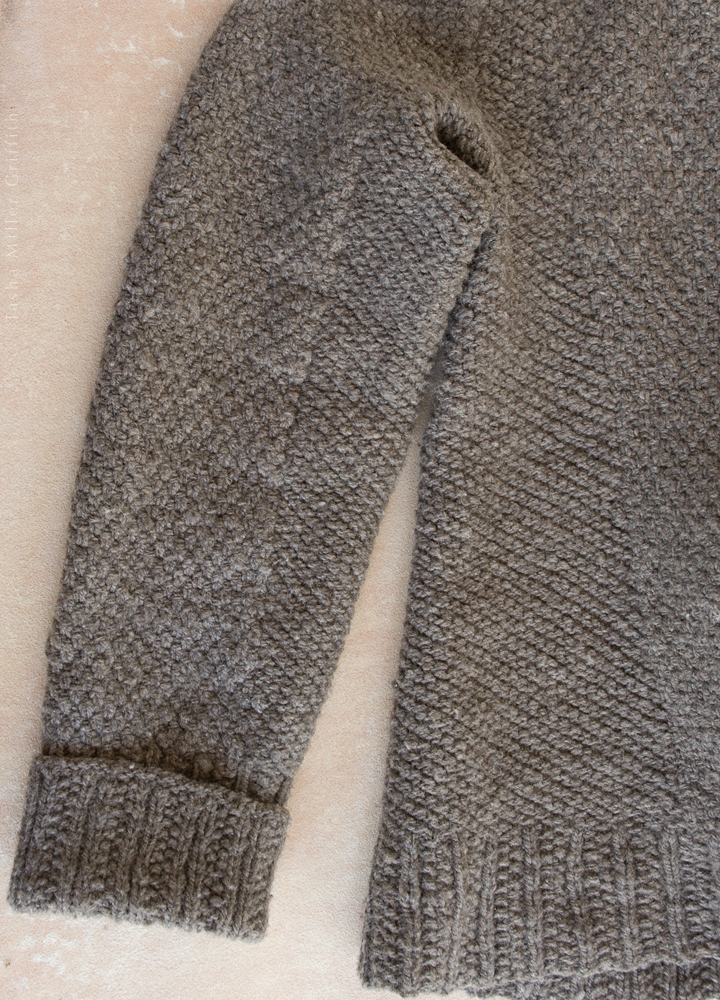
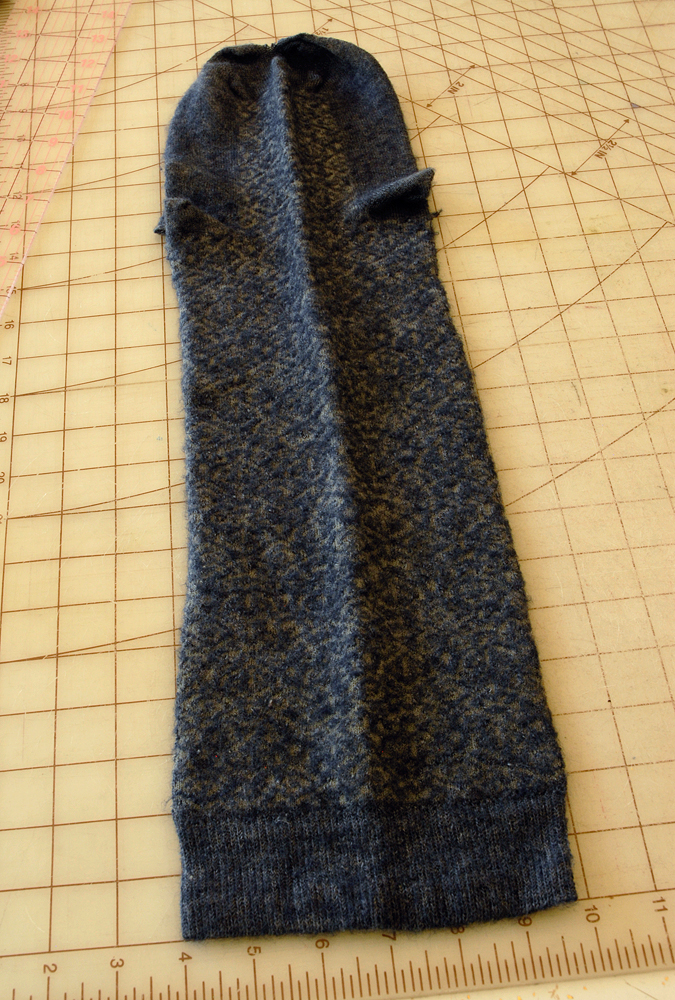
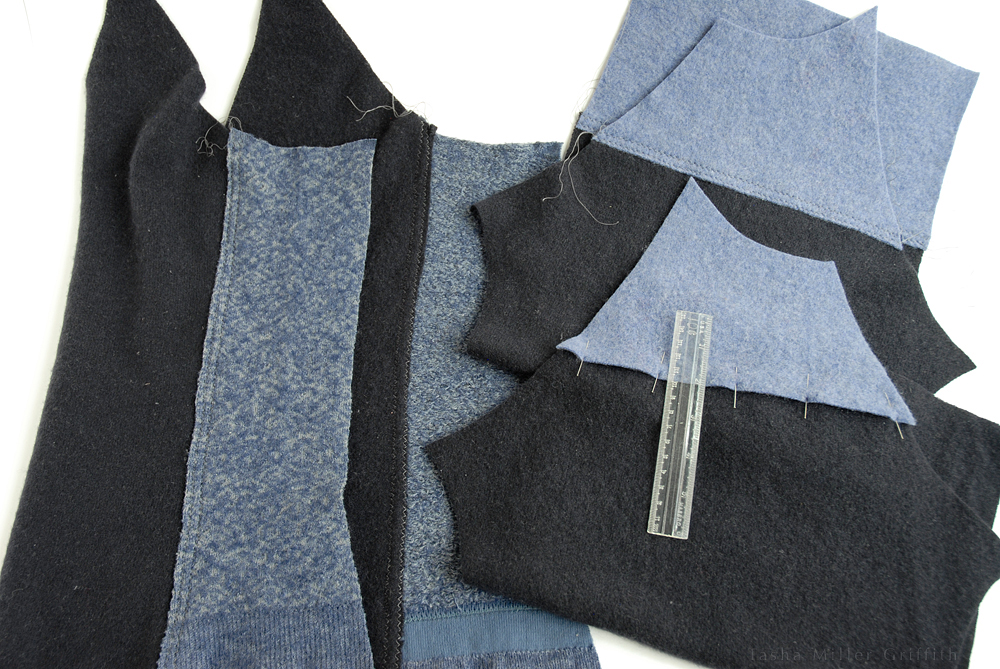
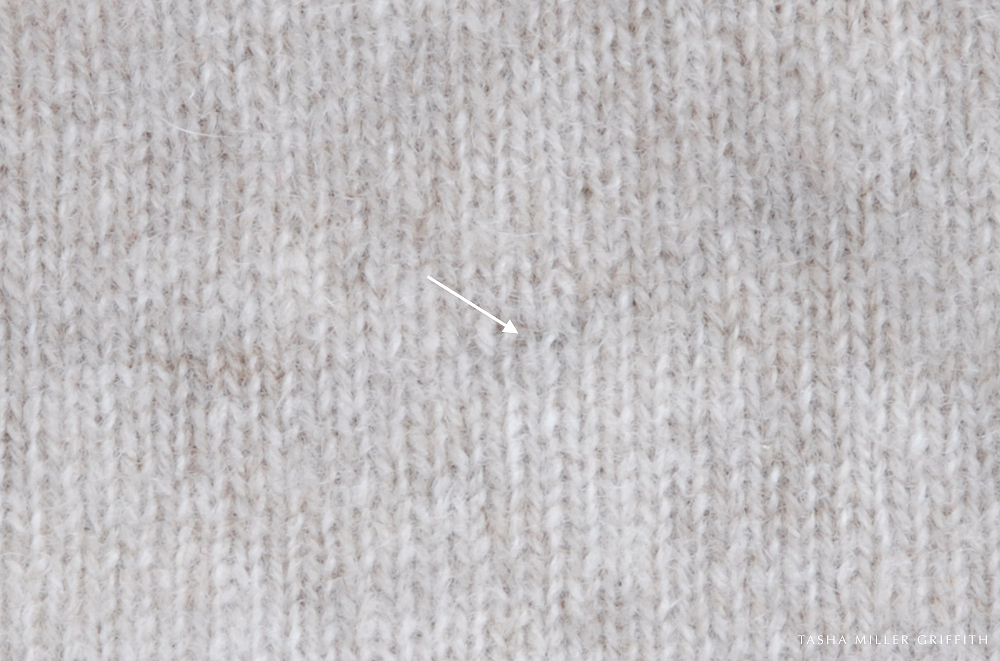
There are two different stitch patterns, but they’re hard to see unless you’re really looking. I possibly should have gone with something bolder/more contrast, but then again subtle is my jam …


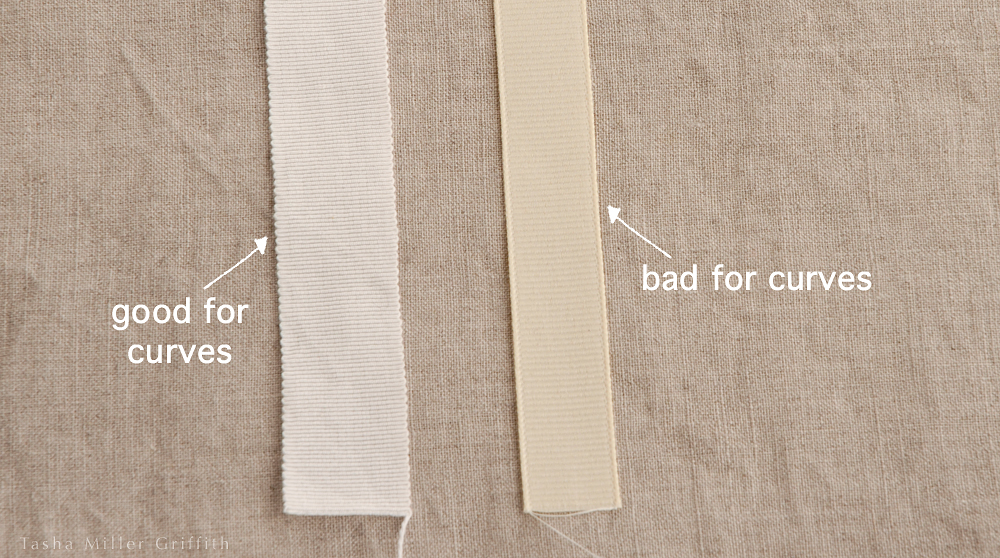
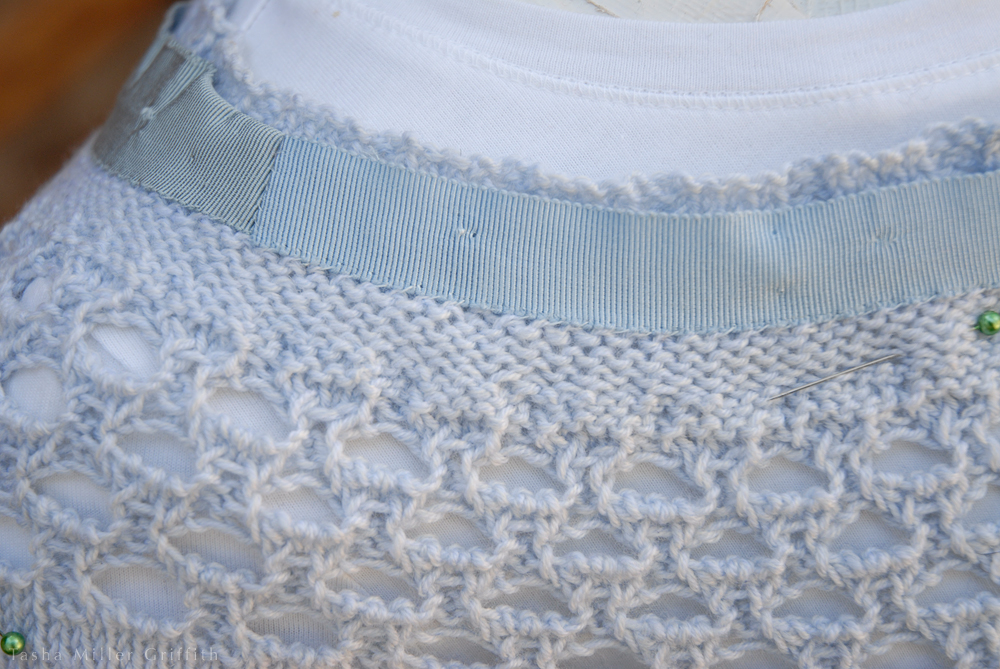
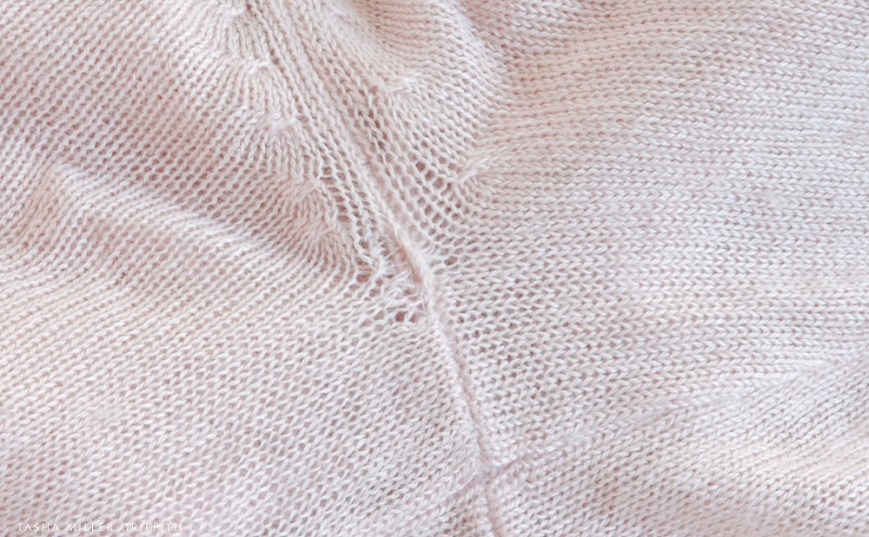
A few knitting notes: I wanted this to fit over my thickest winter shirt/sub-sweater (I hate being cold). I used Karen Templer’s idea of in-the-round “seams”. This is seriously brilliant as far as I’m concerned. Knitting seems so perfectly adapted to be made in the round, to be shaped organically, to be seamless, and I’ve never been willing to give all that up for the structure that seams can add. Now I just might get both! I made a pretty detailed/extensive chart of measurements for various sections of the sweater when I was planning where the “seams” would go and how big the whole thing should be, based on trying on an old sweater and marking it with pins. I’m really looking forward to having that chart and this sweater for planning future sweaters. I’ll be able to look at them and compare pattern measurements and know how big I want the sleeves, or how wide across the shoulders, etc.


MMHenley 5

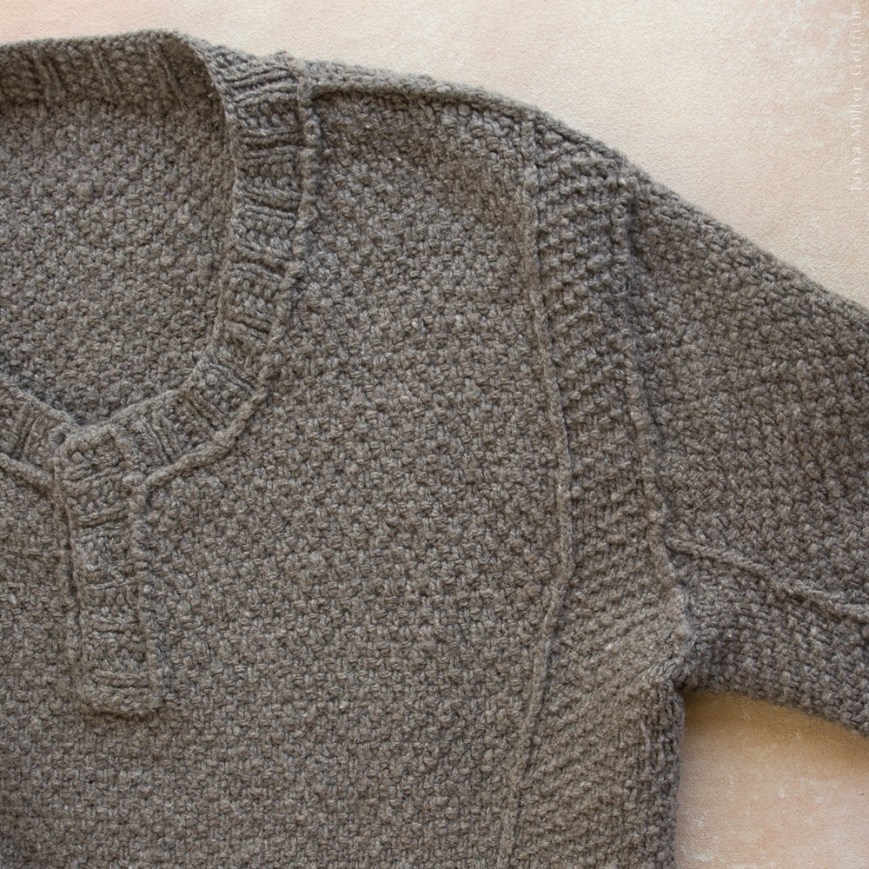
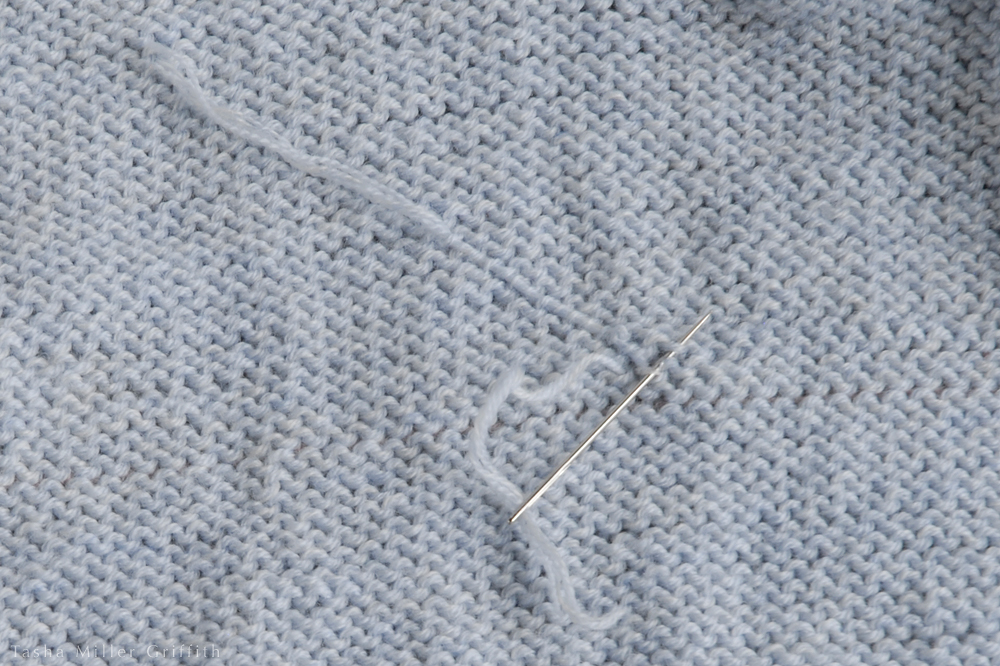
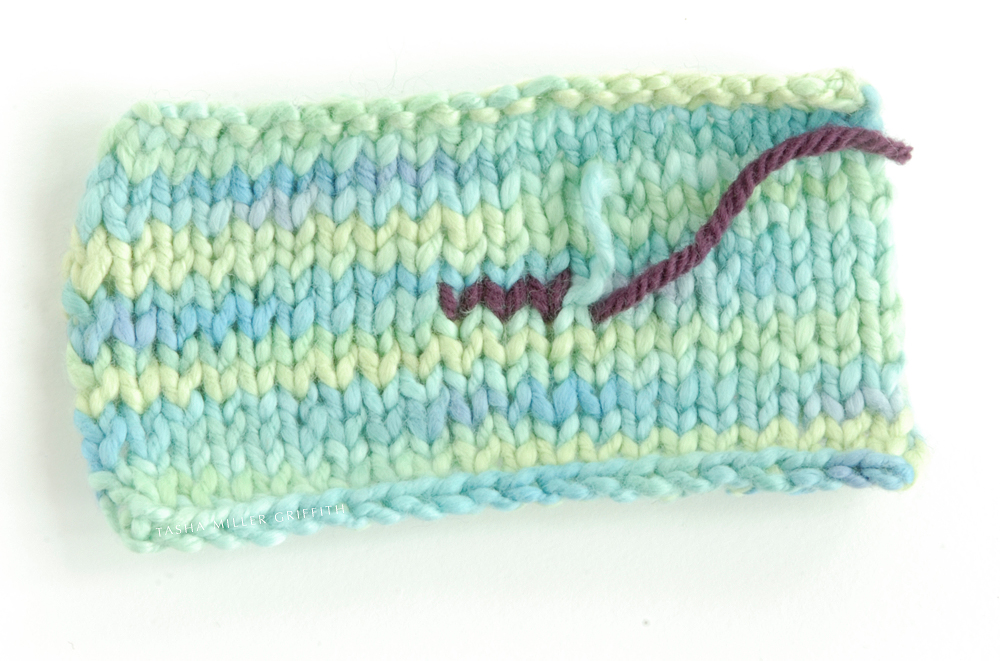
Guts: Picked up stitches around the neck/placket, and where the sleeve joins the body. “Seams” closed with mattress stitch between the two stitch patterns vertically in the body, and horizontally near the bottom of the sleeves.


For now, I’m enjoying knitting socks in spare moments. Compared to this sweater, they seem to appear instantaneously! I have a pair almost done already. I think the speed is mostly due to the “and” factor; socks are really suited to occupying my hands while other things are going on. They’re small enough for me to keep the whole project in the bag I usually carry, and I purposefully kept the stitch patterns simple enough that I can keep track without needing to refer to a pattern most of the time—which also means I don’t have to stop much for deep thinking. I could really use some new socks, so I may just make a few pairs before settling down to anything big and complicated again.

I’d love to hear any thoughts you want to share about big versus small projects, or crafts you like to do on your own in a quiet space versus things that are good for groups and busy times, or where you are in your journey of what you’d like your wardrobe to say …


MMHenley 6


A Failed Attempt


It’s so tempting for our online lives to show only the bright side; just our beautiful finished projects (neatly ironed), our best ideas translated fluidly into tangible objects. I’ve definitely swept my share of failed makes under the rug, never to see the digital light of day. And actually I think that’s fine too—some things we learn from, and some we just don’t want to talk about. I’m going to talk a little bit about this one though, and see how it goes.


failed refashioned sweater 2


I had so many reasons to love this sweater and try to save it. My mom knit it for my grandma, and after my grandma passed on I took it, thinking I could turn it into something I would wear. It started out as your classic grandma Aran cardigan; white and long and covered in cables and textures, slightly too big for me, with a high neckline and little pearly buttons. Although I’m sure it could have fit right into some people’s wardrobes with minor adjustments, it made me look ridiculous. Maybe I should have stopped right there, but I have a lot of faith that things can be refashioned to work in a new wardrobe (built on a solid foundation of makes that have worked out).

My first attempt to refashion the sweater was a few years ago, and included: shrinking/felting it slightly, dyeing it with tea, widening the neckline, and knitting new bands for the bottom and cuffs. It was a fair amount of effort, and I still didn’t wear it much. It felt strange, and the strain on the neckline proved too much, the yarn started to pop in several places. Not sure what to do next, I put it in a plastic bin in the garage, and there it sat, occasionally nagging at the back of my mind.

I got it out again last fall at the start of Slow Fashion October. What could be a more appropriate project? And I had a plan, in several steps, thought out beforehand, which looked good in my head. I trust those plans and my ability to envision how they will come out.

I dyed more yarn and ribbon in tea. I stitched the ribbon in to reinforce the neckline. I shorted the body and used the extra to add a collar onto the (ridiculously wide) neck. I figured out what stitch pattern I had used before, and knit another piece for the collar, and then another one because the first one didn’t work (actually I think there were three attempts at the collar). I wasn’t convinced it was great, but I also wasn’t able to take a step back from all I had invested, and I went ahead and overdyed the whole thing  with madder, hoping for some kind of warm soft brown. It came out, well, salmon, and that’s when I was forced to take a step back.

It wasn’t just the color, it was the spottiness of the color that really got me down. I knew this could be an issue dyeing garments (even though I haven’t had many problems using tea) and I had tried to strategize against splotches, but evidently not well enough. On top of all that, it was inescapably not my style—particularly that blasted collar.


failed refashioned sweater 3


I put it down, knowing it was no good, but not emotionally ready to let it go. It’s been a while since I had a downright project failure, particularly of something that I put this much effort and planning into. I still have plenty of “um, well, I won’t do that again,” learning moments, but at this point in my creating life, the results are usually fixable, or cause just a minor inconvenience in the finished garment. I had kind of forgotten what it feels like to have to give up completely on something that I’d worked so hard on, and how it takes the wind out of your making sails for a while. I definitely felt a little intimidated to start another project after this one.

The best silver lining I can come up with so far is this: that remembering this feeling is good for me as a teacher, in the same way that remembering what it’s like to be a beginner is good for me. There’s one big difference though: being a beginner is super fun if you have confidence you’ll get there in the end, but making a failed project is still no fun at all. I do know that my present confidence and skill is built on a whole bunch of projects that didn’t go very well (to one degree or another). And I’ve reminded myself that no time is ever wasted, as long as you’re making and learning, and enjoying the process. I just finished reading Big Magic by Elizabeth Gilbert, and one of my favorite things about that book is how much she is reassuringly down-to-earth about stuff like this: everyone fails, everyone has droughts of creativity, and crises of confidence (even highly successful authors). What makes the difference is whether we can use the good parts of a bad experience to move forward, or we get so bogged down in the bad parts that we give up on this path entirely and look for another one.

Needless to say, one crummy sweater will not derail me from the path of any of the fiber arts I love. Thinking about this one still stings a bit, mostly because I can still see the potential in some parts of it … but I’ve accepted that I cannot make it into what I want, and I’m ready to put it in the charity pile, and let it go to meet its future, which whatever that may be, is not my responsibility any more. It took a couple months of the sweater sitting in the corner in our bedroom for me to get to this point. To tell the truth I think, with the benefit of a little hindsight, that the whole second attempt was doomed, because the neckline from the first attempt was beyond saving.

But now, I’m ready to take what I learned, leave the sweater behind, and move on. I still trust my instincts, and my ability to plan a project in my head before I start. These skills are built on years of experience, and usually the plan works. Even when it doesn’t, it’s another step moving me forward on a path which I believe in with my whole heart.


Blocking Knitting Without Special Equipment

When I mention blocking your knitting, I get a lot of blank looks from my students, and concern about how to do it and what they need to make it happen. Although it can be a magical transformation, it doesn’t need to be mysterious. And although there are a bunch of gadgets (special mats and pins, forms, blocking wires etc.) sold specifically for blocking, you don’t need to use any of those to get good results.  Some pins and a place to hold them will do, and sometimes you don’t even need that.

 
lupine cowl blocking


What does blocking mean anyway?

Blocking is actually a simple concept.  It just means using water and/or steam to set the final shape of something after you knit it.  As you knit, you make a new structure—a fabric—with your yarn. When the fabric gets wet, the yarn has a chance to settle into its new shape.  Sometimes it can change quite a bit, expanding or relaxing in response to the tensions (or lack of) that are now on it.

In blocking we take advantage of the fact that the yarn can form new shapes, and influence those shapes in the direction we want.  This can be as simple as gently stretching and patting a sweater so that it looks good flat, and leaving it to dry.  Sometimes more dramatic blocking is part of what makes a pattern shine, like stretching lace as much as possible to make the most of the open areas in the pattern.

Essentially, blocking is getting your knitting wet, shaping it how you want it to be, and holding it in that shape until it dries.


Why wet?

Yarns, especially wool ones, can change shape much more easily when they’re wet.  This is because of the structure of the fibers themselves.  (If you’re curious about the science of wool and haven’t seen the wool article I wrote for this month’s Seamwork, check it out!)

You can also stretch/shape your object while it’s dry, and then steam it to set the shape.  In general, I prefer the wet method for a few reasons.  It’s gentler on the fibers, and gives them a chance to relax before being under tension. It also gives a good idea of what your finished project will be like when it’s washed later.  A damp yarn object is easier to shape.  And when you finish knitting something, it may have been dragged all over hither and yon and have oils from your hands (or sticky stuff from your toddler) on it, and washing it is probably not a bad idea anyway.  (Hey—my favorite method for hand-washing is in that wool article too—good timing!)  (And speaking of good timing, Karen posted an eloquent argument this morning about why you should wash/block a swatch before embarking on a big project.  This is especially important when you’re making something like a sweater, where the final size/fit/drape is crucial to success.)


Does everything need blocking?

Not really.  I do wash all my finished knitting projects, shape them gently with my hands, and then leave them to dry.  But not everything needs to be pinned out, or to dry in an exact shape.  Socks, for example, are meant to be a little smaller than my foot, and to take on the exact shape of my foot when I wear them, so I don’t see much point in carefully shaping them before wearing.


How do I block something without special gadgets?

Everyone should have sewing pins, they’re useful for all kinds of things.  I’m not counting them as special equipment, but, it’s worth getting some with large, easy-to-see heads if you don’t have them already.  I like plain flat-head pins for sewing, but they get lost in the structure of hand knits.

The only other thing you need is a surface where your knits can dry that you can pin into.  A lot of times I use the same folded piece of flannel that I iron on.  An ironing board or a couch cushion covered with a towel are good choices for small projects.  For big items I stretch an old sheet over my bed (see below).


blocking shawl 1I tuck a doubled-over old sheet in tight over the bed covers.  That provides enough tension to hold in place when I pin onto it.  Plus it protects the covers from pin marks or any dye transfer from the yarn.  (Forgive the weird indoor lighting.  I wanted to show how I actually do this, but our bedroom is not ideal for photos …)

 
When your finished project is clean and damp, it’s ready to block.  Stretch and shape it with your hands, patting wrinkled areas out, smoothing ridges parallel, etc.  Pin in place any pieces that try to shrink back, away from the shape you want.


blocking shawl 2For this shawl, I pinned it at regular intervals along the straight edge, and intermittently along the other two edges.  You may have to move the pins as you smooth out the whole project, and that’s fine.  (This is my Indigo Boomerang, made with handspun.  More details are on Ravelry, and pictures of it worn are also in this post on slowness.)

 
For the cowl at the top of the post, I wanted to stretch the lace sections, but not the plain knitting in between.  I could have blocked it flat, a couple of sections at a time, and that would probably have worked fine, especially if I steamed it.  Instead I decided to experiment with different sizes of rolled up towels, and found a combo which was the right size to block it around.  I opened up the lace with my fingers while it was damp, and pinned the two edges parallel.

When your blocked knitting is dry, take out the pins and check out the shape.  If there are any parts you’re not happy with, or little pulled areas from the pins, those are great places to steam.  Hold your iron over the part you want to adjust (don’t flatten it) and fill it with steam.  Then take the iron away and reshape it with your fingers.


Will I have to block my knitting every time I wash it?

Probably not.  The most dramatic change takes place the first time the yarn gets wet in its new knitted shape.  Unless something extreme happens to it, it will stay more or less how you blocked it, with the additional influence of how it’s worn.  Lace may need to be re-blocked to look its crispest, but it won’t go all the way back to how it looked before you blocked it the first time.  For most items, a quick smoothing/stretching with your hands, before letting them dry flat is enough.  I like to drape bigger things like the shawl over the top of a wooden drying rack, using lower bars of the rack to hold the ends so that no part gets too stretched by gravity, or too folded and wrinkly, while it’s drying.

If your project does dry with wrinkles, a little steam will fix that right up.

I hope this helps demystify blocking for you!  The more we can all understand what’s going on with our yarn at various stages and why, the more we can get the results we want.  Happy knitting!


Me-Knit Blue Sweater with Lace

Plus some tips for finishing hand knits.


blue talamh sweater 2


First things first: stop press!  I finished the sweater which I started knitting in Me-Made-May this year!  Between times when I made a real effort to work on it at least an hour a day while on the road, and times when I was back at home and pretty much ignoring it completely, it averaged out to just about 6 months start to finish.  And I’m fine with that, I mean, it’s hand-knitting an entire sweater.


blue talamh sweater 5


An entire sweater which I’m pretty much totally in love with.  This is the Talamh pattern by Carol Feller.  I wanted a pattern with some lace, but also some edgyness, some modernity, and I thought the lace pattern she used really fit the bill.  I added the wide lace section to the center back (it looks awesome, right?) but otherwise actually made fewer changes than I normally do when I’m knitting someone else’s pattern.  If you’re interested, I decided to keep those notes on Ravelry this time, feel free to check them out!


blue talamh sweater 3


In this space, aside from how pleased I am with this project, I thought I’d share a bit about finishing, specifically sewing in a ribbon for stabilization around the neck (which totally saved this sweater!) and how I “weave in” yarn ends.


Adding grosgrain ribbon

As I was blocking this sweater (basically just getting it wet, stretching the lace out a bit, and smoothing out bumps before letting it dry) I decided to try putting it over my dress form (if it’s good enough for Kate Davies, it’s good enough for me!).  But the sweater kept slipping down, and, rather than pin it up every inch or so, I decided to let it dry flat.  Well, after it was dry and I tried it on in front of the mirror, the same thing happened.  The join between the body and the sleeves is a bit low anyway (my fault, and one of only two things I’d probably change if I make a sweater like this again).  As the neckline stretched wider, the underarms and the whole rest of the sweater sagged downward until it looked fairly ridiculous, at which point I’d tug the neck up again.  Clearly, the loose-ish ribbing at the top was not enough to hold the rest of the sweater in place.


blue talamh sweater ribbon 3


I had stabilized various parts of other sweaters with ribbon before, and it occurred to me that I could try it here.  I opened the drawer where I keep bits of ribbon, and there were two lovely grosgrain sections, probably salvaged from recycled sweaters, that both almost matched perfectly!  And each was a width to fit under part of the ribbing on the sweater.  Call it good karma for using up this yarn I’ve had for ages, or proof that if you save the good stuff, it does actually come in handy later.

Pinning the sweater inside out on my dress form to hold it in place, I shaped the ribbon around the curves and steamed it lightly to match them.


blue talamh sweater ribbon 1


Note that in order to curve nicely like this, you need authentic grosgrain ribbon, the kind with the bumpy edges, where the thick yarns in it are free to move a bit.  “Grosgrain” ribbon from your local big box store often has tight edges, which are fine for straight sections, but won’t curve worth a darn.

grosgrain ribbon


I bought sewing thread to match my yarn as closely as possible, and sewed the ribbon on with tiny whip stitches, at the edge where the ribbing meets the first plain knitting section.  After trying on the sweater to check that it was working, I put it back on the dress form inside out, and sewed around the top edge of the ribbon as well.  If you do this, don’t pull the sewing stitches too tight, just try to keep the ribbon softly snug to the sweater, and not to distort the knitting.


blue talamh sweater ribbon 2


This worked so well!  Like magic, my sweater now stays in place, just where I want it, and the ribbon is basically invisible from the outside.


Finishing yarn ends

There were quite a lot of ends in this sweater, mostly because I’ve had this yarn for over a decade (!).  Part of that time was before I knew how to deal with moths, and the outside of a few of the skeins got rather munched early on, leading to extra breaks in the yarn, and weak places that I decided to treat the same as breaks (ie, not use them, and leave the tails to work in later).  I usually tie the ends or the break/place I don’t want to use into a slipknot, just to keep a little tension on the yarn as I’m knitting around it.


finishing knitting 1


I’m sure there are other good methods for burying yarn ends, this is mine.  Keeping the tail going in the direction it was headed, I take a short stitch, then a tiny back stitch to anchor the thread, followed by a tunneling of the yarn along the back of the existing stitches.

Don’t pull tightly, or you’ll pucker the knitted fabric.  Leave enough yarn tail so that as the sweater stretches, the tail can move without catching or distorting anything.

Maybe my best tip is to use a needle with a big enough eye to hold the yarn, but a very sharp tip, making it easy to pierce just the backs of stitches, and keep the yarn tails out of sight.  My absolute favorite are “Chenille” needles from John James, available at fine sewing and embroidery stores.

With each end, take one short stitch, catching just the back of the knitting stitches:


finishing knitting 2


Followed by a tiny backstitch, which functions like a knot to keep the yarn in place.  I start just behind where the last stitch ended, and then continue skimming along the backs of the knitting stitches for the length of the needle. In a stockinette fabric like this, the purl “bumps” make handy diagonals, good directions to hide yarn without it showing on the outside.

If you’re particularly worried about this part of the knitting getting stress or pulling out, (or your yarn is slippery) you could take another short stitch and back stitch, then the long burying stitch. That should hold it!


finishing knitting 3


If at any point you’re unsure if a stitch might be showing on the public side, just check.  One good thing about stitches is that they’re reversible.

Note that the ends should go in opposite directions, at least with the first short stitch.  Take them in the direction they’d pull from if you kept knitting, so that the two ends cross, rather than pull away from each other.


finishing knitting 4


On garment edges, a good place to bury ends is often along columns of ribbing.


finishing knitting 6


When you’re finished, trim the ends so that enough remains on the back for the end to stay there, and not poke through to the front.

That’s about it for now.  Just in case you’re wondering, I did make those matching buttons, and I’ll post about them soon too.  I hope this is helpful, and just let me know if you have more knitting/finishing questions!


Me-Made-May’14 Thoughts and Drawings


mmm'14 day 6


Hello, all!  I’ve been keeping up with my pledge for Me-Made-May’14; wearing, and drawing, and working on some sweater.  You can see some of my sketches and sweater progress on Flickr.  I think it’s fun to check out the whole MMM’14 group and see what everyone is wearing.

Also, in case you missed it, my thoughts for sewing/dressing in May were on ‘So, Zo …’ this past week!  Along with a bunch of other people’s from around the world.  One thing we mostly seem to agree on: spring is a time for layers, and a good pair of pants!  Check it out …

Happy Sunday!


Me-Made-May, My Wardrobe, and Drawing

Plus, I pledge to knit a sweater!


mmm14 logo drawing


So, you guys know I love Me-Made-May, right?  This challenge was a major motivator for me to start really building a handmade wardrobe, especially two years ago, the first year I had this blog and the first year I took part.  Last year, I upped my challenge to wearing two me-made garments every day through May, which was great and gave me a kick in the bum to make at least one thing I had been thinking about for quite a while, but it didn’t have quite the feeling of realizing new things about what I make and wear, and opening up new horizons, which the first year did.

This time, I’d like to bring back a bit of the self-discovery element.  Also, documenting my MMM has been a challenge, we’re usually on the road during much of the month, and it can be hard to find a time when Bryan and I are both not busy to take a picture.  Plus, I am always looking for ways to bully myself into doing more drawing, just practicing drawing … so I’m going to keep a mini visual journal (pictured above) for May.  I’m leaving the exact format of what I’ll put in it purposefully vague, to see how it works out, but it will definitely include drawings of clothing, words about what I wore and thought, etc.  I’ll photograph and post at least some of what I put in it on Flickr and/or here.


mmm'13 day 11-1And, about the sweater.  I’ve had this particular soft blue silk and cashmere cardigan since I started traveling with Bryan.  I got it at a clothing exchange/naked lady party right before we left that first summer, so really, it’s held up amazingly well, that was 10 years ago (egad—really?) and it’s been an indispensable summer wardrobe item that whole time.  I’m wearing it at left, in a pic from MMM last year.  It doesn’t have another summer in it though, the fabric under the arms and around the cuffs is totally shot.

I do have some light blue yarn, which has been in my stash longer than I care to remember, and it occurred to me that, in the spirit of making my own, I could knit a replacement sweater.  It won’t be exactly the same, in fact I would like the style of it to be a little more interesting, but it must have the following characteristics, which I figure are key to indispensable-ness: soft, lightweight, cardigan (easy to layer), washable (at least by hand), go with most of my wardrobe.  I’m thinking of starting with the Talamh pattern (links to Ravelry).

Here is my official pledge for Me-Made-May ’14:

‘I, Tasha of Stale Bread into French Toast, sign up as a participant of Me-Made-May ’14. I endeavour to wear as many me-made and handmade items each day as possible, minimum of two, for the duration of May 2014.  In addition, I pledge to keep a wardrobe journal for May, and to share it via flickr/blog.  And finally, I will knit on, and attempt to finish, a much-needed sweater during this month!’

If you’re thinking about taking part, I definitely encourage you to do it!


How to Mend a Small Hole: Sewing a Patch by Hand


small hand sewn patch 5


Here’s another way to fix a small hole in a shirt or a sweater—especially a hole that’s a little too big to simply sew back together without causing puckers.  No sewing machine required though, it’s more invisible to sew a little patch like this by hand.  These examples are in woven fabric, but this technique also works on knits.  I sewed a patch like this on the front of this sweater, which because of the fuzzy knit fabric is too invisible for pictures!

I’m going to demonstrate on two skirts, which happen to both be made of linen, cut on the bias, and have small holes.  The difference is, the blue one at the top I fixed for keeps—it had a little tear, but the rest of the fabric is still in good shape.  I bought the pink stripey one for a dollar on the sale rack at St. Vinnie’s, and it followed me around the country on our summer travels for years.  I even tried out two different ideas for adding pockets to bias skirts on it.  By now it’s on its way out, the fabric across the back has a few tears, and is super thin and ready to tear in a lot more places.  It’s ready to retire, but I can get one more use out if it by fixing one of the holes with bright green thread so you can see what’s going on.

To start, cut a circular patch, about three times as big across as your hole.  Making it a little bigger will make the sewing easier, and you can trim it later.  If you have a piece of the garment fabric, cut the patch from a section that matches up with where the hole is, in terms of color, pattern, or wear.  If not, just try to find something that matches as well as possible.  Hold the scrap behind the hole to see how it looks.  If your fabric is very loosely woven, you may want to sew around the edges of the patch to keep it from unraveling.  Otherwise, a circular patch should be ok as it is through normal wear and washing.

Click on any of the pictures to enlarge, you can see more detail here than I could while sewing the patches!


small hand sewn patch 1


Carefully center the patch behind the hole.  Match the grain (the direction of the grid of threads) of the garment and the patch.  This is especially important if the garment is cut on the bias (with the grain at 45°) like this one, because I want to avoid changing the drape of the bias cut.

Pin the patch in place through the front of the garment, sticking each pin in and out of the fabric twice.  Check to see that the patch is centered over the hole, and re-pin if necessary.  If the fabric is slippery, it may be easier to sew a few temporary basting stitches, and pull them out when you’re done, than to get the pins to hold it.


small hand sewn patch 2


Knot your thread, and bring it up from the back.  Sew around the hole a couple of times, sewing through both layers using small backstitches.  Don’t pull the stitches too tight, or the fabric will pucker up.  Try to catch each thread that is cut by the hole on one pass or the other.  If there are intact threads in the center of the hole, tack them down to the patch too.

The goal is to keep the hole from unraveling any further, without adding so many stitches that it makes the patch stand out.

When it’s done, secure the thread with another knot or a couple of backstitches just through the patch on the back.

Here’s the finished patch on the front:


small hand sewn patch 4


And from the back.  You can trim the patch, but leave some around the edges so that if it unravels slightly, there will still be enough fabric to hold it in place.


small hand sewn patch 3


Here’s the back of the blue one:


small hand sewn patch 6


Hopefully this adds another option to your mending toolkit!

A New Me-Made Upcycled Sweater


blue upcycled sweater looking side


Hello all!  I’ve been making and mending just about as much as physically possible around here (in between making hundreds of these little fuzzy hats) ever since I got back to my studio a few weeks ago.  Not much has made it up to the blog yet, and I decided to just start with the thing I’m most excited about: my new sweater!  I really, really need some more sweater layers for this winter, and I’ve had a plan to make a couple of upcycled ones from various bits and pieces since the spring.

So, here’s the first one!  The main part of it came from a deep navy blue, super soft, slightly felted, merino sweater that some friends gave me (on the right below).  The fabric is lovely, but the shape was classic sweater that doesn’t work for me—baggy on the sides, gathered in at the bottom—in other words the least flattering possible design for a small pear-shaped girl such as myself.  I also have this knit top which I love the shape of, it has princess lines (flattering—yay!) and interesting side panels, it fits me well and since it seems to be on its way out (the problem with thrift store finds) I had already traced a pattern from it.  So . . .


sweaters on line


piecing sleeveThe biggest lesson I have learned so far when recycling/refashioning something old into something new, is to treat the something old as fabric.  Unless the alterations you want to make are super duper simple, take the whole thing apart and press it flat and see what you’ve got, and it will be so much less frustrating.  You do end up with some odd shaped pieces of fabric, which can lead to interesting piecing and seams.  I folded the pattern for the new sleeve to accommodate the fabric from the old sleeve, leaving me two parts to cut from another fabric. I just have to remember to allow for seams when I cut the pieces to add on.  I had allowed 1/4″ seam allowances, so I cut the top and bottom sleeve pieces 1/2″ longer than the lines where I cut the middle piece, so there would effectively be a seam allowance on both sides.  Make sense?  I have screwed up the math on that before . . . but not this time.

It probably won’t surprise you if I point out that I have a lot of scraps of cashmere lying around here, plus old sweaters friends have given me, etc.  I chose a dusky purple for the extra sleeve pieces and extra at the back, which also didn’t quite fit on its corresponding piece of ex-sweater.

flat sockI chose the purple because it matched my material for the sides: socks!  My mom was nice enough to buy me these super soft alpaca socks at a fiber festival.  I loved the knitted pattern, I love knee socks, I carefully followed the instructions, which were to machine wash and line dry.  That’s my default washing mode anyway, so I thought I was good to go . . . but by the second wash they had shrunk to the point where fitting over my calves was no longer an option.  (Short strange tangent: this opened up sock reminds me of those animal pelts you see in museums, as if socks ran wild and were hunted for their fur.)  Once pressed flat, there was just enough material in each sock leg (including the ribbing) for one side panel of my sweater!

I experimented with sewing the seams flat, and I really like how it came out.  I overlapped the two pieces I was sewing together by 1/2″ (the same seam allowance as if I had sewed the seam 1/4″ from each edge, see what I mean?), feeling with my fingers for the edge of the layer underneath, and pinning in place.  I sewed a narrow zigzag close to the edge of the top layer, and then again about 1/4″ away, using parts of my machine foot against the edge as guides.  I used a walking foot, which I nearly always do for knits.

This method turned out to be only just slightly trickier for the curved seams connecting the sides to the front and back, so I did it there too.  I really like the slightly deconstructed look this gives it.


flat knit seams


I didn’t do the flat overlapped seams running down the sleeves, it would have been too much scrunching the sleeve up under the machine.  I did do it to attach the sleeves to the body though, and because of the raglan construction (not having to put in the whole sleeve in the round) it was pretty easy.

For the neckline, I kept the “v” of the original blue sweater, although in future I might add in some there just to make it a little cozier.  I knew that a section of scrap cashmere ribbing wouldn’t do anything much to keep the neckline from stretching all over the place, so I attached 1/4″ clear elastic first, stretching it to ease in the extra fabric and get the neck to lie flat, especially across the top of the shoulders.


sweater neckline


blue upcycled sweater back(By the way, I think the colors are truest in the two pictures above.  I’ve had trouble getting my white balance and purples to get along.)

So, I zigzaged on the ribbing at the hems and bottom of the sleeves as well, and there you have it.  I actually cut pieces for another purple section around the bottom, but I decided that I really liked the sock ribbing as the hem, and I liked the length when I tried it on, it allows another layer to peek out below.  And winter is coming, so I’m going to be wearing lots of layers!

I think the saddle shoulders may be my favorite part.  I’ve got plans for another franken-sweater using something I knit years ago.  I’m really pleased with how this came out, and looking forward to a DIY cozy winter!


blue upcycled sweater front


How to Fix a Small Hole in a Knit – Glorious Mending

fix sleep pants 1


Before I lose anyone who doesn’t currently have a sweater to fix, I’d like to mention a couple of really interesting things about mending and repair I’ve come across while working on this post.  The first one is Tom of Holland’s Visible Mending Programme, which is based on darning knits and on the idea that mending is something to be proud of.  Pretty much needless to say, I love this idea and it’s implications.  The second one is about fixing all kinds of other things, I saw it just yesterday (via Boing Boing via Root Simple) it’s a project by Paulo Goldstein called Repair is Beautiful in which he repairs all kinds of things (like a lamp, a chair, headphones) in unusual and beautiful ways.  I love the aesthetic of his project, it says all kinds of provocative things about repair, not just that it can be lovely and unusual to look at, but also he’s calling attention to the repairs, asking you to think about what it means to fix something.  Check it out, the pictures are way better than my description.

So, after all that, just an invisible mend for today – kind of disappointing I know, sorry!  I do have some ideas for visible mending of a couple of things now in my to-fix pile, and I’ll share them as they are done, but sometimes, you just need to repair a little hole.  The idea for his post started a month or so ago, when I realized that two of my favorite light sweaters/tops were sprouting holes under the arms.  Not big enough holes to need filling in/darning, but still enough to need fixing before they got out of hand.  Sometimes I even happen to catch a problem when it’s still a thread that’s about to break, like the one near the arrow below.  Most of the time, I don’t notice until it’s more like the hole on the left.


knit fabric fix 1


If you do find a weak thread that’s still intact, you can “trace” along it, following its path with a new stronger thread.  This is a fine gauge sweater, and I had sewing thread almost exactly the same color, so I used that.  You can also try embroidery floss or yarn of various types and thicknesses to get something close to your garment yarn, or something you like as a contrast.  There will probably be at least one stitch that is only made up of the mending thread, so if you want it to be invisible, choose something as close as possible to the original yarn of the garment.


knit fabric fix 2


We’re now looking at the sweater from the inside.  I like to start a repair like this by anchoring the thread somewhere where you won’t see it, like in the seam or in the back of a nearby intact knit stitch, with a couple of back stitches.  Then I start picking up the parts of the sweater that are coming apart.  Can you see how the thread and needle are following the path of the weak stitch?  In this case, that’s all I need, so I’ll go back to the seam, take two more back stitches, bury and clip the thread, and I’m done.

Ok, how about a hole that’s progressed a little further?  Also illustrated further down is a small hole with one broken thread, keep scrolling down for that one.


knit fabric fix 3


The first step here is to pick up the fallen stitches as much as possible.  Remember when I said that knowing how to pick up a dropped stitch in knitting would help you figure out how to fix things?  (Incidentally, I learned I new tip from my resident photography expert to make the photos from that post clearer, so I went back and edited them, it should be easier than ever to see what’s going on.  You can click on those photos, and the ones in this post to enlarge them as well.)


knit fabric fix 4


I’m not going to lie, it helps to have a really small crochet hook, or another tool with a tiny hook on the end.


knit fabric fix 5


It may also help to use a safety pin to hold any stitches that may pop loose while you work on the rest.


knit fabric fix 6


When you have picked up as many of the stitches as you can, it’s time to stitch the hole closed.  Start by anchoring the thread with backstitches again, in this case in the nearby seam.


knit fabric fix 7


For a small hole right near the seam like the one in this pink sweater, I basically stitch the sides of the hole to the seam, making a couple of passes and trying to keep my sewing stitches looking as much like the knitting as possible, which often involves going back and forth and going though each knitting stitch more than once.  Again resist the temptation to pull the thread very tight, or you’ll pucker the fabric.


knit fabric fix 8


If the hole is in the middle of an area with no seams, still start by picking up any dropped stitches that you can.  Take the anchoring backstitches through only the wrong side part of a nearby stitch, so that they don’t show from the outside.  Bury the thread between backstitches by moving diagonally, again piercing the stitches and not going all the way through to the front side.  In a garment with thicker yarns, you can fix the hole first and bury the yarn ends later, the body and friction of the thicker yarn will usually keep them from unraveling, although of course you can also do backstitches if you wish.  In any case, avoid pulling the mending yarn too tight or the fabric will pucker.

If the hole is too big to look good when pulled almost closed, it’s time to darn it, which will make a more visible patch.  (Look up “darn a sock” if you aren’t sure how.  You could start with Zoe’s post about it, which is where I first found out about Tom of Holland as well).


kitchener stitch 1


The mend will be most invisible if you can mimic the structure of the knitting.  The knitting term for this is Kitchener Stitch.  If you search for it, you’ll find all kinds of diagrams and instructions, but the only way it ever makes sense to me is just to look at the knitting and follow the path of the yarn.  Start a couple stitches away from the hole to make sure that you catch all the threads around it, and to practice moving the needle the way that the yarn goes.  When you get to the missing area, try to keep the pattern going.  This will involve going through a stitch above and a stitch below the hole, then the next stitch below with the same stitch above, or a similar pattern.  I’ll say it one more time, the mending yarn needs to replace some of the yarn that broke, so let it be there and don’t pull too tight.


kitchener stitch 2


kitchener stitch 3


fix sleep pants 2


I fixed the sample from the right side, and the cream knit pants from the wrong side.  You can do either one, whatever works best for you.  Just check the public side if you are working from the inside, and make sure no stitches that you don’t want to show are showing.


kitchener stitch 5


fix sleep pants 3


For a little hole like these, we’re just about done!  If you are tracing the knitting stitches with mending thread, keep going past the hole to make sure that you catch all the stitches which the broken one was connected to.  End with a couple of backstitches to make sure that everything will stay in place, and leave a short tail of the mending thread or yarn on the wrong side so that they don’t pull out.  With thicker yarns, you can use a sharp needle to bury the mending yarn, and any leftover ends of the original yarn, by piercing the back side of the nearby stitches.


fix sleep pants 4


kitchener stitch 7


The finished repairs.  Believe it or not, the arrow points to the replaced stitch in the cream knit.  The green sample still has two ends to bury in the back.


knit fabric fix 9


fix sleep pants 5


kitchener stitch 6


If you have questions about mending something, or an unusual repair you made to share, I’d love to hear about it, do share!