Fixing Store-Bought Socks


fixing blue stripe socks 3

Isn’t the phrase “store-bought” kind of funny when you think about it?  Maybe I should have said mending “factory-made” socks?  Maybe not, that sounds weird too.  Fixing “non-me-made” socks … never mind!

Anyway, I get a little depressed any time our society expects me to get rid of something which is mostly perfectly good, but has one flaw/broken part/hole/mold on just one corner.  Although I do accept that there’s a point at which socks are well and truly worn out and need to go, what happens to most of mine is that they develop one or two really worn places somewhere around the heel first, while the rest of the sock fabric still seems totally intact.

The really tiny gauge which commercial socks (I might like that phrase best so far) are knit in makes it hard to darn them in the traditional needle-and-yarn ways.  I’ve been experimenting with patching them, using compatible knit fabrics, and it’s been working well.  Experimenting over some time now, so please forgive the different lighting in the photos, I’ve been documenting the socks as I fix them.

As most of you reading probably already know, I love the idea of “visible mending”, of showing the world that I fixed something and I’m using it.


So, should you have the audacity to mend a store-bought sock, here are some things I’ve worked out:
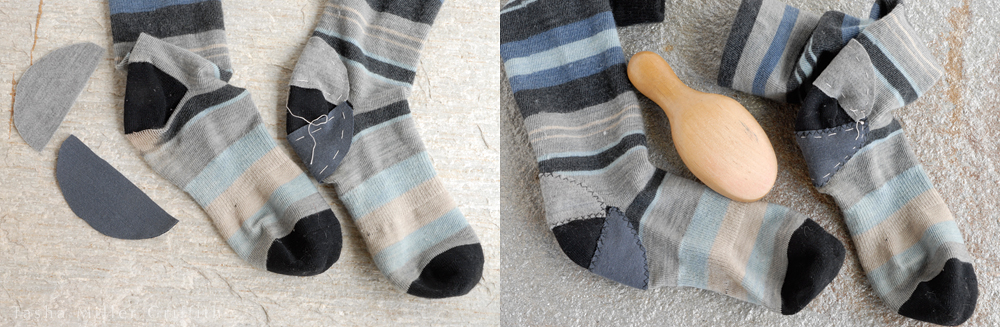
The fabric for the patches should be similar to the socks: knitted (stretchy) and fairly sturdy.  I’ve been using wool knit fabric swatches, scraps from making these leggings, and parts of other socks.  Although I’ve been seeking out wool patches, I think cotton knits would work too, as long as they are fairly thick/tough.  Check that the care requirements for the patch fabric work with how you wash your socks (I usually machine wash & line dry mine, occasionally they go through the dryer, and the wool patches have worked fine for me).
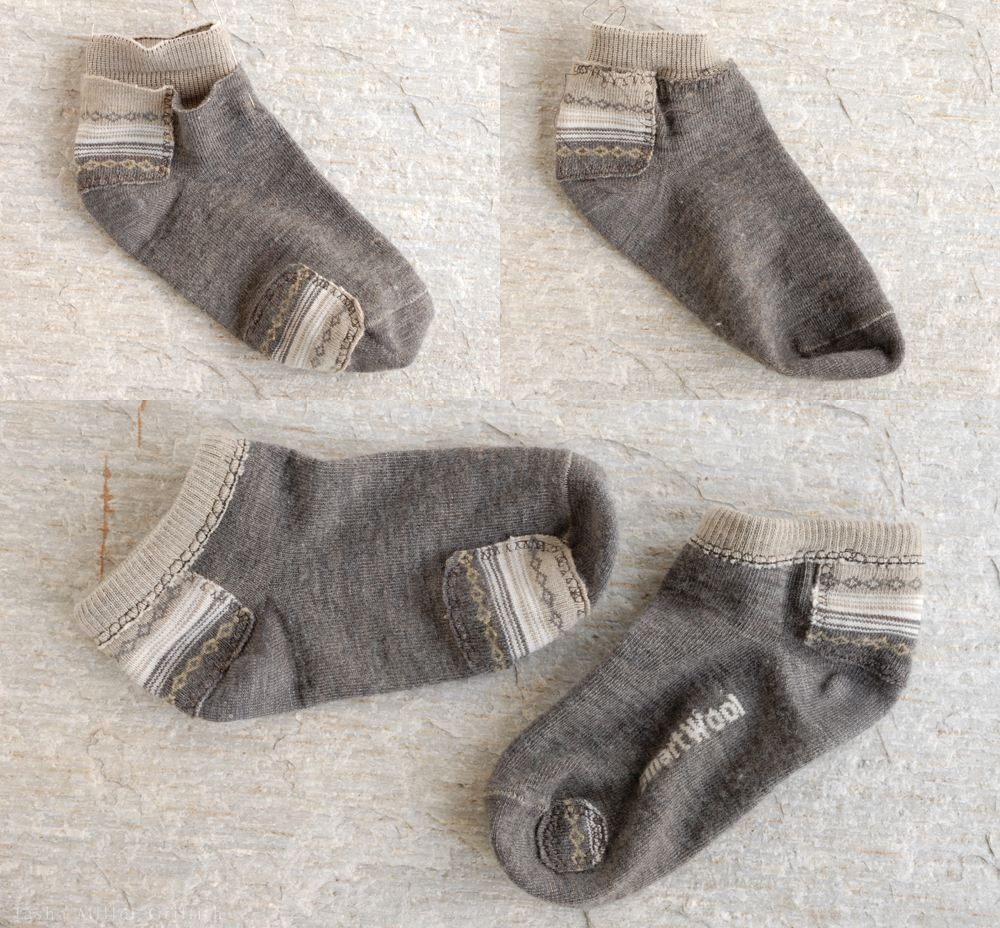
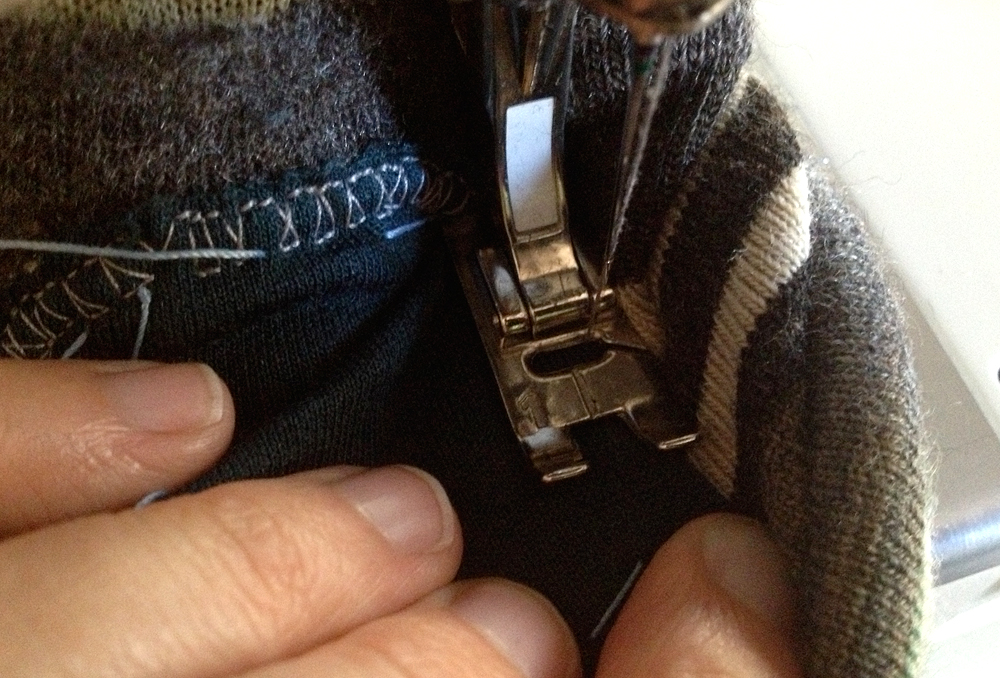
 

patched purple hobo socks


sock under machine It’s totally possible to mend shorter socks with a sewing machine, any time that you can scrunch the rest of the sock out of the way (kind of as if you are turning it inside out), so that just the layers you want are under the foot of the machine. I used an overlock stitch for maximum stretchiness & sturdiness.  As with any knit project, you may need to experiment a bit to figure out which stitch and settings work best.  Expect to do a lot of lifting the foot with the needle down and repositioning things while sewing on the patches.  You can cut down on that somewhat by basting the patches on first (takes about 30 seconds).
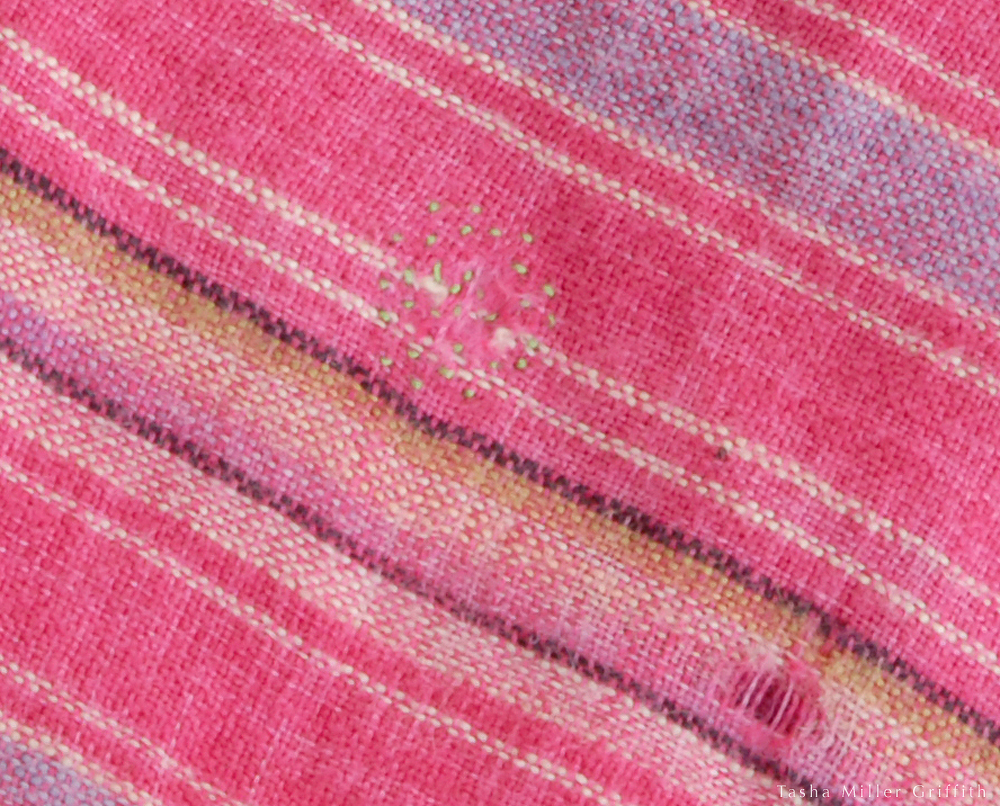
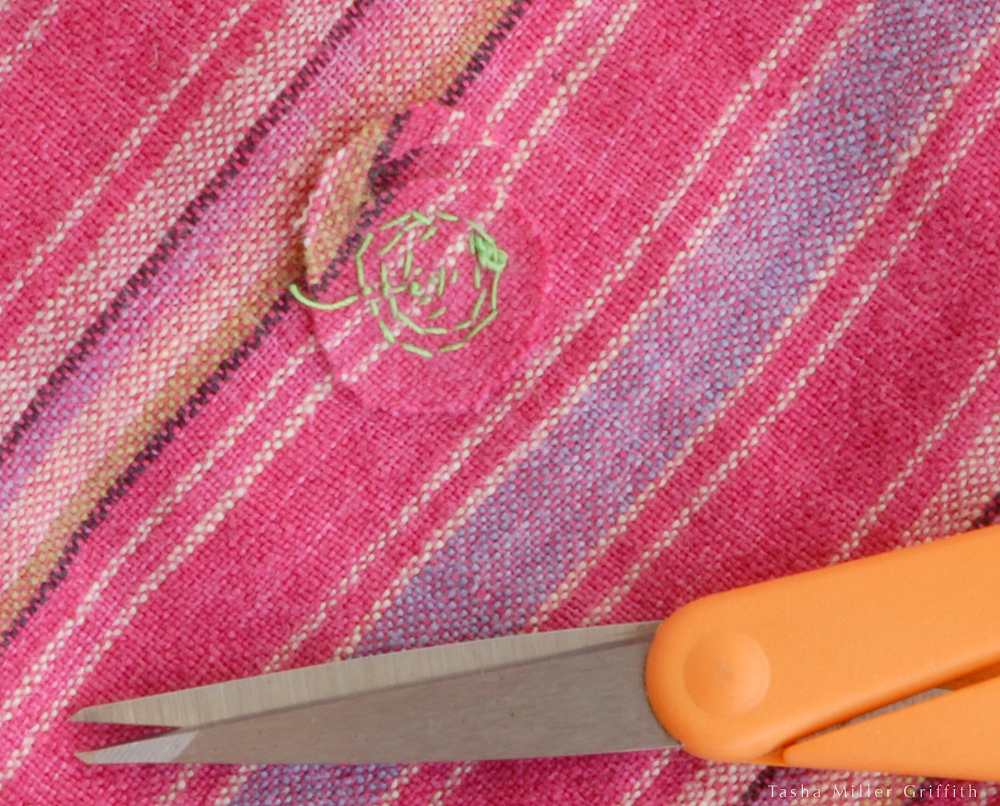
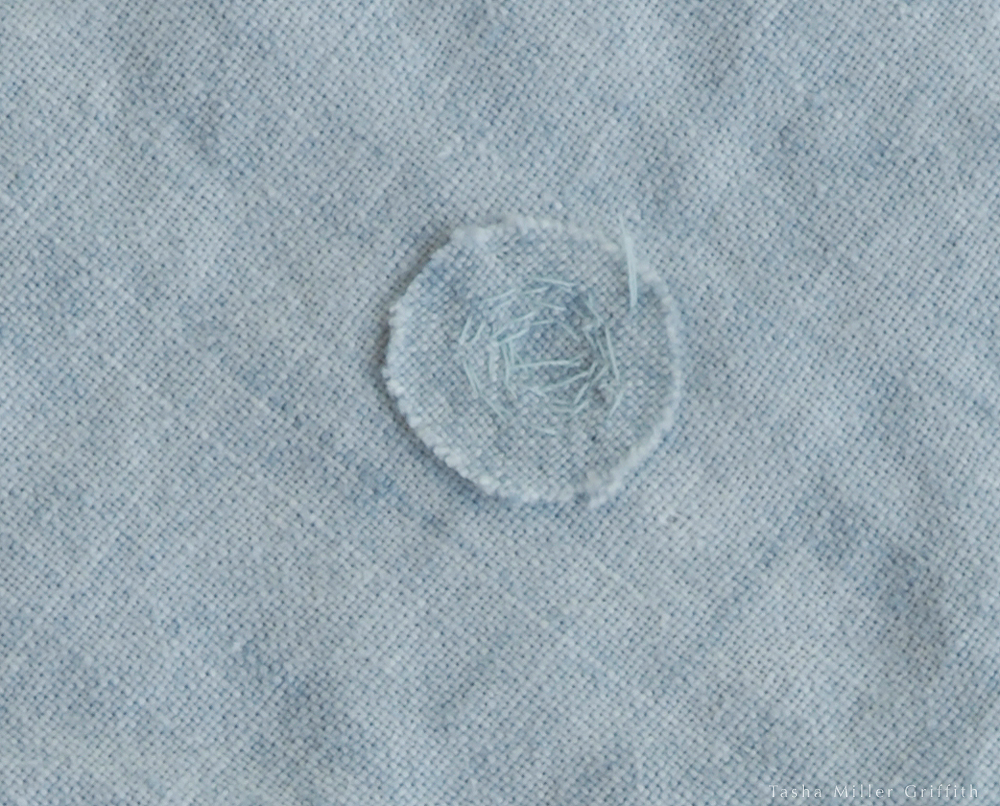
 

When the patch is done, I finish by getting all the thread ends to the inside, and burying them before trimming, using a hand sewing needle.  You can also trim the edges of the patch outside the stitching if they come out funky looking.
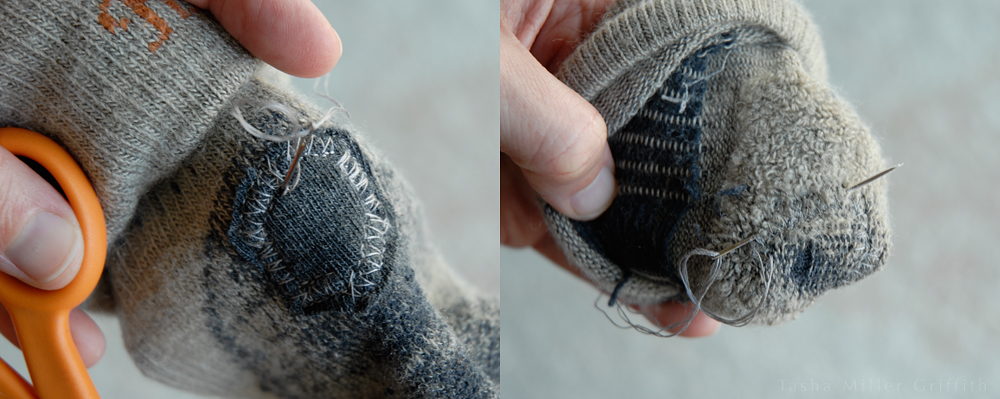
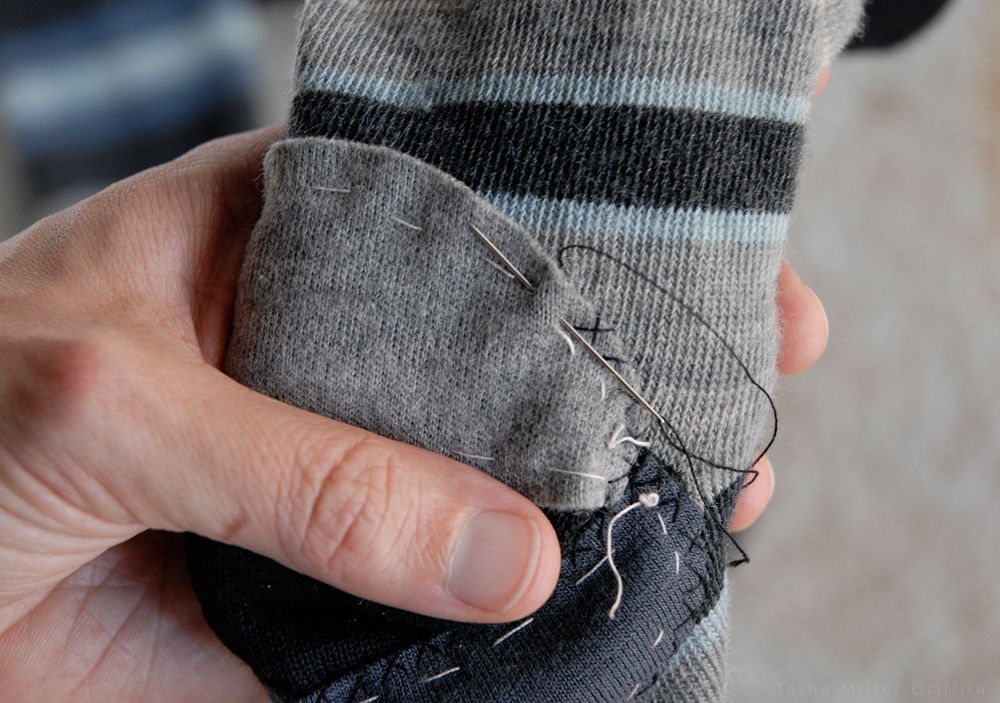
 

thread ends fixing socks


For heels and toes of knee socks, and any time I can’t easily get the part of the sock I want under the machine, I find it just as easy to sew the patches on by hand.  (I like hand sewing, and I don’t like fighting with my machine.)  I’ve been using a catch stitch (explained in more detail here) around the edges, sewing through both the patch and the sock when possible.  An old-fashioned darning egg (or improvise with a small block of wood etc.) inside the sock is so useful here that it’s almost essential, making things much easier by assuring that you only sew through the layers you want.


fixing blue stripe socks 2


fixing blue stripe socks 1


For either method, cut the patch definitely bigger than the worn place/hole, otherwise it will quickly wear right along the edge of the patch.
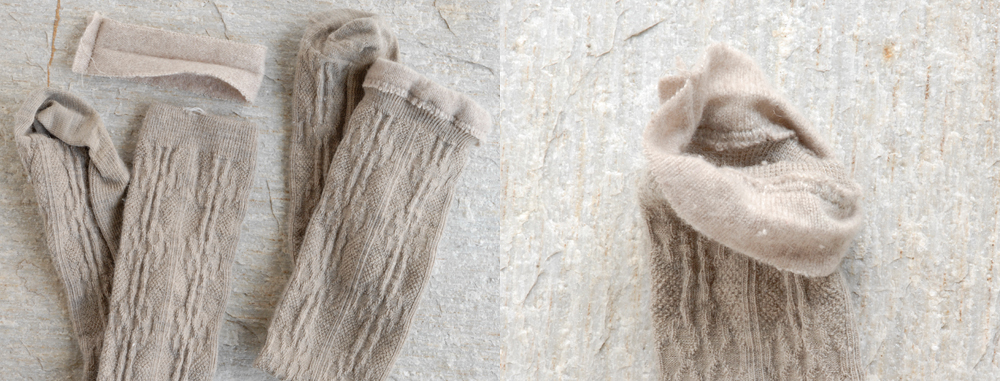
  For cuffs, you can use a scrap of ribbing to cover worn places and/or make a new cuff.  Make sure the ribbing is long enough to stretch around the widest part of the leg which the sock will go around.  Mark and sew the ribbing together, then stretch it evenly around the sock.  I find it’s easier to sew two seams, one on the inside and the again around the outside edge of the ribbing, than to try to catch both edges perfectly in one seam.


fixing sock cuff


Both my hand- and machine-sewn patches have worn well, adding a year or more to sock life, and lasting until the rest of the sock fabric gives up the ghost.


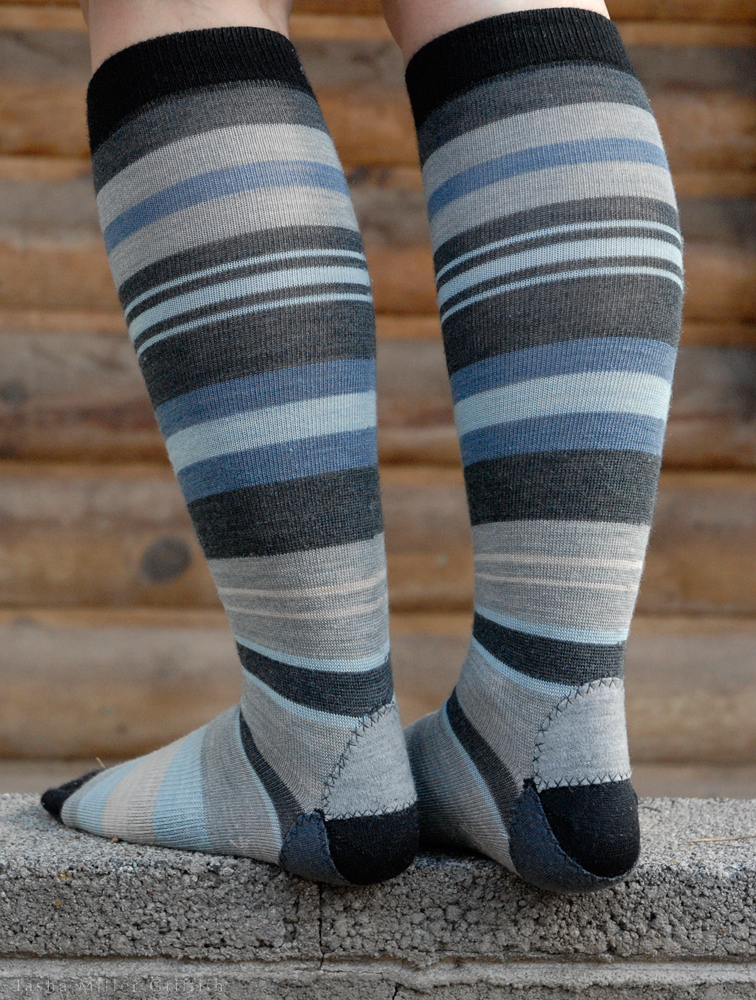
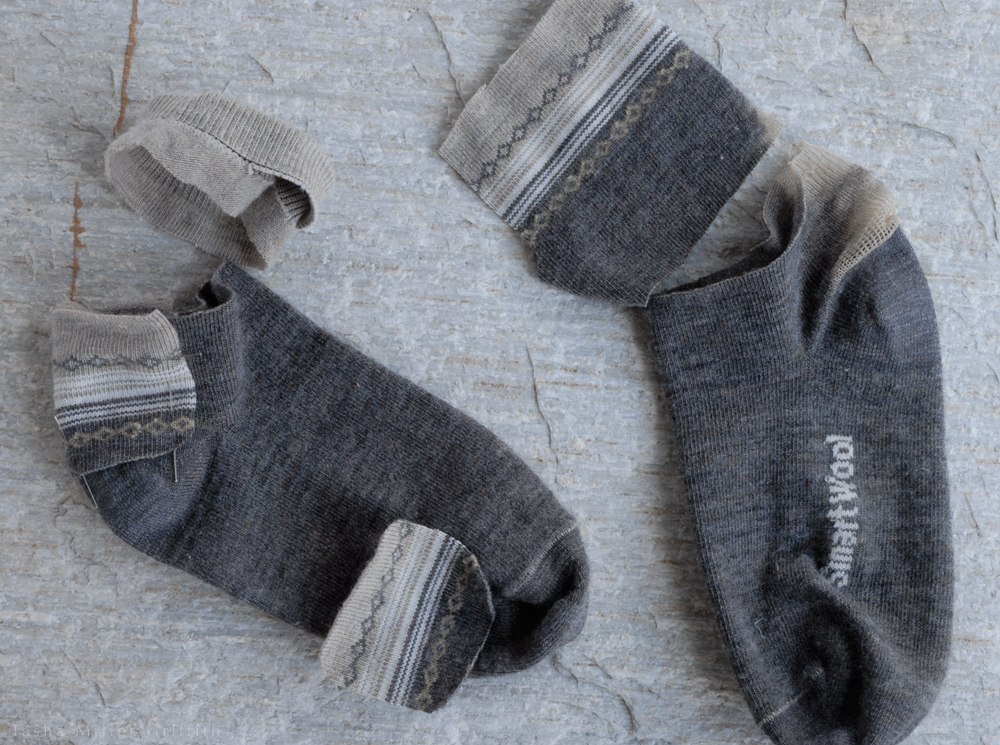
The socks below I didn’t even mean to fix, but they ended up being some of my favorites.  They’re the ones I wear in the summer when we’re setting up the booth.  I was going to buy new ones, but in the end I couldn’t bring myself to spend real money on new socks for such a humble purpose, and I knew cheap socks would wear out super quick under those conditions.

The new short length is perfect for when it’s hot but I still have to wear shoes, and I love seeing my little mended socks during what can be a stressful situation.


mending set-up socks 1


mending set-up socks 2


Finally, just in case you’re thinking that I have a magical house where socks are fixed as soon as they develop holes, let me tell you, it ain’t so.  I’ll admit that I tend to let them pile up until my sock drawer is looking sparse, and I’d forgotten about the very existence of some of these by the time I got around to mending them … when I start to run out of socks that don’t need fixing, then I settle down and do one or two pairs a day until they’re all fixed.

Happy mending!


A Simple Piece of Mending, and Some Thoughts on Posting


potholder front


So, here I am.  We’ve been home for the fall for a few weeks now, and it’s lovely to be back.  But ever since we got here, I’ve just felt swamped.  With good things mostly, and some of the best kind of quality time with family, but still swamped.  I have great ideas for posts.  I even have pictures for a lot of them, but I just haven’t been able to put together the time to edit and put in the words.

As I’m sure you know if you’ve been reading for a while, I’ve been shifting more towards posting when I have something I really want to share, and away from a set schedule.  I hope this gives me more time to work on each post, so that each post is better.  Goodness knows we all have enough arriving in our email every day, and I don’t want to be contributing to that just to make something appear in this space, unless it’s something I’m proud of.

And yet, sometimes (like right now) I really do want to connect with my online community, I want to put something out there, and it doesn’t have to be complicated to be worth reading, right?  Sometimes the simplest things are the best.

Like this potholder.  I know, I mended a potholder, it’s not exactly Earth-shattering news.  In fact, I didn’t even like this potholder.  Bryan had it when we met (goodness knows where he got it) and I always thought it looked so cheesy—definitely not my favorite kitchen object.  But, the back fabric wore out.  (It was yellow plaid.  I had so little intention of posting about this that it never occurred to me to take a “before” picture.)  The front was still fine, even the binding was in good shape, and I have this stubborn genetic defect which makes me refuse to throw out anything useful, so I just sewed a patch of sturdy black knit over the back.  After I sewed around the edge, I thought it needed a bit more, and I decided to outline the tacky shapes on the front.


potholder back


Then, the stupidest thing happened: I suddenly loved this potholder.  It’s now cheeky, it’s a little edgy, it’s visibly mended, it’s mine.  Every time I see it I smile.  Sigh …

What about you, ever fixed something and then fallen in love with it?  (The more I think about it, the more I think this happens to me all the time.)  If you blog, how do you balance the number and quality of your posts?


How to Mend a Small Hole: Sewing a Patch by Hand


small hand sewn patch 5


Here’s another way to fix a small hole in a shirt or a sweater—especially a hole that’s a little too big to simply sew back together without causing puckers.  No sewing machine required though, it’s more invisible to sew a little patch like this by hand.  These examples are in woven fabric, but this technique also works on knits.  I sewed a patch like this on the front of this sweater, which because of the fuzzy knit fabric is too invisible for pictures!

I’m going to demonstrate on two skirts, which happen to both be made of linen, cut on the bias, and have small holes.  The difference is, the blue one at the top I fixed for keeps—it had a little tear, but the rest of the fabric is still in good shape.  I bought the pink stripey one for a dollar on the sale rack at St. Vinnie’s, and it followed me around the country on our summer travels for years.  I even tried out two different ideas for adding pockets to bias skirts on it.  By now it’s on its way out, the fabric across the back has a few tears, and is super thin and ready to tear in a lot more places.  It’s ready to retire, but I can get one more use out if it by fixing one of the holes with bright green thread so you can see what’s going on.

To start, cut a circular patch, about three times as big across as your hole.  Making it a little bigger will make the sewing easier, and you can trim it later.  If you have a piece of the garment fabric, cut the patch from a section that matches up with where the hole is, in terms of color, pattern, or wear.  If not, just try to find something that matches as well as possible.  Hold the scrap behind the hole to see how it looks.  If your fabric is very loosely woven, you may want to sew around the edges of the patch to keep it from unraveling.  Otherwise, a circular patch should be ok as it is through normal wear and washing.

Click on any of the pictures to enlarge, you can see more detail here than I could while sewing the patches!


small hand sewn patch 1


Carefully center the patch behind the hole.  Match the grain (the direction of the grid of threads) of the garment and the patch.  This is especially important if the garment is cut on the bias (with the grain at 45°) like this one, because I want to avoid changing the drape of the bias cut.

Pin the patch in place through the front of the garment, sticking each pin in and out of the fabric twice.  Check to see that the patch is centered over the hole, and re-pin if necessary.  If the fabric is slippery, it may be easier to sew a few temporary basting stitches, and pull them out when you’re done, than to get the pins to hold it.


small hand sewn patch 2


Knot your thread, and bring it up from the back.  Sew around the hole a couple of times, sewing through both layers using small backstitches.  Don’t pull the stitches too tight, or the fabric will pucker up.  Try to catch each thread that is cut by the hole on one pass or the other.  If there are intact threads in the center of the hole, tack them down to the patch too.

The goal is to keep the hole from unraveling any further, without adding so many stitches that it makes the patch stand out.

When it’s done, secure the thread with another knot or a couple of backstitches just through the patch on the back.

Here’s the finished patch on the front:


small hand sewn patch 4


And from the back.  You can trim the patch, but leave some around the edges so that if it unravels slightly, there will still be enough fabric to hold it in place.


small hand sewn patch 3


Here’s the back of the blue one:


small hand sewn patch 6


Hopefully this adds another option to your mending toolkit!

Repairing a Backpack


mending backpack 1


This spring, when I fixed this jacket for my dad, I got an unexpected bonus.  Every time I saw him wearing it (which was quite often, it’s his favorite for cool windy days) my heart would warm with a soft fuzzy glow.  Here was my dad, who I love dearly, so pleased with his jacket and so obviously getting good use out of it, both of those all the more so since I had fixed the zipper and the tearing pockets.  It’s hard to describe actually— it seems at the same time obvious and silly— but I’m telling you, every single time I saw him in the jacket I would get a moment of happiness.


mending backpack 2


So, the obvious thing to do was to mend something else of his, and the standout candidate was this backpack.  He’s had it since, I don’t know, around the time I was born maybe?  And he still takes it out into the field on weekly basis.  (Maybe I should explain that Dad is a fairly recently retired wildlife biologist, who now gets to spend more time outside with his pet projects than he did while he was working.  Objects, which are part of his field gear and/or live in his pickup truck, do not lead an easy life.)  And I have a serious soft spot for things that have far outlasted their expected usefulness—this clearly qualified.


Another (non-sentimental) reason I was all up for fixing rather than replacing this pack is that the zippers still work!  I asked Dad if they did, and he said “kind of,” which turned out to mean that the only thing holding them back was the amount of frayed nylon threads stuck in the teeth.  Amazing.  The first thing I did was to turn under and sew down the raw edge of the flap covering the zipper, which had pulled out of its original stitching long ago and was the main source of the zipper-clogging threads.  I pulled the threads from the zipper using my fingers, a tweezers, and a scissors for stubborn parts, alternately zipping and unzipping it until they were just about all gone.  I also went kind of nuts zigzagging over any and all seam allowances and raw edges I could reach inside the pack with my machine, trying to keep future fraying and loose threads to an absolute minimum, since after all, this backpack has to be ready for another 30-odd years of use.


mending backpack 4


The bigger holes I patched inside and out, to reinforce them, and again to keep all raw edges inside so they wouldn’t unravel any further.  The worst hole was where one strap had pulled out of the body of the pack.  That one had allowed Dad’s not-so-small camera to fall out of the pack—that was the last straw for him to hand it over so I could fix it.  After patching that hole on both sides, I sewed a big X through the strap webbing and the new fabric, which ought to hold it.  I also reinforced the other strap with similar stitching.


The only part I have a doubt about, is where one strap had pulled off at the point where it’s anchored to the top of the pack.  I added new fabric on both sides of the whole area where the straps attach (the one you see on the outside is black faux suede), and stitched around the whole thing as best I could.  But, there is an old rivet in there that had pulled out.  I couldn’t stitch as close to it as I would like, and I thought pulling it off completely would weaken the strap too much.  At least I will be around to see how it holds up, and make future repairs if necessary!


mending backpack 3


Hopefully you don’t need any more encouragement than the above story to get out there and fix something for someone you love.  It doesn’t have to be sewing, use whatever skills you have.  And if you have any questions about needle-and-thread mending, let me know, I’ll be happy to help if I can.