Fixing Store-Bought Socks


fixing blue stripe socks 3

Isn’t the phrase “store-bought” kind of funny when you think about it?  Maybe I should have said mending “factory-made” socks?  Maybe not, that sounds weird too.  Fixing “non-me-made” socks … never mind!

Anyway, I get a little depressed any time our society expects me to get rid of something which is mostly perfectly good, but has one flaw/broken part/hole/mold on just one corner.  Although I do accept that there’s a point at which socks are well and truly worn out and need to go, what happens to most of mine is that they develop one or two really worn places somewhere around the heel first, while the rest of the sock fabric still seems totally intact.

The really tiny gauge which commercial socks (I might like that phrase best so far) are knit in makes it hard to darn them in the traditional needle-and-yarn ways.  I’ve been experimenting with patching them, using compatible knit fabrics, and it’s been working well.  Experimenting over some time now, so please forgive the different lighting in the photos, I’ve been documenting the socks as I fix them.

As most of you reading probably already know, I love the idea of “visible mending”, of showing the world that I fixed something and I’m using it.


So, should you have the audacity to mend a store-bought sock, here are some things I’ve worked out:

The fabric for the patches should be similar to the socks: knitted (stretchy) and fairly sturdy.  I’ve been using wool knit fabric swatches, scraps from making these leggings, and parts of other socks.  Although I’ve been seeking out wool patches, I think cotton knits would work too, as long as they are fairly thick/tough.  Check that the care requirements for the patch fabric work with how you wash your socks (I usually machine wash & line dry mine, occasionally they go through the dryer, and the wool patches have worked fine for me).


patched purple hobo socks


sock under machine It’s totally possible to mend shorter socks with a sewing machine, any time that you can scrunch the rest of the sock out of the way (kind of as if you are turning it inside out), so that just the layers you want are under the foot of the machine. I used an overlock stitch for maximum stretchiness & sturdiness.  As with any knit project, you may need to experiment a bit to figure out which stitch and settings work best.  Expect to do a lot of lifting the foot with the needle down and repositioning things while sewing on the patches.  You can cut down on that somewhat by basting the patches on first (takes about 30 seconds).


When the patch is done, I finish by getting all the thread ends to the inside, and burying them before trimming, using a hand sewing needle.  You can also trim the edges of the patch outside the stitching if they come out funky looking.


thread ends fixing socks


For heels and toes of knee socks, and any time I can’t easily get the part of the sock I want under the machine, I find it just as easy to sew the patches on by hand.  (I like hand sewing, and I don’t like fighting with my machine.)  I’ve been using a catch stitch (explained in more detail here) around the edges, sewing through both the patch and the sock when possible.  An old-fashioned darning egg (or improvise with a small block of wood etc.) inside the sock is so useful here that it’s almost essential, making things much easier by assuring that you only sew through the layers you want.


fixing blue stripe socks 2


fixing blue stripe socks 1


For either method, cut the patch definitely bigger than the worn place/hole, otherwise it will quickly wear right along the edge of the patch.

  For cuffs, you can use a scrap of ribbing to cover worn places and/or make a new cuff.  Make sure the ribbing is long enough to stretch around the widest part of the leg which the sock will go around.  Mark and sew the ribbing together, then stretch it evenly around the sock.  I find it’s easier to sew two seams, one on the inside and the again around the outside edge of the ribbing, than to try to catch both edges perfectly in one seam.


fixing sock cuff


Both my hand- and machine-sewn patches have worn well, adding a year or more to sock life, and lasting until the rest of the sock fabric gives up the ghost.


The socks below I didn’t even mean to fix, but they ended up being some of my favorites.  They’re the ones I wear in the summer when we’re setting up the booth.  I was going to buy new ones, but in the end I couldn’t bring myself to spend real money on new socks for such a humble purpose, and I knew cheap socks would wear out super quick under those conditions.

The new short length is perfect for when it’s hot but I still have to wear shoes, and I love seeing my little mended socks during what can be a stressful situation.


mending set-up socks 1


mending set-up socks 2


Finally, just in case you’re thinking that I have a magical house where socks are fixed as soon as they develop holes, let me tell you, it ain’t so.  I’ll admit that I tend to let them pile up until my sock drawer is looking sparse, and I’d forgotten about the very existence of some of these by the time I got around to mending them … when I start to run out of socks that don’t need fixing, then I settle down and do one or two pairs a day until they’re all fixed.

Happy mending!


In Which I Make a New Handle for a Plastic Gadget using Silicone Putty


sugru handle 1


When my friend Becca introduced me to the site The Grommet, the thing I immediately wanted was this moldable, air-curing silicone putty called sugru.  It’s supposed to stick to practically anything, be formed into any shape, and be washable and permanent when cured.  Their motto is “the future needs fixing”—how could I not love that?

I got some for my brother for Christmas, and kind of hoped he might give me one of the little packets to try myself, which he did.  (Whether it’s nature or nurture, we definitely share a tendency to tinker and fix things.)  “I don’t care what color,” I said.  “Then you’re getting yellow,” he said.

I really didn’t care, because the thing I wanted to fix was this cheese grater.  It came with a handle that rotated, but the plastic clips which held it on eventually broke, meaning that the handle just fell off, leaving me with nothing to grab onto but the sharp plastic shards on the end.  Nevertheless, this is the kind of thing I can’t seem to get rid of, because all the other parts of it still work perfectly fine.


sugru handle 2


Working with the sugru is a lot like molding polymer clay, except it smells different.  It will hold fine details like a fingerprint, or you can smooth the surface with a light touch.  I could have spent a lot of time minutely sculpting it, but I tore myself away and mainly went for function here.  The contents of one little package were plenty to form the handle.  It cures up harder than I expected, more like the grips on my camera than like a silicone spatula.

The new handle is working well!  It doesn’t rotate, but it makes the grater nice and comfortable to use again.

A product that lets consumers fix more things themselves—yes please!  We need more of that.


sugru handle 3


(Full disclosure: I don’t have any connection to this product other than buying some, and I wasn’t compensated in any way for writing this post.  However, if anyone wanted to send me some free sugru, I would not say no … )


Convertible Knitted and Felted Mittens

In which I remodel my mittens to make them better than ever, and show you how to calculate shrinkage when felting your knitting.


purple mittens finished 2


My friend Tom once commented that many of my clothes have stories behind them, and these mittens are no exception!  In fact, I’m going to tone it down here, story-wise, and stick to only the most interesting and relevant of the many angles I could go for.


A Very Short History of the Original Mittens

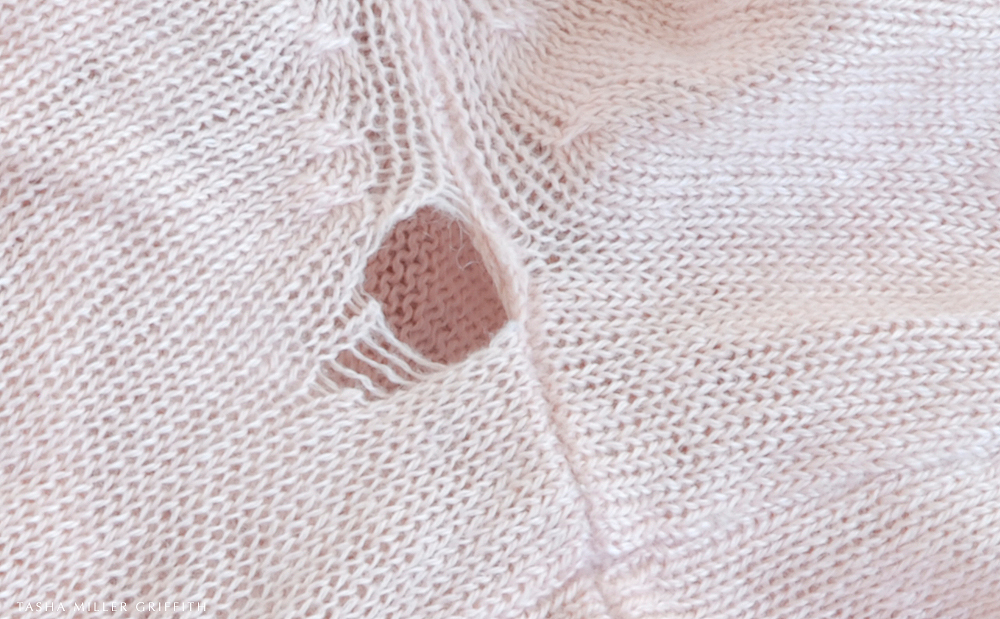
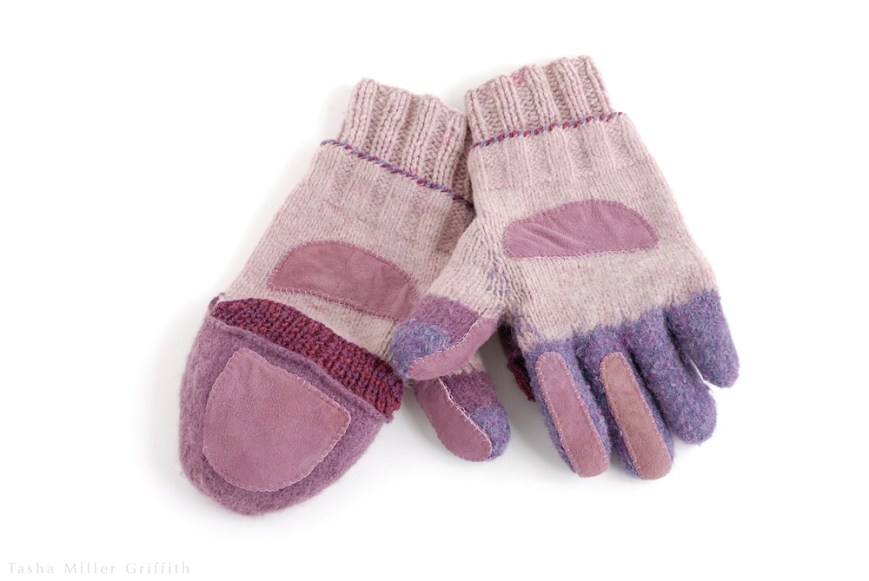
I started knitting these as my take-along project on our trip to Italy in February of 2010.  I knitted the main parts from yarns that we dyed the first time I ever did natural dyeing, with my grandmother and a bunch of dear family members in 2008.  (I’m telling you, I’m skipping  a lot of stories here).  My goal was glove fingers for finer dexterity, that could also be covered by a mitten flip-top for extra warmth.  Typically for me, I consulted a few patterns, but didn’t end up really using any of them.  I didn’t have enough purple for the fingers and the flap, and because I love purple and green together (one of my favorite color combos for the hats) I decided to get green yarn.  No one else was impressed with this decision, and I can now admit that one of my students at the time probably put it best when she said they looked like “dead fingers.”  So, moving on, when I discovered that they were too slippery to drive in, I sewed on a bunch of patches from faux suede samples in different colors.  Ignoring whether or not this made the green fingers look any better, and also the fact that all the fingers had come out too short after felting, I wore them all the time, all over the place, skiing, shoveling snow, etc., through last winter.  By the end of that season, one of the fingers had developed a rather large (and cold) hole in the end.


purple mittens before


A Plan for New and Improved Mittens

When I got them out this fall for the season, the more I thought about it, the more I wanted to do more than just fix the hole.  You see, if I was going to fix the hole, it made way more sense to knit on a little more finger, so that it would be actually the right length.  And, it would be ridiculous to do that for only one finger.  And, if I did it for the rest of the fingers, I would either have more green fingers or an even more ridiculous color mash-up than before.  I decided to start over on the fingers, and this time, do the math.

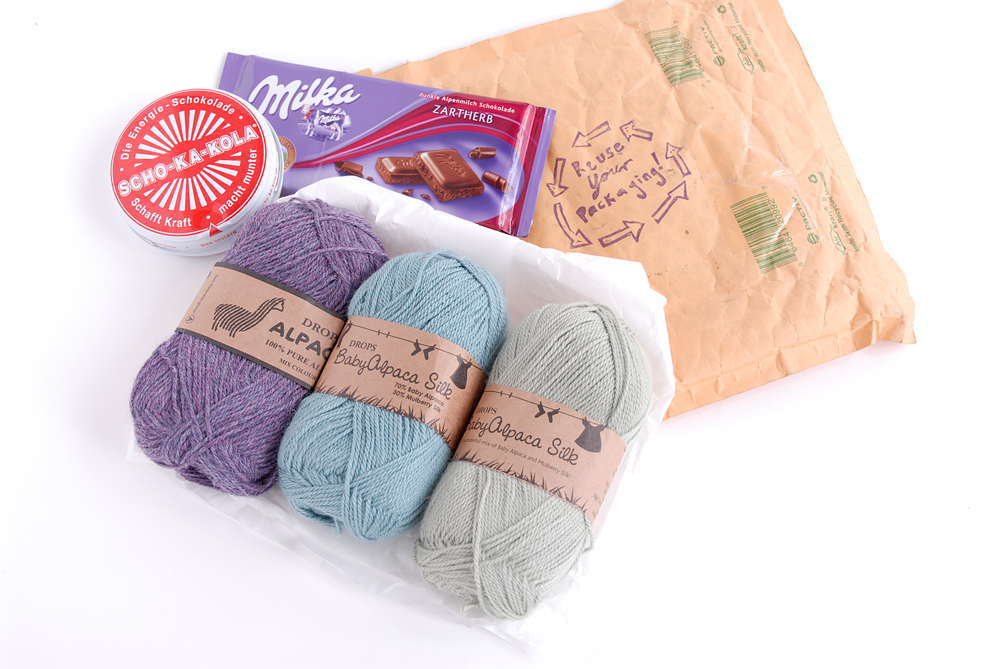
As fate would have it, last winter I sent my blog friend Alessa some American patterns, and she sent me some yarn and other lovely stuff from Germany (these mittens really are more full of stories than average, even for me).  Thanks Alessa!  One skein of the yarn (on the left below) was a lovely variegated purple in 100% alpaca.  Alpaca felts like a dream, and is just as soft felted as not.  I saw it in my yarn bin and knew it would be perfect for new fingers.


package from AlessaIs that not the most-awesome-looking tin of chocolate?


How to Calculate Shrinkage for Felting Knitting

Lots of times I tell my students that knitting can either be all math; full of charts, calculations, and exact numbers of stitches, or no math at all; flowing along and decreasing when it looks right to you.  In my mind, the happiest mix is somewhere in the middle.  When you’re felting, it really helps to have a least a little math, which comes from making a sample in your intended yarn and measuring how much it shrinks, especially if you need it to come out a certain size.  (I neglected to do this for the first fingers, and you saw how that went.)

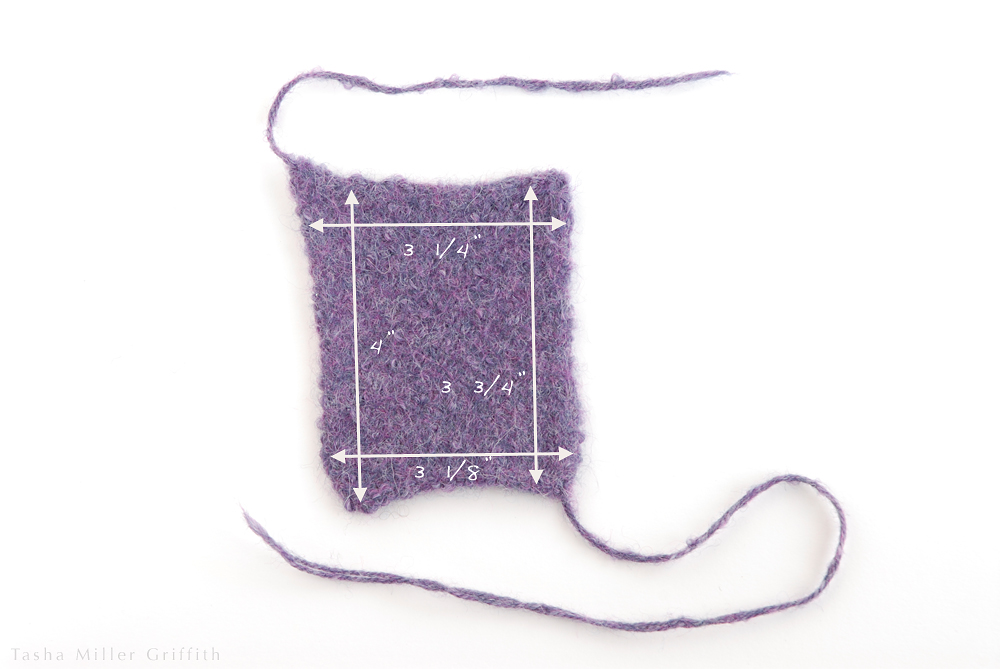
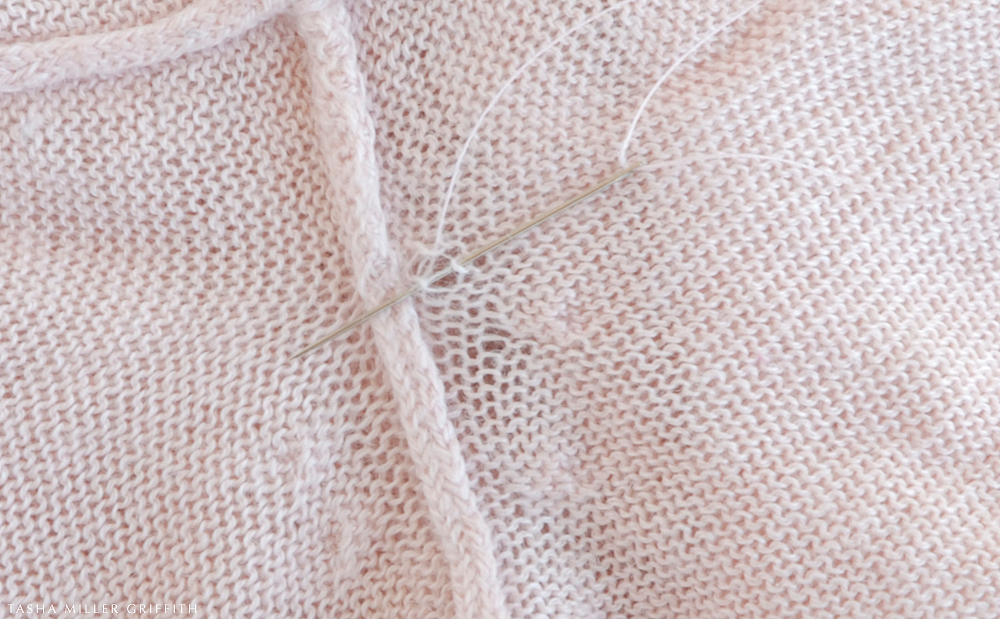
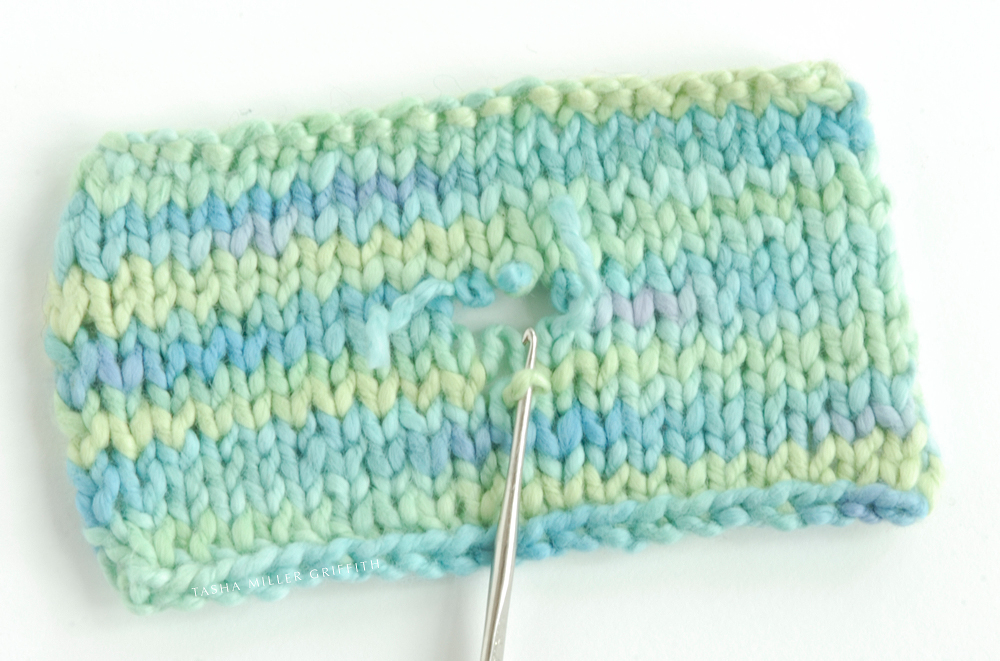
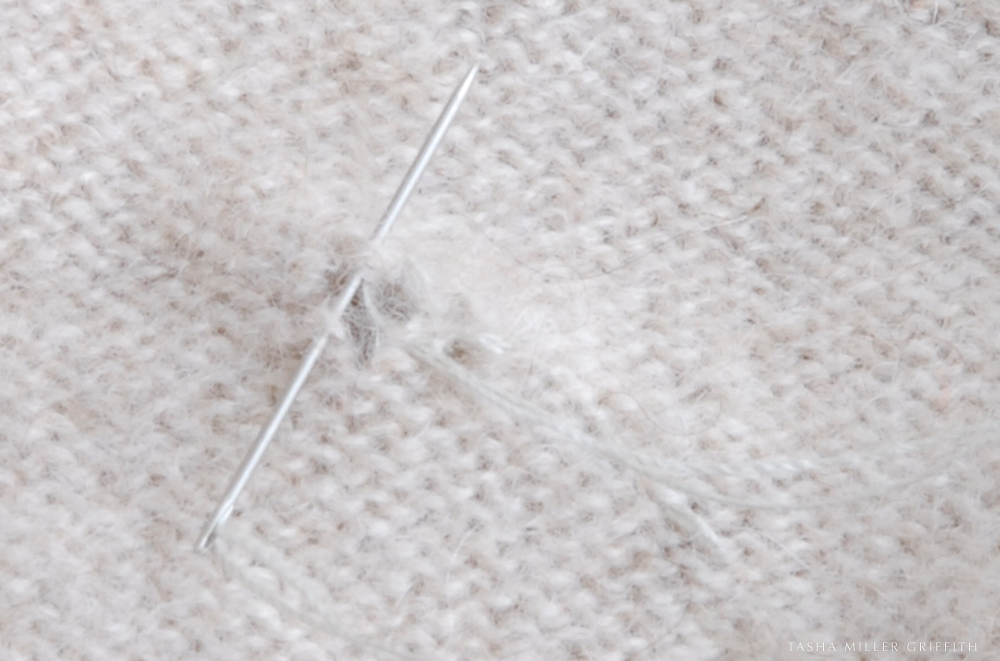
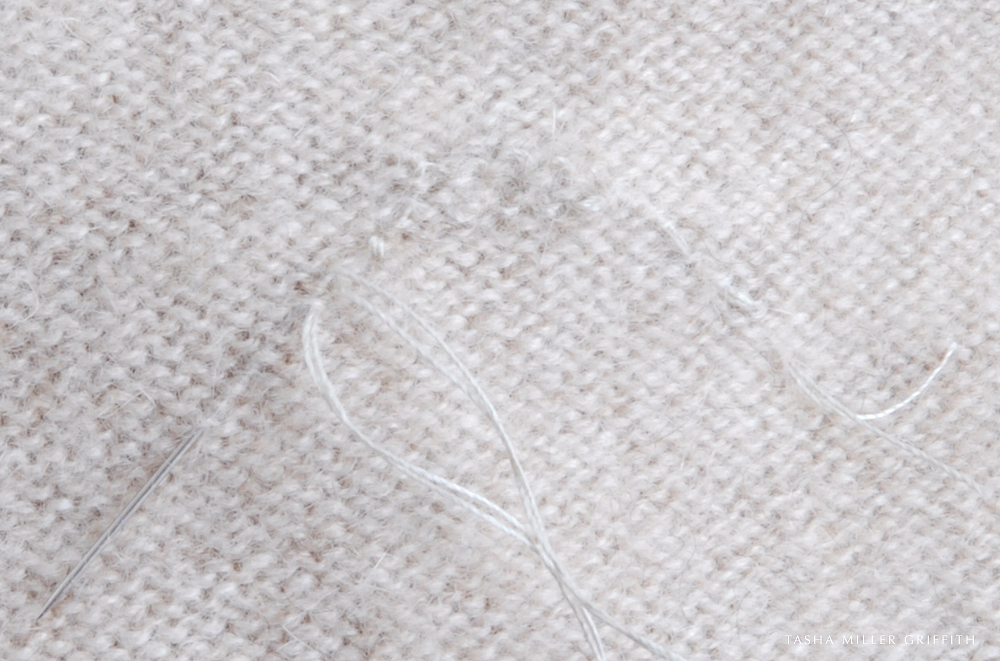
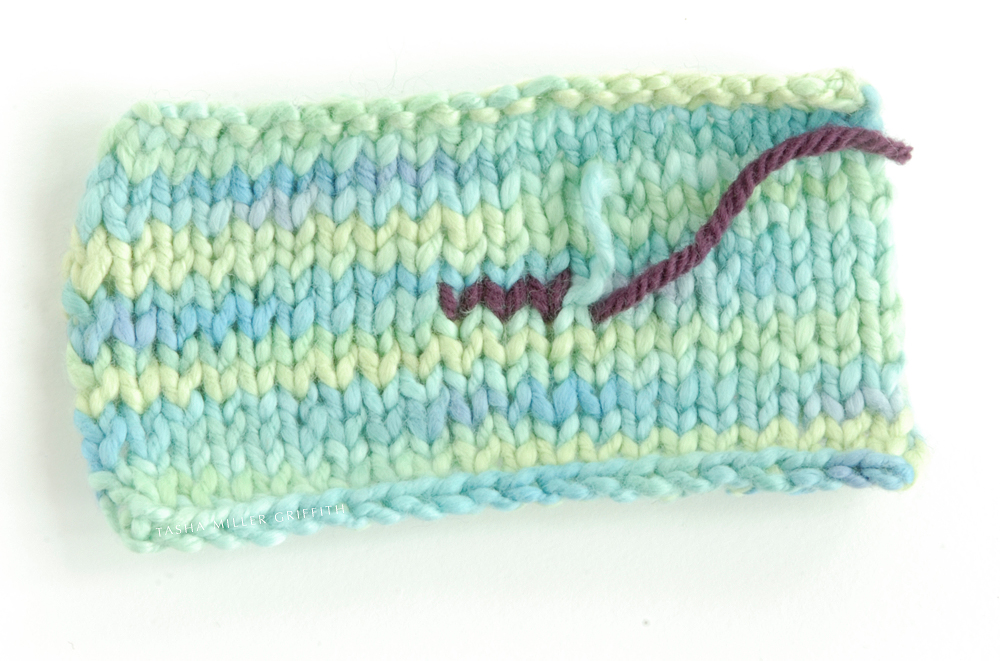
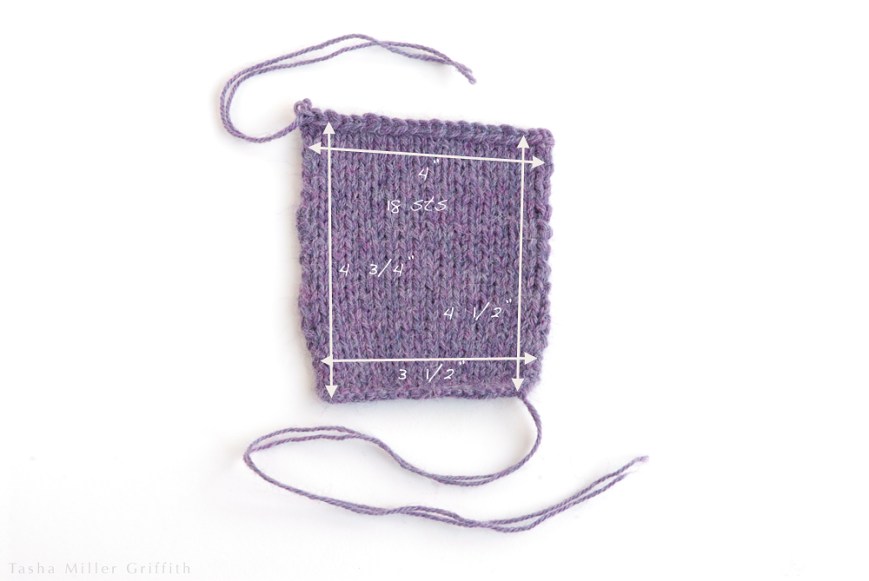
I started out with a tighter gauge, then decided to increase my needle size, because looser knitting will felt faster (you can see from the before and after that it also affects the percentage of shrinkage).  I’m using two strands of the yarn since it was fairly fine, and I wanted the fingers to be nice and thick and warm when finished.  You don’t have to take a photo, but do measure and draw around your sample.  Also make a note of how many stitches are in your sample, they will disappear into the felted texture and you won’t be able to tell later.  (This is about the smallest sample that will give you an accurate idea.)
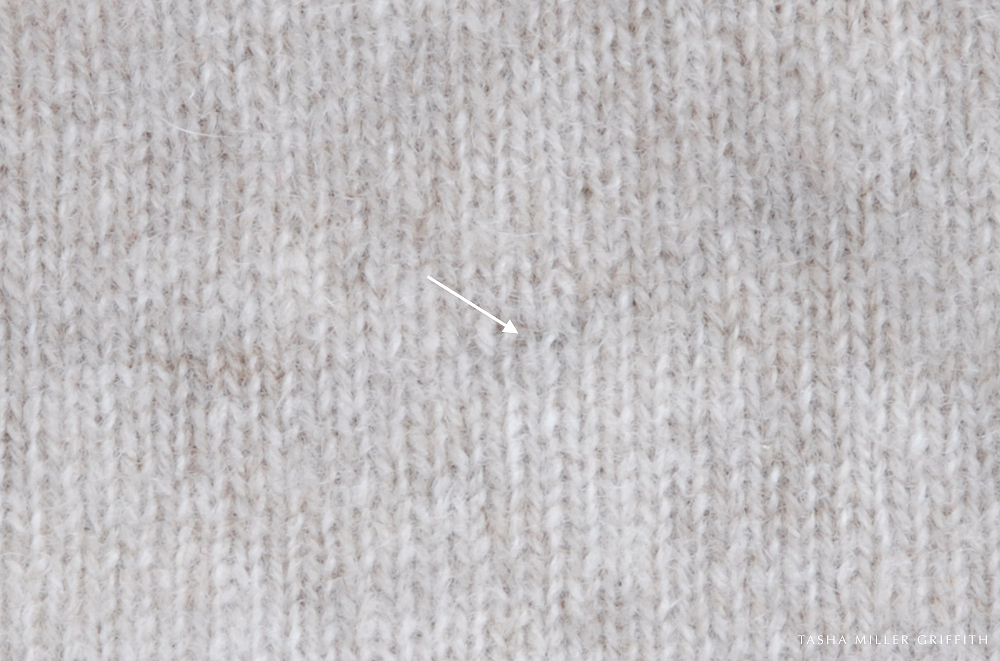
Before felting:

purple mittens sample before

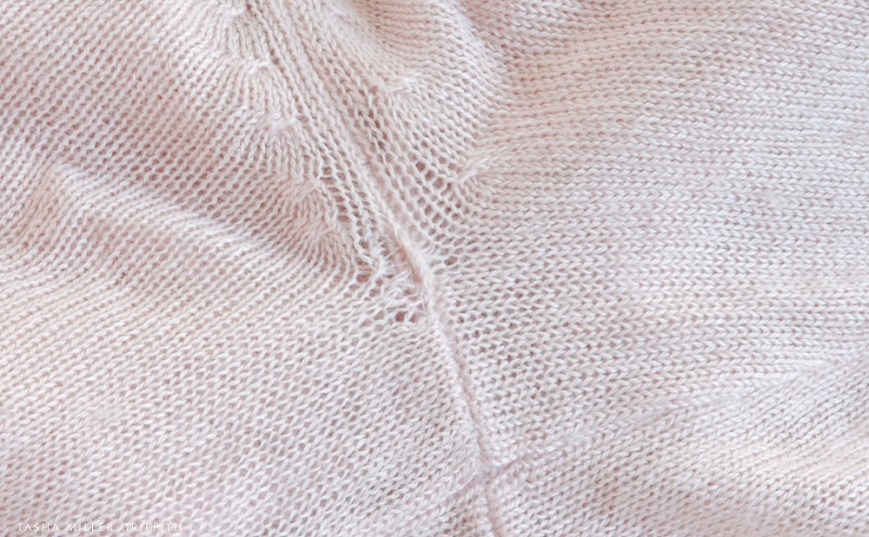
After felting:  (As usual, click on the pictures to enlarge if you wish.)

purple mittens sample after


Here’s the math part, it’s not too scary: divide the felted measurement by the unfelted measurement, to get the percent of the original measurement after shrinking.  F/U = %  I did this across my various measurements and got an average of 79% for the width, 84% for the height.  I wanted both, because I had noticed when felting the fingers the first time that they wanted to shrink more in height than in width, no matter how I stretched them out, which meant that I had not added enough extra knitting in that dimension.

Now that you have your percentage, apply it like this (there was algebra involved but I did it for you): the unfelted measurement (the one you want so that you know how much to knit before it shrinks) equals the felted measurement (how big you want it to end up) divided by your percentage of shrinkage (.79 or .84 in my example).  U = F/%  Clear as mud?  Try it, you’ll see what I mean.  You end up with a number a bit bigger than the felted/finished number you put in.  You can check it by putting it back in the first formula and see if you get the right percentage.

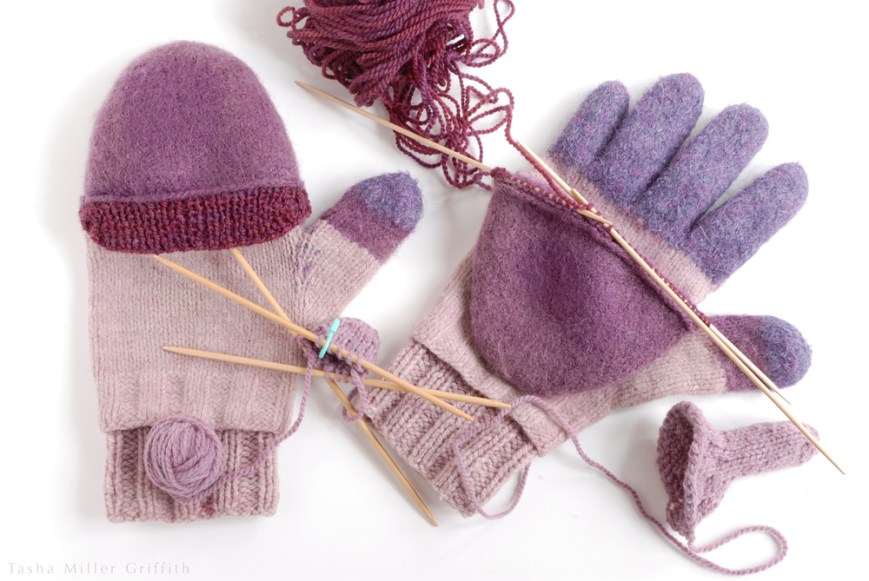
For my finished/felted measurements, I used the width of the previous fingers (by now chopped off), which I liked, and measured the height of my fingers sticking out of the mittens, adding a little extra for the thick knitted fabric to go over the top.  I calculated the unfelted measurements, then used the gauge from my sample to figure out how many stitches to use for each finger.  You can’t have a fraction of a stitch, so round up or down, whichever is closer or you want to err on the side of.  I knit until each finger was about the calculated unfelted height, erring on the side of a bit extra at the top, which turned out to be a good idea!

Just in case, I made one finger as test (the index finger on the right below) and felted it before knitting the others.  It came out great.

purple mittens unfelted fingers
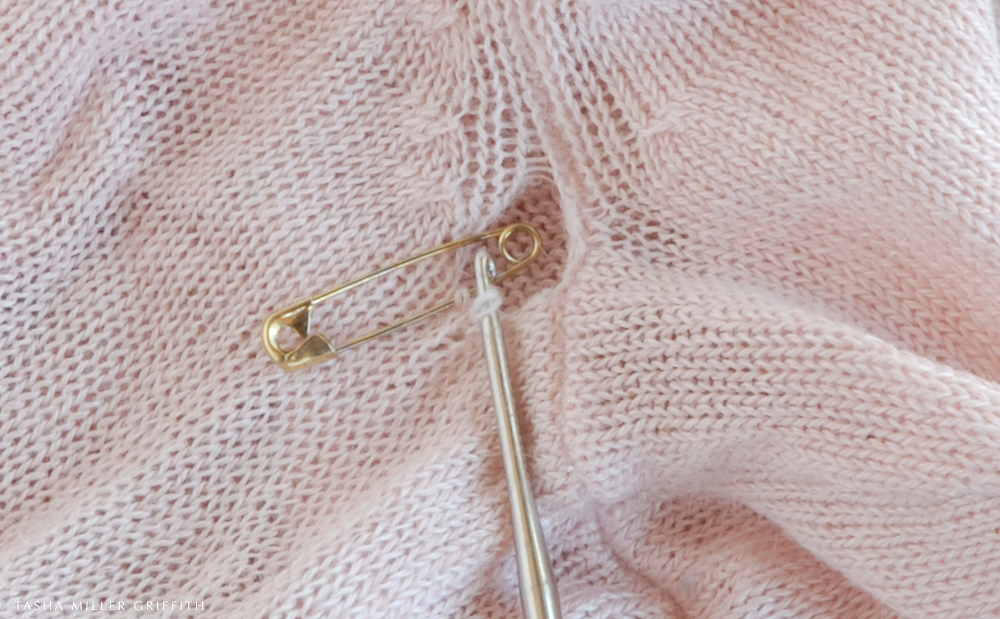
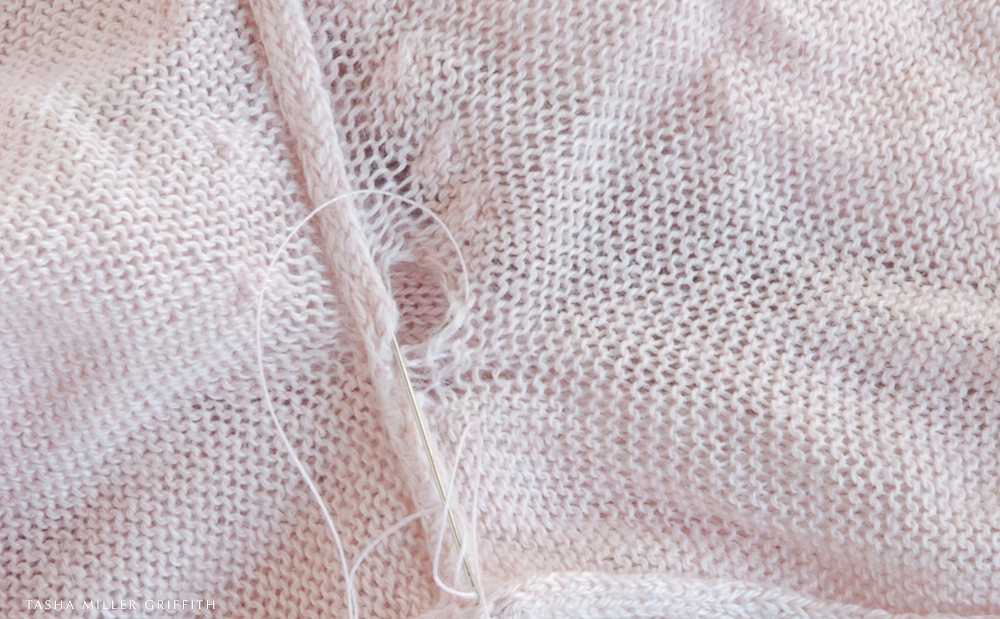
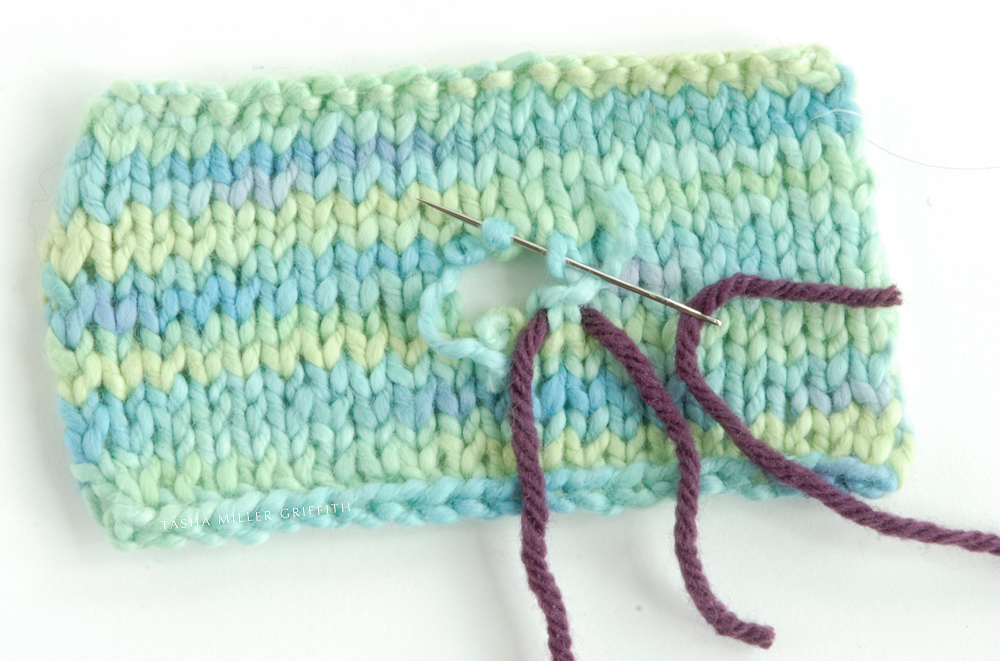
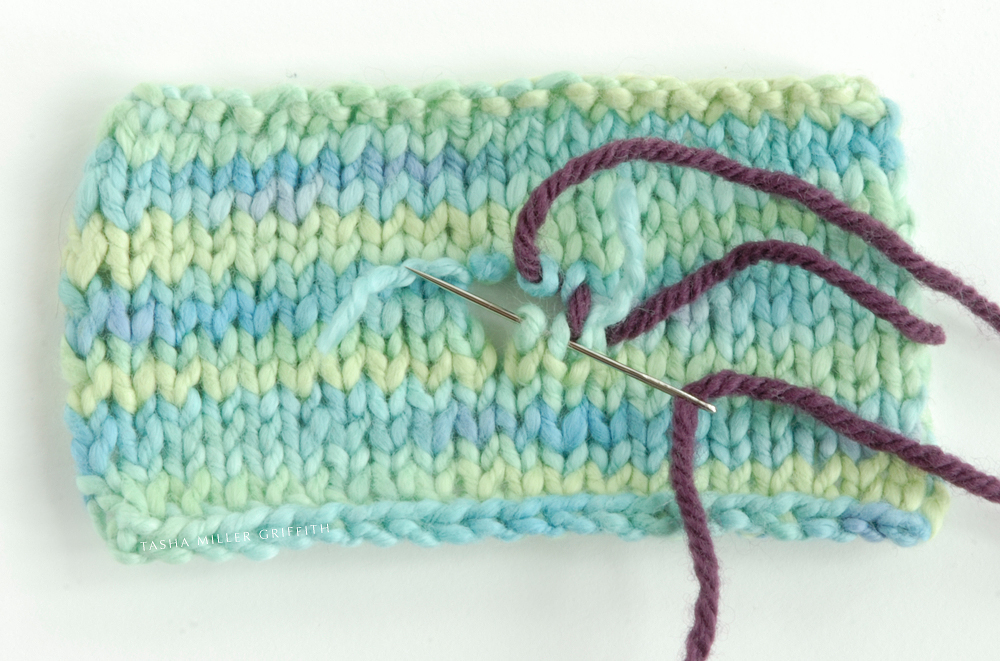
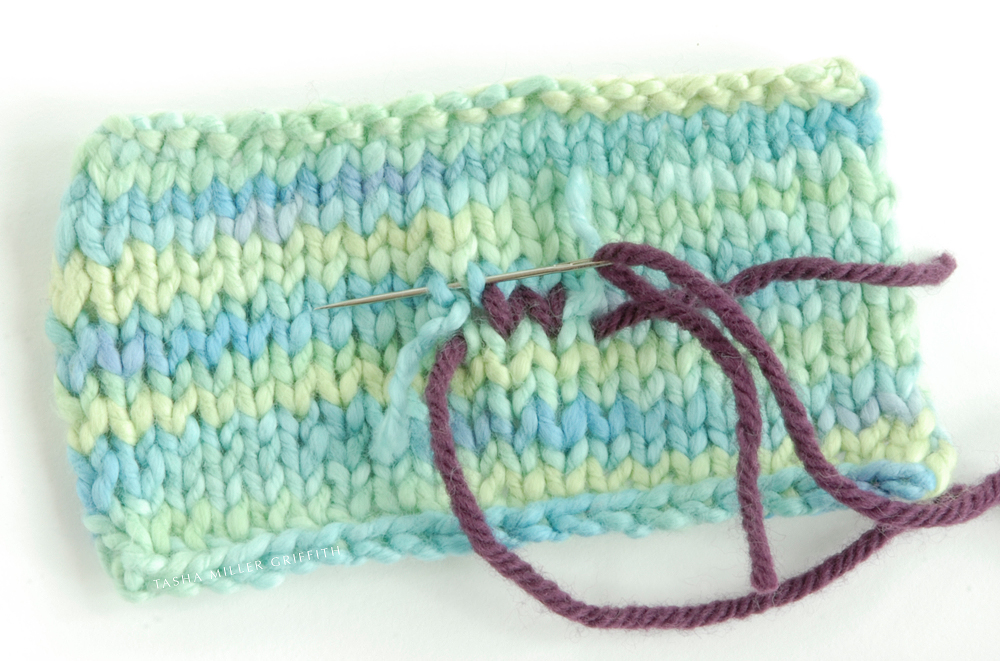
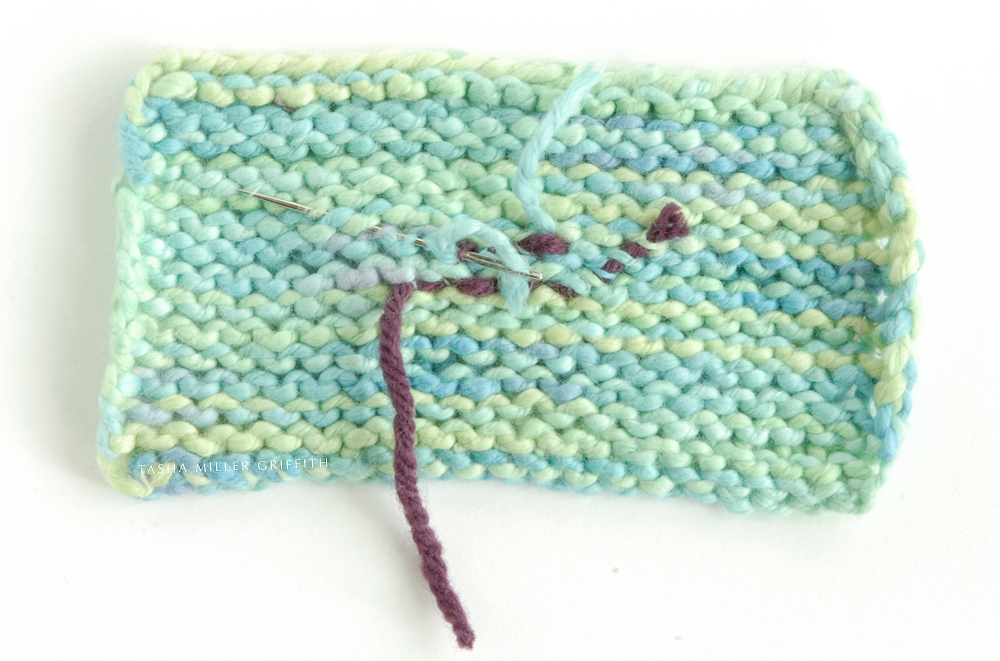
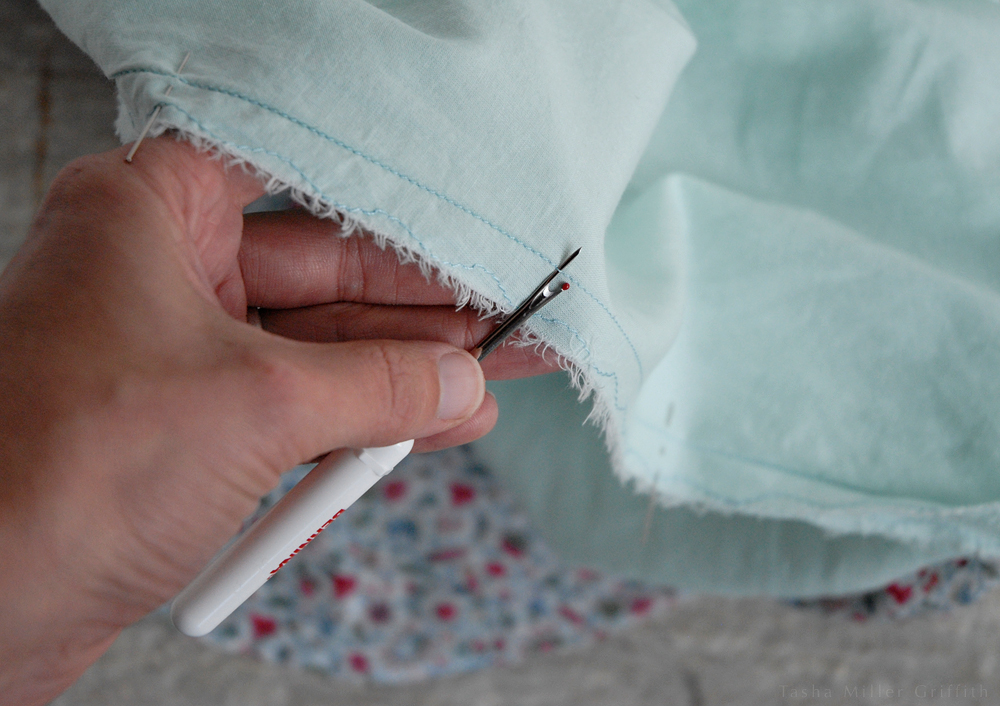
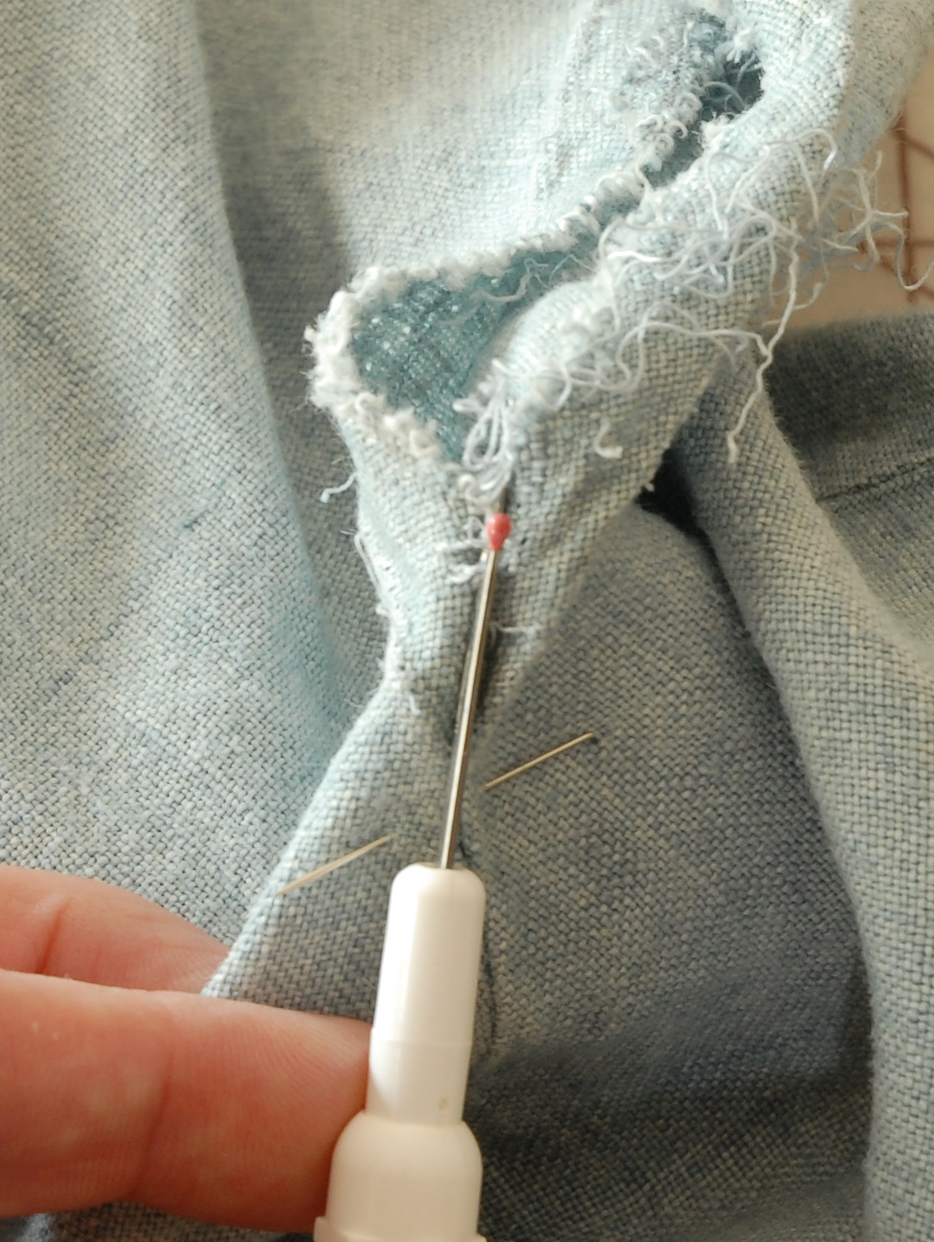
Even though the old fingers were felted on, I was able to snip the green stitches and pull them out, leaving the purple ones which I could pick up and knit from.  It helped that the palms never got totally felted.

Other Improvements

The thumbs were too short as well, plus worn mostly through in one spot from gripping.  And having only one layer of knitting (the part between the thumb and palm where the stitches tend to stretch open no less) meant that my thumbs were sometimes cold.  I fixed all that.  At this point, there was no stopping.  Since the thumbs were somewhat loose, I decided to knit inner layers for them.  I thought that I might need to slash the top of the mitten flap and extend it too, but after felting the fingers, it fit snugly over them, which would be warm, and I could add a bit of ribbing on the palm side for a little more length and to help hold the flap down.  Neither of these new additions would be felted, and both were small, so this was the no-math part.  I made adjustments visually, pulling something out if it didn’t seem right, and tried on the thumbs a lot to fit the shape to my hand.


purple mittens knitting extras  This may be hard to believe, but according to my notes, the wool I used for the new ribbing is the same as the original flap and thumb!  So it has definitely faded with sun and wear and washing.  Fortunately I like both colors.


A Minor Miracle of Purple Suede

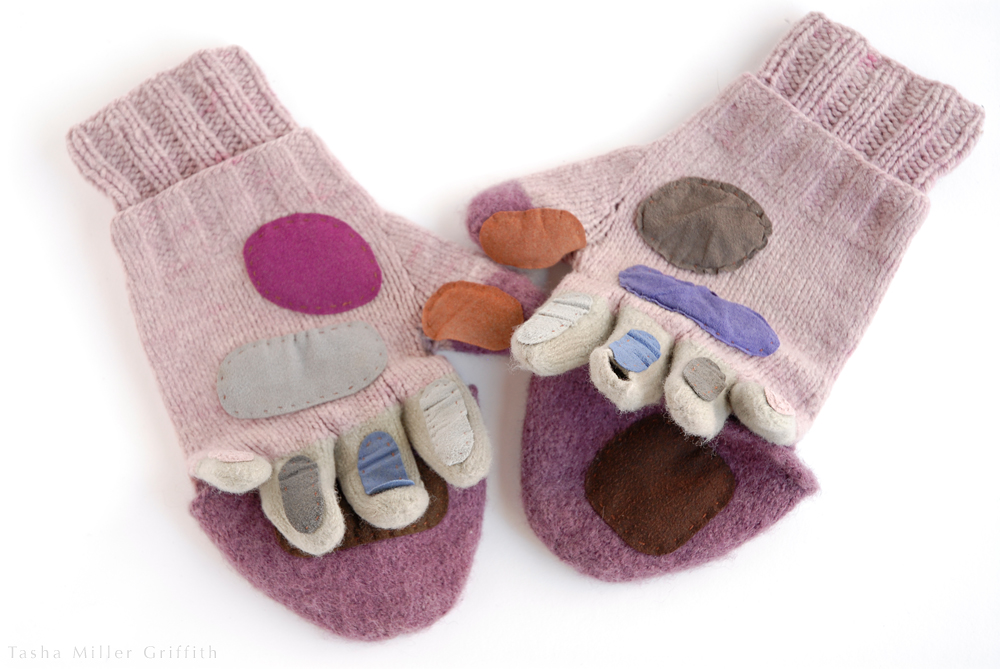
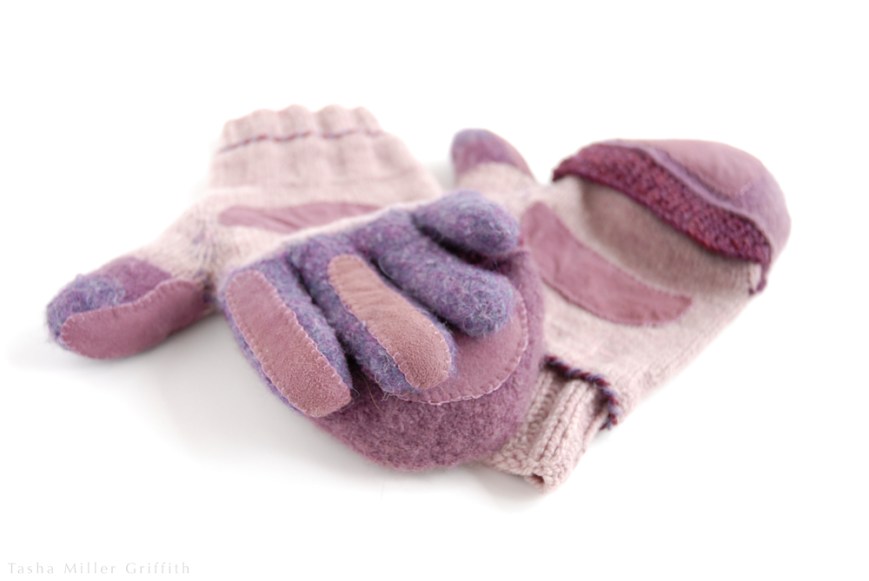
Finally, I needed something for grip on the fingers and palms.  (I’m telling this story whole, it’s a good one.)  I want to be able to drive and grab ski poles and my keys, etc., and I didn’t want to go back to the multicolored bits of Ultrasuede.  I briefly considered using some light green suede elbow patches I got along with a sweater for recycling . . . and was fortunately dissuaded by friends.  What I ideally wanted was something that would match the mittens.

Almost on a whim, I dropped into a rather old-school shop downtown, which sells saddles and leather and a few seemingly random bolts of blanket wool and skeins of rug yarn.  I remembered that the last time I was there, over a decade ago, they had a bin of leather and suede scraps, and I thought if they still did, I might be able to find something close.  I was the only one in the little shop, not too long before closing, and the woman working said that no, they didn’t have any scraps.  I had the mittens with me, I showed her what I wanted to do.  Suede and leather started at half a hide for $24, there were black and green and red . . . and at the end of the rack, four smaller, scrappier pieces, all in dusky, slightly mottled shades of purple.  Not just purple, four distinct purples that each were so exactly what I needed that they looked like they were dyed to coordinate with the mittens, and left on the end of the rack by magic.  “Oh,” she said, “You could use those!  They’re $9 each.  We sold all the red, all the black . . .”  Hardly believing my good fortune, I picked the color I liked best out of the thicker two (two were quite thin), paid for it, and practically skipped down the street towards my car.  A few times, when I’ve been intensely searching for a supply I cannot find, probably which doesn’t exist, I’ve dreamt that I went into a shop and found exactly that thing, only to wake up disappointed.  This is the only time, so far, it’s ever happened in my waking life.  I have a rather large piece of somewhat smelly purple suede left in my studio to prove it!


purple mittens finished 5

purple mittens finished 3


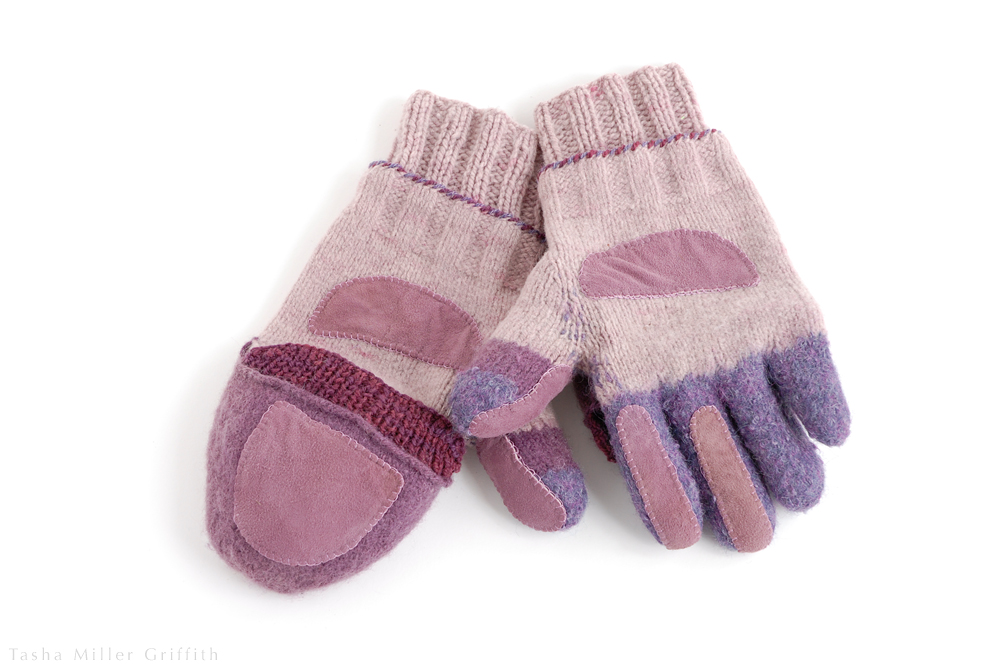
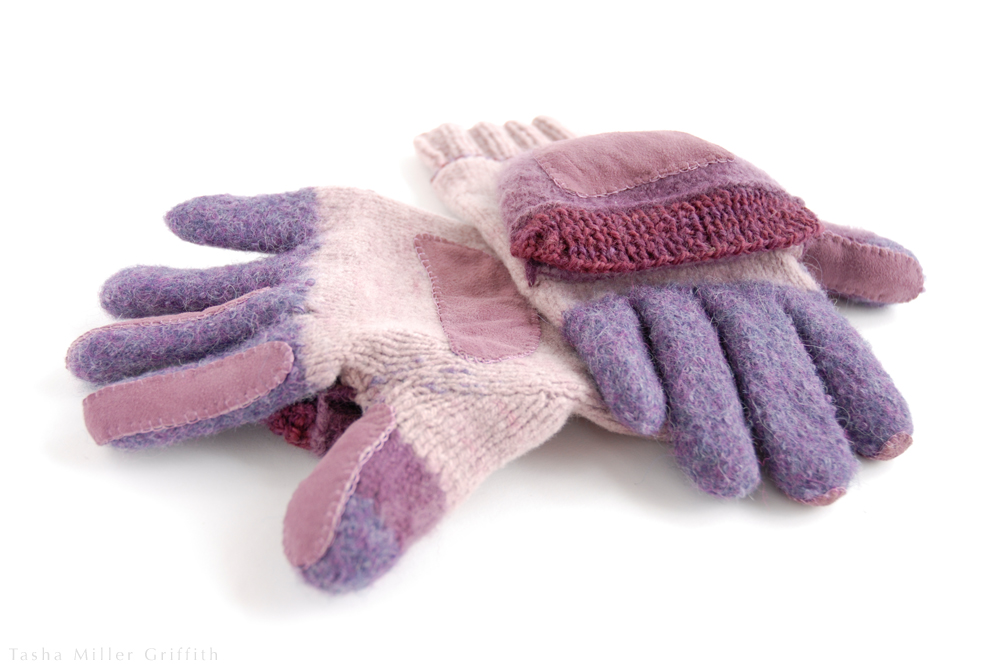
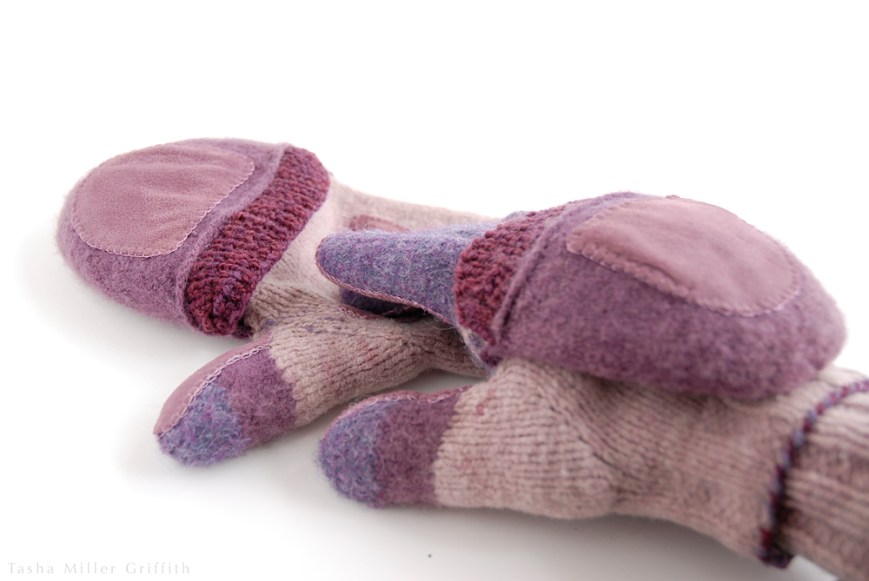
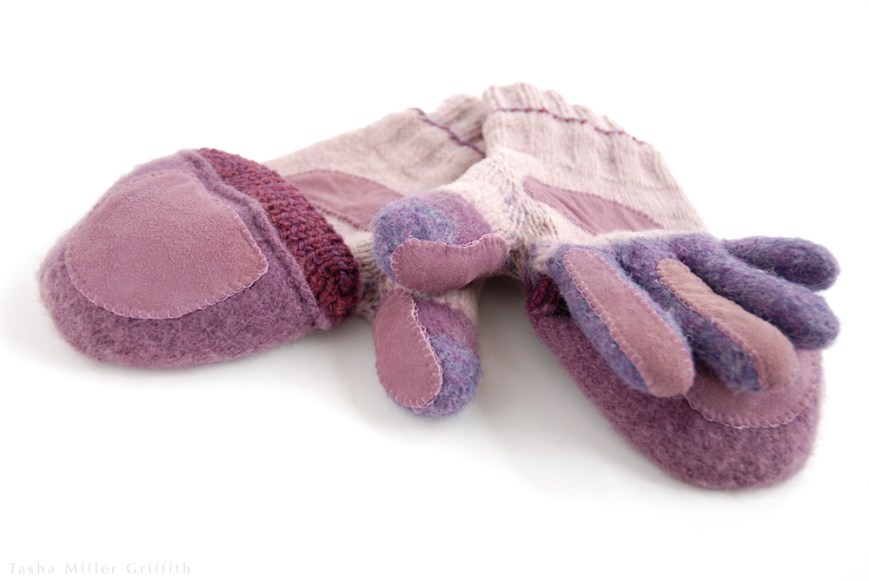
I love love love these mittens.  I finished sewing on the suede over our family Thanksgiving trip, and just in time too, when we got back our town had a major cold snap, not getting above freezing at any time for over a week, unlike our usual mountain cold nights but mild days.  I’ve worn these cross-country skiing, I wore them to art walk downtown at night (during the below-freezing week), shoveling snow, driving, and never one cold finger have I had!  Felted alpaca is like little down blankets for your fingers.  I can easily wriggle my fingers out of the mitten top for fine tasks without using the other hand.   Having placed the suede patches where the wear was on the old fingers, plus the part of my palm that I use when I grip things—surprise!—they are in the perfect spots.  I recommend the inside of the thumb especially.


purple mittens finished 4


If you want to make your own version, I’d start with a glove pattern you like.  Either refer to a flip-top mitten pattern, or make up the flap as you go (Basically:  I picked up sts across the back of the hand, cast on across the front and did a few rounds of short rows for a curved shape, joined everything into a round and knit, decreasing following the shape of the fingers underneath).

I realize that I haven’t talked about the actual felting, in fact that felting is probably the thing I know the most about that appears the least on this blog.  Maybe I’ll do something about that in 2014.

In the meantime, if you have any questions about making mittens or felting in general, feel free to let me know!

Happy Solstice, everyone!
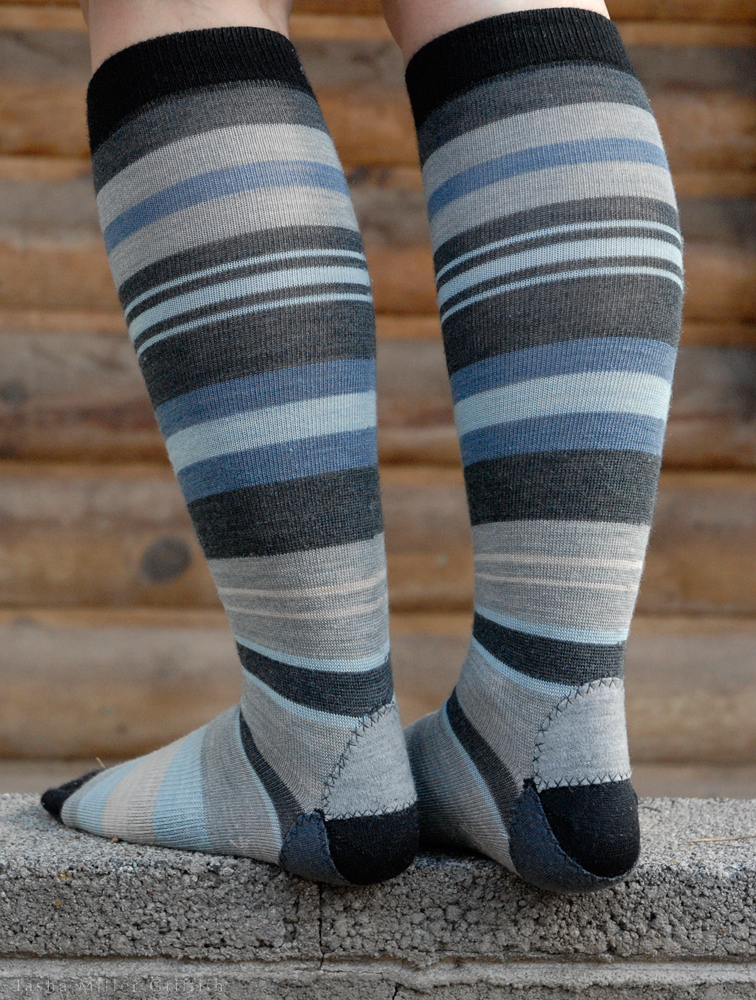
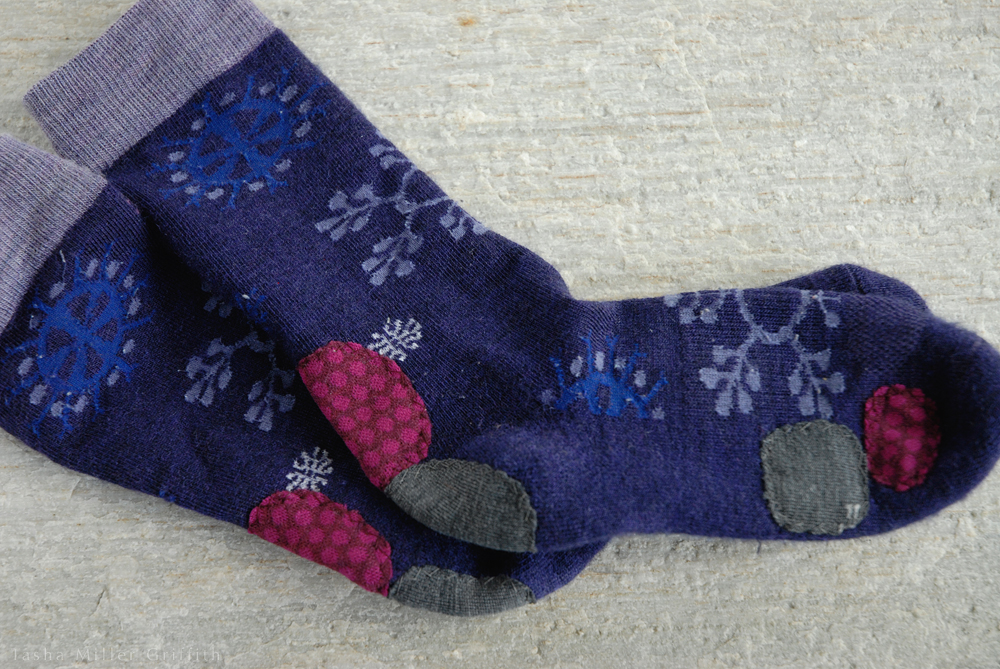
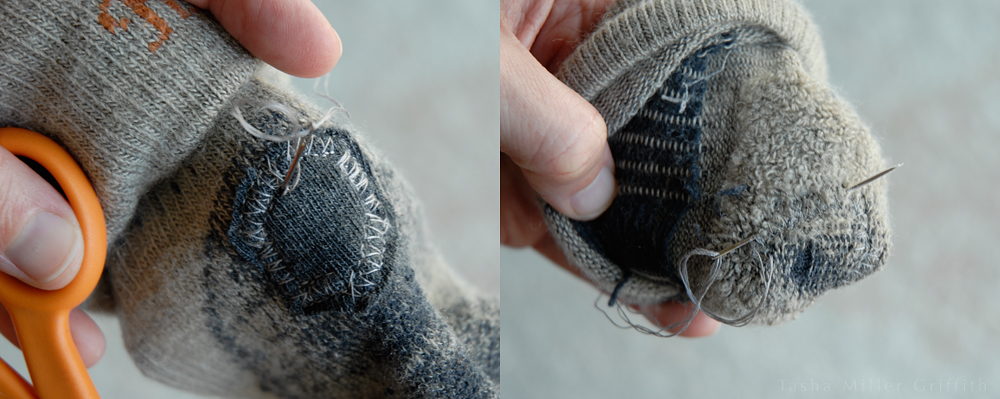
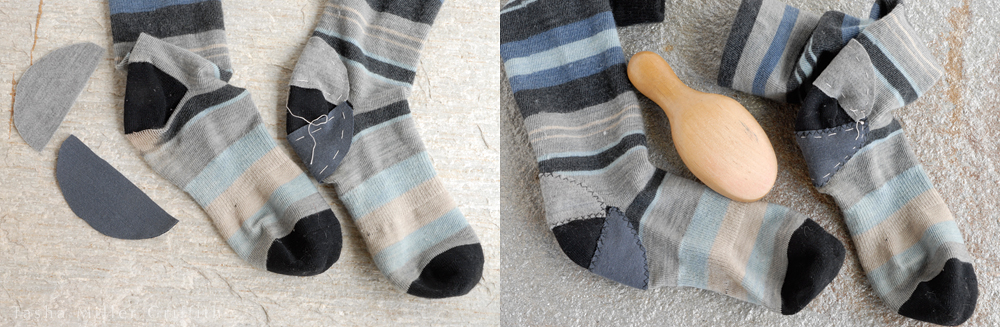
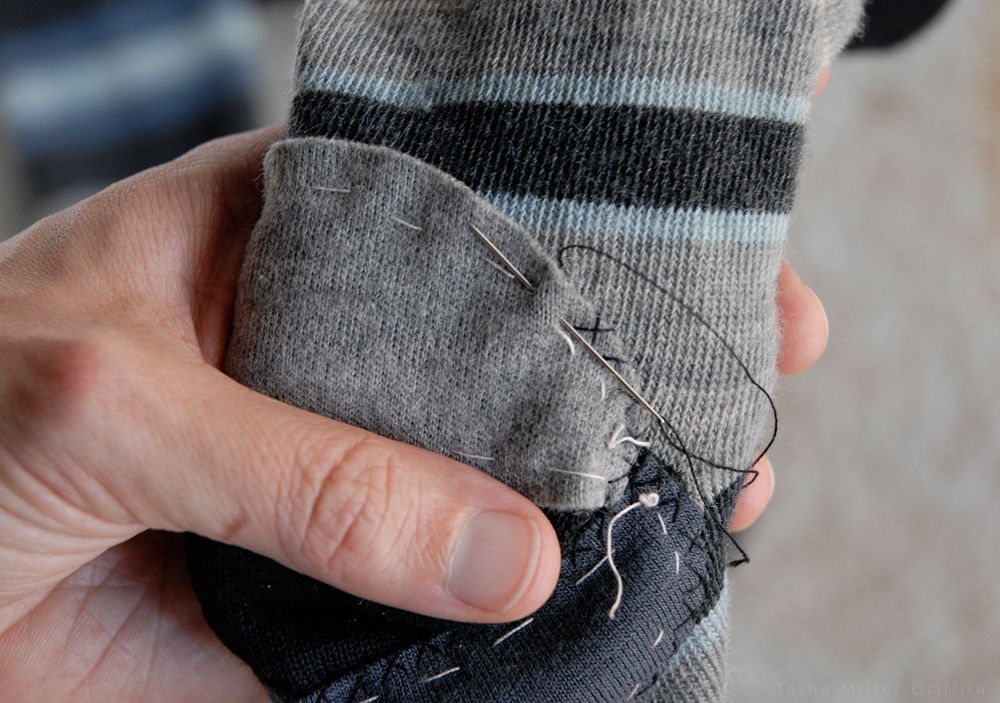
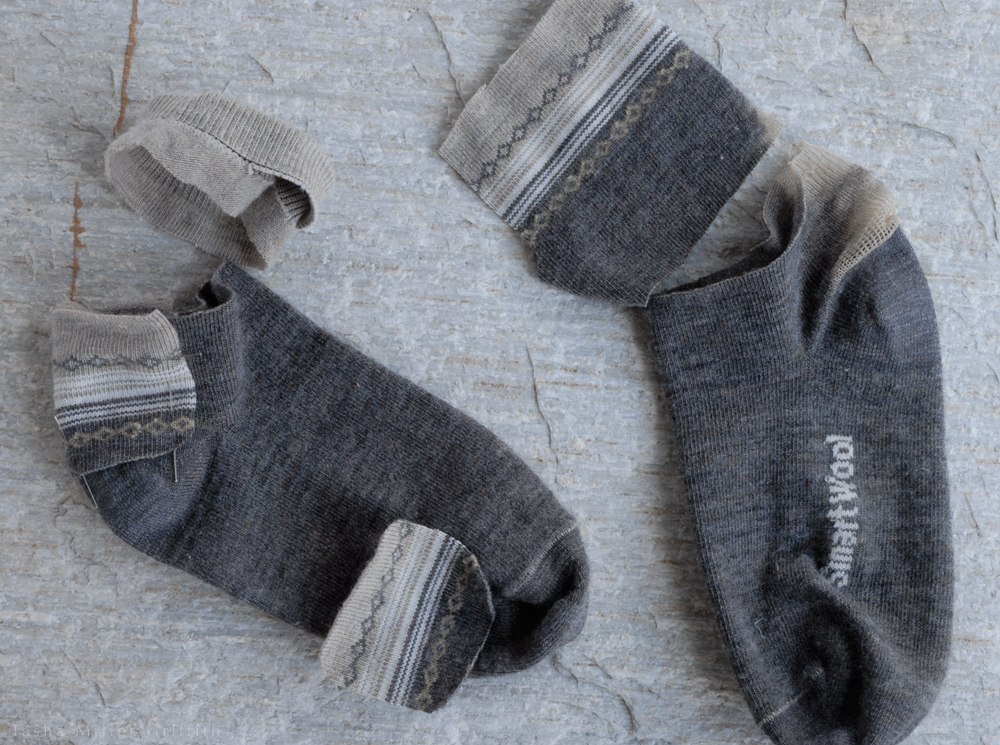
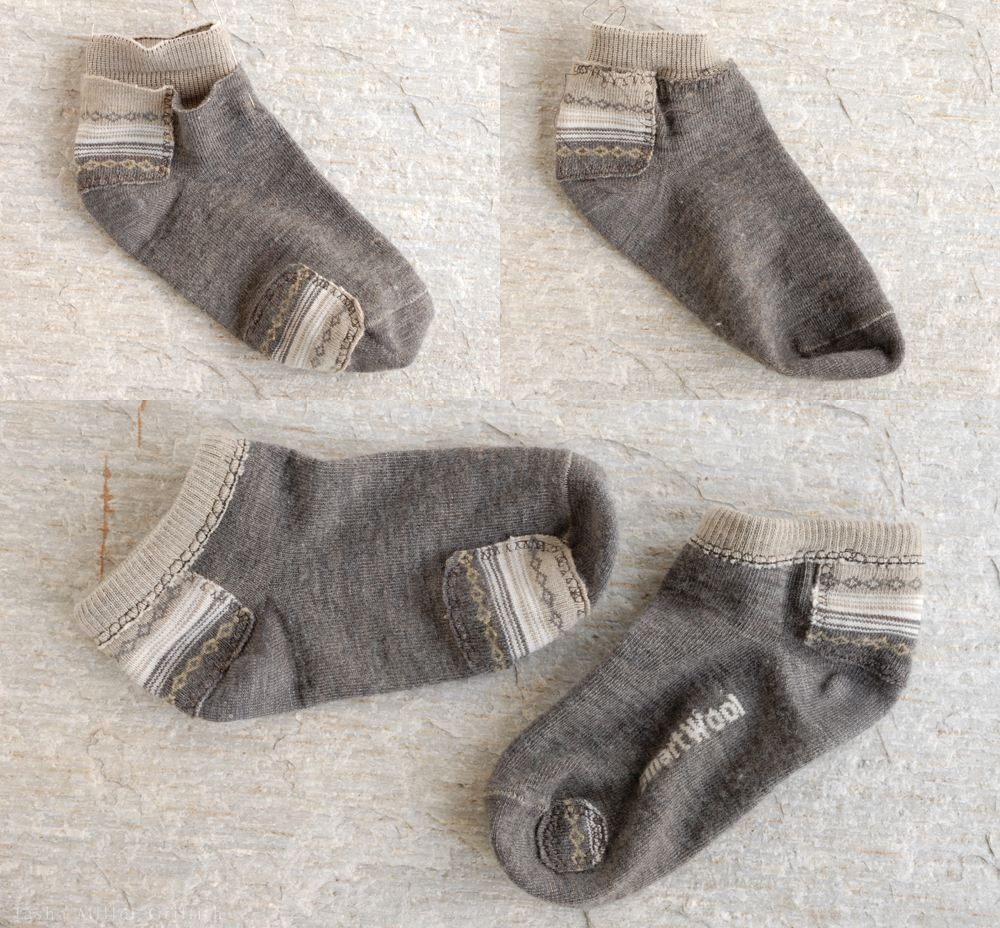
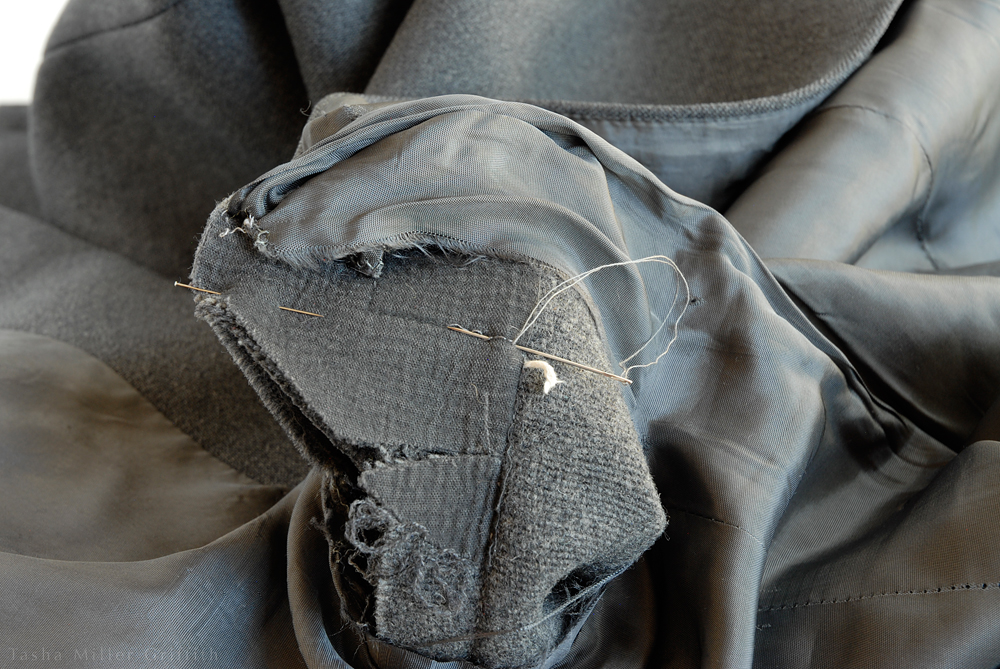
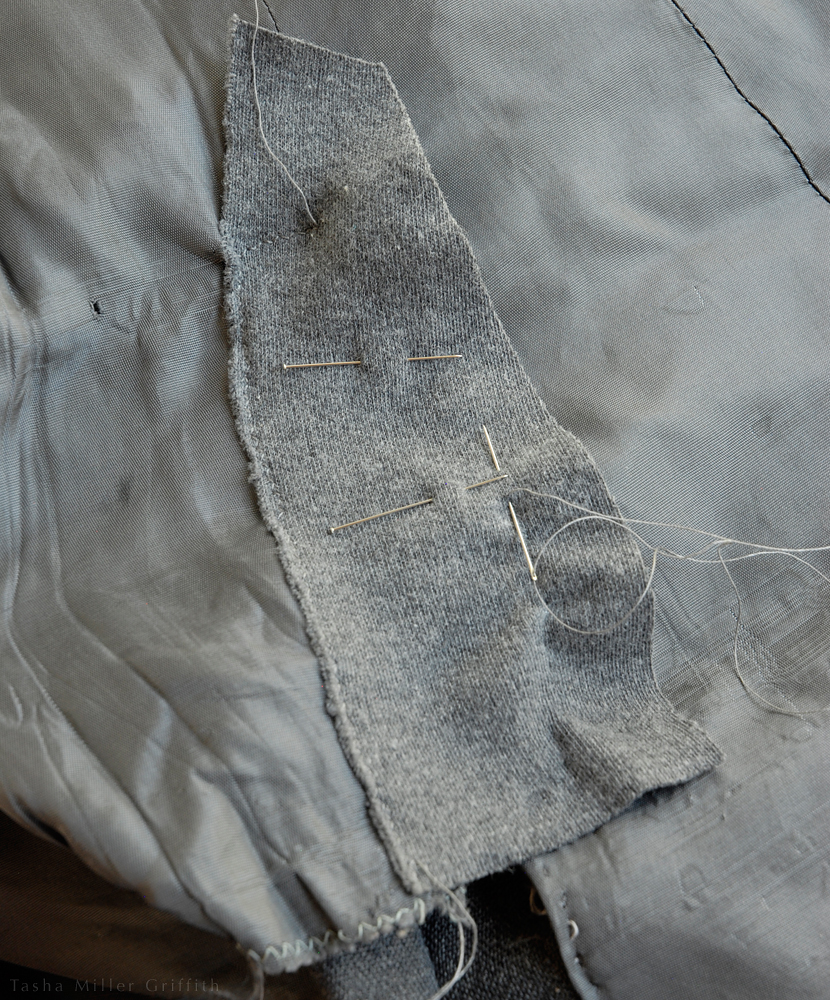
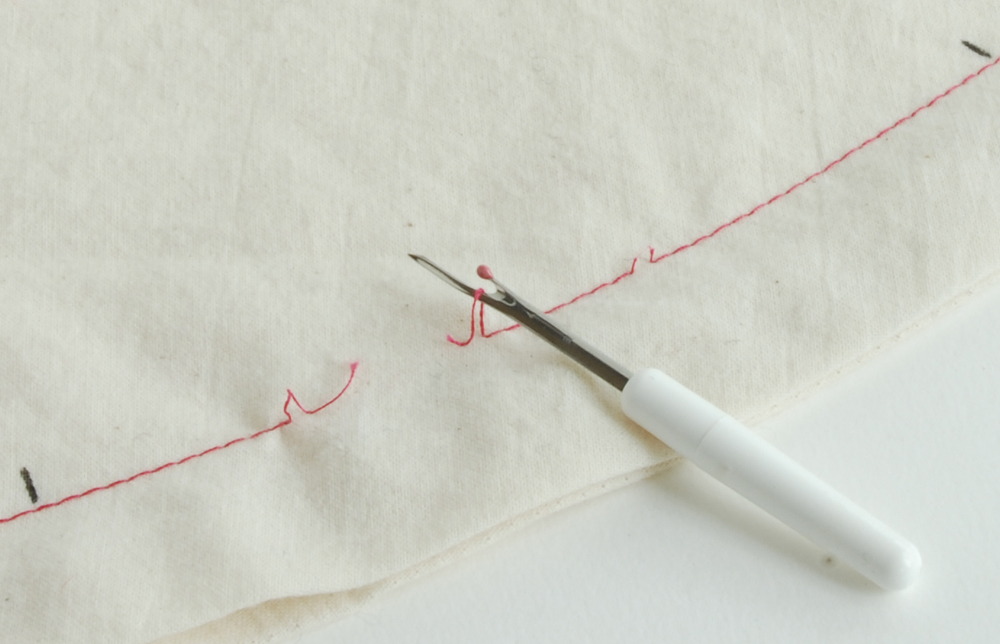
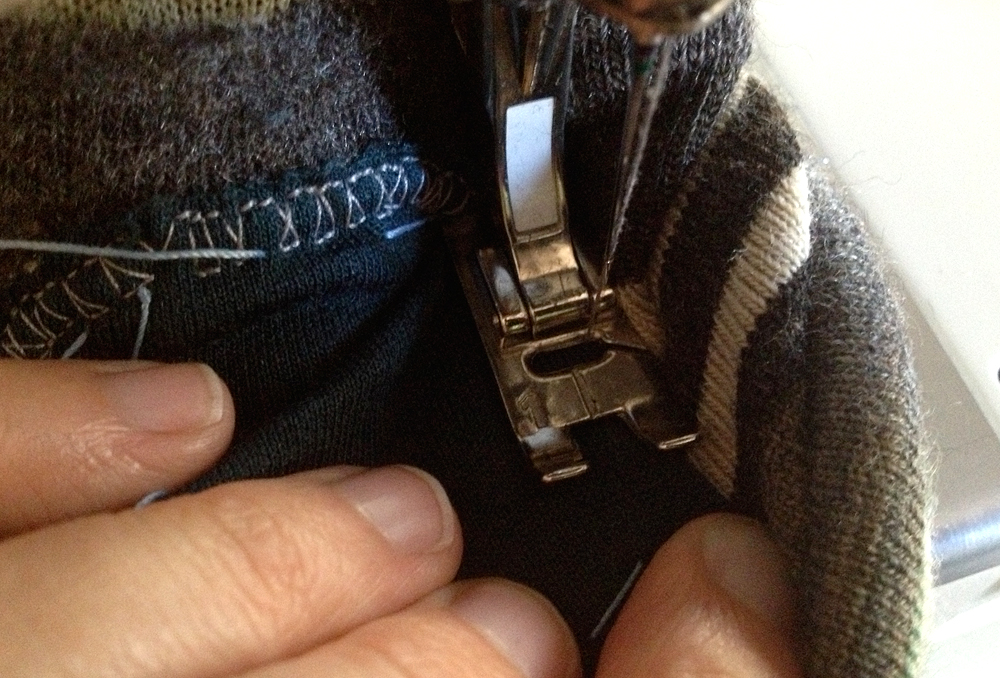
 

purple mittens finished 1


How to Fix a Coat with a Ripped Back Vent


coat vent mend 1


I’ve had this coat for, um, more than a decade now, around 15 years I think (!) . . . I bought it for $5 at a garage sale at my dad’s church, when I was in High School.  It was, without question, one of my best ever thrift finds.  I wear it all winter, every winter, and I still get compliments on it all the time.  I have fixed it so many times, in so many places, which really is the biggest key to its success over all this time, that and the quality fabric. The only clue I have to the coat’s true origins is a little tag inside which says “wolle.”

The other day, as I was finishing up teaching, I looked over at my coat hanging on the back of my chair, and the back vent was completely ripped out.  It’s cold here now, especially at night, so this project jumped right to the head of my line.

Fixing the outside part is actually not too big a deal.  Thanks to interfacing and the aforementioned quality fabric, the stitches have popped but the outside fabric isn’t torn (the lining is another matter which we’ll get to later).


coat vent mend 2

(As always, click on any of the pictures to enlarge for a better look.)

I lined up the vent in its original position, twisting the coat around to get a good angle for sewing.  I can tell where the stitching was by the little channel the thread has left in the fabric, and by the bits of leftover thread.  I lined up these clues, pinned things in place, and started sewing, overlapping the place where the original seam is still intact.

I used a double thread and backstiches sewn by hand to replicate the old seam.  I could have done at least some of this on the machine, but by the time I got the thread, stitch length etc. all sorted out, I figured this way was faster and easier.

As near as I can tell, those bits of thick white yarn are for matching a point in the original construction, and weren’t used to hold anything together.  When this coat does finally give up the ghost, I think I’ll take it apart and see what else I can glean from how the inside is put together.  I’d love to make my next winter coat from scratch.


coat vent mend 3


Back to mending for now; keep following the path of the old vent stitching.  It makes several right angles which seem random, but they were obviously holding everything in the right place before, so just go with it.  I found that right at the turn it was useful to make another pass and add a few more backstitches.  It can be hard to get them as dense as you would like and still get through the thick layers.  Turn the coat right side out and see if everything is held in place the way you would like.  If not, it’s easy to add more stitches.


coat vent mend 4


So that’s actually about it, just keep backstitching until you get to the end of the old seam.  Since that’s obviously a point of stress, I stitched in a little rectangle all around it to distribute the stress, rather than just following the path of the old thread.

Flip the coat right side out, and if you are satisfied with how the vent looks, it’s time to fix the lining.


coat vent mend 5


Sigh, the lining.  On the night that the coat vent busted, I described its lining to a sewing friend as “a hot mess” which pretty much sums it up.  Whatever this (I’m guessing acetate) lining stuff is, it’s not nearly as nice or durable as the outside, so that at this point, particularly at areas which get lots of wear (like the vent, and where the sleeves join the coat body), it’s a patchwork of repairs reflecting the techniques, scraps of fabric, and even moods I’ve had over the past decade or so . . . at this stage my goal is just for it to hang together and not look too awful if someone happens to catch a glimpse of the inside.

Since the fabric itself is ripped here, I needed to patch it with something.  I settled on a scrap of grey knit fabric, because 1. I won’t need to finish or turn over the edges, since it won’t ravel 2. The color is a pretty close match and 3. a knit is stretchy, which might work well at an area that’s clearly getting strain.

I sewed the first part of this patch on my machine, using a narrow zigzag stitch.  It proved difficult to go around the top without everything bunching up under the machine foot, so I decided just sew the second side using backstitch again (but only one strand of thread this time).


coat vent mend 6


After stitching to the top and burying the thread ends, I trimmed the patch for a neater (ha!) look, and there you have it.  I also tacked the bottom of the lining piece to the outside fabric.

This has got me wondering about lining my fantasy next coat in a silk knit.  What do you think?  Could be pretty sweet . . .


coat vent mend 7


Tada!  Fixed.  I just gave it a good press from the outside (a quick ironing with a lot of steam in the repaired part) and it’s good to go.  Pay no attention to the other small hole, I didn’t even see it until I was editing the photos . . .

I bet after all that you might like to see a picture of me wearing this fabulous, recently fixed, coat, yes?


me wearing coat


I know, it’s lovely, right?  If you look closely, some of the repairs are more obvious.  I’ve re-sewn the buttonholes multiple times, re-covered and attached I don’t know how many buttons, tacked down the tabs on the back belt every way I could think of, I put a bigger pocket in one side . . . but I’ve been more than paid back for time invested in repairs vs. time wearing coat.  I think it has another season or maybe two left.  The fabric right around the cuffs and front is starting to obviously wear.  When it does go I may just copy it and make a few modifications.  It occurred to me while working on this post that since this is my only real coat, I’d better make the new one while the weather is warm . . .

Here’s to extending the life of the things you love!

Repairing a Backpack


mending backpack 1


This spring, when I fixed this jacket for my dad, I got an unexpected bonus.  Every time I saw him wearing it (which was quite often, it’s his favorite for cool windy days) my heart would warm with a soft fuzzy glow.  Here was my dad, who I love dearly, so pleased with his jacket and so obviously getting good use out of it, both of those all the more so since I had fixed the zipper and the tearing pockets.  It’s hard to describe actually— it seems at the same time obvious and silly— but I’m telling you, every single time I saw him in the jacket I would get a moment of happiness.


mending backpack 2


So, the obvious thing to do was to mend something else of his, and the standout candidate was this backpack.  He’s had it since, I don’t know, around the time I was born maybe?  And he still takes it out into the field on weekly basis.  (Maybe I should explain that Dad is a fairly recently retired wildlife biologist, who now gets to spend more time outside with his pet projects than he did while he was working.  Objects, which are part of his field gear and/or live in his pickup truck, do not lead an easy life.)  And I have a serious soft spot for things that have far outlasted their expected usefulness—this clearly qualified.


Another (non-sentimental) reason I was all up for fixing rather than replacing this pack is that the zippers still work!  I asked Dad if they did, and he said “kind of,” which turned out to mean that the only thing holding them back was the amount of frayed nylon threads stuck in the teeth.  Amazing.  The first thing I did was to turn under and sew down the raw edge of the flap covering the zipper, which had pulled out of its original stitching long ago and was the main source of the zipper-clogging threads.  I pulled the threads from the zipper using my fingers, a tweezers, and a scissors for stubborn parts, alternately zipping and unzipping it until they were just about all gone.  I also went kind of nuts zigzagging over any and all seam allowances and raw edges I could reach inside the pack with my machine, trying to keep future fraying and loose threads to an absolute minimum, since after all, this backpack has to be ready for another 30-odd years of use.


mending backpack 4


The bigger holes I patched inside and out, to reinforce them, and again to keep all raw edges inside so they wouldn’t unravel any further.  The worst hole was where one strap had pulled out of the body of the pack.  That one had allowed Dad’s not-so-small camera to fall out of the pack—that was the last straw for him to hand it over so I could fix it.  After patching that hole on both sides, I sewed a big X through the strap webbing and the new fabric, which ought to hold it.  I also reinforced the other strap with similar stitching.


The only part I have a doubt about, is where one strap had pulled off at the point where it’s anchored to the top of the pack.  I added new fabric on both sides of the whole area where the straps attach (the one you see on the outside is black faux suede), and stitched around the whole thing as best I could.  But, there is an old rivet in there that had pulled out.  I couldn’t stitch as close to it as I would like, and I thought pulling it off completely would weaken the strap too much.  At least I will be around to see how it holds up, and make future repairs if necessary!


mending backpack 3


Hopefully you don’t need any more encouragement than the above story to get out there and fix something for someone you love.  It doesn’t have to be sewing, use whatever skills you have.  And if you have any questions about needle-and-thread mending, let me know, I’ll be happy to help if I can.


Why Not Fix an Item, as a Gift?

jacket repairs


So, it was my dad’s birthday recently, and he asked me if I would fix this jacket as my present to him.   Great idea, right?  Since half my DNA comes from this man, I guess I shouldn’t be surprised if he comes up with ideas I love, but I was a little surprised by this one.

Think about it, instead of getting someone we care about a thing which they might or might not use, we could offer to fix something they already have and love.  Who couldn’t use a chair glued back together, something painted, or a ripped seam sewn.  Especially if you, the giver, have some expertise in what you’re fixing.  Book repair, sock darning, judicious application of super glue . . .

This jacket has been in Dad’s wardrobe for years.  It needed a new zipper, and as I inspected it I noticed that the fabric around the cuffs was also shredded, and the pocket corners starting to wear.  I cut new cuffs and reinforcing patches for the pockets out of some leftover outdoor fabric from my mom’s stash, which luckily matched pretty well.  Now it’s ready to go, hopefully for a few more years of wear!

When we choose to repair an item, not only are we keeping things out of the landfill and extending the life of a much-loved/used object, the time we spend fixing something is a thoughtful gesture to a loved one and, to me anyway, far more satisfying than trolling the stores.

So, thanks Dad for the wonderful idea!  Let’s spread it, it has potential . . .


How to Fix a Small Hole in a Knit – Glorious Mending

fix sleep pants 1


Before I lose anyone who doesn’t currently have a sweater to fix, I’d like to mention a couple of really interesting things about mending and repair I’ve come across while working on this post.  The first one is Tom of Holland’s Visible Mending Programme, which is based on darning knits and on the idea that mending is something to be proud of.  Pretty much needless to say, I love this idea and it’s implications.  The second one is about fixing all kinds of other things, I saw it just yesterday (via Boing Boing via Root Simple) it’s a project by Paulo Goldstein called Repair is Beautiful in which he repairs all kinds of things (like a lamp, a chair, headphones) in unusual and beautiful ways.  I love the aesthetic of his project, it says all kinds of provocative things about repair, not just that it can be lovely and unusual to look at, but also he’s calling attention to the repairs, asking you to think about what it means to fix something.  Check it out, the pictures are way better than my description.

So, after all that, just an invisible mend for today – kind of disappointing I know, sorry!  I do have some ideas for visible mending of a couple of things now in my to-fix pile, and I’ll share them as they are done, but sometimes, you just need to repair a little hole.  The idea for his post started a month or so ago, when I realized that two of my favorite light sweaters/tops were sprouting holes under the arms.  Not big enough holes to need filling in/darning, but still enough to need fixing before they got out of hand.  Sometimes I even happen to catch a problem when it’s still a thread that’s about to break, like the one near the arrow below.  Most of the time, I don’t notice until it’s more like the hole on the left.


knit fabric fix 1


If you do find a weak thread that’s still intact, you can “trace” along it, following its path with a new stronger thread.  This is a fine gauge sweater, and I had sewing thread almost exactly the same color, so I used that.  You can also try embroidery floss or yarn of various types and thicknesses to get something close to your garment yarn, or something you like as a contrast.  There will probably be at least one stitch that is only made up of the mending thread, so if you want it to be invisible, choose something as close as possible to the original yarn of the garment.


knit fabric fix 2


We’re now looking at the sweater from the inside.  I like to start a repair like this by anchoring the thread somewhere where you won’t see it, like in the seam or in the back of a nearby intact knit stitch, with a couple of back stitches.  Then I start picking up the parts of the sweater that are coming apart.  Can you see how the thread and needle are following the path of the weak stitch?  In this case, that’s all I need, so I’ll go back to the seam, take two more back stitches, bury and clip the thread, and I’m done.

Ok, how about a hole that’s progressed a little further?  Also illustrated further down is a small hole with one broken thread, keep scrolling down for that one.


knit fabric fix 3


The first step here is to pick up the fallen stitches as much as possible.  Remember when I said that knowing how to pick up a dropped stitch in knitting would help you figure out how to fix things?  (Incidentally, I learned I new tip from my resident photography expert to make the photos from that post clearer, so I went back and edited them, it should be easier than ever to see what’s going on.  You can click on those photos, and the ones in this post to enlarge them as well.)


knit fabric fix 4


I’m not going to lie, it helps to have a really small crochet hook, or another tool with a tiny hook on the end.


knit fabric fix 5


It may also help to use a safety pin to hold any stitches that may pop loose while you work on the rest.


knit fabric fix 6


When you have picked up as many of the stitches as you can, it’s time to stitch the hole closed.  Start by anchoring the thread with backstitches again, in this case in the nearby seam.


knit fabric fix 7


For a small hole right near the seam like the one in this pink sweater, I basically stitch the sides of the hole to the seam, making a couple of passes and trying to keep my sewing stitches looking as much like the knitting as possible, which often involves going back and forth and going though each knitting stitch more than once.  Again resist the temptation to pull the thread very tight, or you’ll pucker the fabric.


knit fabric fix 8


If the hole is in the middle of an area with no seams, still start by picking up any dropped stitches that you can.  Take the anchoring backstitches through only the wrong side part of a nearby stitch, so that they don’t show from the outside.  Bury the thread between backstitches by moving diagonally, again piercing the stitches and not going all the way through to the front side.  In a garment with thicker yarns, you can fix the hole first and bury the yarn ends later, the body and friction of the thicker yarn will usually keep them from unraveling, although of course you can also do backstitches if you wish.  In any case, avoid pulling the mending yarn too tight or the fabric will pucker.

If the hole is too big to look good when pulled almost closed, it’s time to darn it, which will make a more visible patch.  (Look up “darn a sock” if you aren’t sure how.  You could start with Zoe’s post about it, which is where I first found out about Tom of Holland as well).


kitchener stitch 1


The mend will be most invisible if you can mimic the structure of the knitting.  The knitting term for this is Kitchener Stitch.  If you search for it, you’ll find all kinds of diagrams and instructions, but the only way it ever makes sense to me is just to look at the knitting and follow the path of the yarn.  Start a couple stitches away from the hole to make sure that you catch all the threads around it, and to practice moving the needle the way that the yarn goes.  When you get to the missing area, try to keep the pattern going.  This will involve going through a stitch above and a stitch below the hole, then the next stitch below with the same stitch above, or a similar pattern.  I’ll say it one more time, the mending yarn needs to replace some of the yarn that broke, so let it be there and don’t pull too tight.


kitchener stitch 2


kitchener stitch 3


fix sleep pants 2


I fixed the sample from the right side, and the cream knit pants from the wrong side.  You can do either one, whatever works best for you.  Just check the public side if you are working from the inside, and make sure no stitches that you don’t want to show are showing.


kitchener stitch 5


fix sleep pants 3


For a little hole like these, we’re just about done!  If you are tracing the knitting stitches with mending thread, keep going past the hole to make sure that you catch all the stitches which the broken one was connected to.  End with a couple of backstitches to make sure that everything will stay in place, and leave a short tail of the mending thread or yarn on the wrong side so that they don’t pull out.  With thicker yarns, you can use a sharp needle to bury the mending yarn, and any leftover ends of the original yarn, by piercing the back side of the nearby stitches.


fix sleep pants 4


kitchener stitch 7


The finished repairs.  Believe it or not, the arrow points to the replaced stitch in the cream knit.  The green sample still has two ends to bury in the back.


knit fabric fix 9


fix sleep pants 5


kitchener stitch 6


If you have questions about mending something, or an unusual repair you made to share, I’d love to hear about it, do share!


Another Way to Rip Seams


pocket seam ripping 1


If you’re going to make anything, it’s fairly certain that you’ll have to un-make and re-make part of it at some point.  It’s not bad, it’s just part of the process.  In sewing, this involves seam ripping.  It’s an essential skill for makers, and especially those who are interested in refashioning, repairing, upcycling, etc.

Although some folks rip stitches fast and furious with razor blades, I have always stuck to my trusty seam ripper.  Recently I’ve been using it in a slightly different way on straight and zig-zag seams, with really good results.

seam ripping 2014 0


The photo at left shows classic seam-ripper technique.  Slide the seam ripper into the seam, use the pointed part to pick up a stitch or two, and slide them into the blade in the middle of the ripper to cut.  Once you have a couple of stitches cut, pull the seam open and you will be able to see and cut more without harming the fabric.


seam ripping 2014 1For this technique though, everything stays flat, which is especially nice if you have a delicate fabric or it’s hard to see the stitches in the seam.  Use the ripper to cut a stitch, and then another one 1 -2 inches away, creating a small thread section with cut ends.  Then use the long prong of the ripper to pull a few stitches up and out of the back thread without cutting them.  You may need to do this one by one if the stitches are small.  The object is to get a little tail that’s long enough to hang onto with your fingers.


Once you get a tail, grab it with one hand, hold the fabric with the other, and pull the the thread section out in one go!  Pulling close to the plane of the fabric, instead of straight up, will make it easier.


pocket seam ripping 3


If you flip the fabric to the back you’ll see that the stitches on the other side, which were held in place by the ones you just pulled out, are now free.  All you have to do is cut a stitch a little way down the seam and you can use the free thread to pull out another section.  Every time you pull out a section, flip the fabric over and you’ll find a tail ready to pull out the next section.  I find this quite fast, and it also creates fewer tiny thread ends that you’ll have to clean up.


pocket seam ripping 4


If you are ripping out a specific part of a seam, such as between the pins here, you may want to have a longer thread to work with when you get to your stopping point, so you can tie a knot to hold it in place.  In this case, pull up the last inch or two of stitches without cutting either side.  It may help to turn the seam ripper so the stitches don’t slide into the cutting part.  Once a stitch is loosened, you can also use your fingers, the whole handle of the seam ripper, or another tool to pull the stitches up without cutting them.


pocket seam ripping 5


When you get to the new end of the seam, pull on the thread to get the last stitch from the back side to pop through onto your side.  Slide the point of the seam ripper into this new stitch and pull it up so that both ends are on the same side.

Tie a knot or use backstitch, and bury the ends if they’ll show.


pocket seam ripping 6


Again, this last part is only necessary if the end of the old seam won’t be crossed by or stitched over with a new seam, and so you need to secure the end.

This way of seam ripping works great on zig-zag seams, too, although it won’t work with seams where the thread crosses back over itself.  Sometimes I’ll get lucky and pull the right thread on serged seams, but I don’t have a sure-fire formula for those yet.  Maybe you do?

I’m sure that others use this technique, I just discovered it recently and I’ve been using it all the time …