
Revised and updated with new photos and text (and drawings I found in my sewing class materials), this tutorial is now better than ever! Feel free to grab a fabric scrap and some thread and follow along.
If I had to name the single most useful hand sewing stitch I know, it would probably be the backstitch. I love it for repairs, for sewing in zippers, and for anywhere I need the control and flexibility of hand stitching with a hard-wearing stitch.
When you think of hand sewing, you probably think of running stitches, like the ones below. The needle dips into the fabric and comes up going in the same direction. You can make several running stitches on the needle before pulling the thread through, and the thread slides easily through several running stitches at once.
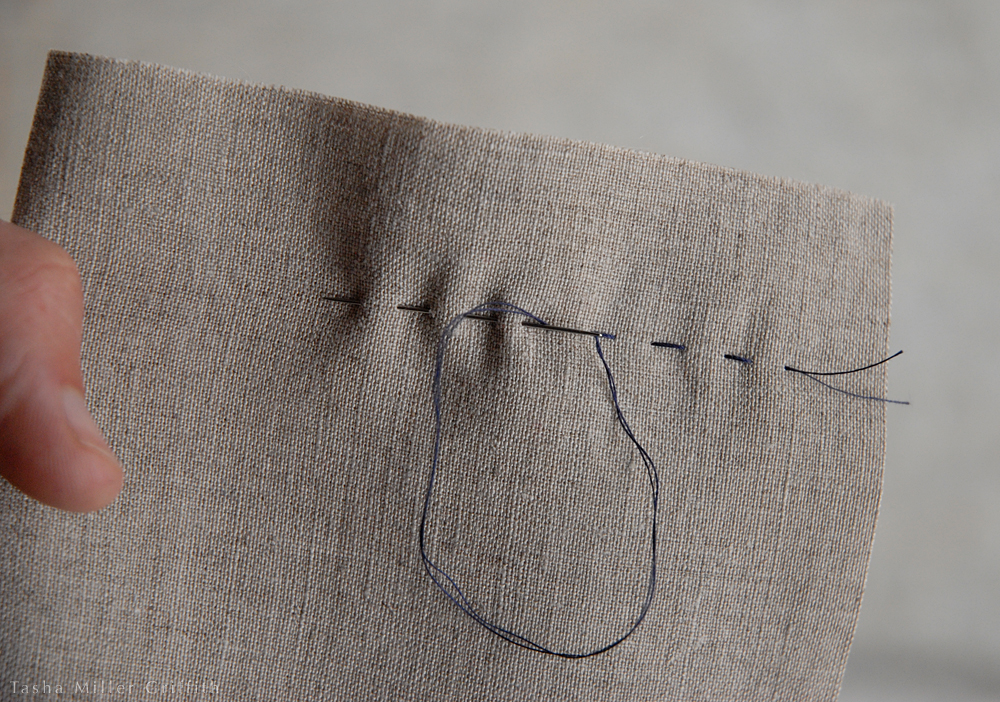
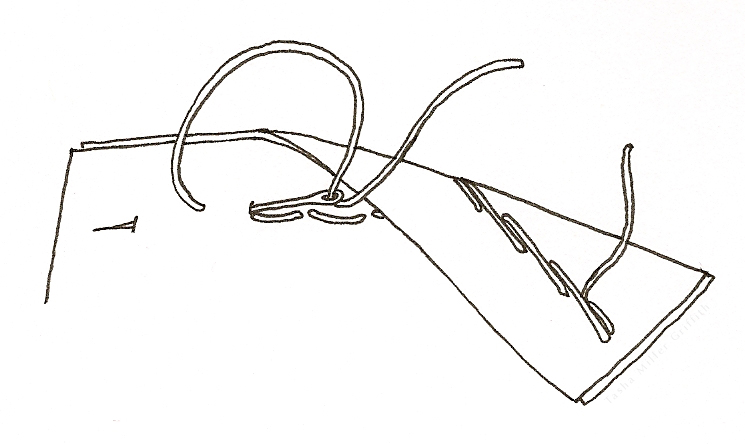
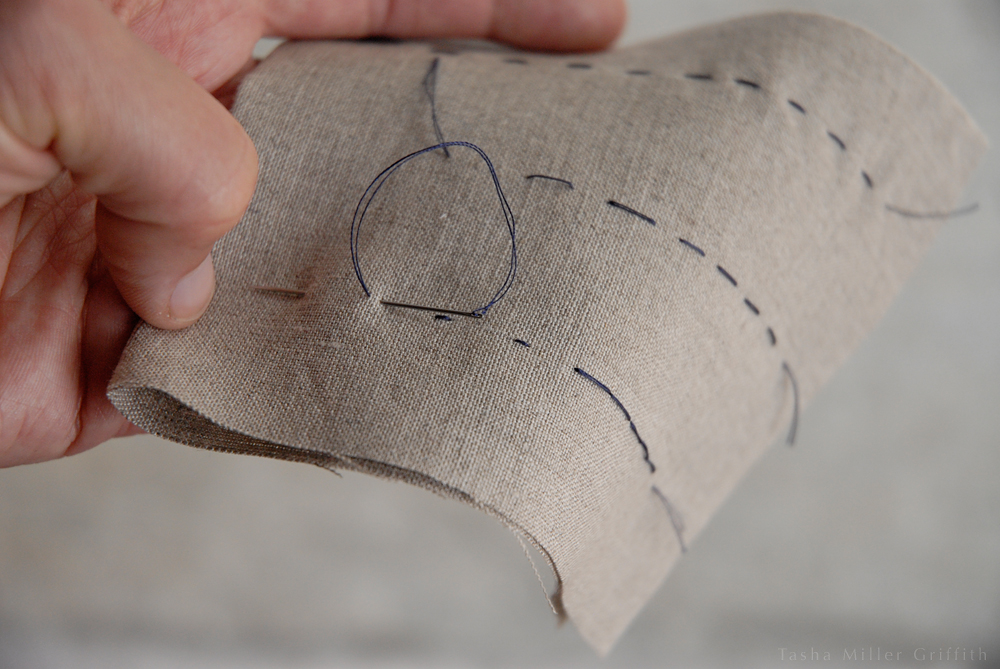
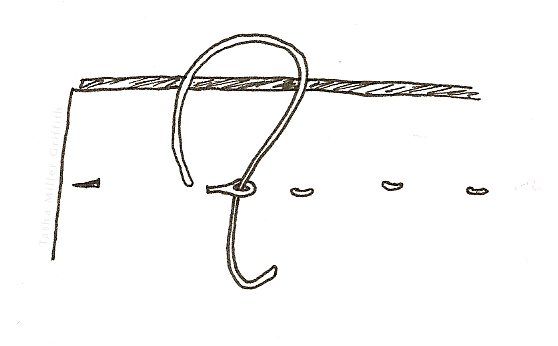
In a backstitch, the thread loops around itself, which makes the stitch much harder to pull out. To make one, take the needle backwards from the direction you’re stitching in, stab into the fabric, and bring the needle out at the further end of the next stitch. Then go backwards again and take the next stitch.
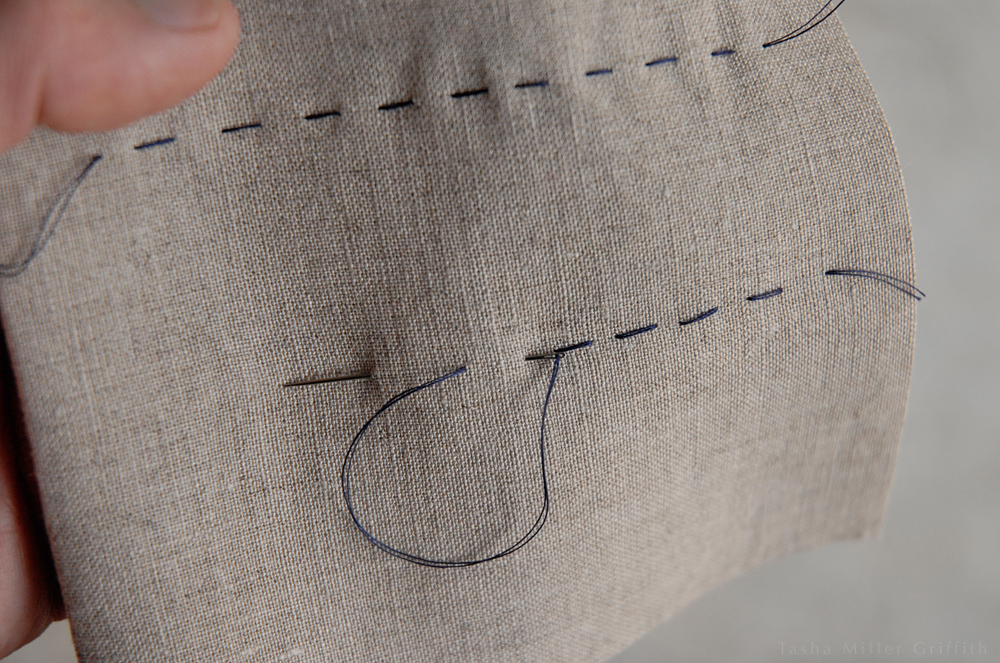
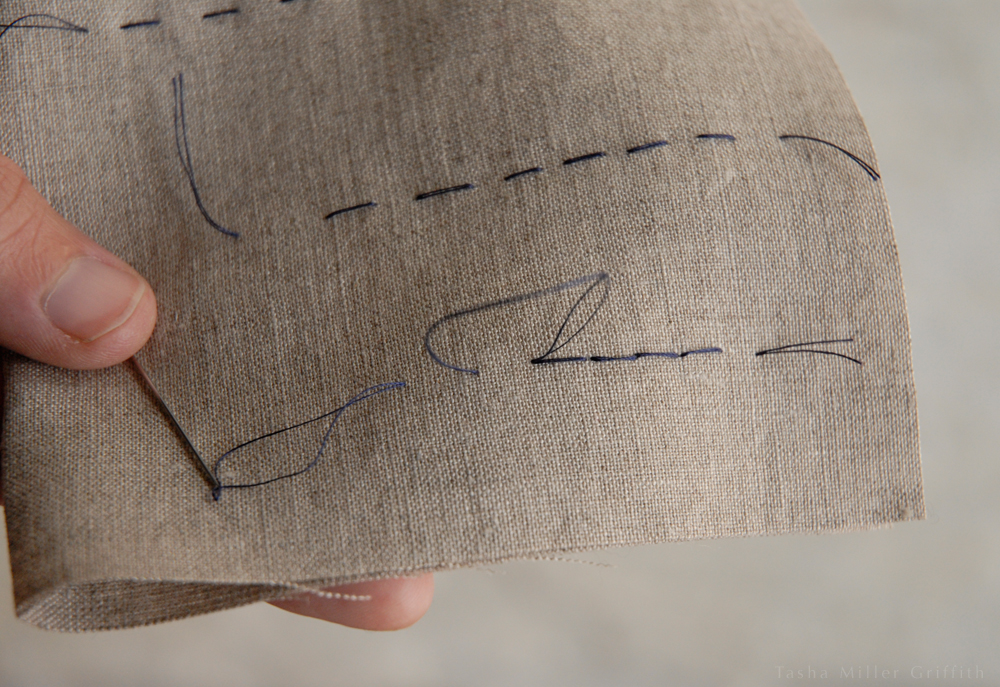
You can see the overlapping loops on the wrong side (backside) of the stitching. By contrast, the running stitches look the same on both sides.

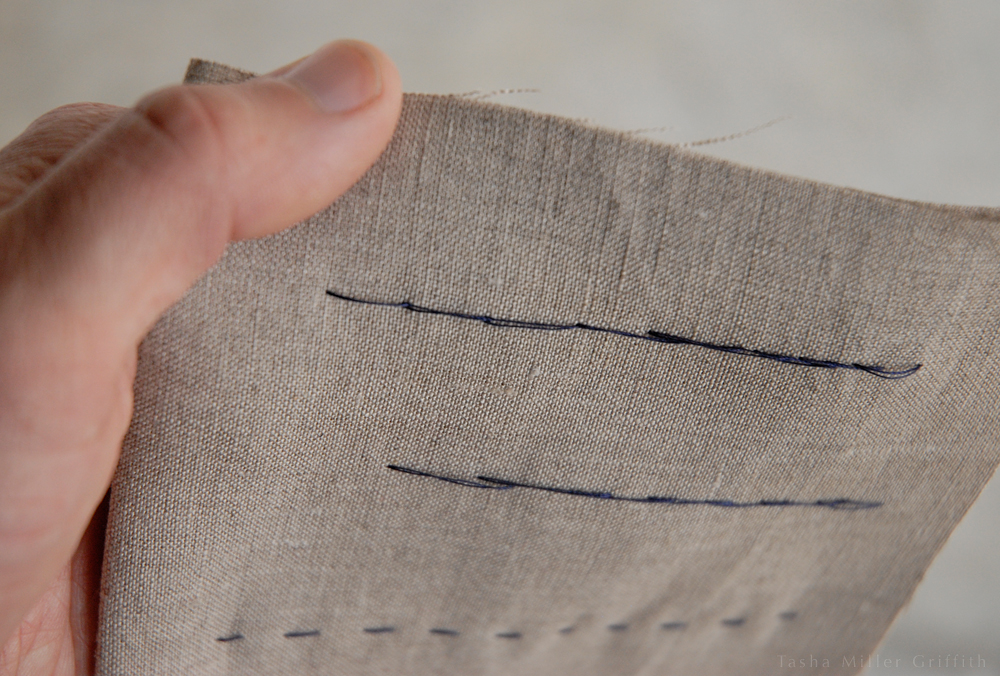
If you make backstitches touching each other, from the right side (public side) it looks almost exactly like machine stitching, which makes this a great stitch for repairs and touch-ups.
You can also leave more space between small backstitches. This is sometimes called a prickstitch. It’s the stitch I use to sew zippers into just about everything, including my trousers! I love sewing zippers by hand, it gives me great control and precision, and more flexibility about when I attach them. Susan Khalje wrote an article for Threads magazine about hand-picked zippers that’s worth looking up if you’re interested, that’s what got me started doing them this way.
Because each one is almost a knot in itself, backstitches are really sturdy. The zippers I’ve sewn with them have lasted at least as long as the pants!
Backstitches are also useful for securing your thread anywhere you don’t want to have a knot. I often use one or two to secure the beginning or end of a seam, and when I’m burying yarn ends in knitting. In the days when most garments were sewn by hand, it was common to use running stitches with a backstitch thrown in every few stitches for extra strength. (I know that from reading The Mary Frances Sewing Book, which is amazing).
Happy stitching!

I am enjoying following the copyright symbol as it wanders with your sample fabric. I am impressed by how straight your hand sewn line is on the fabric. Apparently I only know the backstitch – maybe Mom said “start with that” and I learned “do that”. Perhaps my next sewing project will go faster (but I always thought it made my stitches tough and strong, and that if the thread ever broke I wouldn’t care – because my stitches are tough and strong…).
I am glad you used all those photos – I need visuals for learning.
I’m glad you liked the photos! I am a very visual learner too.
Back in the day (before sewing machines) most seams were sewn with a few running stitches, then a backstitch for strength, repeat. It’s a good combination of fast and strong, and the backstitch provides a little break against a big section ripping out.
If I’m repairing something that has already ripped once, I tend to use all backstitches for extra strength.
Enjoy – get out there and sew something! 🙂
I love how you set up this tutorial – great simple, clean design and easy to follow 🙂
Thanks so much KP! That is my intention, it can be hard for me to tell if things are as clear as I mean them to be. Feel free to leave questions or other topics you’d like me to cover!
Pingback: Another Way to Rip Seams « Stale Bread into French Toast
Pingback: Summer Spark Batik Dress « Stale Bread into French Toast
Pingback: How to Fix a Small Hole in a Knit – Glorious Mending! « Stale Bread into French Toast
Pingback: Hemming Jeans Part II, with Catch Stitch Tutorial | Stale Bread into French Toast
Pingback: How to Sew on a Button | Stale Bread into French Toast
Pingback: Making a Lining for a Simple Top | Stale Bread into French Toast
Pingback: How to Mend a Small Hole: Sewing a Patch by Hand | Stale Bread into French Toast
Reblogged this on Stale Bread into French Toast.
Pingback: What Is Back Stitch Used For In Sewing?