
And make a thread shank, for a better-working button.

As promised, complete directions! Anyone can do this. All you need is some thread and a sharp needle. Start with a piece of thread about as long your arm, and put it through the needle so you have a double length.
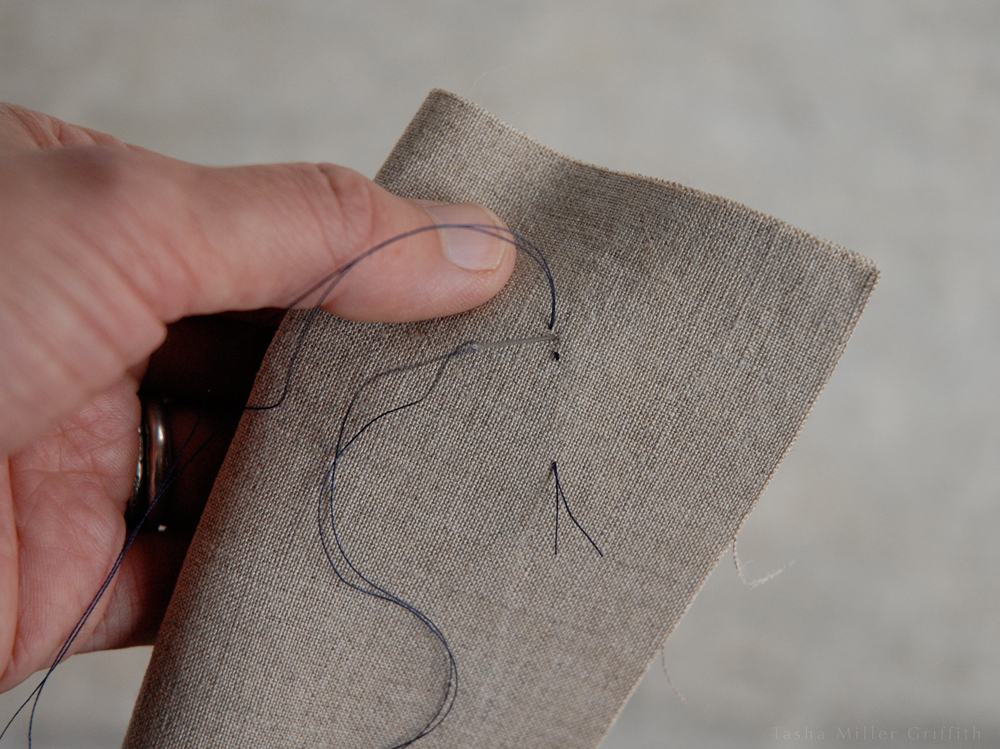
Start by anchoring your thread. The conventional way to do this is by tying a knot in the end. But sometimes a big knot on one side is too conspicuous or would catch on things. Instead try backstitching. A backstitch is a stitch that makes the thread loop back on itself, it’s very secure. On the wrong side, slide the thread between the fabric layers and come up near where you want the button to be. Pull the needle though, leaving a thread tail at the start. Take a small backstitch. Put the needle out nearby, then take another backstitch in the opposite direction. The thread is ready to go! Pop the needle up to the right side where you want the button.
 Click on any of the photos to enlarge if you’d like.
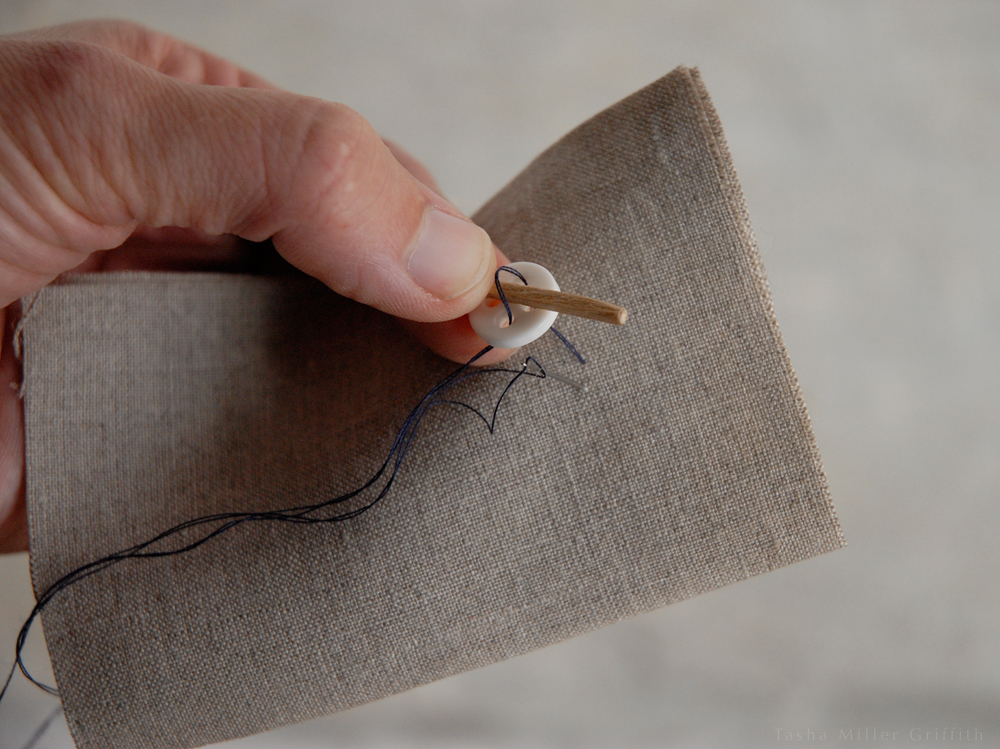
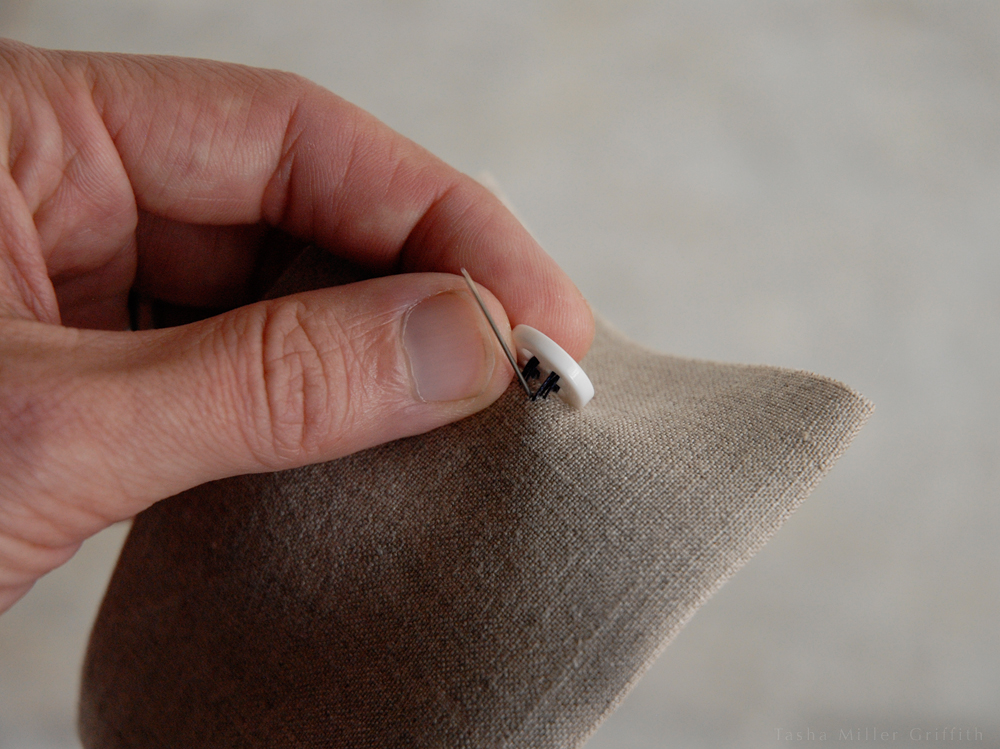
The next part is pretty much self-explanatory, except for one thing. Use a spacer to make room for a thread shank underneath the button (ignore this part if your button already has a metal shank on the back—just stitch through that). This makes room for the fabric (where the buttonhole is) to fit underneath the button. I often use a toothpick which I keep in my sewing stuff. You may want a bigger or smaller spacer depending on the thickness of the fabric and how curved the button is. Just sew over the spacer as you go in and out through the holes of the button.
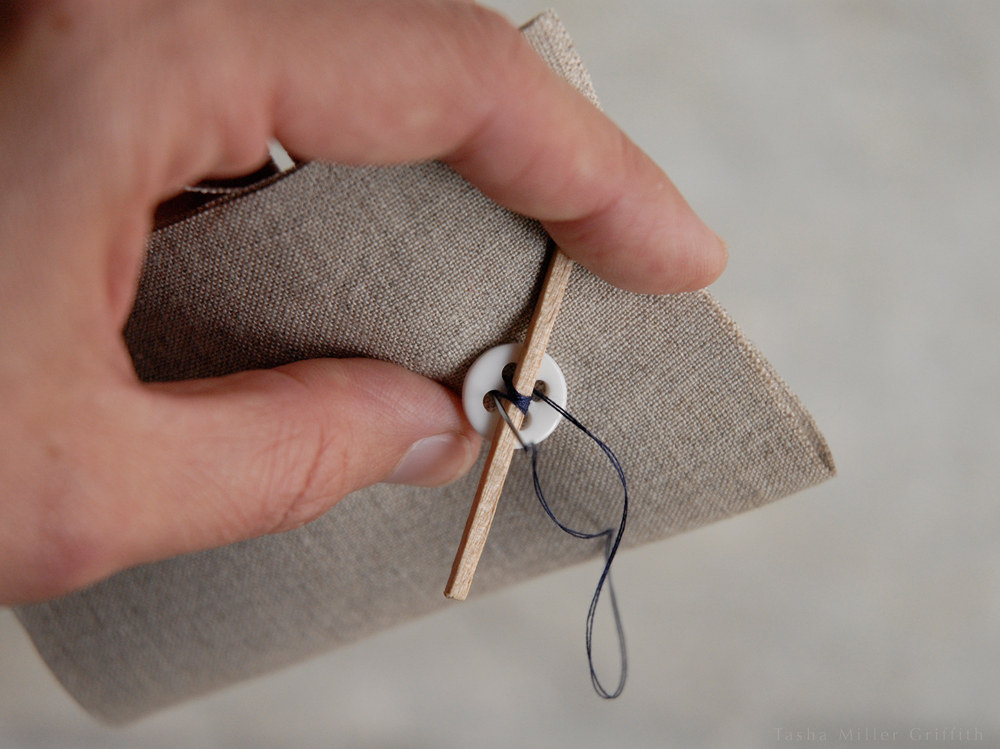
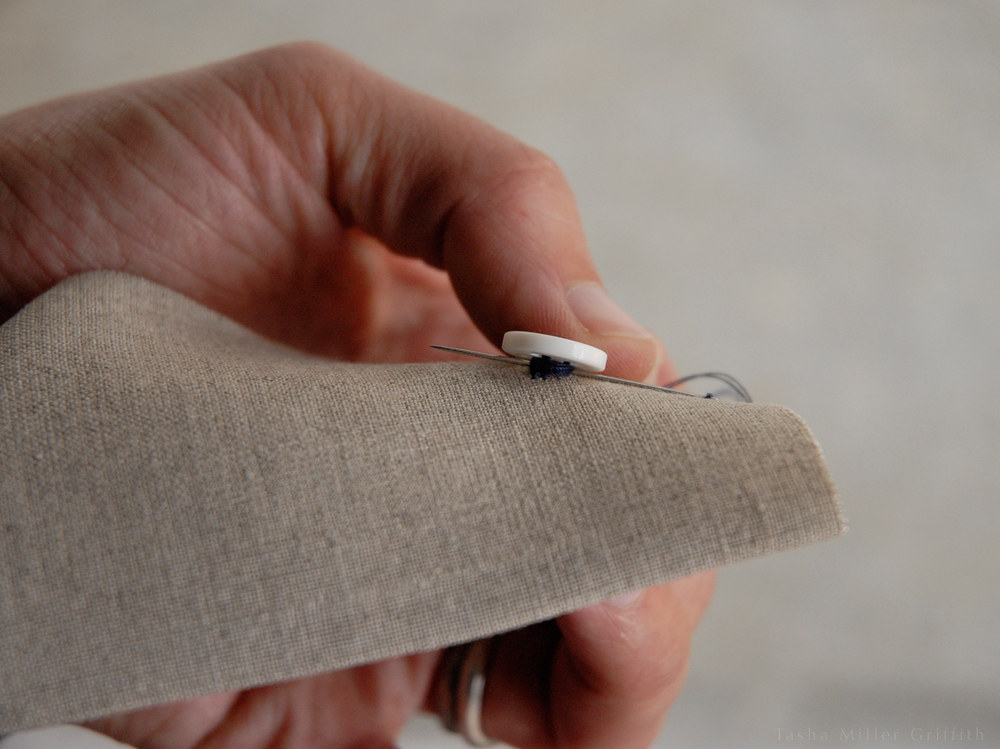
Go through each part of the button a couple of times. Pull out the spacer and pull up on the button, see how there’s now extra thread underneath? Bring the needle up from the bottom under the button.
Wind the thread a few times around the thread bars under the needle—but not too tightly. If you make this whole thing too tight, the sides of the holes in the button can rub and wear through the thread. Stab the needle straight through the thread shank a couple of times from different directions.
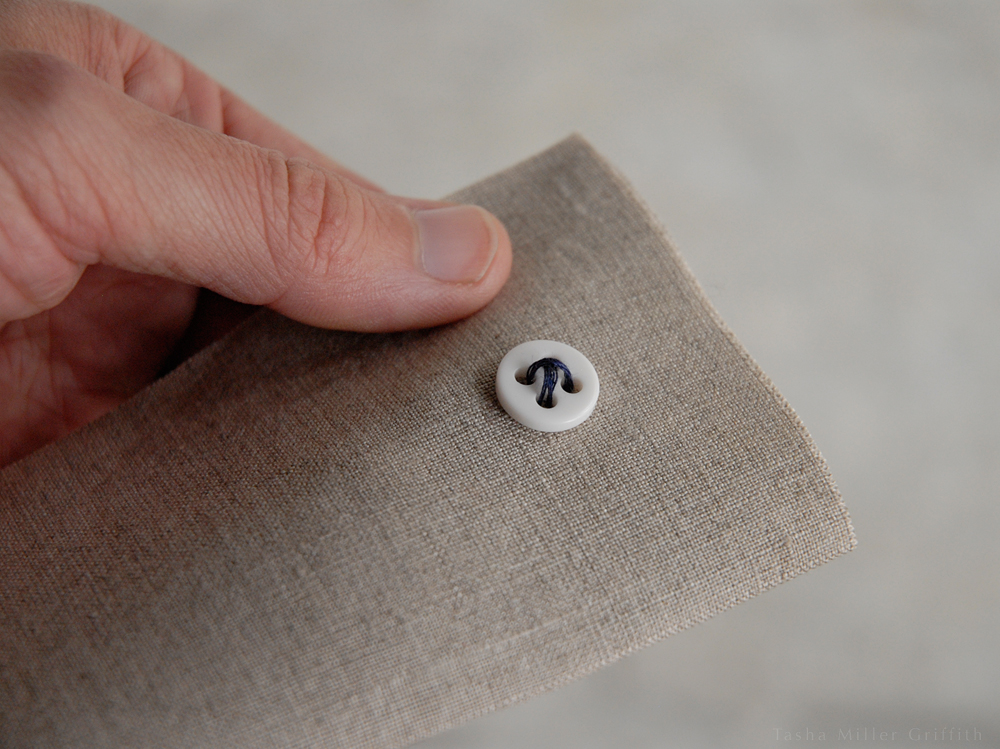
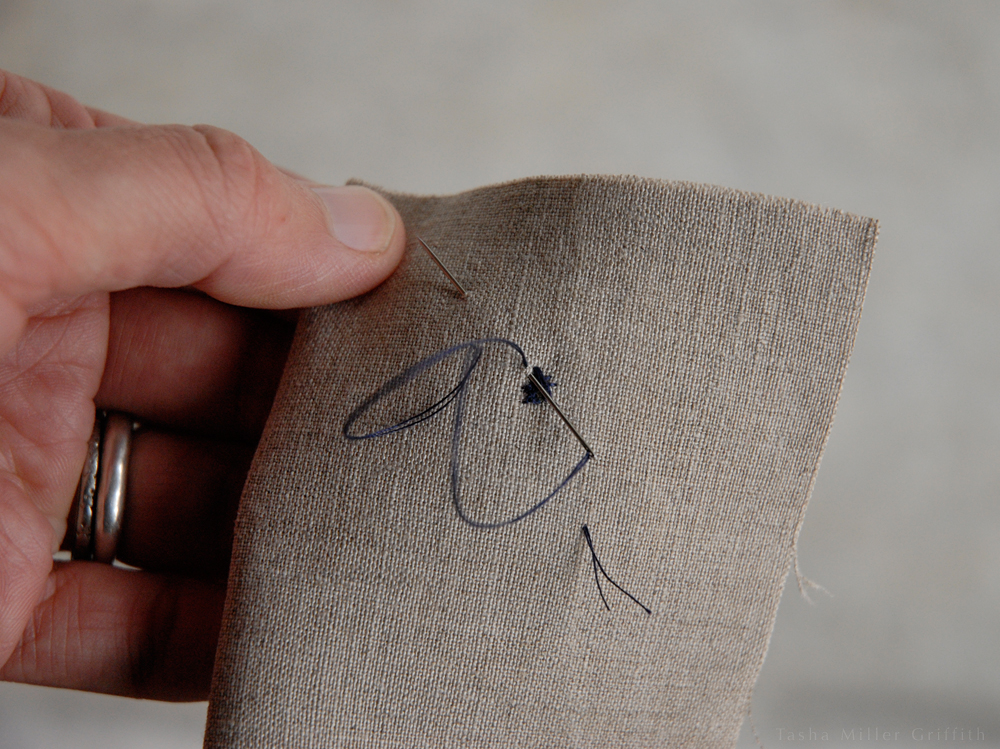
Secure the thread either just under the button, or on the back side with a couple more backstitches, then trim the thread tails.
So the next time a button pops off your shirt, you don’t need to send it off to Mom or stuff it in the back of your drawer, you can fix it yourself! Feel free to post other button questions, too …

I would love a photo of the complete backstitch, as I don’t see what keeps those thread ends from eventually coming loose. I guess they can’t go anywhere given the button thread keeps ’em immobilized.
Oh and how do you tie off the other end after you stab it through the thread under the button a few times? For this novice seamster, beginnings and endings seem more challenging than the middle (at least on the button front).
Hi Tom,
Yeah, getting started and and finishing can be the hardest! So, the backstitch does hold, imagine the thread going up, back, and coming down on top of itself a little behind where it just came out. It’s basically a tiny flat knot that the thread has a really hard time squirming out of.
You can prove to yourself how strong it is with some fabric and thread scraps. Take a few forward moving, classic sewing stitches where the thread goes above the fabric, then below it, then above, etc. You can still pull the thread along, right?
Now take the needle just behind (ie in the opposite direction your stitches are going) where the thread just came out, and take another stitch forward starting there. You just made a backstitch! Pull the thread now – much less willing to move, right? Make another one and your thread is not going anywhere.
This is hard to explain without pictures, and it may be the most important everyday stitch I know, so stay tuned for a fully illustrated backstitch tutorial, now here!
Pingback: Make Your Own Tiny Hand-Knit Cover Buttons | Stale Bread into French Toast
Pingback: Tips and Ideas for Sewing Cover Buttons, DIY and Store-Bought | Stale Bread into French Toast
Pingback: Knitting 102 Cowl – Free Pattern | Stale Bread into French Toast
Pingback: Fix a Ripped Out Button (or Other Small Hole) | Stale Bread into French Toast
Pingback: Slow(er) Fashion is for Everyone | Stale Bread into French Toast