Level Up your Mending—with Videos

I’ve been thinking a lot about my mending journey lately as I put together slides and videos for online classes. New formats, new adventures, but as always, it’s clarifying for me to explain something to someone else, and to dig through photos of past projects, thinking about what I’ve learned in the meantime.

For example, I’d like to share that it turns out, cramming a sock under my sewing machine to put a patch on it works for a while, but if the sock still has life in it and the patched area wears out again, things can get pretty messy, since it’s hard to take off the patch, and covering it again makes a really thick spot.

Commercial wool sock with layers of patches and stitching.
Multiple patches later …

Fortunately, there are lots of other good options! For one, you can use the sewn-knit-duplicate-stitch technique that’s become one of my favorites. Here’s a video I made for North House Folk School with my filmmaker friend Amanda where I walk you through this technique on a sweater knit. It’s definitely easier to practice on a fabric with bigger stitches first. This works on all kinds of knits!

You can even use this for factory-made socks. For those and other fine-gauge knits, try working each new stitch over more than one of the tiny original stitches—for example, treating a block two or four stitches wide and the same number high as one new stitch. (Approximately. It’s fine if you get off by a tiny stitch or two.) I really like this idea for when the wool is gone from a sock but the nylon remains, since it adds new yarn to both sides of the old threads. And, the whole point of mending with the knit stitch (instead of flat woven darning) is that it maintains the stretch and cushy thickness of the original knitted fabric. It’s also easy to add more stitches around the first ones as you need them.

If that seems like not quite your cup of tea, you might try another idea from my North House friend Elise Kyllo—using needle felting to fill in the missing wool. She shows the whole process in this video. (It’s on Facebook, but I’ve had no problems accessing it even though I don’t have an account there.) This technique works best for areas where there are still some threads remaining (either nylon or wool) for the new felted wool to work through and around. Needle felting on its own isn’t usually sturdy enough to fill in an a large hole, unless you wet felt it thoroughly afterwards. And if you’re thinking of patching a large area, also keep in mind that felted fabric is stiff and doesn’t stretch much at all—although that should be fine for the bottom of a sock. And little needle-felted motifs are also a great way to patch small holes in a fine knit sweater.

Sewing on a patch is still a good option too, and I’ve gone back to preferring to sew them by hand. It’s easier to do, easier to take off if you need a new patch later, and I just love how the stitches look. In my quest to add more visible hand stitching to my wardrobe, I’ve been experimenting with stitches that work well with the stretch of knit fabrics. I really like zigzagging running stitches for this, and alternating back stitches that essentially make a catch stitch on the inside. I demonstrate the latter style in the video below, along with how much more these stitches can stretch than a plain running stitch across the grain of the knit. (This is a short video I made for my online classes. There’s no sound. Anyone who has the link can see it, but it’s not searchable, not meant to stand on its own without any explanation.)

I now recommend using one of these stitches rather than the catch stitches I used in my original sock mending post, since it’s easy for long stitches on the surface of the mend to snag on things. You may still want to check out that post for more visuals of sock patches though.

One thing I can’t fix is the tendency of mass-produced socks to lose their stretch and get saggy over time. The nylon content is also problematic from the standpoint of microplastics and biodegradability … but I know there are a ton of these socks in circulation, and I fully support mending them. For myself, I’m slowly letting them go from my life as I embrace knitting socks, and lately, spinning my own yarn to knit the socks … it sounds like a process, and it is—an amazing one—taking me towards a deeper understanding of different kinds of wool, and of how to make a durable yarn. It turns out that Merino is actually a terrible choice for socks—it’s super fine, super prone to pilling and felting, and not very durable! Other springy, non-felting, durable wools exist! In fact, this kind of wool is often undervalued or wasted, when it could be going into naturally wonderful socks and other sturdy knits.

Fuchsia hand-knit socks with many overlapping duplicate-stitch patches in different yarns.

Happily, the tops of good hand knit socks seem to last forever, so as long as I keep repairing the bottoms I’m good to go. I’ve been wearing and mending the socks above since 2012. Still going …

If you want to find out more of what I’ve learned in my mending journey so far, come and join me for a class! You can find upcoming online and in person opportunities on the workshop page.

Be well everybody!

Enoughness, Wardrobe, Mending


old silk cami after detail


Are you ready for a radical anti-consumerist statement? Here goes: I have enough clothes. Now, this isn’t a terribly original radical idea, even among other makers & sewists (for one, Felicia wrote eloquently about it last summer). But it’s an idea that I’ve been rolling around my head for a year or so now, mulling over where I’m going with it, and I think I’ve made some progress.

Roughly six years ago, without really telling anyone about it, I decided that I would get the clothes I needed in my wardrobe by making them instead of buying them. At the time, I needed quite a bit. For winter wear I remember having a total of two long sleeved knit shirts, both plain cotton not-great-fitting ones from the thrift store. Situations like that were part of the reason I went handmade; I was frustrated looking for ready-made clothes I liked that I could afford, and tired of feeling like most of what I wore didn’t suit my personality or my life. Me-Made-May was also essential in getting me going in this direction. Before we move on, I want to acknowledge that it is a great privilege to be able to choose warmer and better-looking clothes. While I’m not always sure what to do with that knowledge, it seems important to say it, and I do think that just acknowledging it helps me be more grateful and mindful of what I have, and encourages me to take care of things and not take them for granted.


old silk cami before

This was an old silk cami with a shelf bra inside, made from a thrifted top. As you can see, it had a lot of wear and had already been patched once. But there was still enough sound fabric between the body and the shelf to reconstruct a different cami (below). It’s certainly arguable that this was too much work, too much hand stitching, for a garment which realistically is made from worn fabric and has a limited life expectancy. And yet, it gave me a lot of freedom to experiment, and a functional garment …

old silk cami after


So back then, I just started sewing garments, beginning with what I needed most, and then moving to the next-most-needed thing. It worked—I slowly but surely built a wardrobe of clothes I love, which covers just about any situation in my life. The new things have been mostly me-made, with a few lucky thrifted/gifted pieces mixed in. It certainly helped my progress that I already knew how to to sew (and knit), that I was already thinking about how my style reflects the way I want to be seen, and that I had a fair amount of fabric stashed away (although I certainly acquired more for specific projects).

Because I came into my personal wardrobe sewing revival from a place of making what I really needed, it was unavoidably obvious when I got to the point of not needing much. It’s been a gradual but ultimately fairly profound shift for me; from having a new garment in progress most of the time, to focusing more on slower projects, mending, and keeping my wardrobe in good shape.


layers of sock darning

These handknit socks I got from a friend quite a while back are my longest-running mending project. I just can’t give them up. All but one pair are still going.


At first, I was a little conflicted about all this. I thought I might miss sewing things from fresh fabric, or maybe more truthfully that I would miss dreaming things up to sew out of fresh fabric. But, as Jess pointed out, there’s no reason not to keep dreaming. After all, just a small percentage of the garments I imagine ever get sewn, no matter how much I’m actually making. Also, it turns out that for me anyway, it’s just as satisfying to dream up ways to re-make things that have been languishing in the back of my closet or in the “try again” basket. And it’s not that I am making nothing new. Right now I am knitting socks (the world’s slowest pair since I’m only working on them when traveling, plus I keep changing my mind and ripping out the heel …), spinning yarn which will become a sweater in its own sweet time, and plotting a new shirt from my natural-dye-printed fabric. And, I’ve just realized that neither my newer purple corduroys nor my blue cotton pants are really presentable for outside wear anymore—there will always be things to make!

But for the most part, my sewing lately has been directed towards keeping my existing wardrobe going, making it better, and adding in the next level of that message I want to send when people see what I’m wearing. At some point it occurred to me that while I know I’m wearing handmade, anyone who sees my clothes (especially if they don’t sew) will just assume that I bought them somewhere, like “everyone” does. In fact, many a sewist’s goal has been to make clothes that look “just as good” as store-bought ones. Well, I’ve decided that I’d actually like people who see me on the street to think to themselves, “Hey, I wonder if she MADE that … or someone did …”—in a good way, of course! I’m interested in adding more hand stitching, more hand-dyed fabrics (and eventually handmade fabrics?!), and definitely interested in wearing visible mending proudly on the outside of my clothes.


black handstitched pjs 1

Rather than making a new pair of PJ pants when I needed some recently, I decided it made more sense to revamp a pair that Bryan wasn’t wearing. That meant getting rid of crumbling elastic, and adding enough hand stitching that they felt like “my new comfy beautiful PJs” rather than “this hand-me-down thing I’m stuck with.”

black handstitched pjs 2


This downshift in sewing fits in really well with other shifts in my life over the past couple of years. A lot of my creative energy has been and is now going into thinking about natural dyes, fibers, and fabric printing. As I’ve taught those skills more widely, I’ve been working hard to learn all I can and improve my process. (It’s the biggest, deepest, best rabbit hole of research and experiments I’ve ever been in.) I’m teaching mending more too, so it’s been perfect timing for me to take on mending my own wardrobe as more of a deliberate project, seeing how far I can push things and what I will learn by continuing to choose “fix it” over “rag bag.” As much as I am devoted to other textile arts, it pops into my head over and over again that mending is probably the most valuable, most potentially world-changing thing I could do, show, or teach. (Come join me! New classes recently added.)

I think it’s also worth noting that I’m more comfortable in this stage of my evolution as a maker because of the type of maker I am. While I certainly try to master the skills I take on, every textile technique I learn about fascinates me, and I’m always ready to expand my horizons. So spending less time sewing ultimately means I’ll have more time for dyeing, spinning, maybe some weaving, or to try something else entirely new—a bonus in my book.

This blog has evolved with me, and I want it continue to do so. I have plans to start sharing some of what I’ve learned about natural dyeing here, as well as whatever else comes up. So for now, a happy season to you, whatever yours may be. (The monsoon rains just started here, and I am so very grateful!)


black handstitched pjs 3


Slow(er) Fashion is for Everyone

decoration spool 1

A start-where-you-are, one-step-at-a-time, use-what-you-have, guide.

Here we are in Slow Fashion October again! It kind of snuck up on me, actually; we just got home from traveling for shows, and if it were any other challenge/focus for the month, I probably would have just let it go. But not this one—it’s too close to the heart of what I think is important. I remember last year being amazed at how articulate and thoughtful everyone was being around these topics on Instagram. As I sat down to write an introduction to where I’m at this year, I surprised myself with how much I cared about what I was writing, and the idea for this post sprang into my head.

I almost didn’t write it though. It just feels too big. I’ll never cover it all, and I’ll leave out things that are important … which I probably will. But it turns out I care more about what I want to say than about how I might screw it up, so here goes.

It bothers me when people complain about the idea of Slow Fashion being elitist or exclusive, because to me at the center it’s about buying less, and being more thoughtful. It’s about the power of choice, and the fact that every single choice makes a difference, whether or not it’s a difficult or expensive choice. It starts with small steps that almost everyone can absolutely do, today, and if we all moved just a little bit toward Slower Fashion, it would mean a massive shift in the way the fashion industry operates.

These steps are roughly in order of difficulty. Each one has actions (readily available things we can all do) and ways to level up (which are more involved and could also make a bigger difference), plus notes for those of us who already make part/most/all of our own clothes.

In case you are still wondering what all this is about or why the heck you should care (but miraculously still reading), I invite you to check out this article about how our level of clothing consumption has reached the point of totally overwhelming any market for secondhand clothes.

One last thing before we start: although I’ve tried my best to keep this list simple and actionable, trust me, I know it can seem like these are humongous problems, way too overwhelming for any one person. But I can honestly say that the deeper I dig, the more I come through the uncomfortable feelings into a space where I feel better about myself, and what I’m making and wearing, and even about my place in the world. Each of these actions, even the ones that seem simplest, can have ripple effects into the rest of our lives as well, making things seem just a little bit slower and saner. Taking it slower has been such a healthy and fulfilling choice for me on quite a few levels.


refashioning scraps


1. Buy Less

This step is available to anyone who is buying clothes, anywhere, and has a budget for anything more than the bare necessities. If everyone did only this—nothing more than being more thoughtful about what we bring into our closets—it would be a true fashion revolution. Opting out of the constant consumerism which is so much a part of our economy that it’s also part of our culture is a big deal.

Actions:
Before you purchase an item of clothing, ask yourself some of these questions:
Do I need this?
Can I see myself wearing this frequently? Does it go with what’s already in my closet?
When I look at this, what message does it send? Is that the message I want people to get when they see me?
Do I need this many?
Is this so cheaply made, or so trendy, that it won’t last me very long?
Am I shopping for something I really need, or is this “retail therapy”?

Level Up:
Try to buy pieces that will last longer, either because of more timeless style and/or more quality materials and construction. Instead of buying several cheaper pieces, wait and use the same funds towards one better quality item.
Unsubscribe from emails/newsletters/magazines etc. that make you think you always need more and promote seasonal “must have” items. If you enjoy shopping and contemplating your wardrobe, you might try a project like the Wardrobe Architect (designed for makers, but with exercises that work whether you make or buy most of your clothes) that encourages thinking about and honing a personal expression of style, rather than following trends.

For Makers:
I would not encourage you to be less creative, or spend less time using your hands and your favorite tools. However, it’s all too easy to switch from consuming finished goods to consuming materials, with as little thought to their origin and future usefulness. The same questions above can apply to fabric and yarn, or to potential makes. If you should find yourself in the enviable position of having already made everything you need, consider learning a new skill, taking on a longer/slower project, and/or making something for someone else who can really use it. Check out the very thoughtful Stash Less series for a lot of exploration of the emotional reasons we stock up our stashes, and ways to avoid doing it.


sw sweater palette


2. Care for Your Clothes

If we started treating our clothes like things we cared about, instead of disposable items, that would be another big cultural shift with big, positive ripple effects.

Actions:
Wash clothes only when they need it. When washing, soak clothes longer and agitate less. This may require turning off your washer and setting a timer to remind you to turn it back on. Use the delicate cycle.
Hand-wash. It’s ridiculously easy (and also saves money and chemicals if your alternative is dry cleaning). I wrote about my favorite method in this article for Seamwork.
Use a clothesline or a dying rack. It lets your clothes last longer (by saving the abrasion of the dryer) as well as saving energy.

Level Up:
Mend. Everyone should know how to sew on a button and do simple repairs. There’s no shame if you don’t though, as these skills have been largely abandoned. Luckily, they’ve been replaced by the internet, where you can find people willing to help you with almost anything (including right here on this site). There are even challenges and forums that focus on mending, like #visiblemending and #menditmay. Some locations also have in-person repair events (a fantastic idea)—check your local listings.

For Makers:
One of the benefits I’ve found of having a more handmade wardrobe is that it encourages me to take the best care of those clothes so they’ll last as long as possible. I’m not always the best about extending that care to my non-handmade clothes, or my husband’s non-handmade clothes … but that’s a step I could and should take.
Teaching your friends simple mending is another way to make a difference, and darning socks is way more fun in groups. Why not organize your own mending event?


What is that thing on the right anyway?  Not sure, a rug maybe?


3. Consider Origins & Life Cycles

This is where it gets sticky, but we’ll end with some hope. Acknowledging that the way most companies make clothes now does harm to the environment and/or to other humans, and that by buying those clothes (or that fabric) we are complicit in that harm, feels bad I know. But I also think that we have to know where we are in order to move on and make better choices. The other hard part is that this is where the choices get narrower. Clothes that are produced more sustainably and with fair labor practices are more expensive than clothes that aren’t, because the ones that aren’t are carrying a bunch of hidden costs we aren’t paying in money—but we are paying them in environmental damage and bad conditions for workers. As we hopefully move towards a more sustainable fashion future, it will almost certainly mean all of us buying fewer clothes, and paying more for them. I hope that we can navigate this transition with fairness both to the people making the clothes (and the ecosystems that produce the raw materials) and to the people buying them, but I definitely don’t have all the answers here.
Here are the icky facts: synthetic fibers (like polyester & nylon) are made from the same stuff plastic is: oil and tar … plus increasing evidence shows that just washing these fibers releases tiny synthetic bits that make their way all the way into oceans and the food chain. Most chemical dyes are toxic, and few of the countries where fabrics are now produced have good enough environmental regulations to prevent them being released into waterways and harming human health. Most yarns and fabrics are also treated with other harmful chemicals (bleach, agents that change the hand or finish, etc.) before they come to us. If, as that article on textile waste states, there is enough of these chemicals left in our garments once they reach the landfill to leach into the groundwater, surely they are also leaching into the wash water, and probably onto our skin.
Now that you’re thoroughly freaked out, may I remind you to take this one step at a time, and do the parts that seem achievable today. Some of this is subjective, or depends more on the individual case. Is it better to buy polyester made from recycled pop bottles, or non-organic cotton? I don’t know either … but I’m making my way as best I can.

Actions:
Choose natural fibers. I’ve been making this choice for a long time, out of personal preference and knowing that they wear better than synthetics, but knowing about the micro-fibers in the ocean cements this one for me. Even if they are treated with chemicals, biodegradable fibers usually find an easier place in the ecosystem.
Buy quality whenever you can. Pieces that last longer save resources.
Buy secondhand.
When buying new, buy things produced in countries with good labor practices and environmental regulations (such as the one you live in?) whenever you can.
If you can afford a couple of really special, locally made, responsibly sourced items of clothing (or the materials to make them), please buy them! But if you can’t, your choices still make a difference.
Pass on unwanted clothes responsibly.

Level Up: (Most of this boils down to research.)
Consider raw materials individually. For example, it takes less water and fewer pesticides to grow linen or hemp than cotton.
Choose minimally processed, low-impact dyed, and certified organic fabrics if at all possible. Look for the Global Organic Textile Standard (GOTS) label, which covers all stages of production. I’m not going to lie, these can be hard to find, and looking for them puts you in danger of being labeled a hippie. Nevertheless, more mainstream brands are starting to offer organic options, especially for cotton. (I found GOTS certified sheets at Target this year, very reasonably priced.)
Buy from brands that have a commitment to fair labor. Often these brands are concerned about the environment as well, so starting with either one can lead to both. The more questions we ask, the better. Searching for “ethical fashion” will give you a bunch of places to start.
Organize a clothing swap with your friends (this is an especially good way to pass on handmade/special items you aren’t using, and make sure they get a home with someone who will appreciate them).
Look for charities near you that can actually use your old clothes, and donate there.

For Makers:
You know the bad news here already: making something yourself does not erase the environmental or labor impact of the materials you’re using. The good news is: it’s easier to find responsibly made materials than finished clothes, and the more of the process you’re doing yourself (i.e. knitting or spinning your own) the more available and reasonably priced those materials tend to be. I have a list of sources for more sustainable fabrics, and there’s a good roundup of resource lists from the end of Slow Fashion October last year. It seems there are more American-made, domestically-spun yarns every time I turn around, which is a great thing! I know the local wool movement is also going strong in Britain, and probably other places as well …


TOCMC cotton 4

Photo courtesy of Texas Organic Cotton Marketing Co-op


4. Make

Making your own clothes is the final frontier of fashion independence, and opens up a new world of choices, both stylistically and in materials (new and repurposed). If these are skills you aspire to, start with small, doable projects (ahem, mending) and get a feel for the tools and materials. You’ll be able to grow your skills quickly, especially if you can find a good mentor/teacher.

Actions:
Try a new skill, like knitting or sewing. There are about a million tutorials and friendly folks online if you can’t find someone to help you in person. If you can, you’ll get a head start. Look for classes or ask crafty friends. Be patient with yourself, especially if you’re not used to working with your hands. New skills take practice, but they’re so worth it.

Level Up:
Already knit or sew? Try spinning! I’m only a little bit kidding. Spinning is aaaamazing, and perhaps the ultimate expression of slow fashion.
Learn any other new skill you’ve wanted to try. Leatherwork? Natural dyeing? Each one only increases the possibilities of what you could make, and for me at least, feeds into the creative whole with new ideas.

For Makers:
Help the new makers!


cartoon with both threaded small


So, I hope you’re convinced that you don’t have to run out and get a sheep and start from scratch in order to make a difference. (But if you want to do that, I totally have your back!)

I’d welcome your thoughts, resources, notes about things I forgot … take care everyone!


Satisfaction — Restoring a Treadle Cabinet

 
At last, my treadle sewing machine restoration project is done, and at even longer last (depending on how you look at it) I’m sharing it here!  This is necessarily a big post.  Backstory is at the beginning, practical details are in the middle, words from the heart and pictures of the finished object at the end.  I hope you enjoy it!
 

treadle cabinet restoration 1It’s actually much easier to rock the machine up on its hinges and lift it out by loosening screws underneath (as shown in the Seamwork article) before taking out the hardware.   But, I really like this photo.


One of my hopes for the article about treadle sewing I wrote for Seamwork this summer was that it would give me the motivational push I needed to get this machine out of the garage.  Which it did, but in a longer process than I could have anticipated …

This machine came to me through my husband’s family.  It’s remarkably similar to the one my mom inherited, which I learned to sew on.  Bryan’s brother took it to the Midwest from Florida for us in his truck, and one summer while we stayed with him during the art fair season, I spent a fair amount of time and elbow grease working over the machine itself, until it was running pretty well and looking pretty good.  We brought it back to Flagstaff with us in our truck, and while I really, really wanted to use it, it languished in our garage, becoming the ultimate unfinished object.  Because, the cabinet looked like it does below, and I just couldn’t bring myself to bring it in the house until it was refinished—a monumental-feeling task I never seemed to make time for.


treadle cabinet restoration 2

I’m really glad I took these pics, at this point it’s kind of hard to believe how bad it looked!


So, with the article ahead, to feature photos of my beautiful restored treadle, it was time to bite the bullet and get after that yellow paint.  I did some good old-fashioned library research.  The most useful thing I got there was the idea of using a heat gun to take off the paint. (Which I borrowed from a friend. It takes a village to tackle a big project. And, it absolutely would be worth buying a heat gun if you have this much paint removal in your future.)


treadle cabinet restoration 3

Disassembly.


Since I didn’t find much information besides that idea (which I really liked because it meant I could avoid using chemical strippers), and figured out some things as I went, I’m going to include some tips for removing paint with a heat gun.  Feel free to skip ahead if you’re not restoring anything yourself.

  •  Leather gloves and long sleeves are a must, no matter the outside temperature, at least if you’re clumsy like me.  My arms and hands would have been covered in little burns from swiping against the heat gun otherwise.
  • I used a temperature of 850° F.  You might need a little hotter or cooler depending on your paint and what’s underneath.
  • Give yourself an out-of-the-way part of your project to practice on, you’ll definitely get better results as you get the hang of it.


treadle cabinet restoration 4

I started with the inside sides of the drawers.  First, second, and third attempts from left to right.


  • For flat areas, melt a small section thoroughly with the heat gun, then scrape it off using one motion with a flat scraper. Scrape it up and off, not across, the surface, and watch for redeposit of paint.  Knock the curls of paint off the scraper frequently, or rub them off on something like a sawhorse as you work.
  • I found these small wire brushes (purchased at Home Depot) invaluable for getting off leftover flecks of paint, and working around curves and tight spaces.  Again, melt the paint with the heat gun, and then use the brush, kind of like you’re brushing your teeth, to flick the paint off.  I ran through a few of these, but the softer bristles are better at taking off the paint without scratching the wood below than a tougher brush.


treadle cabinet restoration 6


  • Areas with thin paint and/or worn or damaged finish underneath were much harder to remove than a full coating of paint over the original finish in better shape.  I don’t have many tips other than: yes, you can still get the finish off if you’re patient.  Take breaks.

Overall, I loved seeing progress, and at some points the removing paint was it’s own reward as I saw what the wood was like underneath.  I could also see that my former self was avoiding this project for a reason.  There’s no way around it, it was a slog.  It was so, so very worth it in the end though.


treadle cabinet restoration 5


For the record, I would like to say that although I spent much time cursing this yellow paint and all it stands for, I understand why the painter did what she did.  The finish underneath wasn’t in great shape, some parts were water-damaged, and I’m sure restoring it seemed daunting to her too.

Also for the record, I would like to say that I do not, under any circumstances, support the painting of antique furniture.  People, just say no!  As an alternative, shellac provides a clean finished surface, while showing off the original character of the piece.  If you need help, ask a handy neighbor, or a professional.


treadle cabinet restoration 7

Only one piece of the veneer was too water-damaged to save—the very top, where doubtless a potted plant once sat (I’m not going to rant about that, but, you know, plants on wood=bad idea).  So now we know what they put underneath veneer in 1913: pieces of rougher, second-cut wood.


About this time in the project, with the heat-gun-paint-removing not done, Bryan, sensing that the whole thing probably wouldn’t be done in time, stepped in and offered to sand the parts that did have paint removed.  This made me feel very loved and supported.  But it soon became clear that no matter how much he helped, it just wasn’t possible to finish the restoration in time to take the photos for the article.

So, my mom stepped in and let me borrow her treadle cabinet (carefully restored by my grandparents decades ago).  It’s certainly not the first time my mama has saved my behind, and I’m pretty sure it won’t be the last!  As luck would have it, the two machines are the same model, made only a year apart.  The photos in the article are of the machine I had worked on, sitting in my mom’s cabinet.  (Now you know!)


treadle cabinet restoration 8

Bryan sanding the top.  Under his hand you can see a discovery I loved—a burn mark from an old-school iron—which most certainly did not sand out.


Seeing what a careful job my grandparents did on my mom’s treadle was definitely a motivation to make mine as nice as I could.  Once the article was done, I took what bits of time our schedule and the weather allowed to continue working on the cabinet as summer moved into fall.  I definitely did a better job with more time to finish this project than I would if I had rushed it, but I still wanted to have a firm goal to keep me going: finishing it and bringing it inside before winter.

There was a lot of sanding.  The original finish under the paint was shellac, which can also soften/be disturbed under the heat gun, and in order to blend the intact finish with the damaged sections, we ended up sanding most of it out.  It’s not a very photogenic part of the process, although after working over a section with successively finer grades of sandpaper and blowing off the dust, I could start to see the beauty of the wood revealed.

At every stage, the drawer holders/slides took by far took the longest, being full of tiny parts and impossible angles.  I took them off where they attach to the top, but if I had to to do over again, I would separate the vertical supports from the slides as well, and scrape/sand/finish the pieces separately, even though it would mean pulling out old nails and labeling parts to get them back in the right order.

There were many days where I was apparently feeling more like working than documenting, including a lot of gluing and clamping sections of loose veneer, and more sanding.

One tip I picked up online (here) which is way to good not to share: baking soda and hot water will remove paint from metal hardware as if a miracle has occurred.  If you can soak the metal in the hot water and soda, the paint will actually bubble up and can be pushed off with a rag or your finger.  Even pressing a rag wet with the hot solution onto metal parts you can’t take off will usually make it so that you can scrape the paint off with a fingernail.  It works unbelievably well.


treadle cabinet restoration 10

I dropped the hardware in, went inside to get the camera, and by the time I got back I could see the paint detaching and bubbling up.


I became a big fan of shellac when we were doing a lot of work on our house a few years ago.  It gives off less toxic fumes while it’s curing than polymer-based finish, comes from a renewable source (bugs), and sticks to pretty much everything.  Although it can be damaged by water and heat, it’s easy to repair and refinish.

Pretty much any wood working book can tell you more than I know about sanding and shellac.  I’ll just say that I sanded until everything possible felt satiny smooth, and then applied 3 thin coats of shellac with a cloth pad.

After the shellac had a few days to cure, I rubbed out the finish with fine steel wool.  This step was pure magic, rubbing out imperfections and taking the finish from a hard glare to a soft glow.


treadle cabinet restoration 9It’s a little hard to see here, but the top has been rubbed out and the bottom hasn’t yet.


After replacing a few missing screws, the only thing left was cleaning the metal base.  I tried wiping it down all over with a wet rag, but it still looked somewhat sad.  I couldn’t stand for it to look neglected when the rest now looked so nice.  I tried a rag damped with sewing machine oil (my solution for nearly everything treadle-wise) and that did the trick, giving it a very soft sheen and a used-hard-but-cared-for look that goes with the rest of the project.

Ready for the big reveal?  Here goes:


treadle cabinet restoration 11


treadle cabinet restoration 13


It’s more like a Victorian with exposed brick and modern fixtures than a meticulously re-created period home.  It wears it’s beauty and the trials of it’s long history equally openly, and equally well.  It’s actually hard for me to describe how happy this thing makes me, almost like it was a living thing.  Such a process of transformation I’ve been through with it!


treadle cabinet restoration 12I decided to keep the exposed-inside top and sand it carefully smooth, rather than apply new veneer.


I sort of hate to tell you this, but you can’t fully appreciate this thing unless you touch it.  I couldn’t stop touching it when it was first done.  The velvety smoothness seems miraculous after all the time I spent with it when it was in such bad shape.


treadle cabinet restoration 14


I don’t know if it’s because I don’t often do projects like, because it waited for so long and then in the end came out so well, or because of a shift in my attitude (probably some of all of those), but this project was so incredibly satisfying.  In the final stages, I was really able to appreciate exactly what I was doing while I was doing it, and reveling in both the results and all the work that got me there in felt fantastic.

When I go into my work space in the mornings now, this is one of the first things I see.  I still often reach out and touch it at some point while I’m stretching and getting ready for the day, or if I’m sewing with it later I’ll give it an extra caress.  It probably sounds like I’m obsessed, but while this is now one of my very favorite physical objects in the world, it’s the experience of having brought it from what it was to what it is that’s my favorite part.  The best reward for tackling something big is the satisfaction.  Cheers to that!


treadle cabinet restoration 15

Fixing Store-Bought Socks


fixing blue stripe socks 3

Isn’t the phrase “store-bought” kind of funny when you think about it?  Maybe I should have said mending “factory-made” socks?  Maybe not, that sounds weird too.  Fixing “non-me-made” socks … never mind!

Anyway, I get a little depressed any time our society expects me to get rid of something which is mostly perfectly good, but has one flaw/broken part/hole/mold on just one corner.  Although I do accept that there’s a point at which socks are well and truly worn out and need to go, what happens to most of mine is that they develop one or two really worn places somewhere around the heel first, while the rest of the sock fabric still seems totally intact.

The really tiny gauge which commercial socks (I might like that phrase best so far) are knit in makes it hard to darn them in the traditional needle-and-yarn ways.  I’ve been experimenting with patching them, using compatible knit fabrics, and it’s been working well.  Experimenting over some time now, so please forgive the different lighting in the photos, I’ve been documenting the socks as I fix them.

As most of you reading probably already know, I love the idea of “visible mending”, of showing the world that I fixed something and I’m using it.


So, should you have the audacity to mend a store-bought sock, here are some things I’ve worked out:

The fabric for the patches should be similar to the socks: knitted (stretchy) and fairly sturdy.  I’ve been using wool knit fabric swatches, scraps from making these leggings, and parts of other socks.  Although I’ve been seeking out wool patches, I think cotton knits would work too, as long as they are fairly thick/tough.  Check that the care requirements for the patch fabric work with how you wash your socks (I usually machine wash & line dry mine, occasionally they go through the dryer, and the wool patches have worked fine for me).


patched purple hobo socks


sock under machine It’s totally possible to mend shorter socks with a sewing machine, any time that you can scrunch the rest of the sock out of the way (kind of as if you are turning it inside out), so that just the layers you want are under the foot of the machine. I used an overlock stitch for maximum stretchiness & sturdiness.  As with any knit project, you may need to experiment a bit to figure out which stitch and settings work best.  Expect to do a lot of lifting the foot with the needle down and repositioning things while sewing on the patches.  You can cut down on that somewhat by basting the patches on first (takes about 30 seconds).


When the patch is done, I finish by getting all the thread ends to the inside, and burying them before trimming, using a hand sewing needle.  You can also trim the edges of the patch outside the stitching if they come out funky looking.


thread ends fixing socks


For heels and toes of knee socks, and any time I can’t easily get the part of the sock I want under the machine, I find it just as easy to sew the patches on by hand.  (I like hand sewing, and I don’t like fighting with my machine.)  I’ve been using a catch stitch (explained in more detail here) around the edges, sewing through both the patch and the sock when possible.  An old-fashioned darning egg (or improvise with a small block of wood etc.) inside the sock is so useful here that it’s almost essential, making things much easier by assuring that you only sew through the layers you want.


fixing blue stripe socks 2


fixing blue stripe socks 1


For either method, cut the patch definitely bigger than the worn place/hole, otherwise it will quickly wear right along the edge of the patch.

  For cuffs, you can use a scrap of ribbing to cover worn places and/or make a new cuff.  Make sure the ribbing is long enough to stretch around the widest part of the leg which the sock will go around.  Mark and sew the ribbing together, then stretch it evenly around the sock.  I find it’s easier to sew two seams, one on the inside and the again around the outside edge of the ribbing, than to try to catch both edges perfectly in one seam.


fixing sock cuff


Both my hand- and machine-sewn patches have worn well, adding a year or more to sock life, and lasting until the rest of the sock fabric gives up the ghost.


The socks below I didn’t even mean to fix, but they ended up being some of my favorites.  They’re the ones I wear in the summer when we’re setting up the booth.  I was going to buy new ones, but in the end I couldn’t bring myself to spend real money on new socks for such a humble purpose, and I knew cheap socks would wear out super quick under those conditions.

The new short length is perfect for when it’s hot but I still have to wear shoes, and I love seeing my little mended socks during what can be a stressful situation.


mending set-up socks 1


mending set-up socks 2


Finally, just in case you’re thinking that I have a magical house where socks are fixed as soon as they develop holes, let me tell you, it ain’t so.  I’ll admit that I tend to let them pile up until my sock drawer is looking sparse, and I’d forgotten about the very existence of some of these by the time I got around to mending them … when I start to run out of socks that don’t need fixing, then I settle down and do one or two pairs a day until they’re all fixed.

Happy mending!


A Simple Piece of Mending, and Some Thoughts on Posting


potholder front


So, here I am.  We’ve been home for the fall for a few weeks now, and it’s lovely to be back.  But ever since we got here, I’ve just felt swamped.  With good things mostly, and some of the best kind of quality time with family, but still swamped.  I have great ideas for posts.  I even have pictures for a lot of them, but I just haven’t been able to put together the time to edit and put in the words.

As I’m sure you know if you’ve been reading for a while, I’ve been shifting more towards posting when I have something I really want to share, and away from a set schedule.  I hope this gives me more time to work on each post, so that each post is better.  Goodness knows we all have enough arriving in our email every day, and I don’t want to be contributing to that just to make something appear in this space, unless it’s something I’m proud of.

And yet, sometimes (like right now) I really do want to connect with my online community, I want to put something out there, and it doesn’t have to be complicated to be worth reading, right?  Sometimes the simplest things are the best.

Like this potholder.  I know, I mended a potholder, it’s not exactly Earth-shattering news.  In fact, I didn’t even like this potholder.  Bryan had it when we met (goodness knows where he got it) and I always thought it looked so cheesy—definitely not my favorite kitchen object.  But, the back fabric wore out.  (It was yellow plaid.  I had so little intention of posting about this that it never occurred to me to take a “before” picture.)  The front was still fine, even the binding was in good shape, and I have this stubborn genetic defect which makes me refuse to throw out anything useful, so I just sewed a patch of sturdy black knit over the back.  After I sewed around the edge, I thought it needed a bit more, and I decided to outline the tacky shapes on the front.


potholder back


Then, the stupidest thing happened: I suddenly loved this potholder.  It’s now cheeky, it’s a little edgy, it’s visibly mended, it’s mine.  Every time I see it I smile.  Sigh …

What about you, ever fixed something and then fallen in love with it?  (The more I think about it, the more I think this happens to me all the time.)  If you blog, how do you balance the number and quality of your posts?


In Which I Make a New Handle for a Plastic Gadget using Silicone Putty


sugru handle 1


When my friend Becca introduced me to the site The Grommet, the thing I immediately wanted was this moldable, air-curing silicone putty called sugru.  It’s supposed to stick to practically anything, be formed into any shape, and be washable and permanent when cured.  Their motto is “the future needs fixing”—how could I not love that?

I got some for my brother for Christmas, and kind of hoped he might give me one of the little packets to try myself, which he did.  (Whether it’s nature or nurture, we definitely share a tendency to tinker and fix things.)  “I don’t care what color,” I said.  “Then you’re getting yellow,” he said.

I really didn’t care, because the thing I wanted to fix was this cheese grater.  It came with a handle that rotated, but the plastic clips which held it on eventually broke, meaning that the handle just fell off, leaving me with nothing to grab onto but the sharp plastic shards on the end.  Nevertheless, this is the kind of thing I can’t seem to get rid of, because all the other parts of it still work perfectly fine.


sugru handle 2


Working with the sugru is a lot like molding polymer clay, except it smells different.  It will hold fine details like a fingerprint, or you can smooth the surface with a light touch.  I could have spent a lot of time minutely sculpting it, but I tore myself away and mainly went for function here.  The contents of one little package were plenty to form the handle.  It cures up harder than I expected, more like the grips on my camera than like a silicone spatula.

The new handle is working well!  It doesn’t rotate, but it makes the grater nice and comfortable to use again.

A product that lets consumers fix more things themselves—yes please!  We need more of that.


sugru handle 3


(Full disclosure: I don’t have any connection to this product other than buying some, and I wasn’t compensated in any way for writing this post.  However, if anyone wanted to send me some free sugru, I would not say no … )


Finally, Some Good Information about Those Nasty Wool-Eating Clothes Moths

moth hole in pants
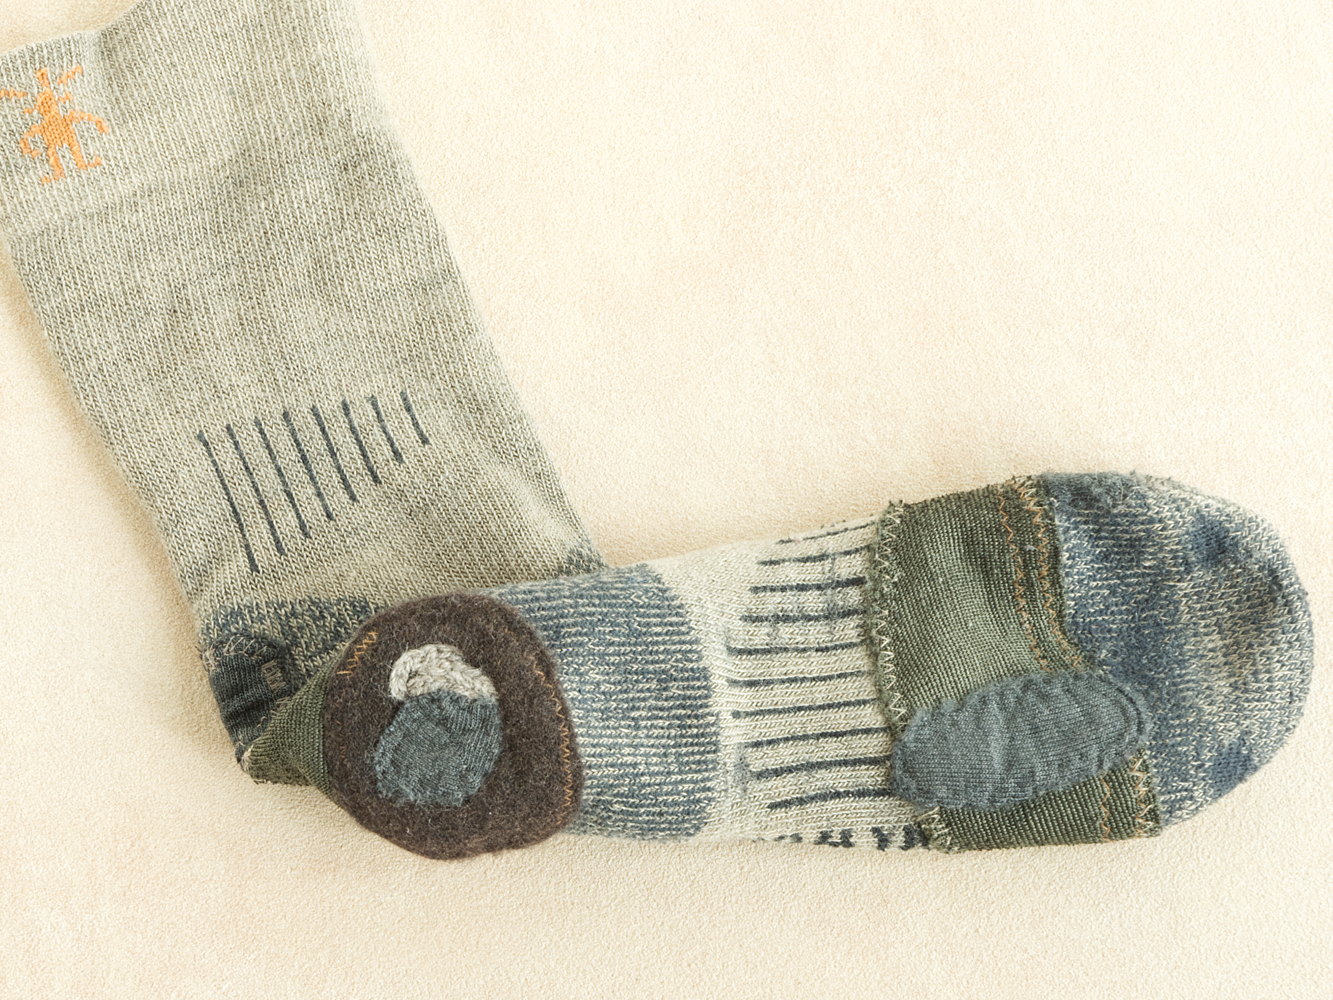
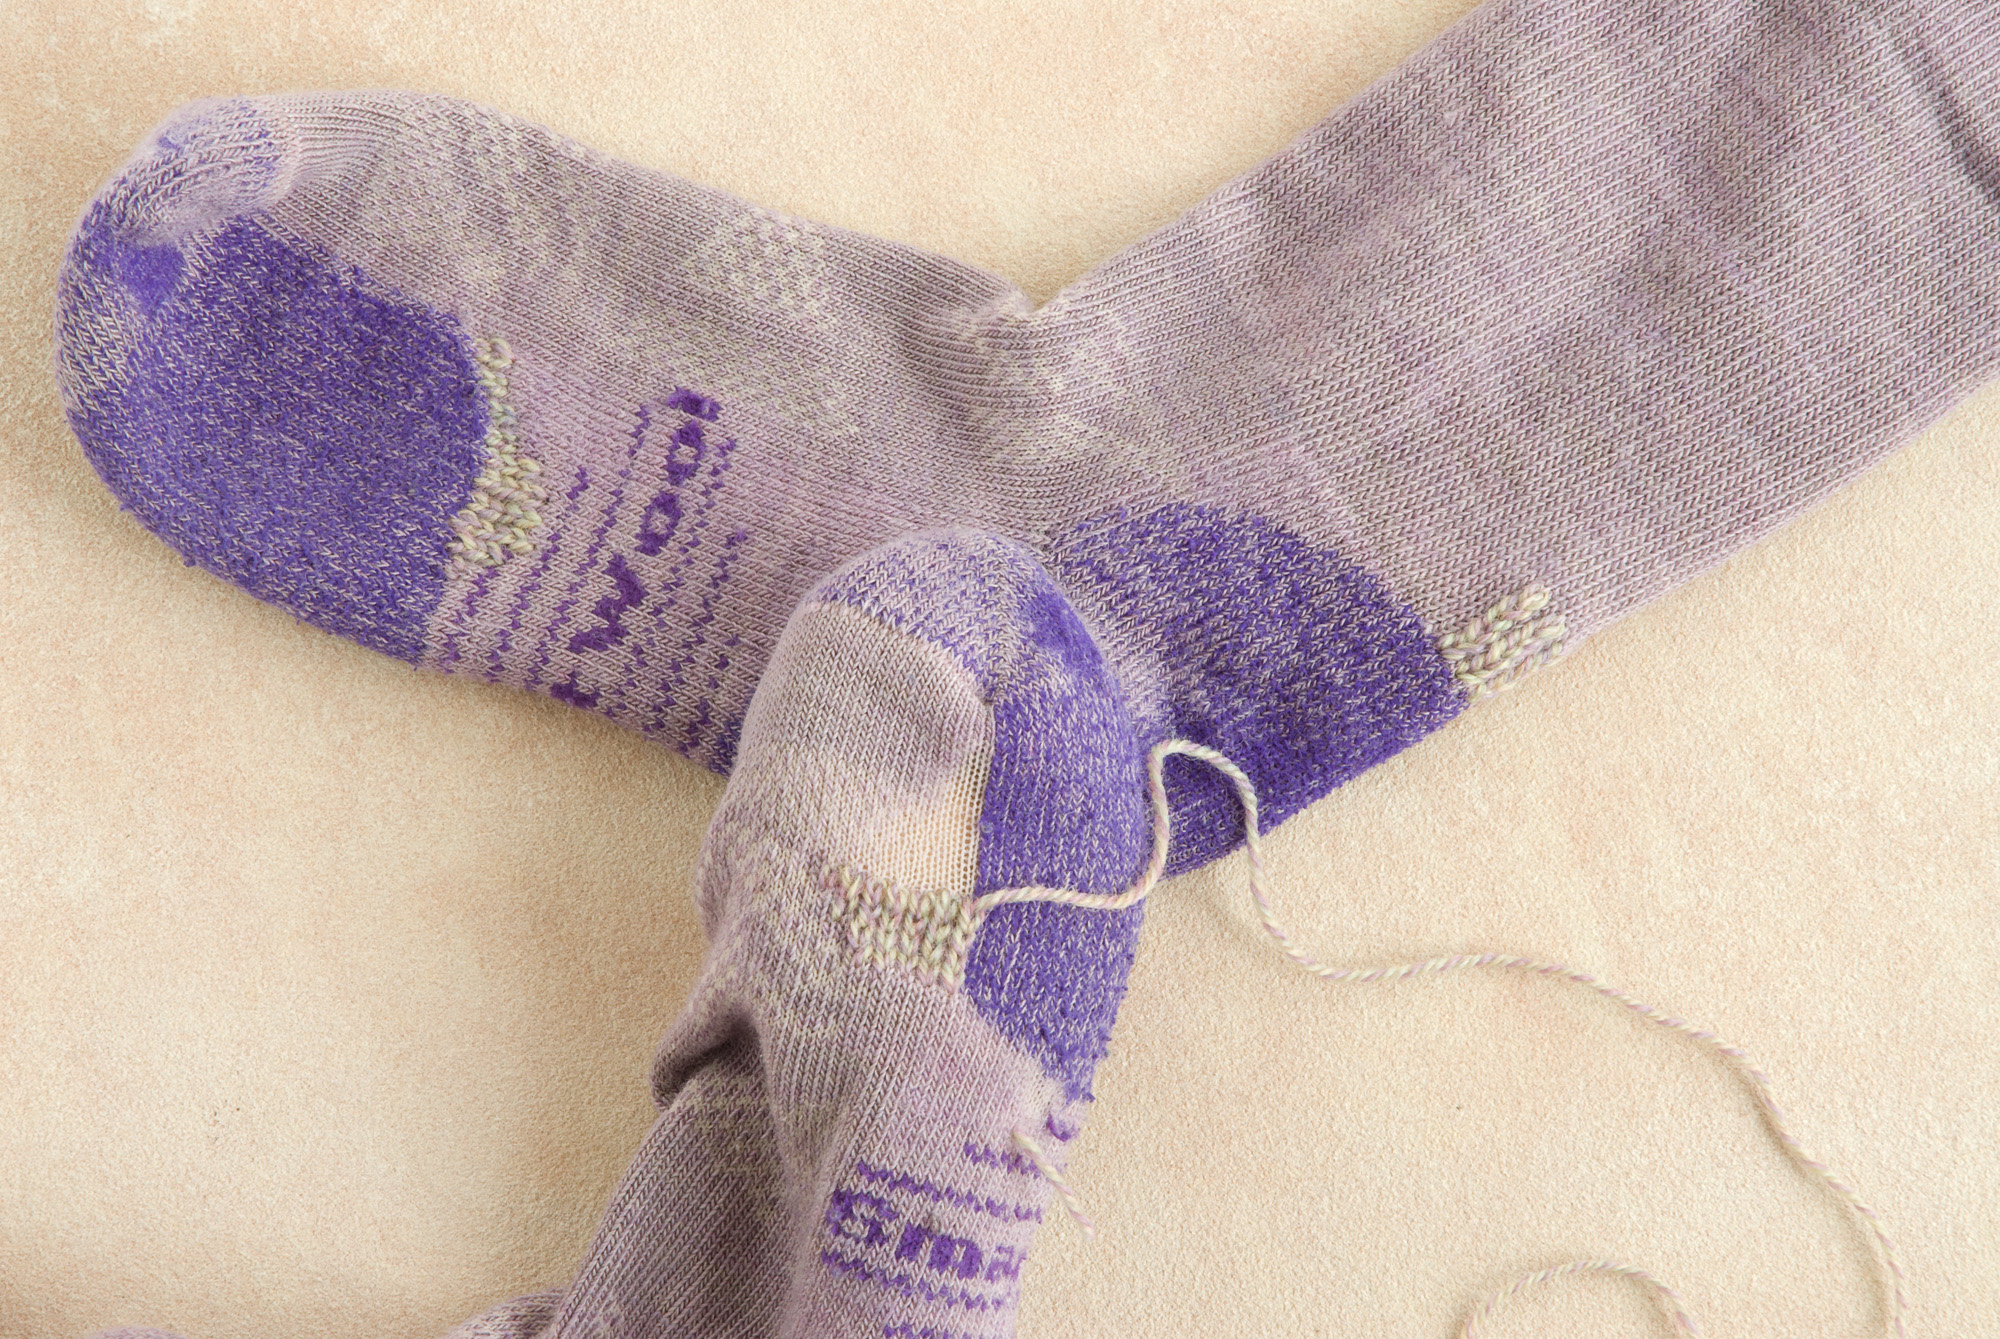
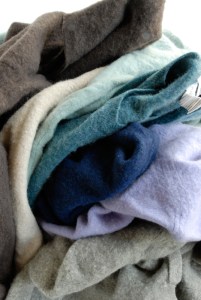
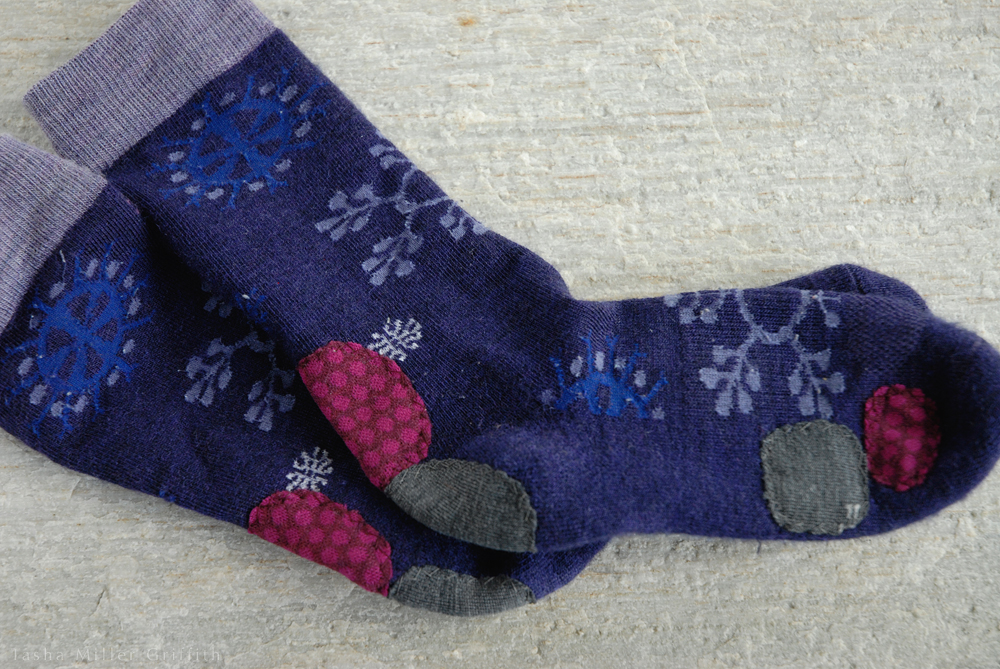
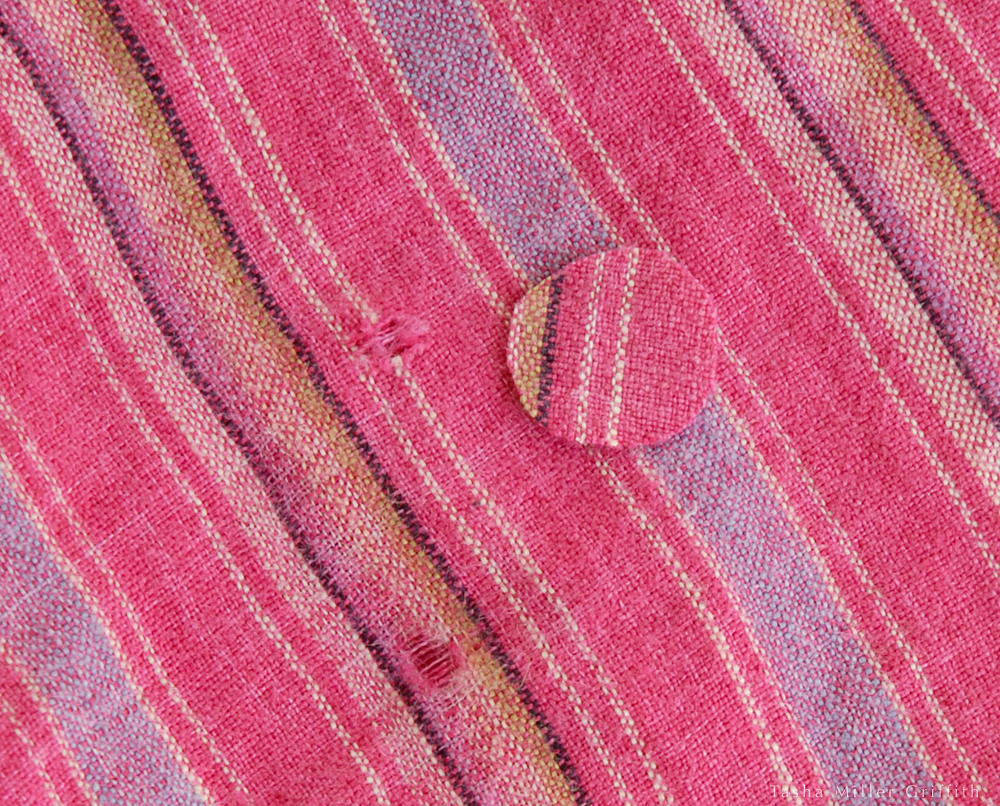
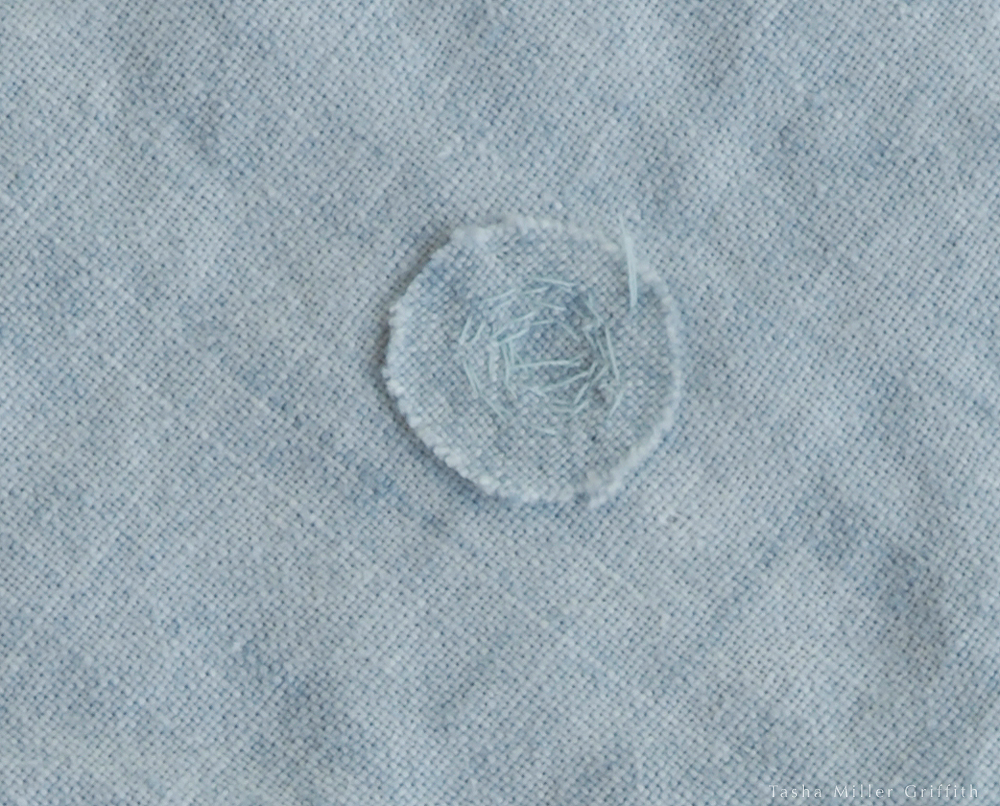
Classic moth damage on wool fabric

Can you tell I hold a grudge here?  Hmm.  Well, let’s get down to it.  There are a lot of confusing “facts” and misinformation about clothes moths out there.  I’ve developed a system for dealing with them that works well for me, but I still wanted to know, from a scientific perspective, what actually kills them?  What temperatures can they tolerate?  What about water, can you drown moth eggs? Etc.  Some of these questions remain unanswered, and I’d still like to team up with an entomologist some day and nail down some specifics.  BUT (this is a big but) not long ago I stumbled on this post at Juniper Moon Farm.  They are doing some great stuff over there, and this was no exception.  The author, Lisa Stockebrand, lays out some specific advice which I heartily agree with: cleaning is the best response to finding moths in your wool, and you can kill all stages of them with heat or by freezing.

UPDATE: Big thanks to astute reader Gabe, who pointed out that even though this blog has vanished, you can still read the original post in the web archive here: https://web.archive.org/web/20150612112534/http://www.fiberfarm.com/2013/03/moths-a-public-service-announcement

After I read this, I told Bryan about it, and how, even though of course I’d like it if our house was 100% moth-free (it’s not—they were here when we moved in—and it won’t be until all the old carpet is gone, all the baseboards are removed and cleaned behind, etc.) and of course I’m bummed that they have done damage in the past, at this point I’d rather have a system that works for dealing with them.  Sure, it’d be great to have a completely moth-free home, but as soon as one of my knitting buddies accidentally brings over an infested ball of yarn, it’s not moth-free any more, and so I would stick with my system even if I did think we were free and clear.

Less than a week after this discussion, I took a bunch of my felt samples to a small event, where they were displayed right next to an item which had clear moth damage, cocoons on it, etc.  So I had a bunch of felt to treat when I got home, and that got me thinking that now is as good a time as any to let you all know what I know about wool moths so far.

They Do Exist

Unfortunately clothes moths are alive and well in the 21st century.  I guess people who have never heard of them grew up in the age of acrylic (actually worse than moths in my opinion).  Those folks definitely have not cleaned out the houses of older relatives who worked with wool!

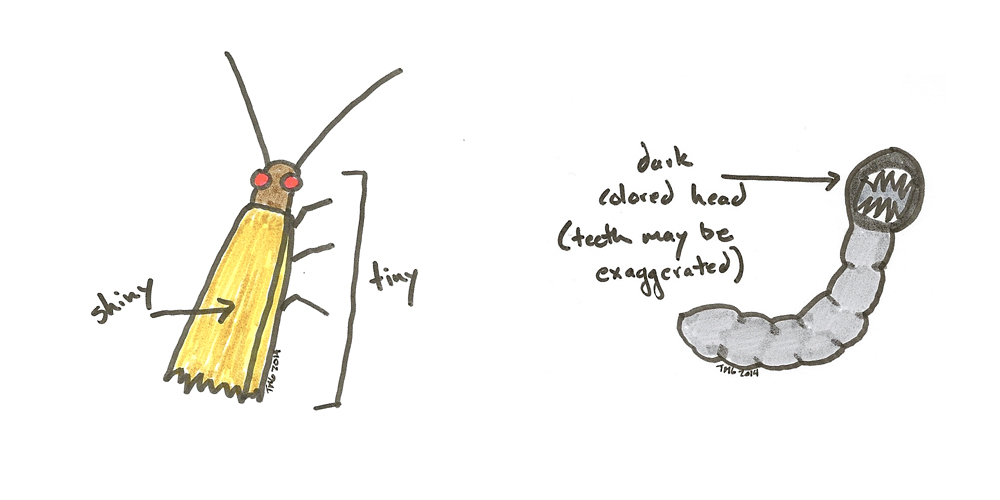
Although the moths themselves are definitely up to no good, scouting around for your most precious garments to lay their eggs on, it’s the larvae that actually eat the wool.  They also eat fur, and mixed fibers containing wool or other animal fibers, and can survive on dust bunnies alone, especially if said dust bunnies contain pet hair.  Supposedly they also eat silk, although I have never seen one on a pure silk garment.  There are two common kinds of wool moths (at least here in the US) and they both look pretty much alike: usually tiny (less than a centimeter long) shiny golden moths with tattered-looking edges to the wings, and red eyes.  The eggs are incredibly tiny, and the larvae, when they first hatch, are practically transparent, and thinner around than a sewing thread.

How, pray tell, do I know that last part you may ask?  Well, one time, years ago, we came back from a long trip and there were quite a few moths flying around the house (the woolens were packed away but I was still pretty mad).  After crushing the first couple dozen I could catch, I decided to capture a few and leave them in jar to see what would happen, in the spirit of “know your enemy.”  Probably the most interesting and disturbing thing I found out was just how practically invisible the larvae are when they first hatch.  I could easily give an item a thorough inspection and not see one at all.  Probably the second most interesting thing I found out was that yes, a couple of days in my freezer does seem to kill them.

moth and larvaIf you click on the links at the bottom of Lisa’s post, some of them have photos of actual moths.

They Can’t Eat It if You’re Using It

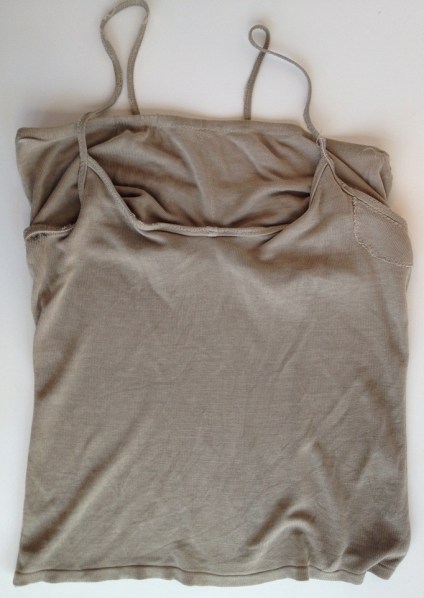
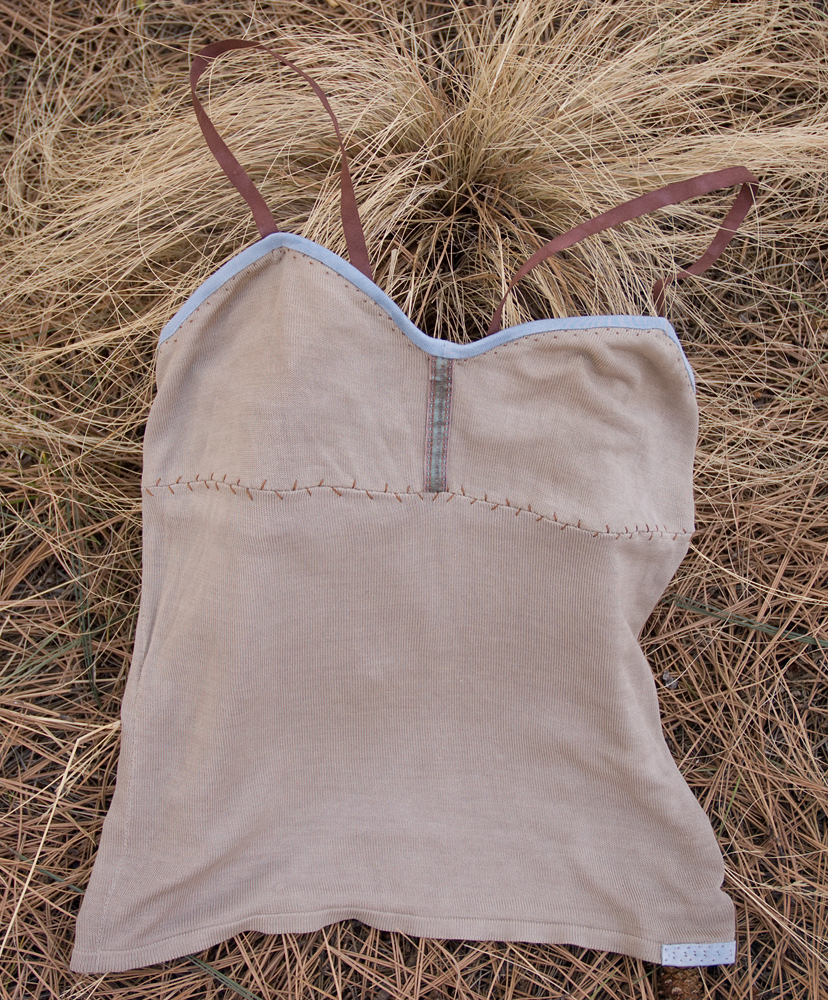
This is the most important thing I’m going to write in this post, so take note: moths are not a threat to woolens you’re using, only those you’re storing.  I have lots of wool clothes, and I just love them.  I wear them all winter long, without worrying a bit that little things with wings will attack them.  That’s because if you’re wearing something, it’s out and about, it’s in the light (which clothes moths don’t like), it’s brushing up against other things, it’s being cleaned and then worn again … in other words, even if a moth did lay eggs on it, chances are very high the eggs would be destroyed or brushed off before they hatched.

Store it Well if You’re Not Using It

When the weather warms up, I wash my woolens, bit by bit usually, and store them for the summer, in a suitcase in the garage.  Dirty clothes are more likely to attract moths, not to mention it’s not good for the fabric to let stains and oils just sit there.  In a weird way I kind of love doing this, and especially love opening up the suitcase in the fall when it’s full of wonderful things for winter.  I hand wash everything except a large rug and my not-me-made coat, which go to the cleaners.

I also use plastic tubs to store yarn and fabric scraps, and some plastic bags inside those as well.  When I worked at a museum, I learned that airtight plastic bags are not really a good choice for long term storage of textiles, you want some airflow, otherwise the air in the bag will become different enough from the air outside that just taking the textile out can damage or destroy it.  But while plastic bags aren’t the best choice for preserving your grandmother’s wedding dress, they should be fine for keeping your yarn stash organized, as long as you open them now and then.  In my mind, the absolutely ideal container for wool storage is one that seals tight to moths but not to air, which is why I use a suitcase (with a tight closing zipper) for summer storage.  Whatever you use, make sure it closes tight enough to keep a little moth from wandering in.  Moths can eat through paper bags and cotton to get what they want, but they only will if what’s in there really grabs their attention.

Cold definitely slows moths down, and may kill them if the conditions are right.  I’ve had good results storing wool for felting, and materials for making my cashmere hats, in big plastic tubs that stay on my back porch year round.  About half the year, it’s pretty cold out there, and usually freezes at night.  I keep my knitting yarn bin out there for part of the winter too.  The rest of the time it stays in the garage.  I’ve also had good results storing wool yarn and fabric scraps that I’m not going to use right away in the garage, either in plastic tubs or in a cardboard box with the seams taped shut.  Again: treat/clean things, then store them.

Two Mistakes You Don’t Have to Make

As my friend Tom says, “You don’t have to make this mistake, I have already made it for you.”

1.  Don’t bring home a new wool rug without having it cleaned, especially if it’s imported and/or has been stored for a while.  Seriously, take it straight to the cleaners when you buy it, then bring it home.  Same thing with any old yarn or sweaters someone donates to you.  Treat them (see below), then wash them, then use them.

2.  Don’t assume that something which has been hanging in your closet for a while is moth-free, and put it away.  Treat it and/or clean it every time before you store it.

How to Kill Clothes Moths

If you find moths in your house, I can’t recommend a better strategy than what’s in Lisa’s article, which I linked to at the top.

It appears, from the incident with the jar of moths as well as other anecdotal evidence, that the ordinary freezer attached to my fridge is enough to kill moths, although that has not been scientifically proven for all stages of moth life.  There was also an incident in which a moth attack got started in a storage bin (see 2. above) but then halted, and the larvae appeared dead when I found them.  I have a theory that, while the temperature was not low enough to kill the eggs, at some point it did freeze hard enough to kill the larvae.  This was in the garage.  This is just a theory.

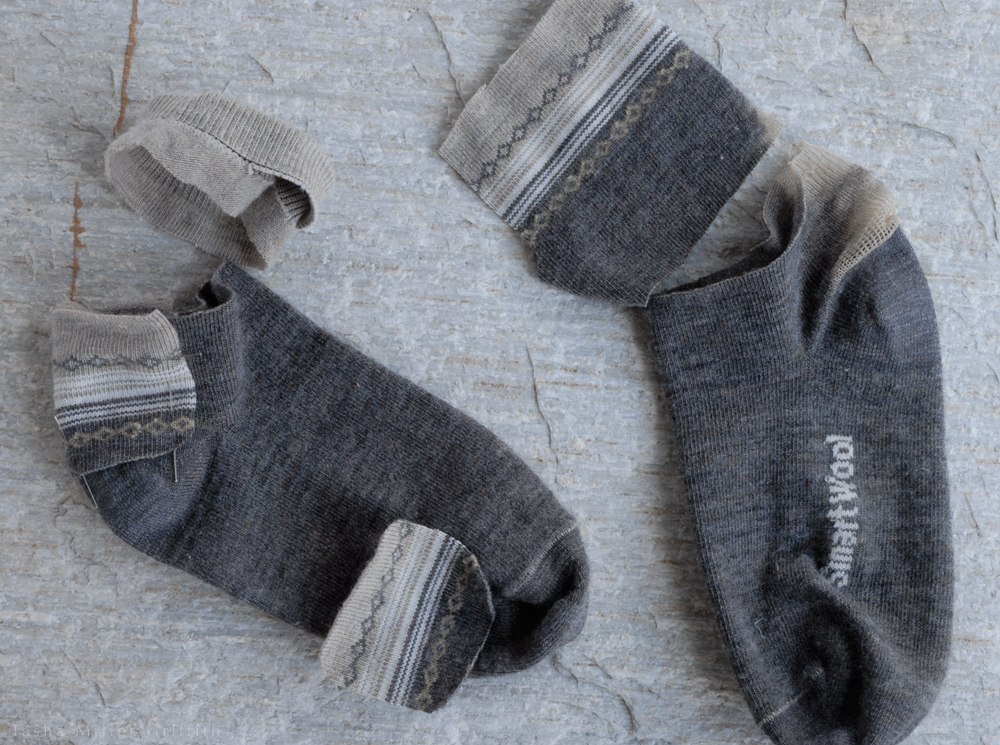
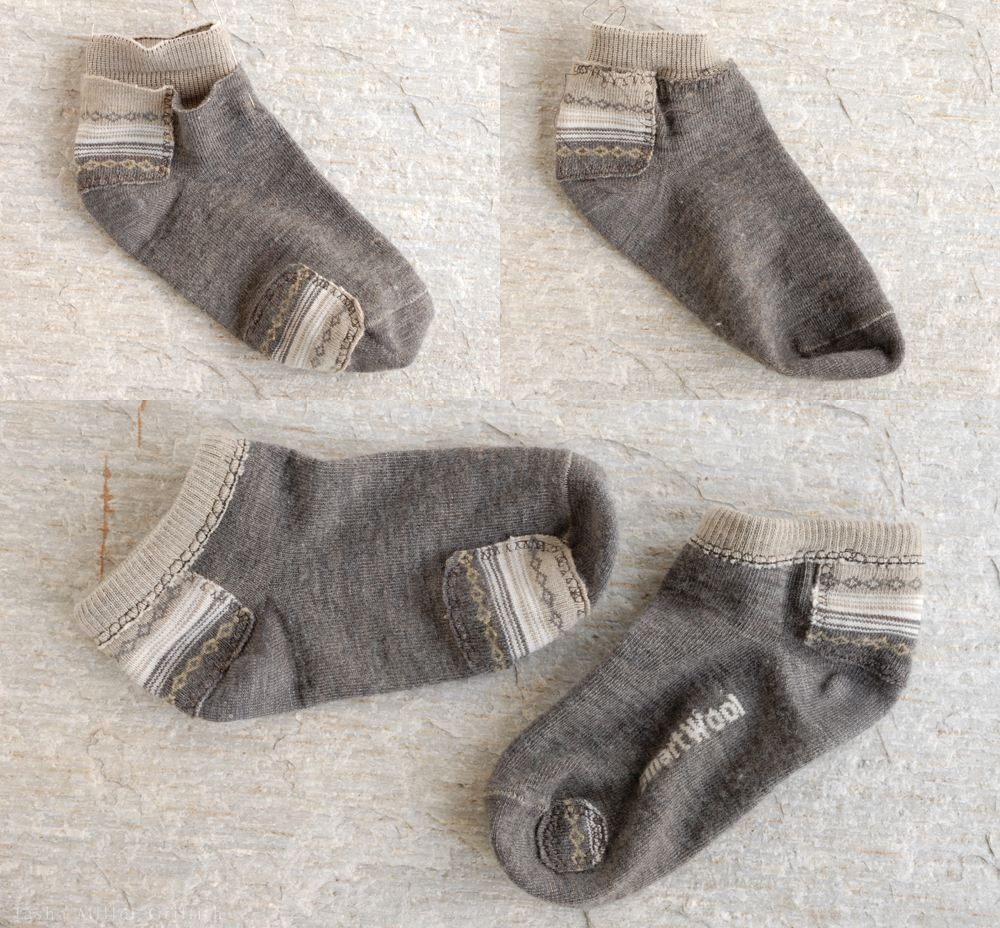
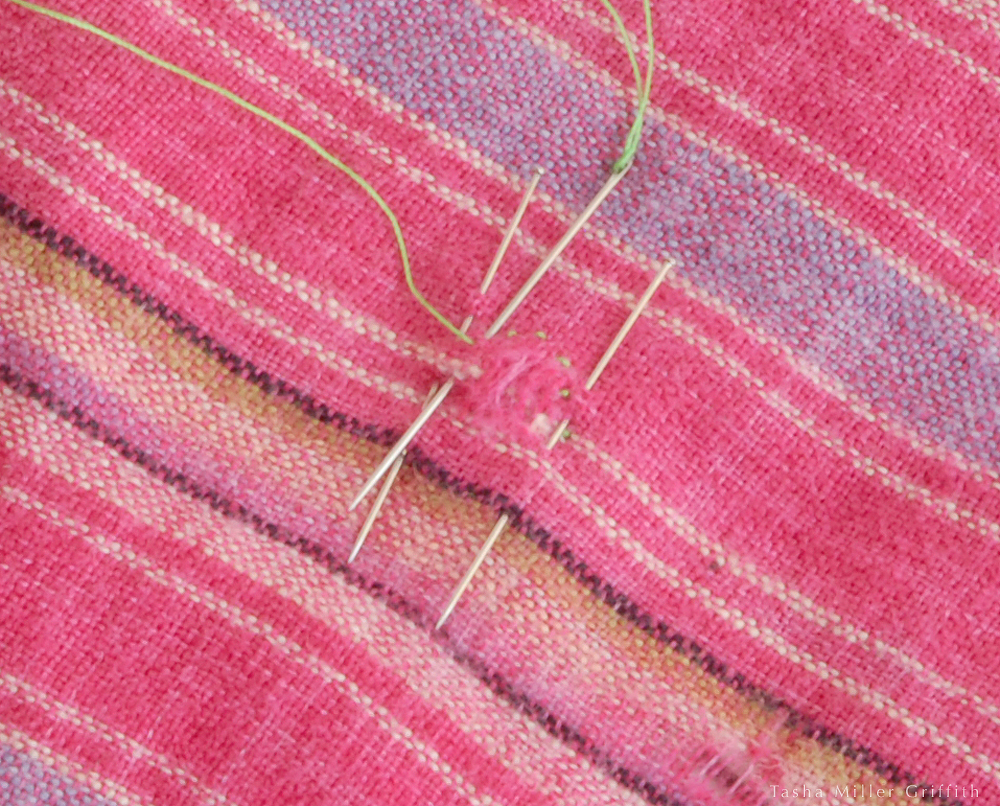
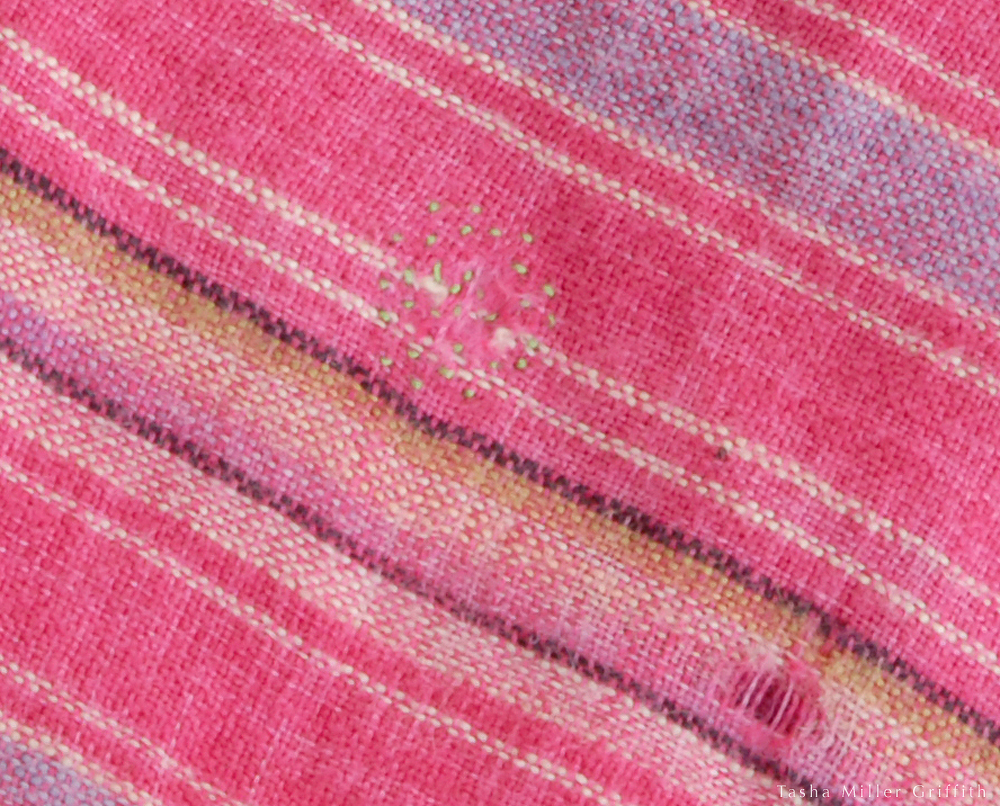
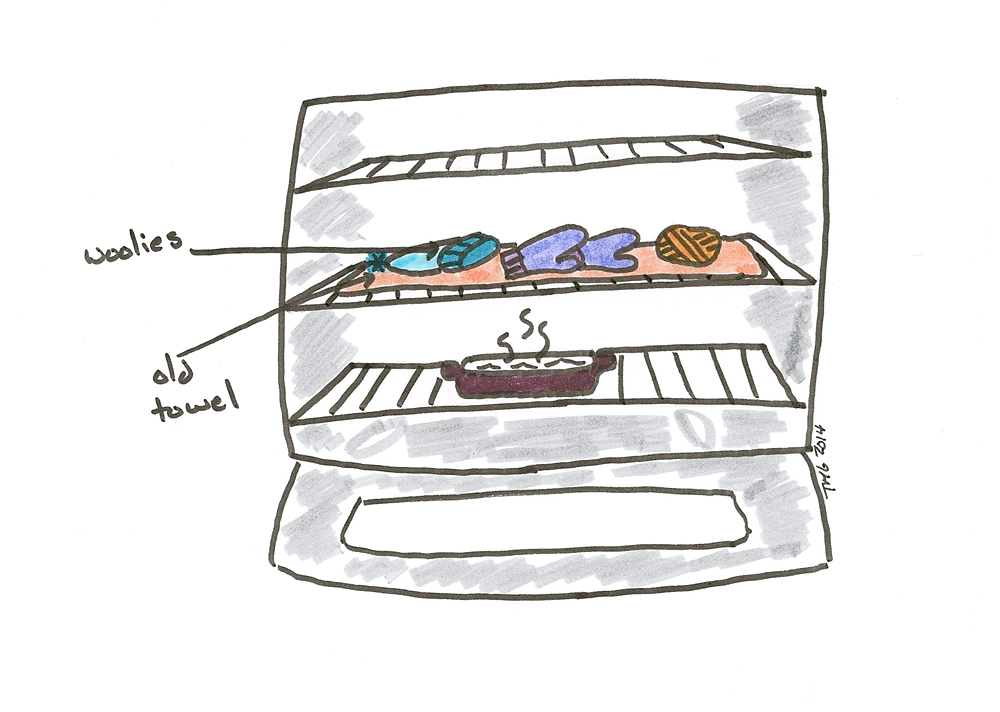
When I brought home my felt samples that were possibly exposed to moth eggs, I decided to try treating them with heat, since I could cycle through everything I needed to treat in a day, rather than over weeks if I used the freezer.  Lisa recommends temps over 120° F for at least 30 minutes.  Washing in water over that temp also works, but I decided I’d rather keep the wool dry so that I could store it right away.  I’ve also steamed small amounts of yarn above boiling water, the way you would a vegetable, and that should work as well, as long as the heat penetrates to the middle of whatever you’re steaming.

I did put a pan of hot water on the lowest oven rack, so that the heat I was exposing the wool to wouldn’t be completely dry.  The lowest temperature my oven will set at is 170° F, and I went for 200° just for good measure.  I put an old towel directly on the middle oven rack, and put the wool items, not too many at a time so that the heat had a chance to penetrate, on top of that, and set the timer for 40 minutes before taking them out and putting in the next batch. At the end, the only thing that showed any signs of scorching was where the towel touched the sides of the oven, so I suggest folding your towel so that it doesn’t touch the oven walls.  I keep a baking stone on the top rack of my oven, and I left it there to hold heat.  If you wanted to, I think you could also do two racks of wool at a time, as long as you allow time for the oven to heat back up after you load everything in.

wool in oven 
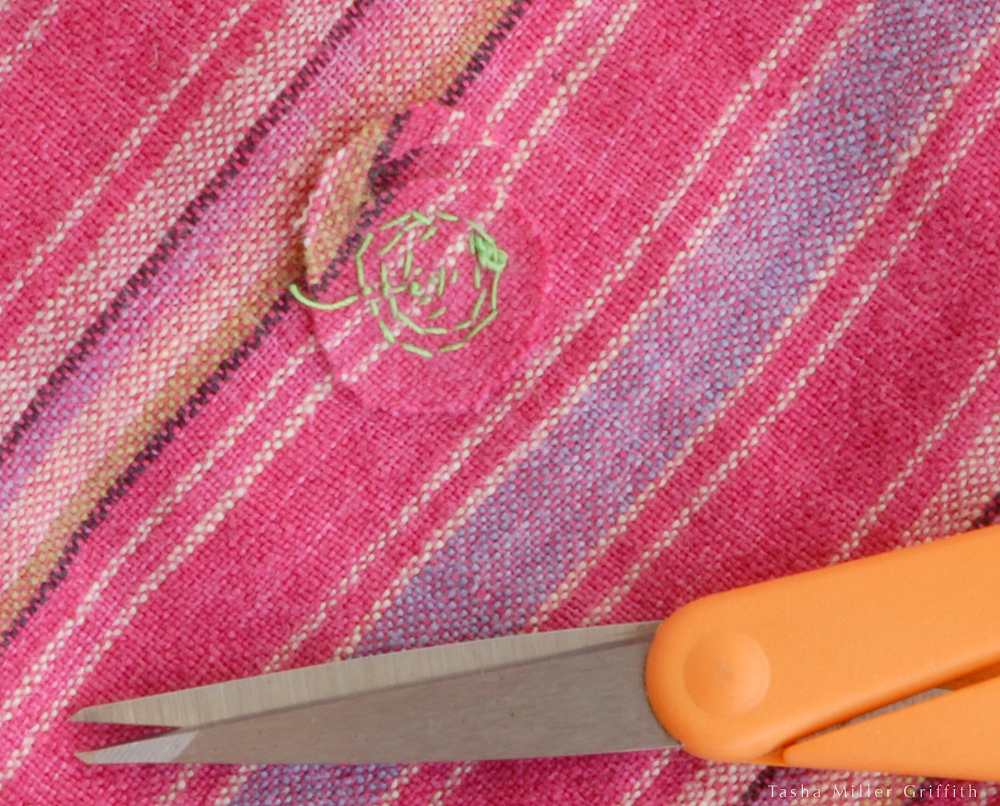
When one batch was done, I put it somewhere clean, and while the last batch was heating, I wiped out the plastic storage bin I keep the felt samples in with a damp cloth, and let it dry in the sun.  The cleaning part always seems like no fun at first, but once I’m doing it, it occurs to me that it was high time anyway, and it feels good in a spring-cleaning kind of way.  When I put the samples back in the bin I felt confident that they were good to go.

This is in Lisa’s article, but I’d like to emphasize it: please please do not use mothballs.  This is another thing I learned from working at the museum: mothballs are truly horrible, they are toxic to all kinds of creatures, including me.  I’m pretty sure I left a few brain cells behind while going through their collection of furs.

And Finally, Spiders

A thought about spiders: another time we returned from our summer journeys to find that moths had hatched in the house, but this time most of them were in a spider web in the studio.  Ever since then, I have let spiders be in the house (except if they’re in the sink, the bathtub, or building a web somewhere very inconvenient) instead of trying to relocate them outside.  It started me thinking that the spiders, being so much smaller than I am, and adapted to eat bugs, and hungry, might be much much better than I was at finding moth larvae under the edges of the carpet, etc.

I can’t say for sure what difference leaving the spiders has made, but I will say that over the past few years, all these strategies combined have meant that I only see a couple of moths a year (and, um, SQUASH them) and more importantly, I’ve managed to keep all the things I care about from getting munched on.

There’s a lot here (phew!), but I still promise to update/post more as I learn more!

How to Mend a Small Hole: Sewing a Patch by Hand


small hand sewn patch 5


Here’s another way to fix a small hole in a shirt or a sweater—especially a hole that’s a little too big to simply sew back together without causing puckers.  No sewing machine required though, it’s more invisible to sew a little patch like this by hand.  These examples are in woven fabric, but this technique also works on knits.  I sewed a patch like this on the front of this sweater, which because of the fuzzy knit fabric is too invisible for pictures!

I’m going to demonstrate on two skirts, which happen to both be made of linen, cut on the bias, and have small holes.  The difference is, the blue one at the top I fixed for keeps—it had a little tear, but the rest of the fabric is still in good shape.  I bought the pink stripey one for a dollar on the sale rack at St. Vinnie’s, and it followed me around the country on our summer travels for years.  I even tried out two different ideas for adding pockets to bias skirts on it.  By now it’s on its way out, the fabric across the back has a few tears, and is super thin and ready to tear in a lot more places.  It’s ready to retire, but I can get one more use out if it by fixing one of the holes with bright green thread so you can see what’s going on.

To start, cut a circular patch, about three times as big across as your hole.  Making it a little bigger will make the sewing easier, and you can trim it later.  If you have a piece of the garment fabric, cut the patch from a section that matches up with where the hole is, in terms of color, pattern, or wear.  If not, just try to find something that matches as well as possible.  Hold the scrap behind the hole to see how it looks.  If your fabric is very loosely woven, you may want to sew around the edges of the patch to keep it from unraveling.  Otherwise, a circular patch should be ok as it is through normal wear and washing.

Click on any of the pictures to enlarge, you can see more detail here than I could while sewing the patches!


small hand sewn patch 1


Carefully center the patch behind the hole.  Match the grain (the direction of the grid of threads) of the garment and the patch.  This is especially important if the garment is cut on the bias (with the grain at 45°) like this one, because I want to avoid changing the drape of the bias cut.

Pin the patch in place through the front of the garment, sticking each pin in and out of the fabric twice.  Check to see that the patch is centered over the hole, and re-pin if necessary.  If the fabric is slippery, it may be easier to sew a few temporary basting stitches, and pull them out when you’re done, than to get the pins to hold it.


small hand sewn patch 2


Knot your thread, and bring it up from the back.  Sew around the hole a couple of times, sewing through both layers using small backstitches.  Don’t pull the stitches too tight, or the fabric will pucker up.  Try to catch each thread that is cut by the hole on one pass or the other.  If there are intact threads in the center of the hole, tack them down to the patch too.

The goal is to keep the hole from unraveling any further, without adding so many stitches that it makes the patch stand out.

When it’s done, secure the thread with another knot or a couple of backstitches just through the patch on the back.

Here’s the finished patch on the front:


small hand sewn patch 4


And from the back.  You can trim the patch, but leave some around the edges so that if it unravels slightly, there will still be enough fabric to hold it in place.


small hand sewn patch 3


Here’s the back of the blue one:


small hand sewn patch 6


Hopefully this adds another option to your mending toolkit!

Making a Lining for a Simple Top

In which I concede that yes, some wool is itchy.


lined MD top front


My grandmother wove the fabric for this top, and she sewed it!  She gave it to me many years ago, but I’ve never worn it much, because when it touches your skin, the fabric is super scratchy.  You all know how much I love wool, and I try to advocate for it, so I usually say that it doesn’t have to be itchy!  But the truth is, of course, it varies enormously with everything from the kind of sheep the wool came from to the way it’s processed, leading to everything from super snuggly high-end next-to-skin layers all the way to heavy duty outerwear.  (And here’s something I can’t get out of my head since I read it, that we might not even want all wool to be soft, we want some to be hard-wearing too.)

Ok, so say that you do have a scratchy wool garment that touches your skin, what to do?  Line it!  I’ve had vague plan for lining this top for a few years, a plan which gradually clarified itself and worked out details in my head, as I realized that I could satisfy my clear need for more sweater layers using almost exclusively things I already had.


lined MD top side


This top is a very simple construction which seems to have a been a favorite of handweavers in the 1970’s.  It’s just two large rectangles for the front and back, and two more folded over for the sleeves.  It has slits at the side seams for a little more movement, and the edge of the fabric is just turned under to make a bit of a curve at the front and back neckline.


lined MD top reinforcementI’ve been storing this in my brain and knew I would use it!  A couple of the older sweaters I’ve re-used for Fiddleheads have a sturdy ribbon reinforcement at the underarms.  I know this is a point of stress for this top, as the stitches had already popped there, and I’m not going to want to undo the lining to fix it again!


I thought it would be pretty simple to line this, and I was right.  There is a lot of minor fudging going on here, and it doesn’t really show, since it’s um, the lining.  I measured all the dimensions of the top and cut the lining the same size, plus seam allowances.  I knew that that would make the lining a little bit baggy, since it’s the same size and inside the top, but I didn’t want to make it too tight, or make this project super fiddly.  For such a simple garment this worked well.

Since the issue with the itchy-ness of this top is where is touches my skin, I knew that I needed an edging that would stick out past the wool at the neck and sleeves.  I had two candidates for lining fabric in the stash, both blue rayon.  I really liked how the color and slight twill texture of one looked with the wool fabric, but it was a little heavy for lining and has more potential as a garment on its own.  So I decided to use the first fabric for just the edging strips, and the lighter weight, darker colored rayon for the main lining pieces.


lined MD top sewing detailsI’m trying something new here, a lot of the sewing details are in this photo.  I hope that it will both be visually more clear what I’m talking about, and make the main text a little less dense.  Click to enlarge and read!


No doubt, this project has a LOT of hand stitching, mainly backstitch.  Fortunately, I love handstitching.  It has all the advantages of knitting in that it’s soothing and portable, I could work on it anywhere, and while talking to people on the phone, etc., so it actually went pretty fast.  Plus, I didn’t want the stitches to show on the outside, and since I could place and pin the fabric as I went, handstitching gave me the most flexibility to see how things were coming out, and pin under more or less to adjust.


lined MD top inside done

handwoven by Dottie MillerSo, many little stitches later, there you have it!  Lined garments just feel so finished, and kind of luxurious when you put them on, don’t you think?  And, the itchy issue is 100% gone, to the point where I forget all about it. (Remind me not to cuddle small children while wearing this . . . )


lined MD top front cowl


Now I just have to figure out how to wear it.  I’m not used to having wide 3/4 length sleeves, and sometimes catch them on things . . .  The first time I wore this into town, I thought it looked better with a cowl or scarf on top.  But looking at these pictures, I kind of like it on its own.  I live in layers, and this one is a bit tricky to layer on top or under, so I think a cowl or scarf will be a good option when it’s cooler.  The weather has been so mild lately that I was really comfortable taking pictures outside in just the top.  It may be a sign of impending doom, but I might as well enjoy it, right?


lined MD top side cowl


Totally, that’s what I thought.  What are you working on for winter, assuming we get winter?