At John C Campbell Folk School, and Thank You


jccfs17landscape4


Once I start talking about my time at John C Campbell Folk School, I usually can’t stop. So much happened in the three weeks I was there that one story just leads to another … in case that happens in writing too, I want to begin with a heart-felt thank you to all of you reading this. This blog may not have thousands of followers or get major media attention, but it stands out here on the big ol’ web as a picture of who I am, what I’m doing and sharing, and where I’d like to go. The fact that it exists has helped make several opportunities possible lately, including this one. The ties between this space and the real world are many and interwoven. So, thank you all for being part of this piece of my life, which has contributed much to the person I’m becoming.


jccfs17landscape1


A heart-felt paragraph is actually a good introduction to this story, since one of the biggest things that stands out about JCCFS is just how many people I met there who were speaking and acting from the heart. My wonderful new friend Becky (who got recruited to be my assistant in the second felting class) told me about another student who had said, “I always knew I marched to the beat of a different drummer, but at the Folk School I met the rest of the band.” I feel more than a little of that myself. Somewhere towards the end of the first week I started to realize that whoever I was standing next to while waiting to go into the dining hall, though they may look like a mild-mannered Southerner somewhere around retirement age, was in fact very likely to be a member of my own quirky maker tribe! And that if I started talking to them, it was also likely that I would learn something really interesting and/or get a new idea. It was amazing. It also made me wonder if part of the reason I’m usually shy with strangers is that I’m convinced they won’t understand me, and if I’m not giving the strangers in other places enough credit. In other places though, it is harder to start conversations with, “Oh, you’re taking blacksmithing, very cool! What are you making this week?”


jccfs17landscape5

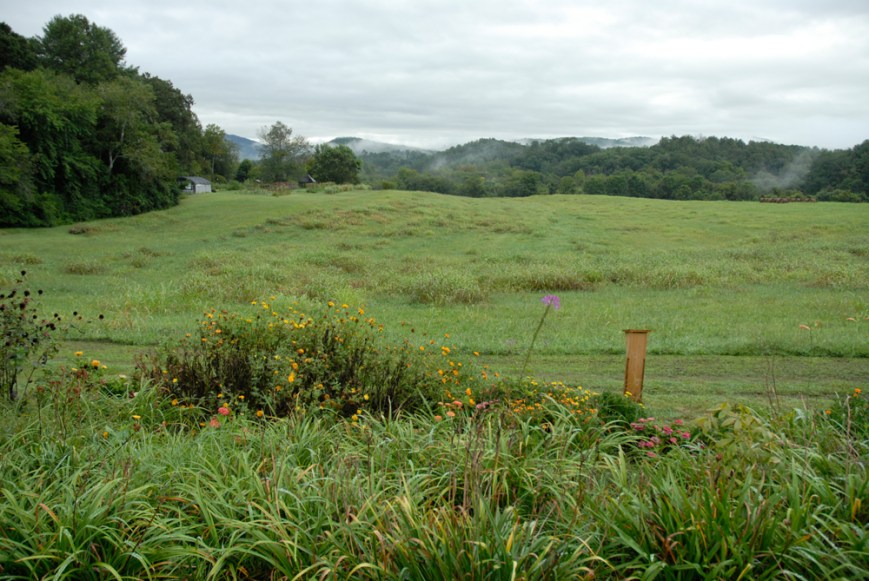
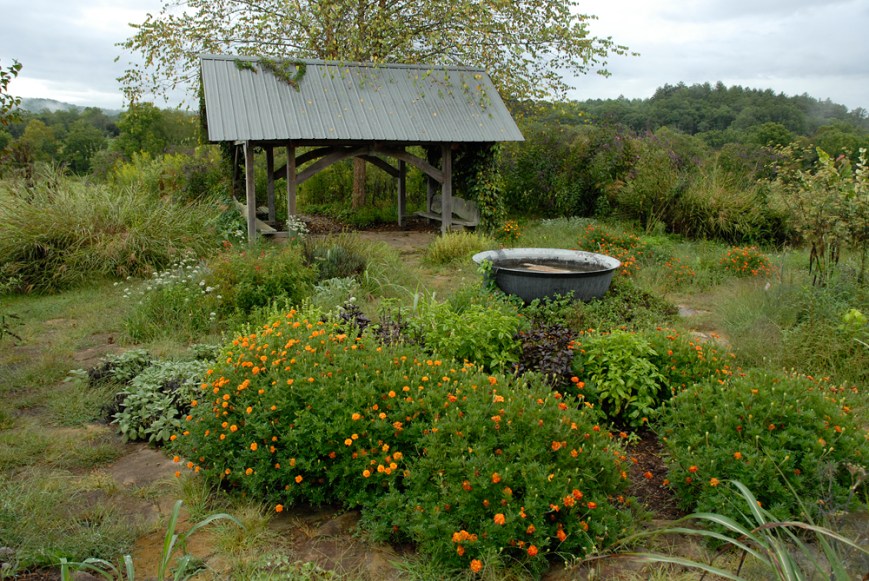
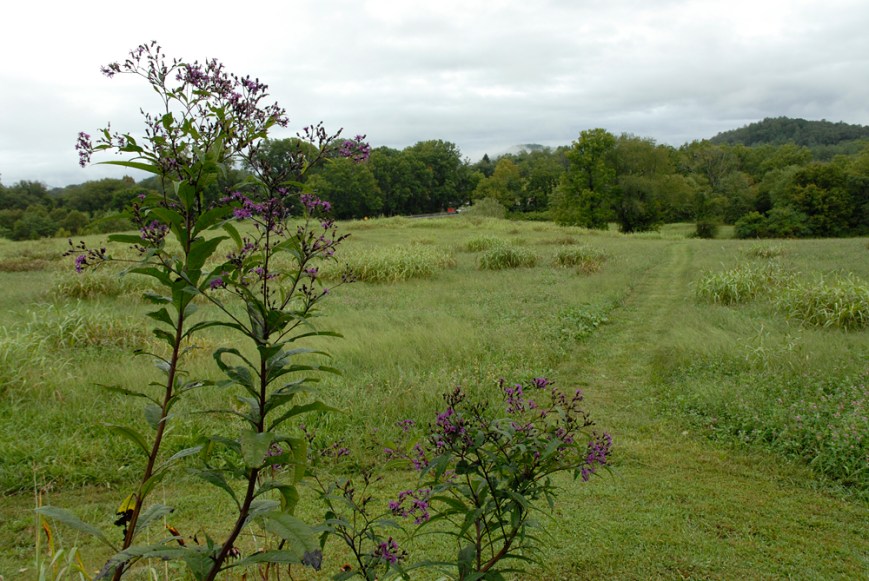
Part of the view walking from my temporary home to breakfast. The garden is in the left background, hay right background.


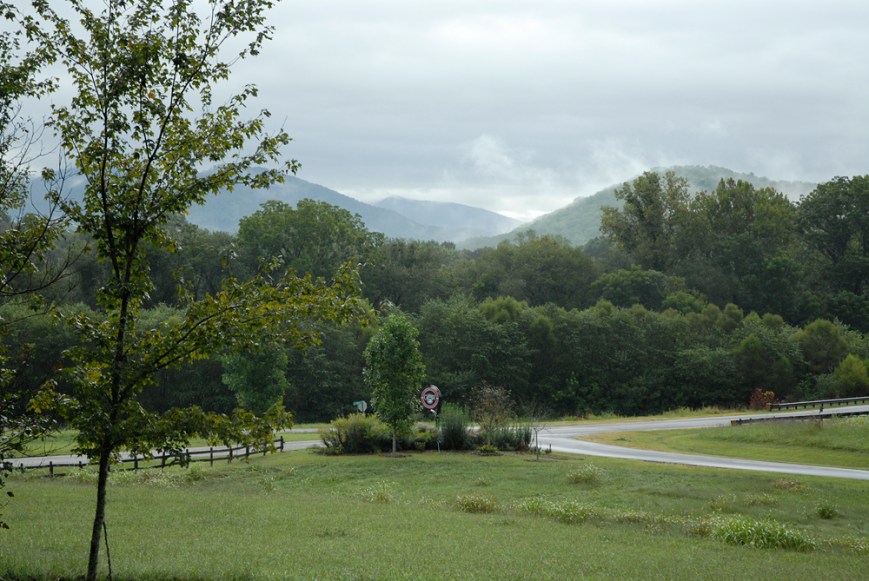
The physical Folk School is a collection of a couple dozen buildings for classes, housing, and community areas. Some are new, and some are gently worn with the passing of many feet and hands. The campus is out of the way enough to feel like its own little world, surrounded by various hills (which people from lower elevations might call mountains), fields complete with picturesque rolled hay, and lots of greenery and flowers towards the end of summer. There was fog most mornings (which being from a dry place I find exotic and beautiful). The chorus of night insects and frogs stood out to me enough that I made a little recording to remember it. On a few weekend nights you can also hear the distinctly incongruous sounds of a nearby car racing track.

Each day is scheduled with class time, meals, and optional extra activities in the afternoons and evenings. Music and dance are a big part of things; there are songs before breakfast (optional of course), contra dances every Tuesday night (so much fun) and concerts on many weekends. And a dozen or more classes in different craft subjects going on all at once! It really is a lot like my family craft retreat every single week—that much energy, that much community, that much learning, that much working intensely—except that during mealtimes and free times you also see a bunch of other people who are having a similar experience in another studio nearby.


jccfs17landscape2

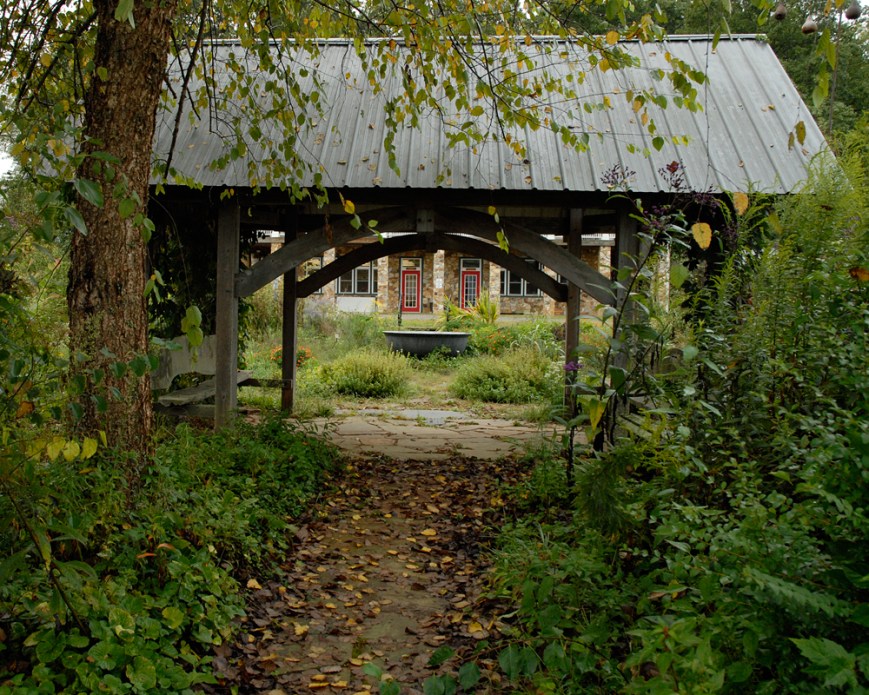
The door through the gazebo on the left goes to the Wet Room, home of felting, dyeing, and other great classes, one of my new favorite places. The door on the right goes to the cooking studio.


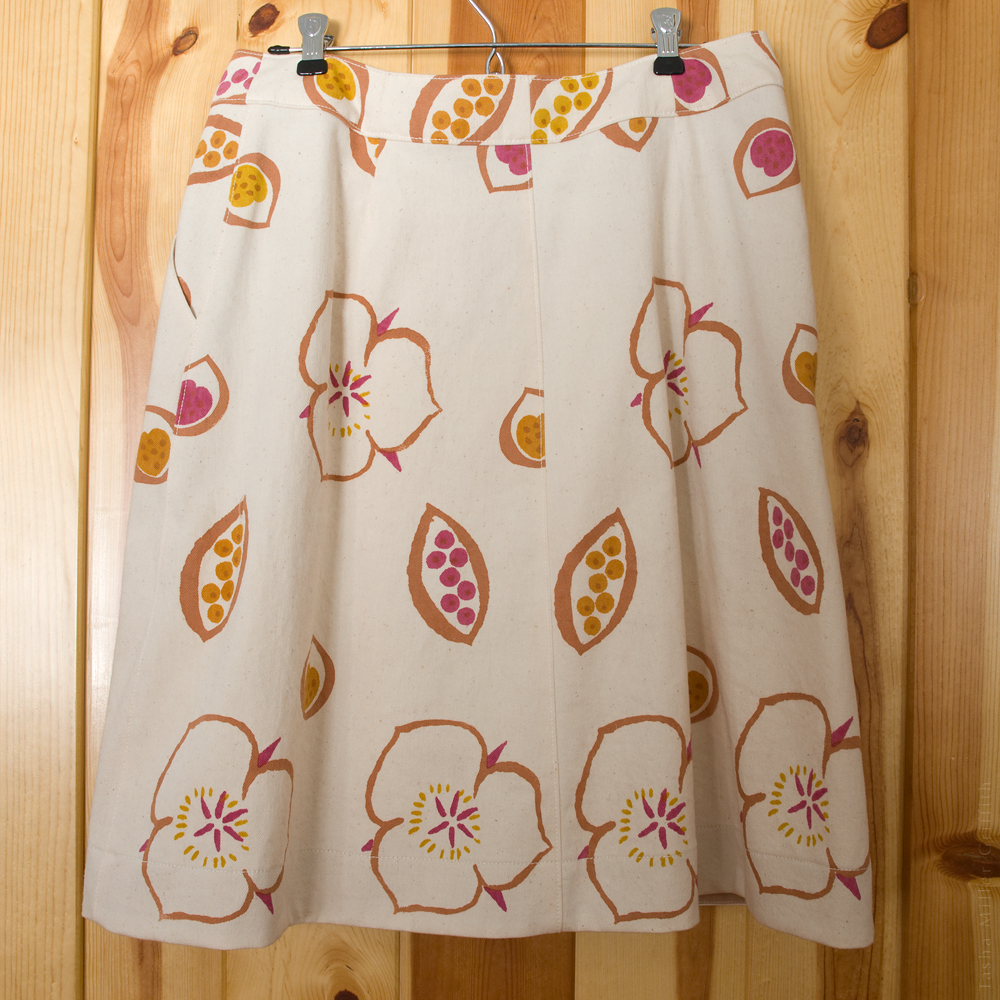
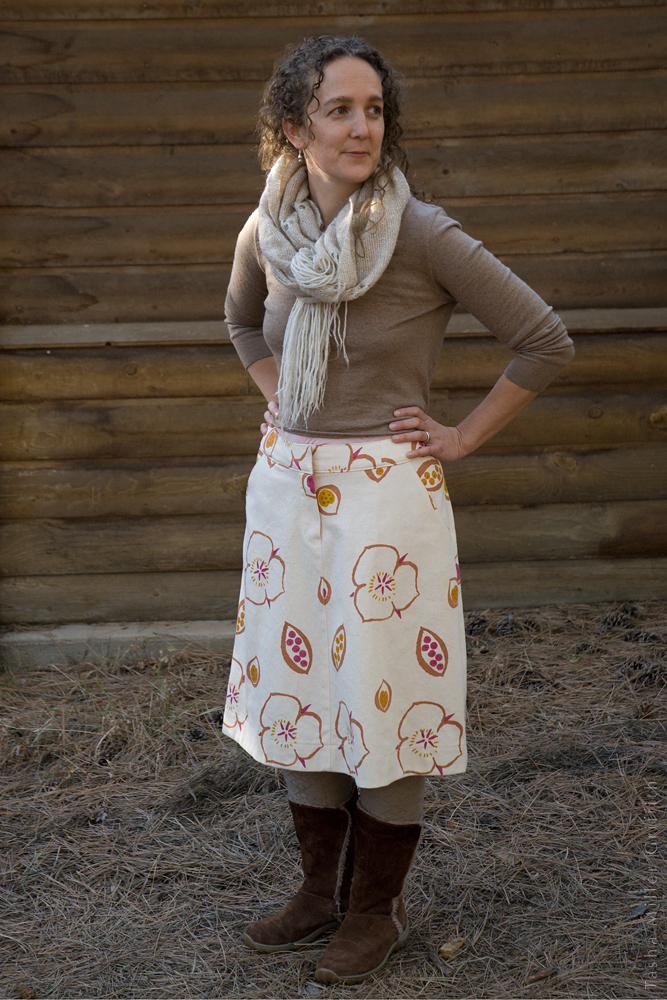
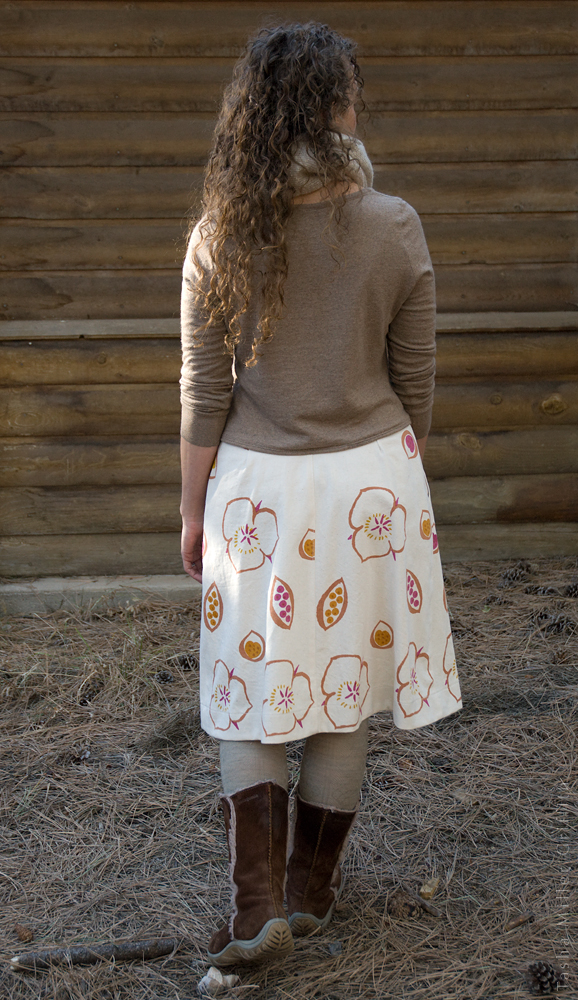
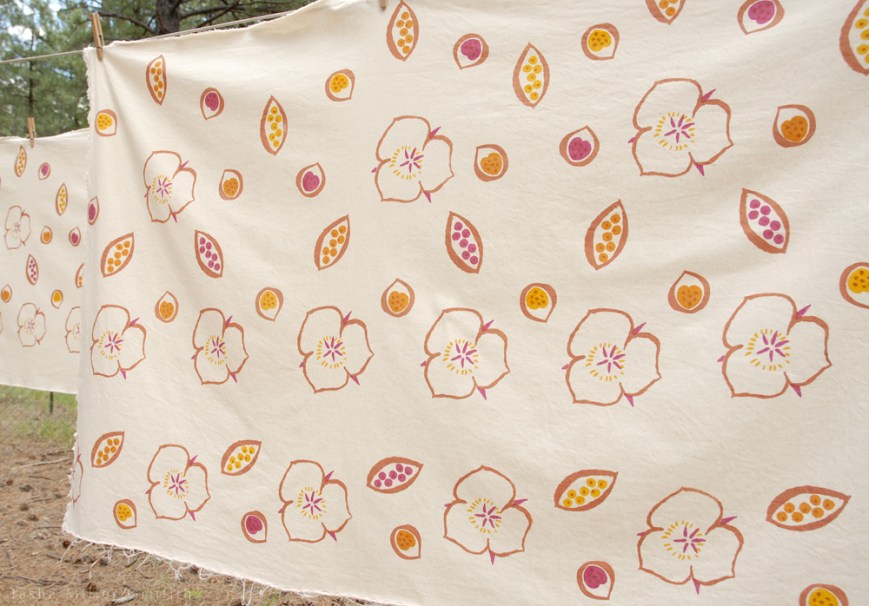
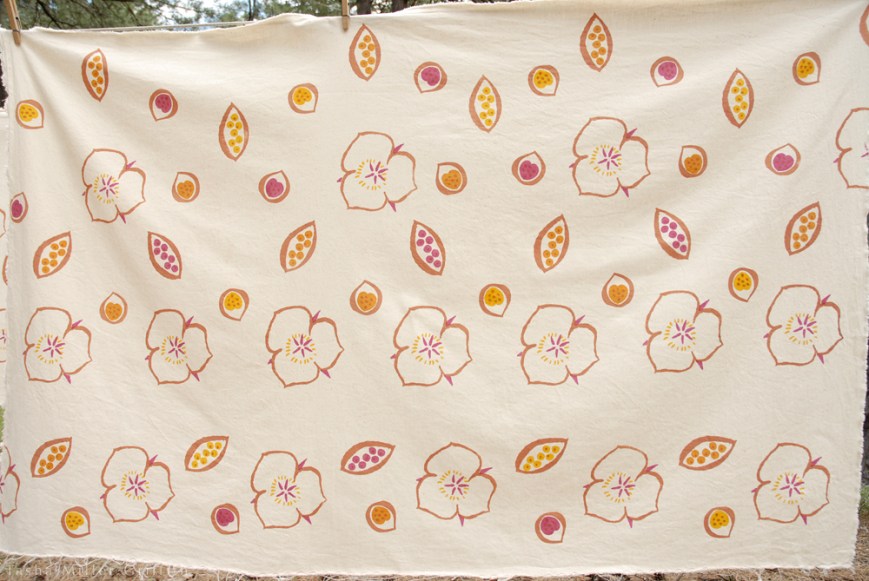
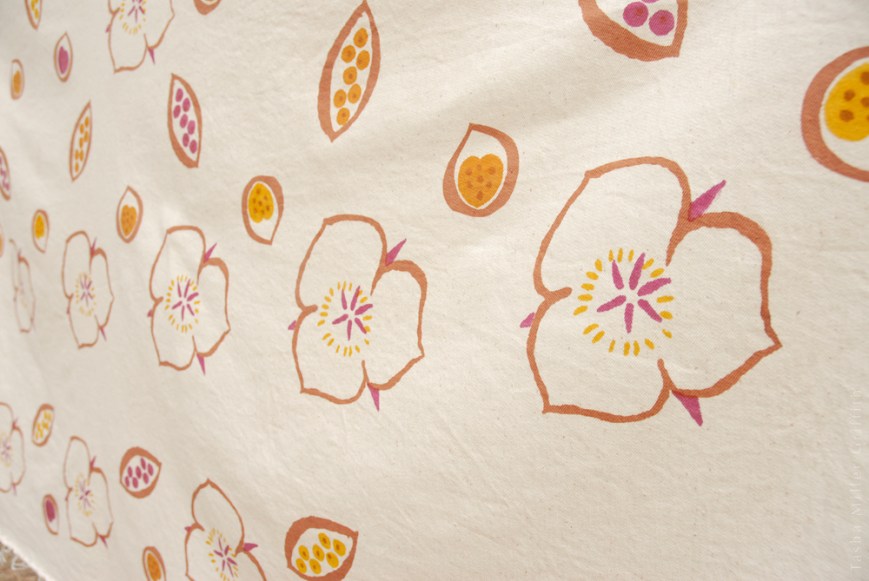
I taught three classes; two on felting (one was a week long and one was a quick weekend format), and a week on screen printing with natural dye. Anyone who has seen me in person (or even on my Instagram) in the last two years or so knows that I’ve been fairly obsessed with natural dye and printing in particular. So much prep work went into that class especially, because it’s the one that’s the newest to me, and also because of the nature of the subject. What makes working with natural dyes so compelling is the infinite possibilities, the way that every single variable seems to affect the color you get … but that also makes it nearly impossible to feel prepared for class! Nevertheless, we all learned a lot and my hope was that the students would all leave with a solid foundation for their own experimenting. I had had some really lovely students in all three classes, people who were gracious, and helpful to each other, and full of new ideas. I was really impressed with the curiosity and creativity of the students who are drawn to JCCFS. You would not believe how many unique felted objects can materialize (and how much wool can disappear) even in a weekend class. In the week-long felting class we formed such a little community that some of us (including me) cried when it was time to say goodbye.


jccfs17felt1

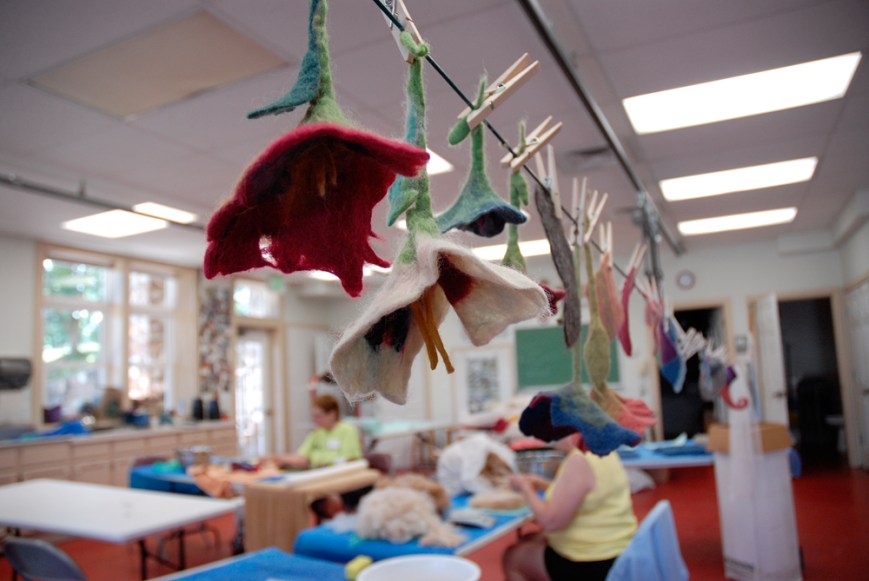
Felting in the Wet Room.

jccfs17printing1

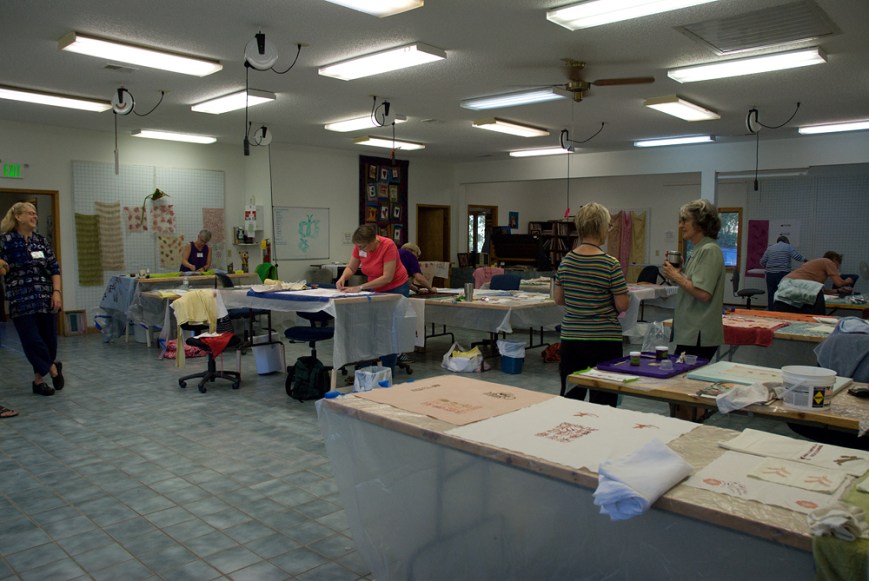
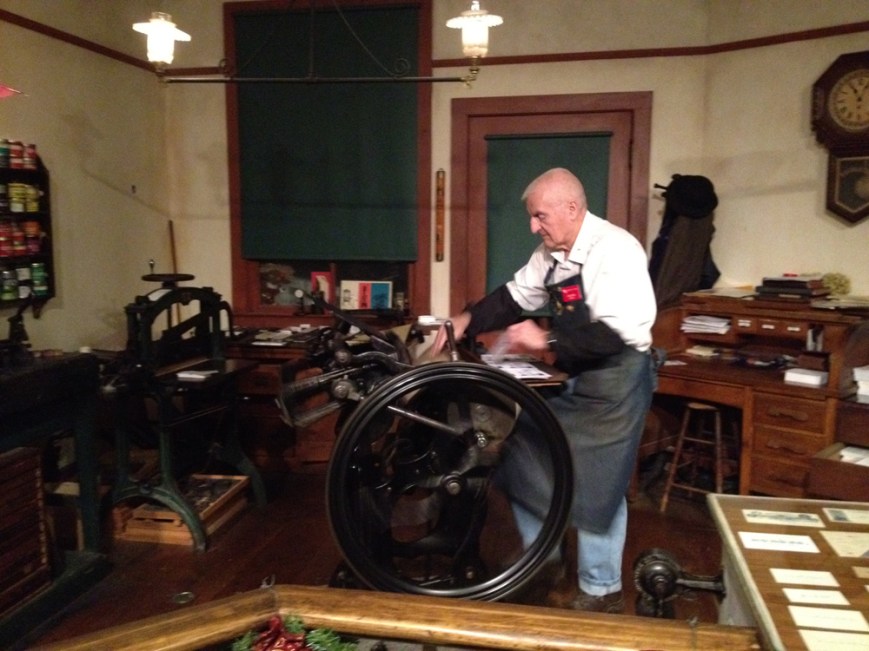
Printing in the Quilting Studio.


After the classes I taught were finished, I stayed a third week as a student (one of the benefits of teaching at the Folk School is that you get instructor credits which allow you to take a class more or less for free). I’m so glad I did, it was wonderful to experience the place from a more relaxed perspective, to have a week with more time for walking, extra activities, and hanging out with Julie, one of the student hosts who took my first felting class and became a fast friend. I took a class called Sheep to Shawl with Martha Owen, who is the resident artist in charge of felting, spinning, dyeing, etc. (and the person who hired me to come teach felting). We washed and dyed fleece in some gorgeous natural colors (without felting it, which I always found intimidating before), we learned to hand card, and we practiced spinning different styles and preparations. I also got to try out a great wheel, and even spinning the fuzz right off of an angora bunny! Martha is a generous teacher who shared a lot of her life with us, taking us to visit her sheep and her home. She knows/knew many people in the fiber world who are legends to me (like Norman Kennedy and Jim Liles), and her class is full of stories. The whole school actually is full of stories, and connections being made.


jccfsfb-greatwheel1

Photo of me at great wheel via the JCCFS Facebook page.


When I got home I knew I still had some internal processing to do, continuing to turn over everything from a very full three weeks until it started to make sense with the rest of my life. Still, I kept thinking that it was taking me quite a while to get back to feeling “normal” … until I realized that is what it feels like when you’ve left a part of your heart behind. I grew a lot at the Folk School. I left as a better teacher, and as a person more able to be calm and trust that things will work out. I met and bonded with so many wonderful people. I’m surrounded by little reminders of them now; handmade things people generously gave me, and other beautiful things that I bought to bring home, and lovely wool from Martha’s class which I am trying to comb a little bit of each day. At least once a week, and usually more, I get a postcard or an email from one of my new buddies. Even if I wanted to pretend to be the same person I was before I left it would be impossible. Whether or not this turns out to be a “big break” that leads to other things for me, I’m profoundly grateful to have been able to go, to have learned all that I did and made all of these connections, to have been somewhere where I felt so at home that I understand what it’s like to fall in love with a community. As my excellent assistant for the printing class, Sally, says, “The Folk School is the easiest place in the world to practice gratitude.” I will endeavor to practice at home too.


jccfs17landscape3


Every Day


Here’s what I made with my special natural-dye printed fabric as part of my one Year, one Outfit project: an every day skirt.  In fact I designed the print with this skirt in mind.  Keep reading for some skirt-construction details, as well as thoughts about what I figured out and where I’m going with #1year1outfit after this.


1year1outfit skirt 2


For the pattern, I copied a skirt my aunt gave me ages ago.  It’s one of those items that I probably would never have picked on my own, but once it was in my wardrobe I wore it non-stop.  I can’t describe it better than to say that it’s the perfect shape for biking in: wide enough for easy movement but not so wide that it flips up in the breeze.


me with early plane 2The original skirt at the Udvar-Hazy Center during Me-Made-May ’12 (I made the pink top).


This skirt seemed appropriate for practically every activity.  The large-scale, colorful print also seemed to go with everything I owned, and was part of my inspiration while thinking about how to print my fabric.  Maybe needless to say, I’ve worn it so much it’s literally falling apart, and had to be retired after finishing the pattern.


mmm'14 day 9Pretty much the only time I document what I’m wearing is during MMM.  Here are the essential elements of the skirt from 2014, when I decided to draw my outfits.  Also pictured: the beginning of this sweater.


Although I was pretty sure the pattern would make a wearable skirt on the first try, I knew there would inevitably be some little things I’d want to change.  And I would have to be certifiably nuts to cut into my carefully printed fabric without trying out my new pattern first.  So I made one from stash fabric, green floral linen/cotton blend I bought ages ago and turned out to be great for this.


1year1outfit skirt 7


And I did in fact have a short laundry list of things to tweak for the second version, including the length.

Judging by the amount I wore this test version before the weather got cold, I’ll wear the snot out of both these. I just have to convince myself not to treat the natural-printed one as too precious. I’m also super curious about how the dye will hold up in real life, so hopefully that will help!


1year1outfit skirt 8This is my favorite thing to do with quilting cottons that I apparently couldn’t resist buying in the past.  I quite like these two fabrics together, especially since you can occasionally see the facing when worn.  This project made me consider making a lot more faced hems.


Once the pattern was tested, I was confident enough to cut out my printed fabric, but then hit a few delays, mainly in figuring out what other materials to use.  My original plan was to source the fabric as sustainably and “locally” as possible per my pledge, but to worry less about where the notions came from.  I’m a firm believer in one step at a time, in breaking things down so that I move towards my goals without feeling totally overwhelmed by the hugeness of what I’d like to accomplish.  Still, after seeing the beautifully creative ways that Nicki crafted her totally local clothes (she made her own clay to make buttons!) I was inspired to dig a little deeper.

There seems to be just one organic sewing thread on the market, Scanfil, which is made in Holland and available lots of places online.  I’d seen it around the web but hadn’t tried it.  After all, Holland is not exactly local to me, and I assumed it would be more expensive.  In fact, it turns out that it costs barely more per yard than the Mettler thread I normally get.  And that thread is made in Germany … so I got some of the organic stuff to try.  It’s silky smooth and soft.  I think it breaks a little more easily, but I had no problems running it through either sewing machine.  For topstitching I used it doubled (two spools) with a 3mm length, and I really like the results, kind of subtle but shiny.  If you try this, I highly recommend tightening the bobbin thread the way you would for buttonholes.


1year1outfit skirt 4


I usually just use a thin, firmly-woven fabric for interfacing, and I’ve been looking for a new source since I ran out of the perfect interfacing fabric (origin: total mystery) found in my mom’s stash.  I got a swatch of every fabric I thought might work from Organic Cotton Plus, whether made-in-USA or not, but ended up rejecting them all and using another bit from my stash.

While I was at it, I ordered a zipper made with organic cotton tape.  The only difference I can see is that unusually, the zipper matches my fabric perfectly.


1year1outfit skirt 6Guts.  I think I’m finally getting the hang of making the inside fly guard thingy like it’s supposed to be.  This lining fabric is a super soft linen, also from stash.  The cute little pocket applique is due to an unfortunate moment while rotary pinking …


I should say that the skirt fabric itself is quite nice (I linked to the fabric I bought in the printing post, but as of today it doesn’t appear on the Organic Cotton Plus site, they must be out).  It has a twill weave.  It’s on the thinner end of what I would consider for this project, and very soft and drapey for a cotton.  It was also crooked when I got it, but easy to pull straight (check out how I do that in this article I wrote for Seamwork), even after printing (phew!).

I had this skirt shape in mind I was printing, and knowing that fabric I print tends to be sparser in design than commercial fabrics, I included a section of dense motifs at the bottom of the yardage, and took full advantage of that to cut all the small pieces for the waistband, etc.


1year1outfit skirt 5


So there you go, my finished project!  Since I joined the #1year1outfit challenge late, I knew I wouldn’t make a whole outfit by the end of the year, but I really wanted to see how I could integrate making more conscious choices about the new fabrics I buy with what I already do.  And in that sense I succeeded!  I’m wearing my skirt below with things I previously made from secondhand garments (this shirt and this camisole if you’re curious), a scarf woven by my grandma, and mended socks.


1year1outfit skirt 1


Moving forward, I’ve decided to keep going with my no-new-fabric-unless-sustainable-and-made-in-USA pledge, at least until July, which will make it a full year.  Even though at some point I’d like to add in some of the wonderful artisan fabrics from around the world I found during my fabric research, I do think that being on this materials “diet” is really helpful in encouraging me to be thoughtful in my choices, and creative with what I do with them.  I’ve loved being part of one Year, one Outfit, and it’s really fit in well with a lot of the other things I’ve been thinking about, and helped me move forward in directions I’d like to go in.

I have enough of this delicious wool yarn from Mountain Meadow to knit a sweater, and that is totally next on my list of sustainable/local-ish/slow fashion garments to make.  It will probably be next fall before it’s done, but that’s fine with me.  In the meantime I’ll continue to work from stash, and search for more local fabric options, and I will definitely keep you updated!


1year1outfit skirt 3


Natural Dye Printed Fabric


This is the fabric I made for my one Year, one Outfit project.  Well, I didn’t make it as in weave it, it was manufactured in Texas (from US grown organic cotton, as per my pledge for the project) and I bought it through Organic Cotton Plus online (it’s this one).  But I printed it myself, using natural dyes.


natural dye print fabric


Here’s what happened: I knew that coloring/printing fabric would be a major component of this project for me.  I do love the native colors that come from color-grown cottons and the fleece of colored sheep, but that’s not all I want to wear.  Most people feel the same, and have for thousands of years.  So I thought that getting color & design onto ethical, locally-sourced fabrics (which are often available in very limited colors) would be a good thing to tackle.

I had already promised to teach screen printing with dye (rather than with fabric paints designed for printing, which are fun too, but leave a bit of stiffness on the fabric) at our annual family craft retreat.  The time for the retreat was getting closer as I decided to join up with #1year1outfit.  At first I thought I would just take this fabric and print on it with the fiber reactive dyes that most crafters use for cotton.  These dyes may not be the best thing for the environment, but I would apply them myself, in extremely limited quantities, and do the cleanup responsibly.  I was sort of wrestling with these ideas, and reading Printing on Fabric by Jen Swearington.  This is an excellent book, I learned a lot from it.  And I appreciate, among other things, that she’s realistic about safety.  I was reading the part about steam-setting fabric you’ve printed with dye, in which she recommends wearing a respirator and/or having good ventilation … for whatever reason that was my “I’m done” moment.  I don’t need to be using toxic stuff, and I don’t want to be exposing myself, or my family (some of whom are small kiddos) to it.


natural dye print fabric 2


So what next?  I tried looking for less-toxic dyes, and I found some cotton clothing and fabrics dyed with metal-free or low-impact dyes, but I couldn’t find any of the dyes themselves available to the average person.  (Unlike if you want to dye protein fibers like wool, then you can buy Greener Shades dyes.)

That pretty much left natural dyes.  I love their colors, but they have a reputation of being less easy to use on cellulose fibers like cotton.  From the bits and pieces I read (and the fact that there were printed fabrics long before there were synthetic dyes) I knew it could be done, I just didn’t yet know how to put it all together.

As much as I value balance in life, sometimes it just feels so good to throw my whole self and all the energy I can muster at a single project.  With the retreat coming up fast, that’s what I did; reading everything I could find about using natural dyes on cotton, printing with dye, and the very little out there about putting the two together, and experimenting all the time on my own.  By the time the retreat came, I felt confident enough to share what I’d learned so far, and continue learning along with everybody else.  At the end of it, I took over an entire now-vacant worktable, and printed my fabric in two sections (before collapsing from whatever virus got a bunch of us that week).

A few details:

  • The dyes were: cochineal, osage orange, madder, and black tea (and combinations of those).
  • We thickened them into a paste using sodium alginate.
  • We scoured the fabric (using soda ash and textile detergent), then mordanted it with aluminum acetate to bond with the dye.
  • We applied the dye using small printing screens made from embroidery hoops.  For my designs, each motif had its own hoop for each color (not the most efficient way to do it, but very flexible design-wise).
  • I wanted a hand-printed look, so I came up with a vague plan, then eyeballed the placement of the first motifs, and made little registration marks to line up the hoops for subsequent colors.
  • After drying/curing, we steamed the fabric to heat-set the colors, then washed to remove the thickener.  The dye remains, and the fabric has the same hand it did before printing.

If you want to get more technical than that, email me! I have so many notes …


natural dye print fabric 3


Somewhat needless to say, I’m pretty stoked with how this came out.  And I’m looking forward to seeing how the colors wear, and doing more experiments with natural dyes!

A few more resources if you’d like to experiment too:

  • The Modern Natural Dyer came out after I made this project, but it has good basic natural dye info (and totally gorgeous photography).
  • This PDF from Maiwa is also a good overview, I used it heavily as a reference while I was figuring out what to do.
  • This online article is pretty technical, but it gave me a lot of confidence that natural dyes and cotton can play well together.  It also helped that I think I’d be happy to use only the color palette in that first photo forever …
  • The book Printing on Fabric, which I mentioned above, is not about natural dye but covers a bunch of other useful stuff, like how to make designs for screen printing, registering multi-colored and repeating patterns, and steam-setting fabric.

Stay tuned to see what I made from the fabric!


Wishing You a Happy 2013

happy new year postcard


This postcard was printed on this mechanical press, at the Public Museum of Grand Rapids, MI.  I could have watched this press all day.  The volunteer printer flung the big wheel to get it started, then kept it going with the foot pedal while he moved the cards in and out.  All the parts moved fluidly, rolling the ink across a plate and printing a card in the time it took him to place a blank one.  It reminded me of two things I love; treadle sewing machines from a similar era (the late 1800s), and the below quote from Anaïs Nin which appeared, with more excerpts, on Brain Pickings:


You pit your faculties against concrete problems. The victories are concrete, definable, touchable. A page of perfect printing. You can touch the page you wrote. We exult in what we master and discover. Instead of using one’s energy in a void, against frustrations, in anger against publishers, I use it on the press, type, paper, a source of energy. Solving problems, technical, mechanical problems. Which can be solved.


grand rapids museum printing press


Here’s wishing you all a new year full of joy, handcraft, and solvable problems!


Stamping on Fabric – With Hand Carved Stamps and Household Objects


Ok, so now you have a hand carved stamp.  Or, maybe you don’t yet.  How about stamping with something you already have around your house?  And, what gets me excited about either of these options: being able to use them on fabric and clothing.


Before we discuss fabric ink and stamping, let me talk briefly about how I set up these buttons as stamps.  I got this idea from a really creative slideshow (on Martha Stewart of all places) which illustrates using all kinds of things you might find around your house to make some interesting designs.  My favorite was the buttons.  Some things already have an easy point to grab them by without getting your fingers covered in ink (like long pieces of wood, which you can see printed in the top photo), but buttons, not so much.  I cut some pieces from a leftover dowel and a small wood block, just using a clamp and a handsaw, they don’t have to be perfect in any way.  I did some quick online research and a couple of sources suggested using some kind of foam to back your stamps, to give them a little more give for even printing.  This seemed like a good idea since buttons are pretty much hard to begin with.  I used tiny pieces of dish packing type foam (we get it as packing material with some supplies) glued to the back of each button and its piece of wood with ATG, which once again I borrowed from the photo studio.  You can use any type of glue as long as it will hold the object and be water-resistant enough to be rinsed after you stamp.  And, you could use just about anything squishy for the foam, just cut the pieces smaller than your object, otherwise the edges of the foam may print.


Ok, time to stamp!  For ink, I used Speedball Water-Based Textile Screen Printing Ink.  I have gotten it from Blick, local art stores, and chain stores.  On the jar, it just says FABRIC Screen Printing Ink, but if you look on the side it also says water based and non-toxic.  I really like that you can thin this ink as much as you want with water, and you don’t have to worry about it if you get it on your hands, which is pretty much inevitable.  Plus it is permanent on fabric with heat setting.  It comes in lots of colors.  I like to mix my own using the three primary colors; the “process” cyan, magenta, and yellow will give truer mixing results than the regular red blue and yellow.  You’ll also need white and black.  A tip I learned from Lena Corwin’s book Printing by Hand (I highly recommend this book if you are interested in more about printing!) is that mixing in a little of both white and black will give you a more subtle color (less screaming bright) and I love subtle colors.

To set up for printing, you’ll need ink, a little water for mixing, and more for washing things off (a big cup full with an old toothbrush for scrubbing is perfect) and a wet rag to wipe your hands and tools on after you rinse.  It’s easier to print on thin fabrics if you put down an old towel underneath to give the surface a little more give, which can allow more details of the stamp to print.  Putting all this on a big table you can wipe off is ideal, and it’s nice to have something under the messy ink part to catch drips.  I used a box since I figured it would still be good for shipping with ink on it.  I used one spoon to get out each color, one to mix my color with, and a small foam brush to hold the ink for stamping.  I let the spoons dry when I’m done, and wash the foam brushes to save for the next time.


When mixing ink colors, start with as little ink as you can, you’ll add more as you decide what to add to get the color you’re looking for (a color wheel can help here), plus you’ll be adding water, and stamping doesn’t take very much ink in any case.  Keep in mind that the ink will dry slightly darker in color than it looks wet.

Having scrap fabric to test on is essential!  The closer the fabric is in type, weight and color to your intended project, the better you’ll be able to see how the stamps are coming out.  For this project, I just used a small section on the edge of my fabric for testing, changing the color or the dilution of the ink a little bit at a time and waiting a couple of minutes to see how the results looked as they dried.

I like the ink to be absorbed into the fabric so that it doesn’t leave a hard or crunchy surface, but looks more like a dye.  To get this effect, I add water until the ink slowly drips from the foam brush when I lift it up.  The consistency you want may vary with your fabric, again, testing is key!


Here is my best fabric stamping tip: squeeze the ink out of the foam brush until it’s not dripping, and only releases ink when you press on it, like a stamp pad.  Then, gently press your stamp or object against the sponge to get a coat of paint.  You can see which parts are going to print by where the ink is on the stamp or object.


Keep the foam brush in one hand, and bring your stamp back to it for a fresh coat each time you print it.  The sponge will hold enough ink for a bunch of stamps before it needs more from the cup.

I found that a light coating of ink, and a soft rolling motion against the fabric with each stamping helped the full possible detail of the buttons to print.


That’s about it!  I place my stamps pretty much randomly, alternating whichever ones I am working with until I get a design density that I like.  It helps to step back and take a look, especially if you are printing something big that you can’t work on all at once.

For troubleshooting, take a look at the very top photo (click to enlarge it).  If you have too much ink on the stamp or the ink is too watery, it will spread out all around your stamp and the detail of the design will be lost.  Clean the stamp off, squeeze more ink out of your sponge, press it gently on just the surface of the stamp and try again.  If it’s still too flowy, add more ink to your color to reduce the water content.  If you don’t have enough ink on the stamp, you’ll get a pale ghost of an image.  If the ink is thick, like it comes out of the jar, it will dry harder and raised on the surface of your fabric, which you may want, depending on your design. If your fabric is wrinkled, iron it before you start.  Soft wrinkles won’t get in the way too much, but if you stamp over a crease, you can see it when the crease opens up.

One last troubleshooting thing: some objects print better than others.  Some of the buttons I tried had details too fine to print, but this will depend a lot on what fabric and how much ink you use, so test it out!


Here’s my finished button printed fabric.  I think it may become a skirt.


Stamping is also awesome for reviving finished clothes or linens that are a little too plain.  I used some of my aunt Barb’s hand made stamps to decorate this previously just beige thrift store skirt.


While your stamped fabric is drying, it’s worthwhile to clean off your tools, since this ink can eventually clog your stamps if left to dry.  Using the old toothbrush and a little water from your clean-up cup works great.

Next time, I’ll post about heat setting the ink, lots of options for this important step that makes the finished product washable!  Plus, a little bit about “green” crafting and less waste from what we make.

In the meantime, have you tried something similar?  I’d love to know what you did and how it came out!