Make Your Own Tiny Hand-Knit Cover Buttons

tiny knit covered buttons finished front


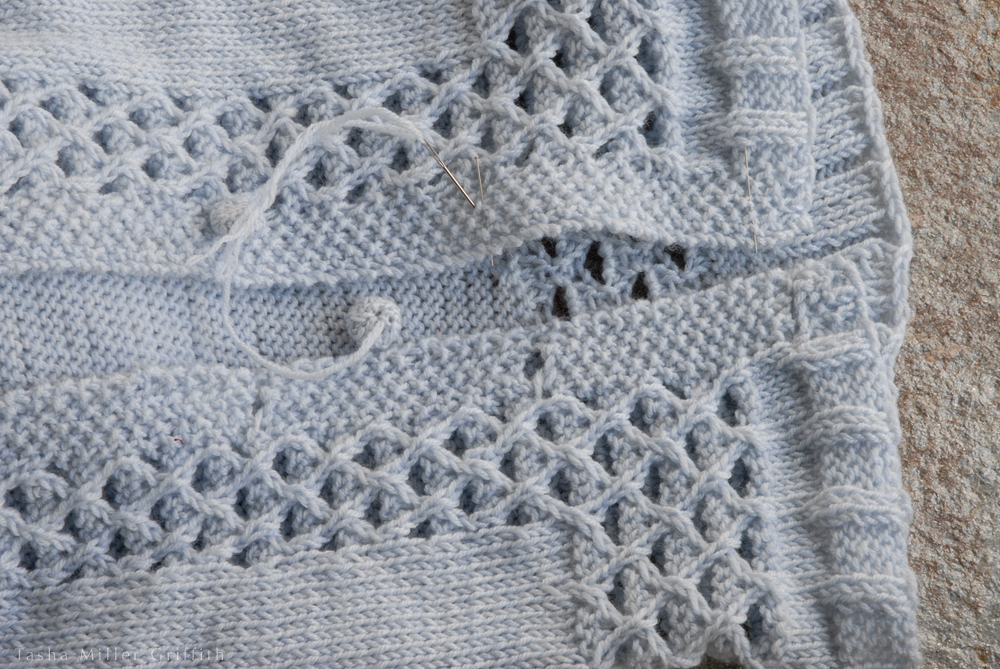
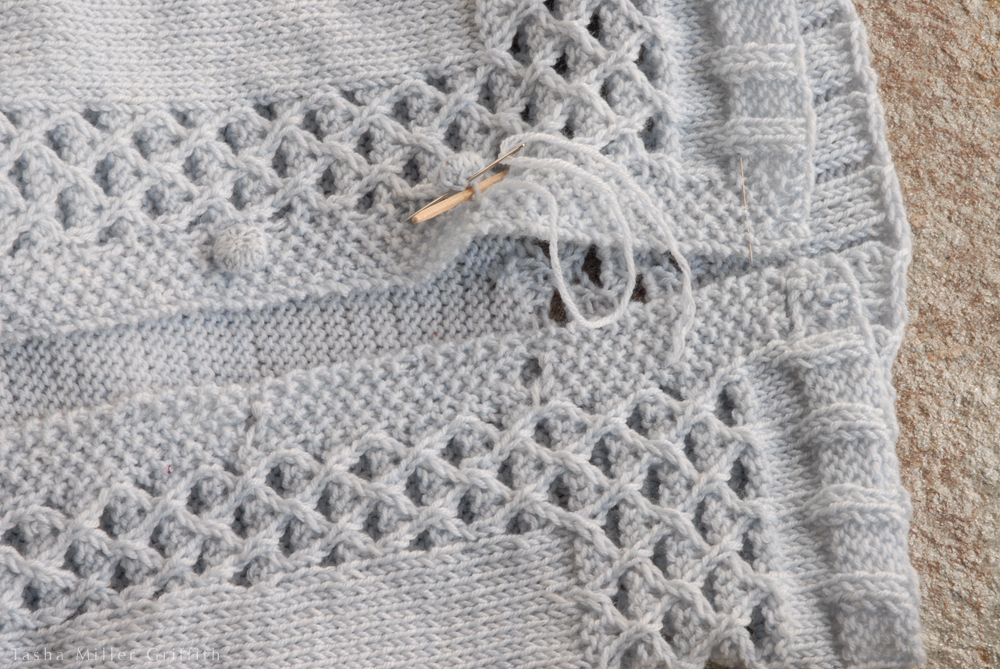
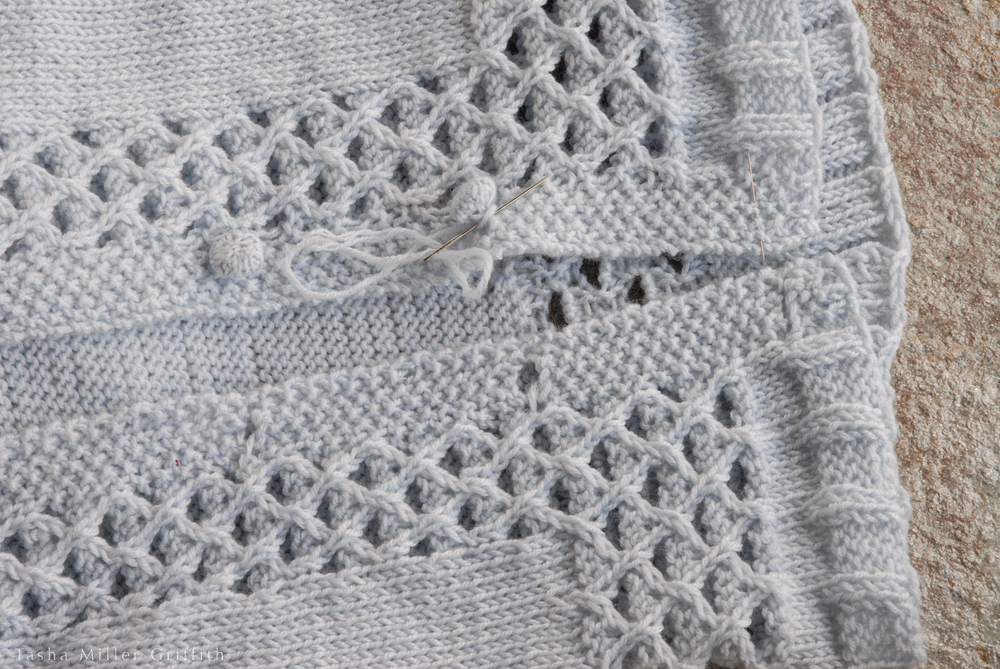
These are the buttons I made for my Talamh sweater.  I found some factory-made buttons covered with knit fabric in my button stash as I was starting the sweater, and the idea stuck.  When I finished the sweater, I knew I wanted buttons covered in my yarn, so I made some.  Afterwards, it occurred to me that I might have been reinventing the wheel here, but searching Google and Ravelry turned up nothing like these, so here are the directions!  At the end of the post I’ll also include some links to other ideas I did find, in case these aren’t quite your style.  As always, click on any of the photos to enlarge for a closer look.


Knitting the Cover

Pick your buttons to go inside the knitted cover first.  They should be a little smaller than you want the finished button to be, and ideally a similar color to the yarn you’re using to cover them.

These buttons are knit in the round from the center out.  Since they are tiny, there are only a few rounds before you decrease, and secure the knitting to the button.

You want the button fabric to be tight, so that it will be sturdy and the button underneath won’t show through.  Use a much smaller needle than you usually would with the yarn (even if your yarn is thicker).  Here I used size 1 needles, after using size 4 with the same yarn for the sweater.  I’ve illustrated using double points, but of course you could use two circulars or a magic loop if you prefer.

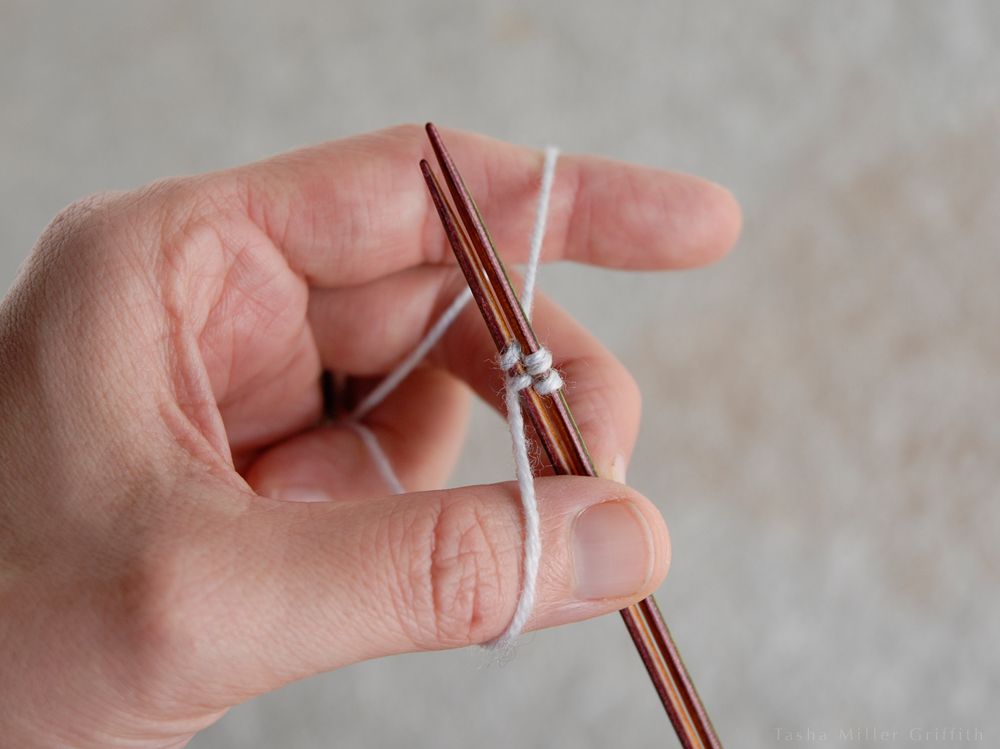
Start by casting on four stitches, using Judy’s Magic Cast On, or another method that starts seamlessly from the middle (this one from Cat Bordhi is also good).


tiny knit covered buttons cast on


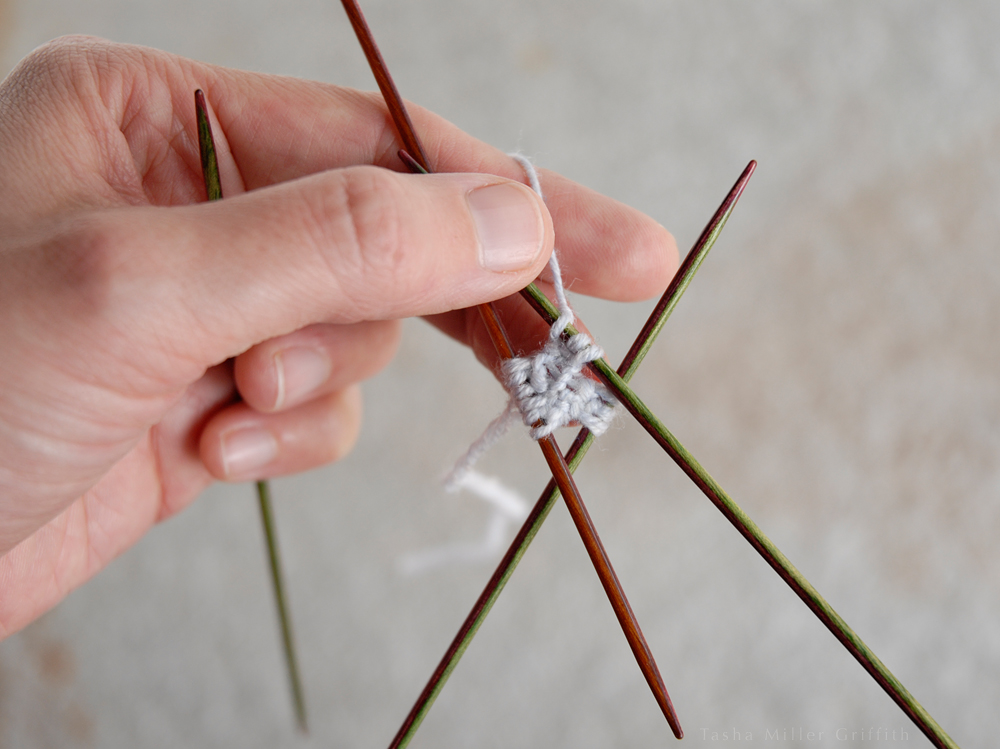
If you increase 4 stitches per round, it makes a flat circle of knitting.  I learned this from Daniel Yuhas’ book, Knitting from the Center Out.  Since a flat circle is my goal here, I knit into the front and back of each stitch, for 8 total stitches in the next round.  (If you aren’t sure how to knit front and back, otherwise known as kfb, just Google it—more tutorials than you’ll ever need will pop up.)


tiny knit covered buttons 8 sts


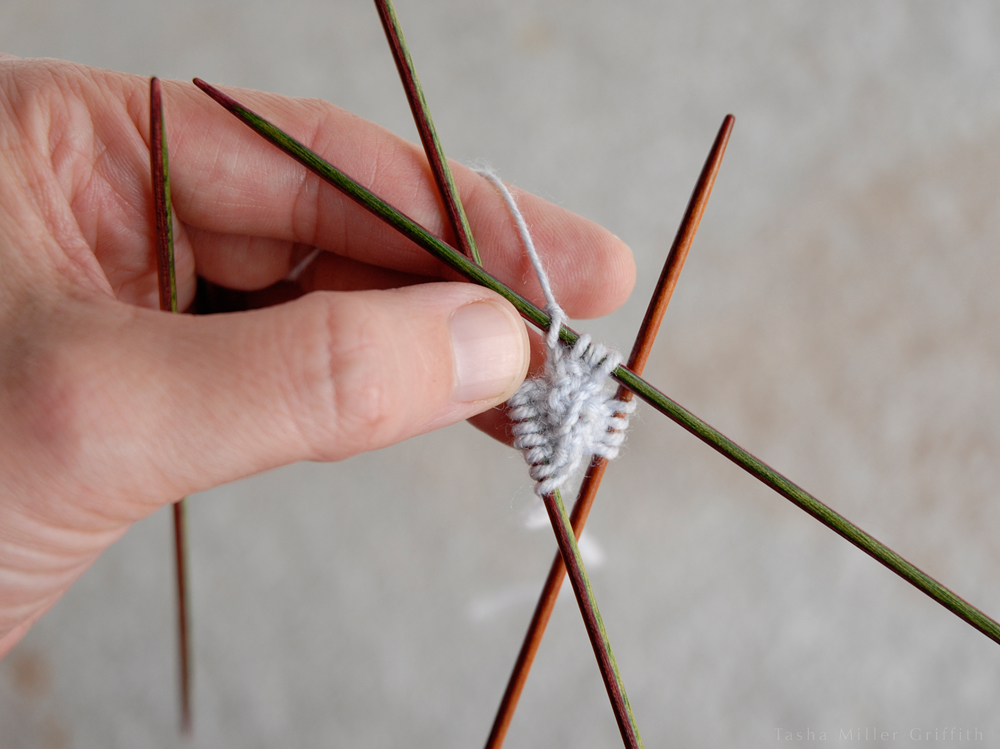
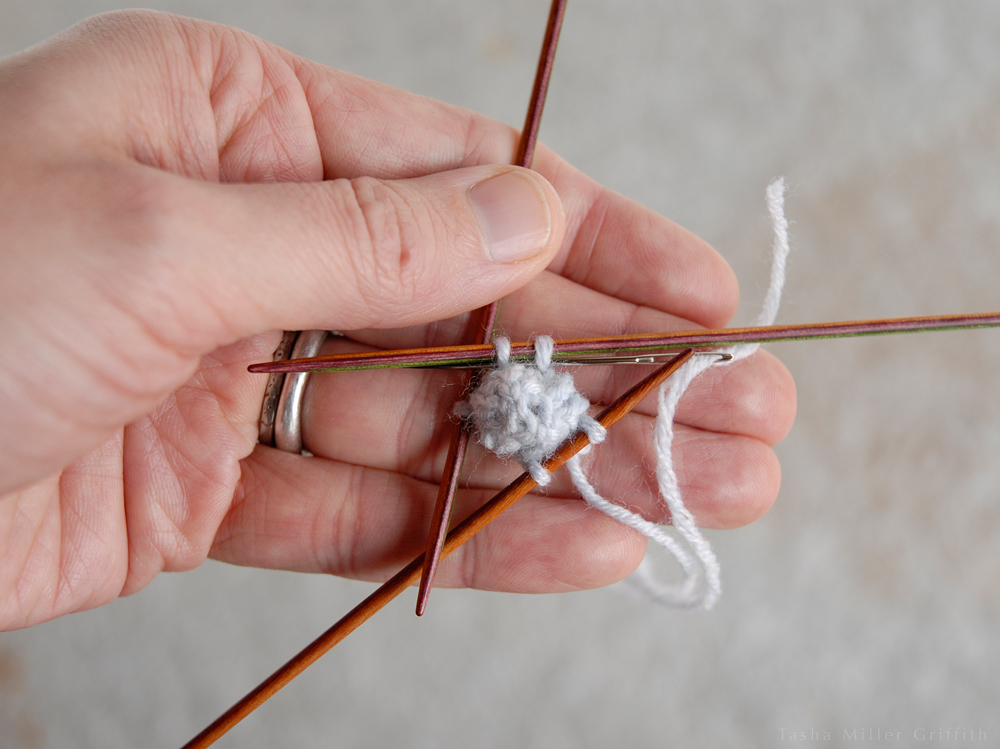
Increase 4 stitches again in the next round (ie: knit into the front and back of one stitch, knit one stitch, repeat those two actions around).  At this point I switched some stitches onto a third needle, to keep my little circle from getting too stretched out where the needles join.


tiny knit covered buttons 12 sts


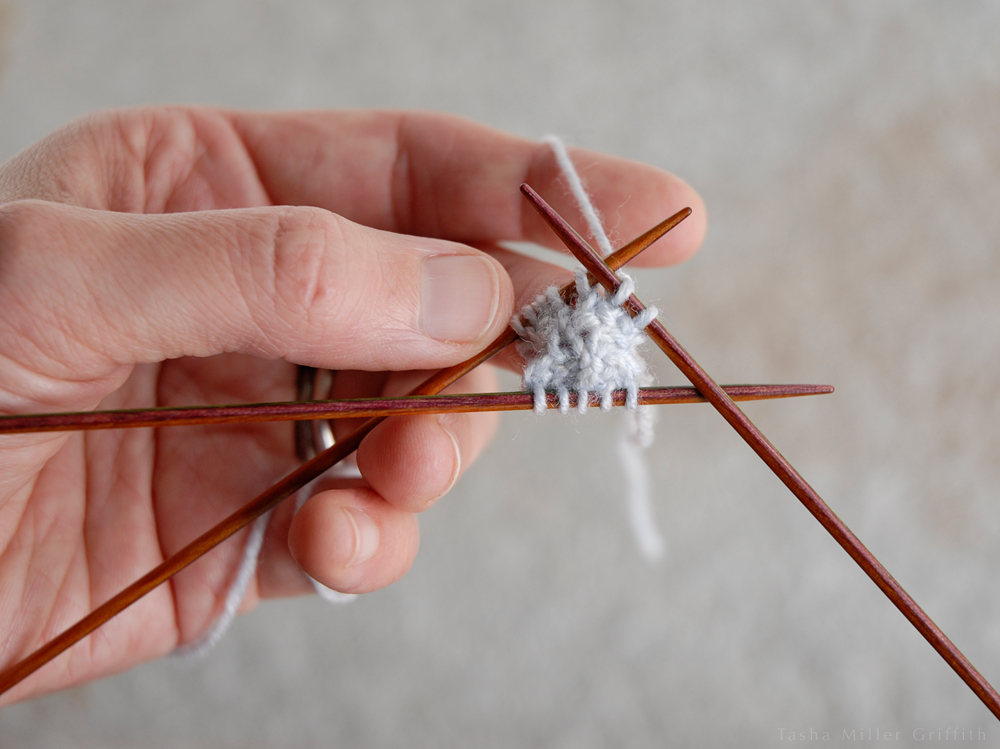
Since my button is tiny, I only needed one more round of increasing 4 (knit front and back, knit 2, repeat around, for a total of 16 stitches) to reach the size of my button.  You can compare the amount of knitting you have to your buttons, but it can be hard to judge without finishing.  Luckily, these only take a few minutes to make, so it’s easy to try another one if the first one isn’t quite right.


tiny knit covered buttons 16 sts


When the button is the size you want, start decreasing, so that the knitted fabric will cup around the edges of the button smoothly.  If your button is bigger and/or thicker, you may want a plain round before you start to decrease, but for these little guys I found it made the cover too baggy for the button, so I went straight from an increase round to a decrease round.

I did one round of knit 2 together, knit 1, repeat.  You can see how the cover begins to puff up in the middle as the edges draw in.


tiny knit covered buttons decreasing


On the next round, I knit every 2 stitches together, until there were 5 stitches left.  If you have a lot more stitches, it may take a couple more rounds of decreasing.  You also want there to be enough fabric on the back of the button so that you can pull these few stitches together at the center back.

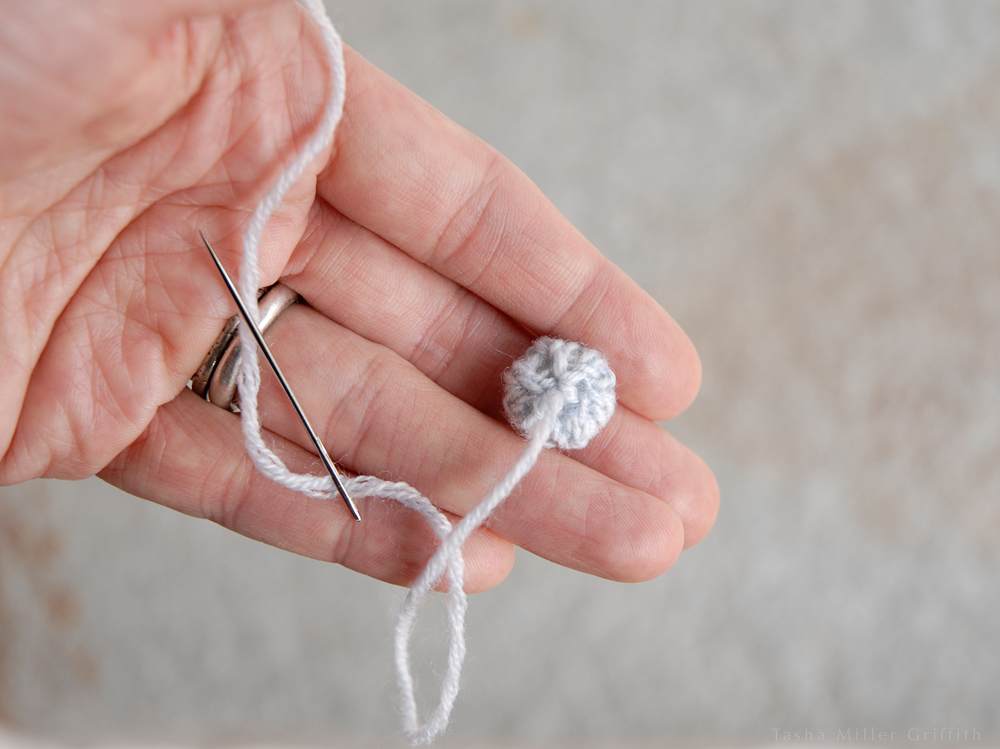
When you have just a few stitches left, cut the yarn, thread the end on a sewing needle, and pass it through the remaining stitches.


tiny knit covered buttons needle to yarn


Knitting Meets Button

At this point the actual knitting part is done.  There are a couple more tricks I want to show you as we sew it together, to make the button come out really nice.

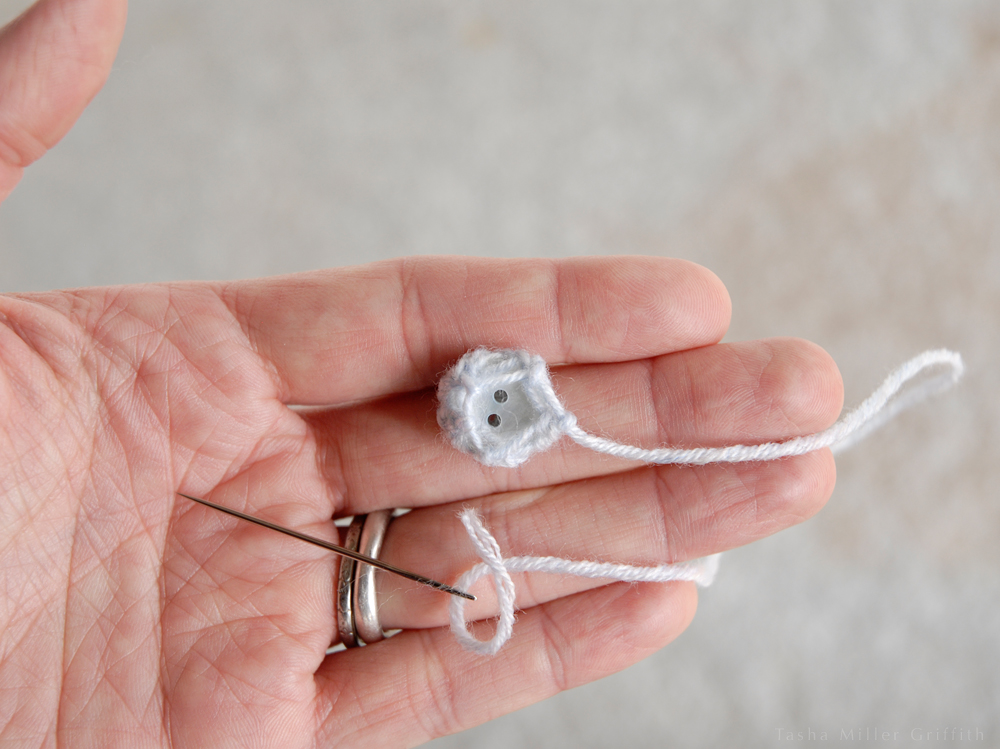
First, before you start to cinch up the knitting around the button, take the sewing needle from the end you finished knitting with, and thread it on the end left from casting on.


tiny knit covered buttons yarn tail inside


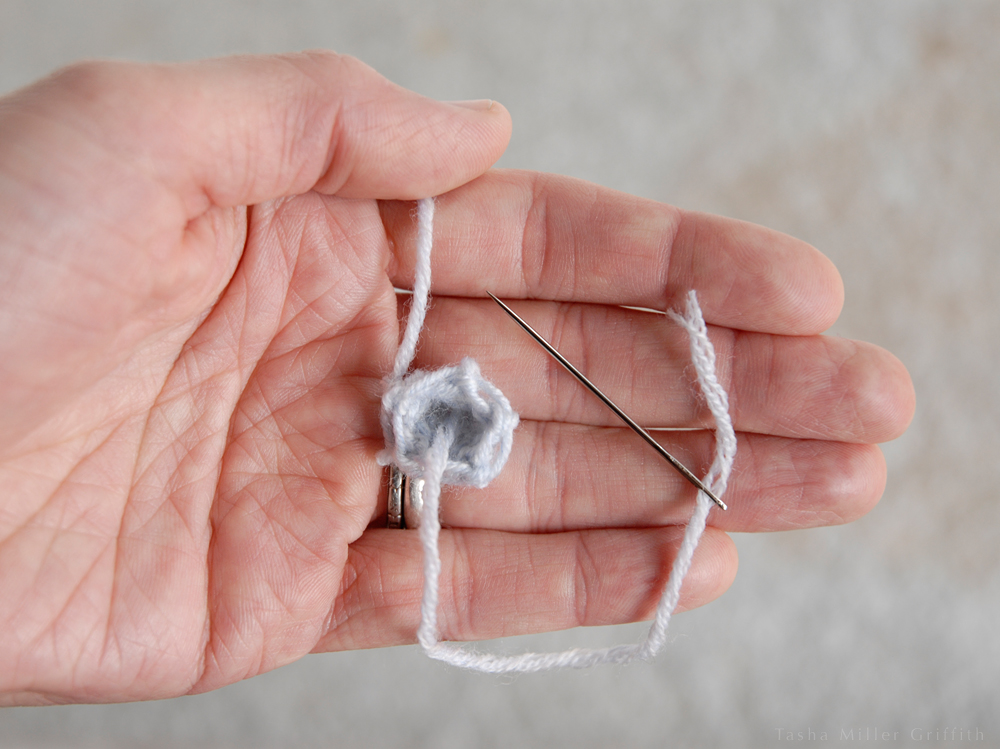
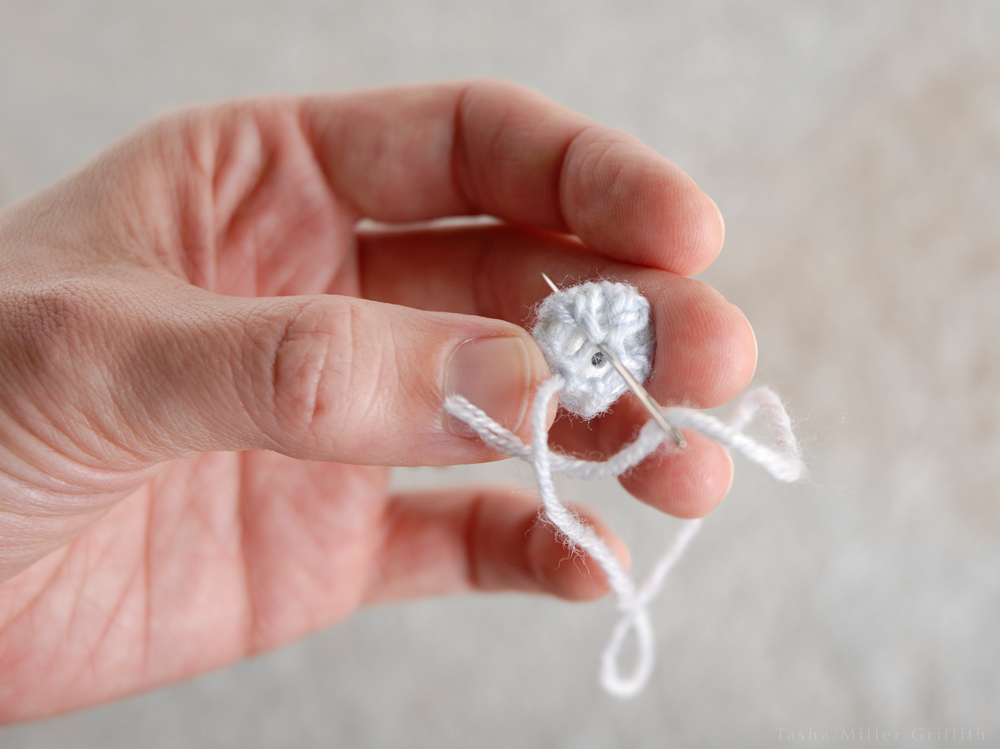
Open out the little circle so the inside of it is clearly visible.  Use the center yarn tail to cinch up the first stitches from the cast on, if necessary.  Then sew around in a little spiral, starting near the center, piercing just the backs of the knitted stitches (use a sharp needle).  This secures the tail, and adds a little extra cohesion to the stitches that will be the button front.


tiny knit covered buttons inside spiral 2


When your spiral is done, trim the inside tail, and thread the outside/last knitted with tail back on the sewing needle.


tiny knit covered buttons ready for button


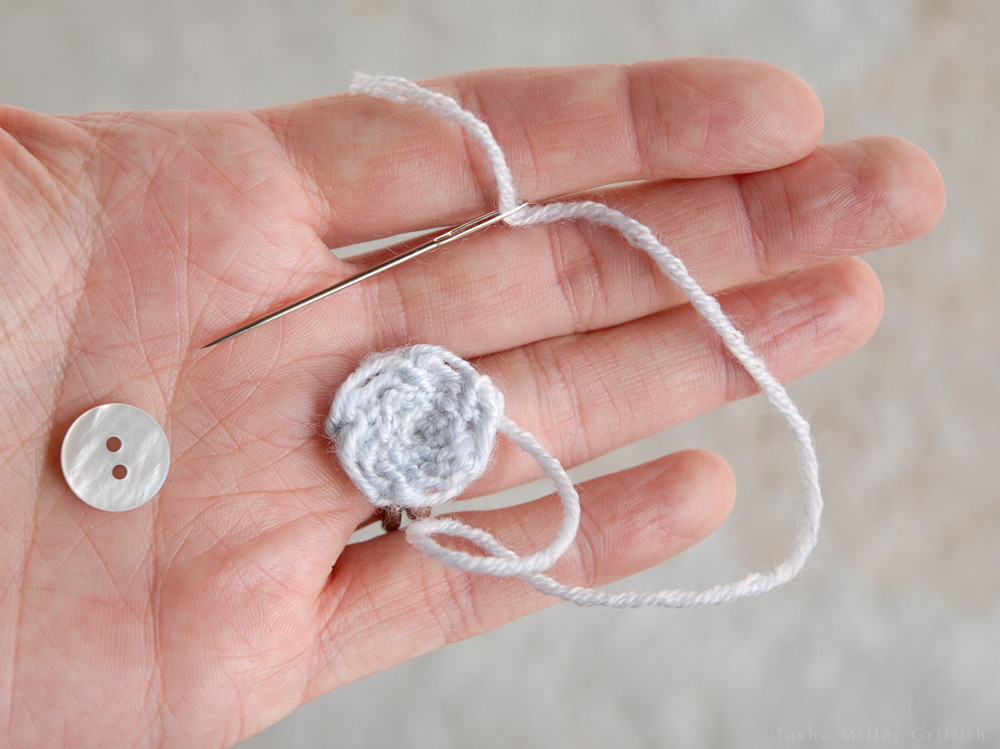
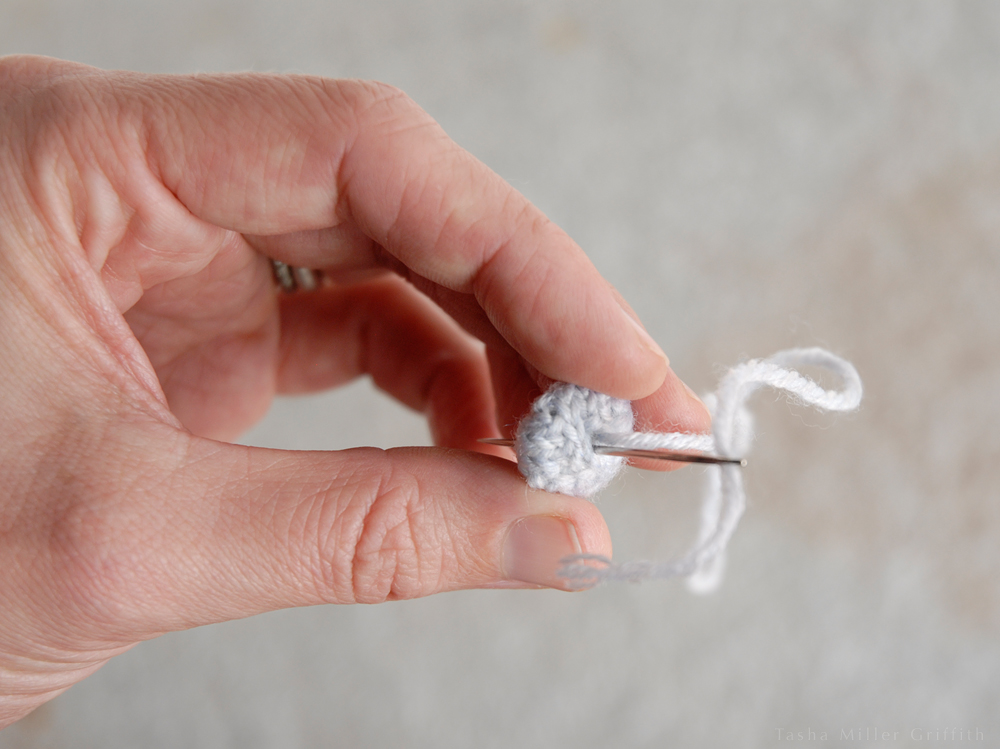
Place the button in the middle of the circle, and draw the edges up with the remaining tail.


tiny knit covered buttons gathering back


Pull the last stitches tight together in the center back, which hopefully will snug the whole cover nicely around the button.  If it’s too loose or too tight, just start again, make another one with modifications.

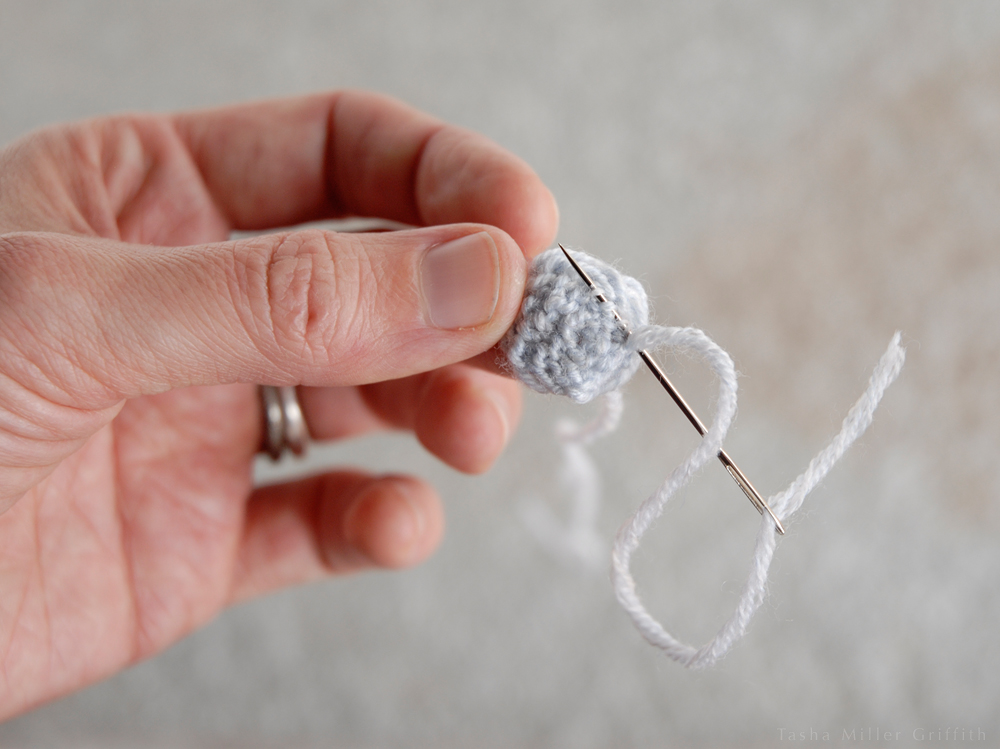
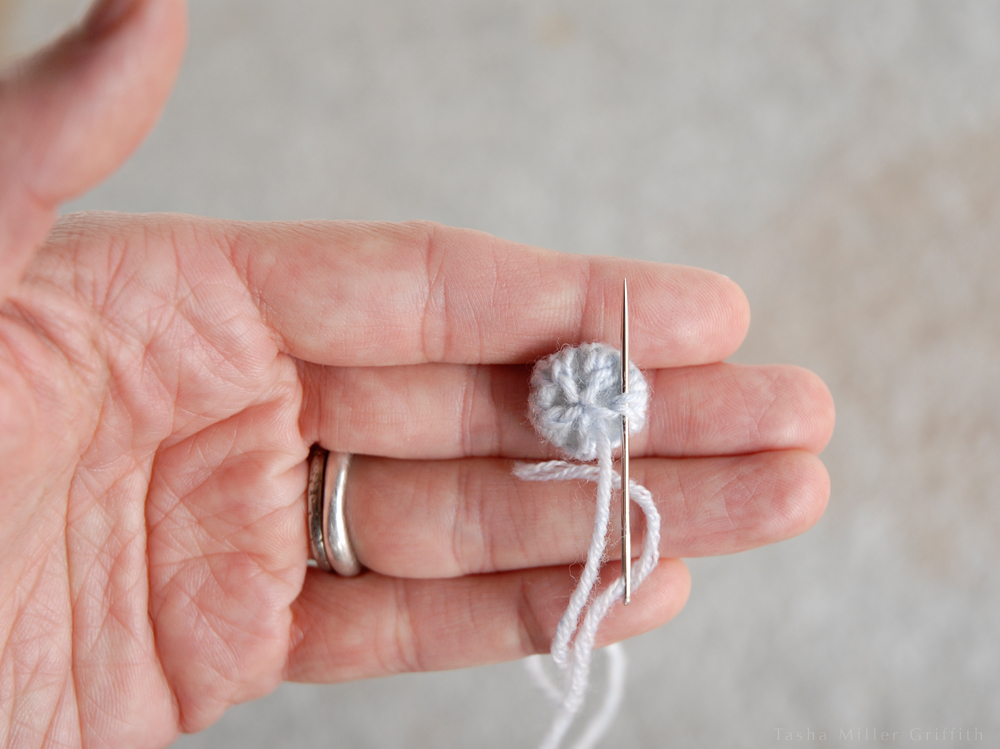
Once your cover fits your button, secure it by taking a stitch through one hole in the button, out to the front side.


tiny knit covered buttons stitching through button


Then take a stitch back, aiming to enter the knitted fabric in the same place you came out (so as not to leave a stitch on the surface) but angle the needle so it goes through a different hole in the button.  You’re putting a loop of yarn through the button itself, to secure the knitting in place.


tiny knit covered buttons stitching through button 2


I think this technique would also work with shank buttons, you would just want to take a few stitches around/through the shank instead.

Lastly, I stitched around the edges of the back side of the button, adding a little more yarn and securing the stitches there.


tiny knit covered buttons reinforcing back


Tada!  A tiny knitted covered button, ready to go.


tiny knit cover button back finished


I sewed these on using a variation of my usual technique (I updated the photos on that post just this week, and love how they came out): sewing through the yarn on the back of the button rather than through the button itself.


knit cover buttons sewing on 1

knit cover buttons sewing on 2

knit cover buttons sewing on 3


I’d love to try making some bigger buttons using this techinique, too.


More Ideas

As if that weren’t enough, when doing research for this post I stumbled on a few other fun things.  Actually, I fell down a bit of a rabbit-hole of cool ideas for DIY covered buttons, both for sewing and knitting, and another post is probably coming soon.  In the meantime …

Kate Davies has a lovely clear tutorial for yarn-wrapped buttons that come out looking sweet.

What about embroidering a design with your yarn on fabric, and then covering a button with that?  There’s a tutorial here on The Purl Bee.

There’s always traditional thread-button techniques, like these from Threads Magazine. Full disclosure: I long ago tried and failed to make sturdy buttons using similar techniques, but I’m pretty sure it was user error.

You could also knit a circle from the bottom up, rather than from the center out, increasing and decreasing at the sides, and then gather it over a button or use a commercial button form.  There’s an example on Knit Darling here. She uses a cover button kit, and rightly points out that those don’t work in small sizes with thick fabrics.  I think you could gather a smaller size over a regular button and secure it something like the second part of my technique (but I haven’t tried this yet to be sure).


Not that there aren’t beautiful buttons out there, but especially during this season when we’re surrounded by encouragement to over-consumption, I just love the idea of putting the final touches on a project myself, made with bits and pieces I have around the house. Here’s wishing you all a restful, creative December!


Stamping on Fabric – With Hand Carved Stamps and Household Objects


Ok, so now you have a hand carved stamp.  Or, maybe you don’t yet.  How about stamping with something you already have around your house?  And, what gets me excited about either of these options: being able to use them on fabric and clothing.


Before we discuss fabric ink and stamping, let me talk briefly about how I set up these buttons as stamps.  I got this idea from a really creative slideshow (on Martha Stewart of all places) which illustrates using all kinds of things you might find around your house to make some interesting designs.  My favorite was the buttons.  Some things already have an easy point to grab them by without getting your fingers covered in ink (like long pieces of wood, which you can see printed in the top photo), but buttons, not so much.  I cut some pieces from a leftover dowel and a small wood block, just using a clamp and a handsaw, they don’t have to be perfect in any way.  I did some quick online research and a couple of sources suggested using some kind of foam to back your stamps, to give them a little more give for even printing.  This seemed like a good idea since buttons are pretty much hard to begin with.  I used tiny pieces of dish packing type foam (we get it as packing material with some supplies) glued to the back of each button and its piece of wood with ATG, which once again I borrowed from the photo studio.  You can use any type of glue as long as it will hold the object and be water-resistant enough to be rinsed after you stamp.  And, you could use just about anything squishy for the foam, just cut the pieces smaller than your object, otherwise the edges of the foam may print.


Ok, time to stamp!  For ink, I used Speedball Water-Based Textile Screen Printing Ink.  I have gotten it from Blick, local art stores, and chain stores.  On the jar, it just says FABRIC Screen Printing Ink, but if you look on the side it also says water based and non-toxic.  I really like that you can thin this ink as much as you want with water, and you don’t have to worry about it if you get it on your hands, which is pretty much inevitable.  Plus it is permanent on fabric with heat setting.  It comes in lots of colors.  I like to mix my own using the three primary colors; the “process” cyan, magenta, and yellow will give truer mixing results than the regular red blue and yellow.  You’ll also need white and black.  A tip I learned from Lena Corwin’s book Printing by Hand (I highly recommend this book if you are interested in more about printing!) is that mixing in a little of both white and black will give you a more subtle color (less screaming bright) and I love subtle colors.

To set up for printing, you’ll need ink, a little water for mixing, and more for washing things off (a big cup full with an old toothbrush for scrubbing is perfect) and a wet rag to wipe your hands and tools on after you rinse.  It’s easier to print on thin fabrics if you put down an old towel underneath to give the surface a little more give, which can allow more details of the stamp to print.  Putting all this on a big table you can wipe off is ideal, and it’s nice to have something under the messy ink part to catch drips.  I used a box since I figured it would still be good for shipping with ink on it.  I used one spoon to get out each color, one to mix my color with, and a small foam brush to hold the ink for stamping.  I let the spoons dry when I’m done, and wash the foam brushes to save for the next time.


When mixing ink colors, start with as little ink as you can, you’ll add more as you decide what to add to get the color you’re looking for (a color wheel can help here), plus you’ll be adding water, and stamping doesn’t take very much ink in any case.  Keep in mind that the ink will dry slightly darker in color than it looks wet.

Having scrap fabric to test on is essential!  The closer the fabric is in type, weight and color to your intended project, the better you’ll be able to see how the stamps are coming out.  For this project, I just used a small section on the edge of my fabric for testing, changing the color or the dilution of the ink a little bit at a time and waiting a couple of minutes to see how the results looked as they dried.

I like the ink to be absorbed into the fabric so that it doesn’t leave a hard or crunchy surface, but looks more like a dye.  To get this effect, I add water until the ink slowly drips from the foam brush when I lift it up.  The consistency you want may vary with your fabric, again, testing is key!


Here is my best fabric stamping tip: squeeze the ink out of the foam brush until it’s not dripping, and only releases ink when you press on it, like a stamp pad.  Then, gently press your stamp or object against the sponge to get a coat of paint.  You can see which parts are going to print by where the ink is on the stamp or object.


Keep the foam brush in one hand, and bring your stamp back to it for a fresh coat each time you print it.  The sponge will hold enough ink for a bunch of stamps before it needs more from the cup.

I found that a light coating of ink, and a soft rolling motion against the fabric with each stamping helped the full possible detail of the buttons to print.


That’s about it!  I place my stamps pretty much randomly, alternating whichever ones I am working with until I get a design density that I like.  It helps to step back and take a look, especially if you are printing something big that you can’t work on all at once.

For troubleshooting, take a look at the very top photo (click to enlarge it).  If you have too much ink on the stamp or the ink is too watery, it will spread out all around your stamp and the detail of the design will be lost.  Clean the stamp off, squeeze more ink out of your sponge, press it gently on just the surface of the stamp and try again.  If it’s still too flowy, add more ink to your color to reduce the water content.  If you don’t have enough ink on the stamp, you’ll get a pale ghost of an image.  If the ink is thick, like it comes out of the jar, it will dry harder and raised on the surface of your fabric, which you may want, depending on your design. If your fabric is wrinkled, iron it before you start.  Soft wrinkles won’t get in the way too much, but if you stamp over a crease, you can see it when the crease opens up.

One last troubleshooting thing: some objects print better than others.  Some of the buttons I tried had details too fine to print, but this will depend a lot on what fabric and how much ink you use, so test it out!


Here’s my finished button printed fabric.  I think it may become a skirt.


Stamping is also awesome for reviving finished clothes or linens that are a little too plain.  I used some of my aunt Barb’s hand made stamps to decorate this previously just beige thrift store skirt.


While your stamped fabric is drying, it’s worthwhile to clean off your tools, since this ink can eventually clog your stamps if left to dry.  Using the old toothbrush and a little water from your clean-up cup works great.

Next time, I’ll post about heat setting the ink, lots of options for this important step that makes the finished product washable!  Plus, a little bit about “green” crafting and less waste from what we make.

In the meantime, have you tried something similar?  I’d love to know what you did and how it came out!


A New Month, A New Challenge – Spark Your Summer

The thing I love about setting a particular goal or participating in a challenge is that it can push me to take something I am vaguely thinking about doing and make it something I am actually doing and concretely thinking about.

I loved participating in Me Made May’12 this last month.  I was surprised by how much pride and self-sufficiency I felt wearing at least one me-made garment every day, even though I didn’t make anything new for the challenge!  It also got me thinking about what I really wear and how I want my style to evolve.  Although I’m not sure I would want to spend as much time thinking about my wardrobe all the time as I did in May, it really pushed me to better define my style (see this post), to figure out what I really need to make (pants!), and to meet some other sewers/thinkers/bloggers, all of which has been wonderful.  In another unexpected spillover, after MMM ended I found myself coming up with new combinations of my not-self-made clothes to better fit my style – bonus!


So when my new friend Alessa, along with Ali and Sarah, announced a new challenge for June, I was pretty much in at the word go.  Plus, this one is a little less involved, you just sew one special garment in June, something you’d like to wear all summer.  It’s good timing for me, since I have fabric I batik dyed last summer that’s supposed to become a dress in time for a special event which starts June 20!  I’ll be making my self-drafted sundress, with a few modifications from the first one.  And, I’ll be home late tonight!!  One thing I have really missed during MMM is my studio – sewing starts tomorrow!


Again, it seems to me that there’s no reason you have to sew to set yourself a helpful challenge for this month.  What about a cooking one?  An art one?  What are your broader goals and how can you set a specific goal to help you get there?  What would you like to do more of?  Why not set aside a specific amount of time for that every week?  Whatever you decide to do, I’d be willing to bet you’ll get some unexpected lovely side effects.

Me-Made-May Thoughts So Far, and my Cartoon Summer Wardrobe

Ok, I realize that it’s the middle of Me Made May, and I haven’t said anything about it!  I have been thinking about it a lot though, and keeping a daily log of what I wear and my thoughts.  So far I have met my goal of wearing one me-made article every day, and on only one day has underwear counted.  (I have one sundress, not a me-made, that I wear when it’s just too hot to wear anything else.)


I wanted to make some kind of visual record so you could see what I’m thinking about for this project.  I loved Tilly’s photo collage of her me-made wardrobe, although photographing mine during several days of camping didn’t seem very practical.  But one of my goals for this summer is to draw more, a perfect activity for unplugged time.  Then I saw the book Information Graphics on Brain Pickings, and was inspired to make my own graphic for Me Made May.

The space we have in the truck for clothes is quite limited.  Every year I try to pack less, leaving out the things I don’t end up wearing much, but a little more of the most versatile, the things I can wear a lot of different ways and the things I know I wear all the time.  This also leaves me with a small enough wardrobe that my drawing project seemed practical.


I circled the clothes I made in yellow.  Somehow, this didn’t seem to represent the amount of effort that it feels like goes into what I wear.  So I circled things I had dyed or otherwise substantially altered in green.  Due to the careful selection of these clothes discussed above, there are only a few things here that I haven’t worn a lot.  I circled them in blue.  All four of these I included this season as a change from wearing mostly the same clothes I did at art shows last year – too much of that and it starts to feel like a uniform, which makes me start to hate even clothes I really like.  Still it looks like I have a little tweaking to do to make these pieces fit, and a couple of them may not fit in my summer wardrobe.

I was surprised to see how many tops I had in relation to pants and skirts, especially since I have been thinking I need to make some more.  I even have one about half done at home, based on the shiny top but in a linen fabric more suitable for every day.  Then I remembered that all three of my me-made tank tops are not exactly spring chickens, in fact, they are getting to the only-suitable-for-camping stage.  I circled everything that is wearing out in red.  After that, I does look like I could use a couple more basic tops, and sundresses, I live in those when it’s warm and it would be great to have a couple more.

One of my favorite things about a challenge like Me Made May is that it asks us to take a look at what we are really using and what we need.  For example, you can tell that pants that fit are the hardest thing for me to find ready-to-wear.  And making my own is still a journey, every time I wear those grey ones I think about what’s wrong with them, but I also get inspired to make better ones this fall!  In fact, with the cool weather we’ve been having so the past week or so, I’ve renewed my vow to make pants I like.

I’ve thought a lot the past few weeks about how what we wear is a compromise between what we’d ideally like to wear, what’s available (due to funds and time), and circumstances like the weather, what we have to wear to work, etc.

What do you think?

What’s in your closet?  What do you need, and what do you have but don’t wear?


Hands and Machines


I’m reading a fairly amazing book called “Living the Good Life” by Helen and Scott Nearing.  One of several standout quotes from the first section of the book is this one:

“Mankind has worked for ages with hand implements.  Machine tools are a novelty, recently introduced into the realm of human experience.  There can be no question but that machine have more power than humans.  Also there can be no question but that they have watered down or annihilated many of the most ancient, most fascinating and creative human skills, broken up established institutions, pushed masses of ‘hands’ into factories and herded droves of anonymous footloose wanders from urban slum to urban slum.  Only the historian of the future will be able to assess the net effect of the machine age on man’s joy in being and his will to live.

I think about this all the time, as I’m making things by hand in ways that have declined or almost disappeared since the industrial revolution.  And I have watched a similar thing happening lately to my husband Bryan with the explosion in digital photography.

I personally think that while some machines are truly labor-saving, we as humans still need to make things ourselves.  For self-fulfillment – I can’t go more than about a week without physically making something or I start to get unhappy.  And because when we make things, we learn and think about where they come from and what goes into them.  It helps us understand the materials that are available and the amazing creative power we each possess to craft our own ideas and dreams using these materials.

What do you think?

PS: I highly recommend this book to anyone interested in living even a little bit outside the box.  Even if you don’t agree with everything the Nearings believe, it’s inspiring to read the story of two people who chose their own path and followed their own hearts and minds.