
For some reason, people give me these lotion bars. It’s true that I have super dry skin, but the consistency of the bars doesn’t really work for me, it leaves a sticky film on my fingers. However, I just love homemade salve. I use it for lip balm, minor burns, on my dry fingertips before bed, etc. The ingredients of the bars and the salve are about the same (a combination of oils and beeswax, and sometimes a few other ingredients like shea butter), except the salve has a higher proportion of oil. So …
Basically all you have to do is heat the lotion bar until it melts, add more oil, and cool it again. I’ve tried this a few times and the mixture has always stayed emulsified.
A re-used glass jar is a good vessel for heating. The ideal container would have a pouring lip (which this one doesn’t). It only took a little brute force to get my lotion bar inside.
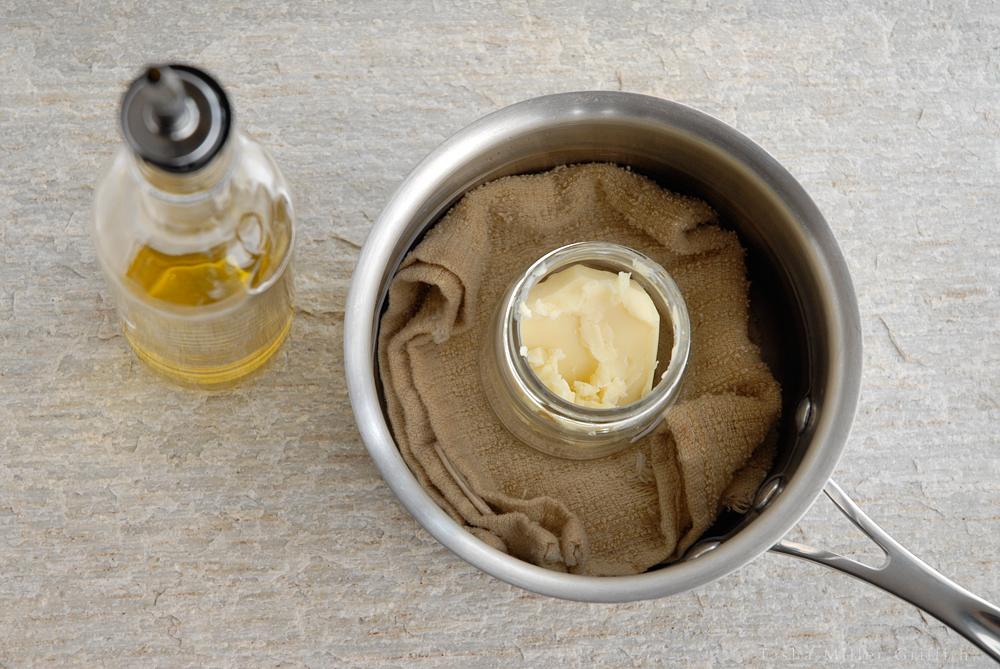
I melt it gently, in a pot with water over low heat. It might not be necessary, but to insulate the jar from the direct heat, I put an old dishrag in the bottom of the pot. The bar will take a while to melt, but you don’t have to watch it the entire time, just remember to come back and check every so often, until it’s completely melted.
To figure out how much oil to add, you really just have to let the mixture cool and try it out, as it depends on how much is in the bar to begin with, and the finished consistency you like. Err on the side of a little less than you think to start with, you can always add more.
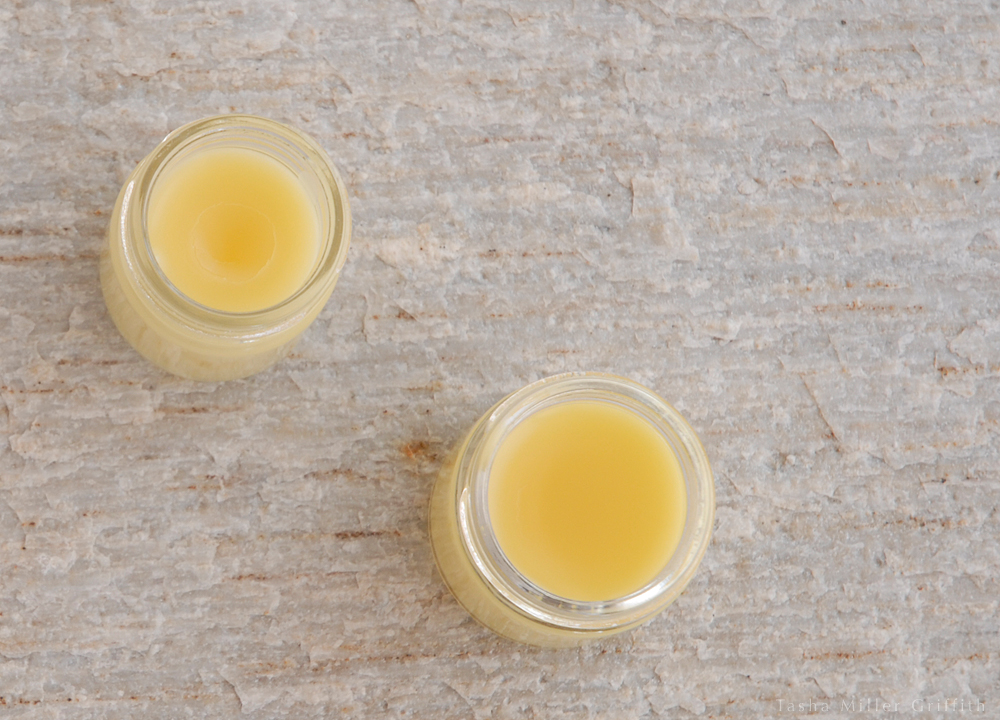
You can add olive oil, almond oil, or any other oil you like that’s good for your skin. I’ve used jojoba oil for the last few batches, since I had some from another project. Stir the oil into the mixture, so that it’s distributed throughout (I used a wooden skewer).
The first time I did this, I let the jar cool down all the way to test it. Then it occurred to me that it would be much faster to cool a small amount in a little measuring spoon. Wait until it’s completely cool to test, and keep in mind that a hard skin forms on the surface, so break through it and smear the salve between your fingers, on your lips etc. to test the texture and absorbency.

As soon as you get in as much oil as you want, the salve is done! If you’d like, you can pour it into smaller containers for storage and use while the salve is still liquid (using a funnel or very carefully).
Every time I do this, I’m pretty excited about the almost effortless batch of lovely new jars of salve around the house. If you want to, you can even make fun labels for them, like we did for the salve we made at my craft retreat two years ago.
I find the best way to get the salve off the teaspoon, or out of a jar I’d like to use again, is to just keep rubbing it off with one dry fingertip after another.
Here’s to upcycling!
