
Or, how to make it easier in any yarn.
I love this cast on*; how easily it stretches and bounces back right along with the knitting, how invisible it is (it’s like whatever pattern you’re knitting just appears fully formed, without a visually different edge), and the bonus that since it only uses one end, you don’t have to worry about starting with a long enough tail.
But it’s notoriously difficult to do with uneven or thick-and-thin yarns, since the yarn has to be able to slide easily past itself to make the required shape. Or does it … My knitting students were having a hard time with this cast-on, even in a relatively smooth yarn, which got me wondering if I could figure out a trick that would help keep the yarn moving. I decided to try it with my first handspun project (a thick and thin yarn if there ever was one). And I did figure it out! It may have helped that I was stuck on an airplane at the time without too much else to do … It turns out that there’s one place that the yarn gets hung up on itself, and if you can get past that, you can do this cast on in a lumpy yarn too! I’ll show you how below.
First, a quick review of what makes a slip knot, since that’s the structure this whole cast on is based on—you’ll essentially make one slip knot after another. First of all, you need a loop.
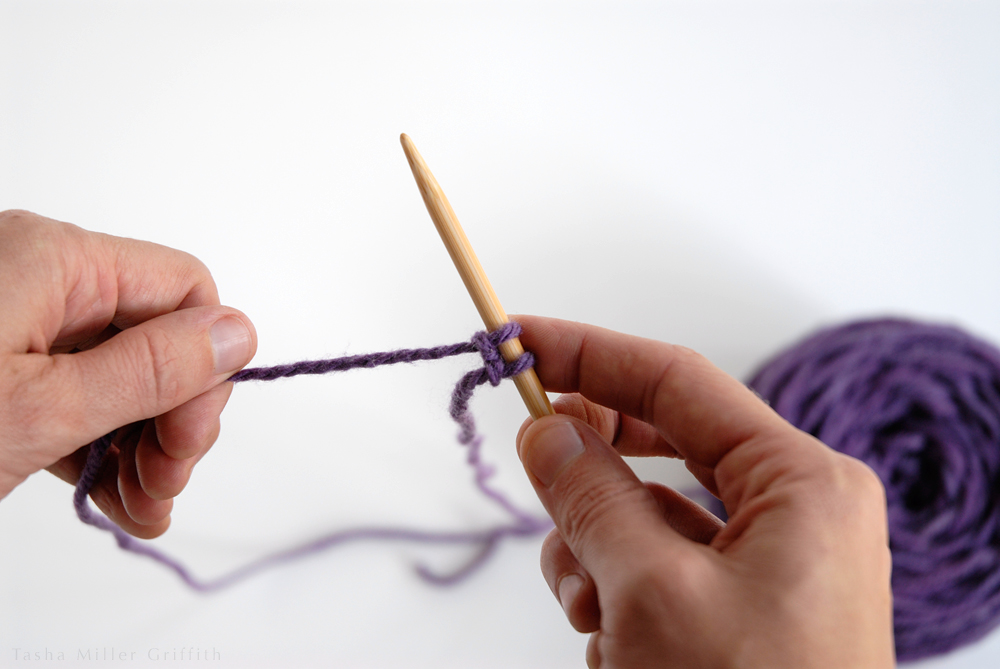
 I’m going to show you using a bit smoother yarn—otherwise it would be hard to see what’s going on. This is “Sheridan” from Mountain Meadow Wool—yummy!
Next you need another loop, and to put that second loop through the first one. Remember that the ends must cross each other for the loops to stay in place. So, you can either make a second loop in the bottom strand of the first loop and bring it through the top, or make a loop in the top strand and push it up through the bottom, which is what I’ve done below.
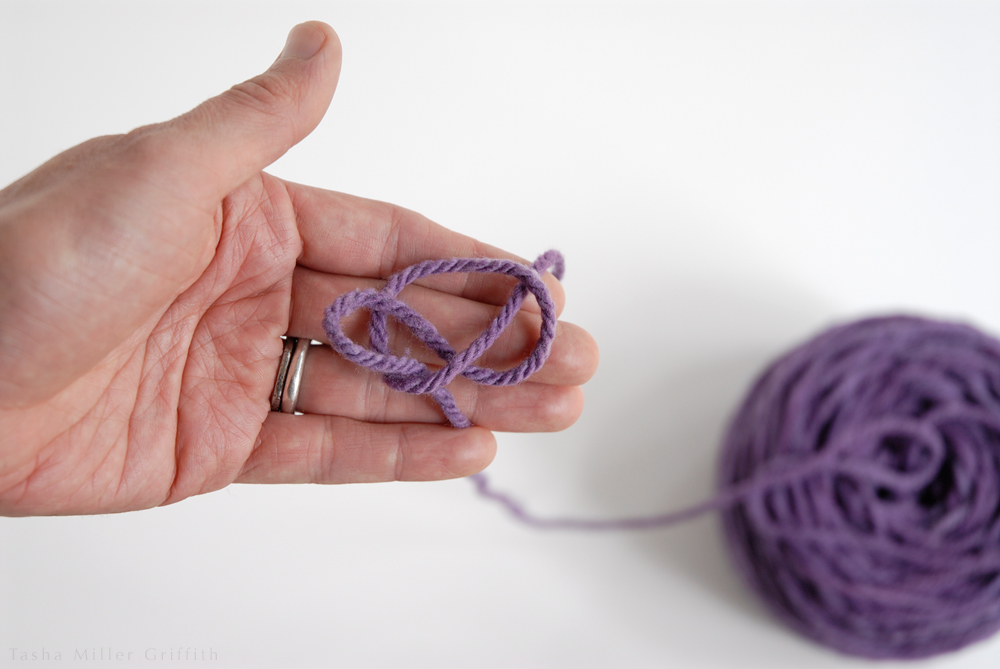
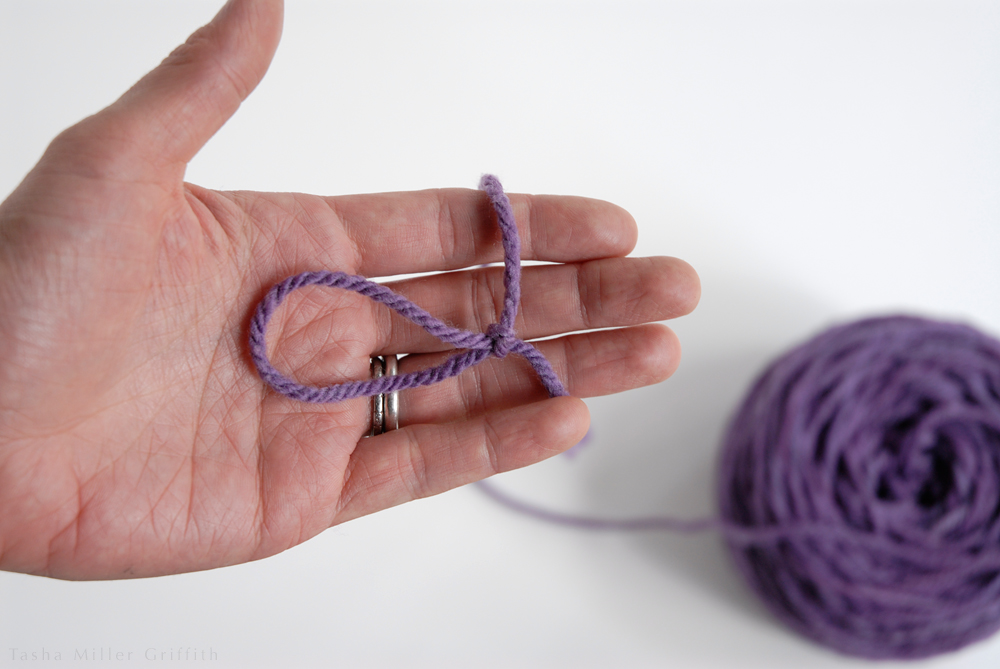
Tighten it up by pulling the second loop through until the first loop closes around it. If you’ve made a successful slip knot, it will go away if you pull on both ends of the yarn.
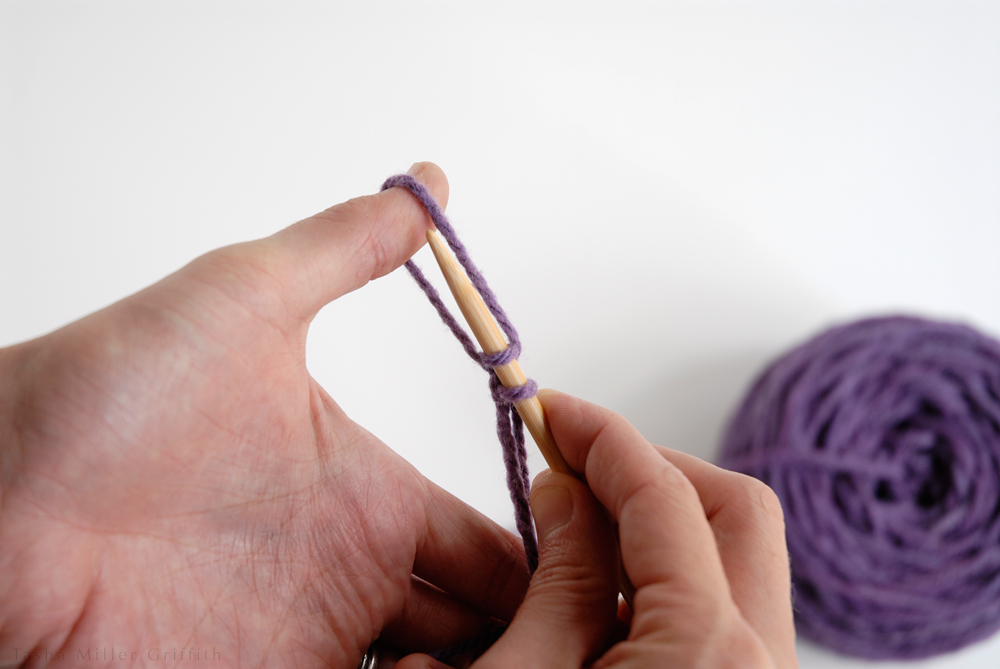
Put this first knot on a needle, and you’re ready for the cast on. I like to put the working end of the yarn (not the short tail) around my thumb, and hold the end with the last two fingers of my hand, as shown below. (There are other hand positions and motions that work perfectly well to make this cast on, these are the ones I use.)
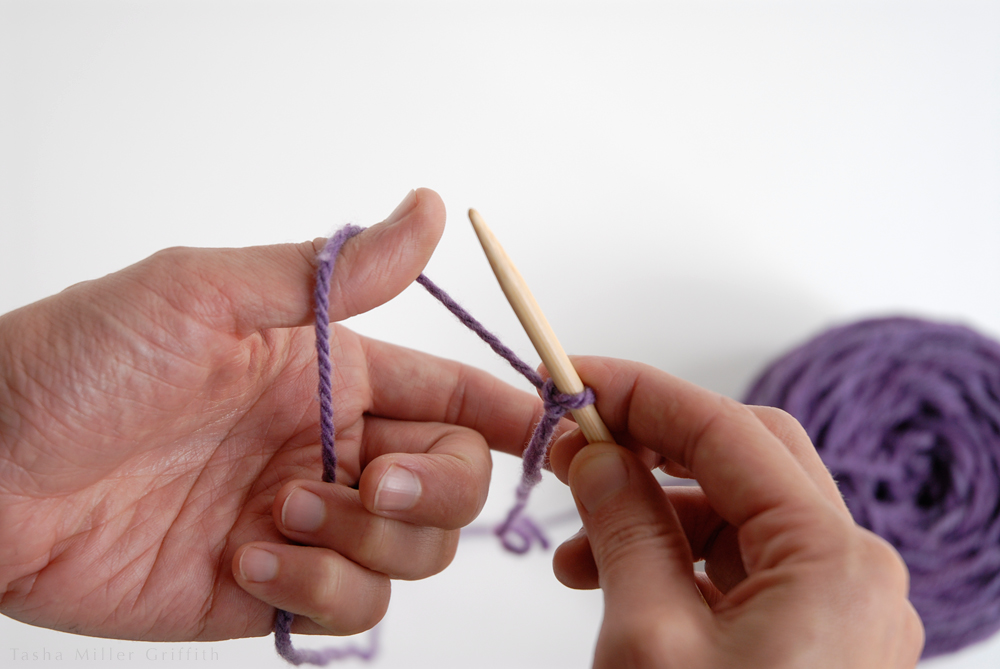
To make the first loop, I use the needle to scoop up the strand nearest me around the thumb, moving from the bottom up.
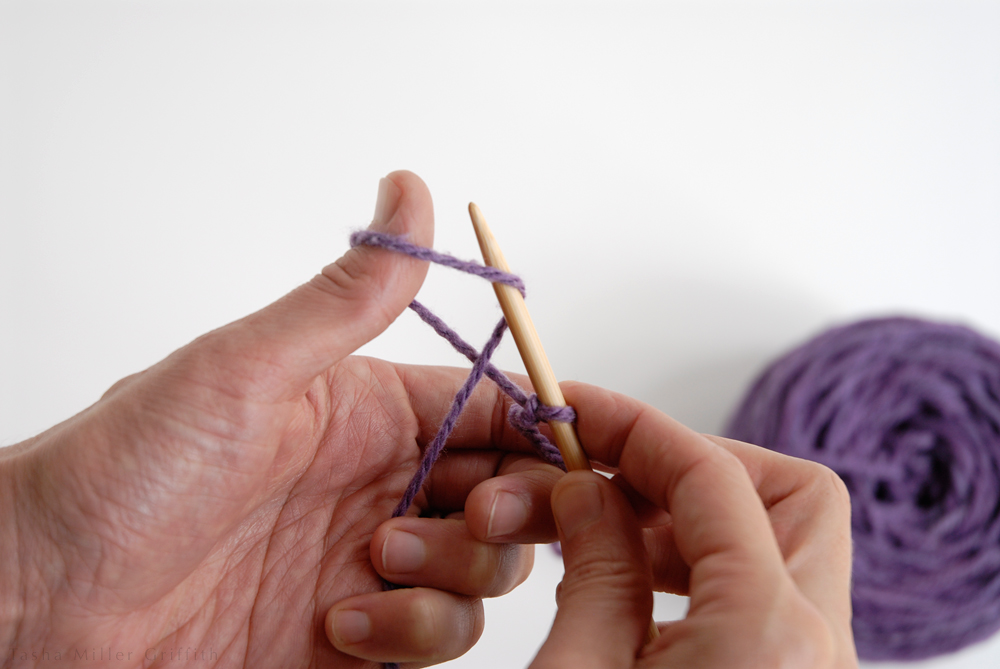
Leaving this first loop on the thumb, I use the rest of my hand to bring a second strand of yarn over the needle, making the second loop.
I used to think that looping this strand one direction vs. the other over the needle might make it easier to pull the yarn through in the last step. That might be true, but it also (of course, silly me) determines which way your first round of stitches sit on the needle. Chances are you want them as shown below, so wrap the yarn starting at the front and moving to the back. If you’re a “combination” knitter or you learned in a tradition that knits through the back of the stitch, you’ll find your stitches ready to go if you wrap the yarn the other way, starting at the back and moving to the front.

In either case, now we have two loops on the needle. We want to move the first loop over the second one, so that it makes a collar around the base of the second loop, just like in the first slip knot we made without the needle. To do this, I use my thumb to lift the first loop up and over the tip of needle, and then let it go.
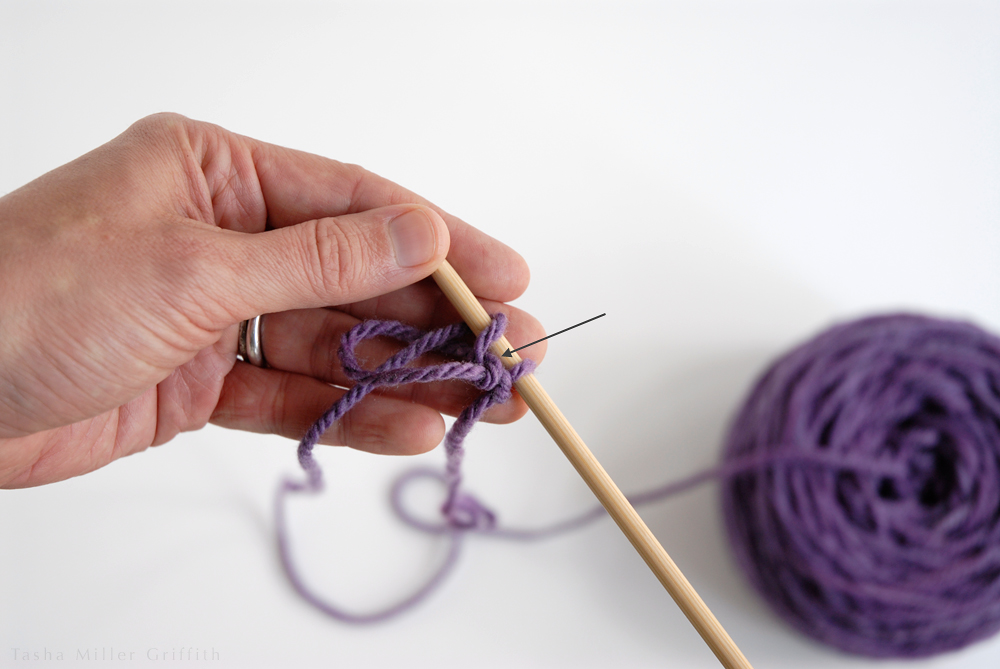
In the instructions I’ve seen before, the next step is to hold the new loop against the top of the needle, and pull on the end of the yarn so the collar around it tightens up. Sometimes this works great, but if your yarn has any resistance to sliding along itself, it will probably get caught up, stop short, and cause you to curse, tug on all the ends available, and try again.
The reason the yarn gets caught easily is that there’s one place in its path where it has to loop quickly around itself, making almost like a little knot (indicated by the arrow below).
What I found was that if I pull the yarn through this tight place first, I can then pull on the end and the stitch will tighten up smoothly, even in my lumpy handspun!
I take hold of the outside of that little loop-de-loop, and pull it out, so that the collar starts to form around the bottom of the new loop on the needle.
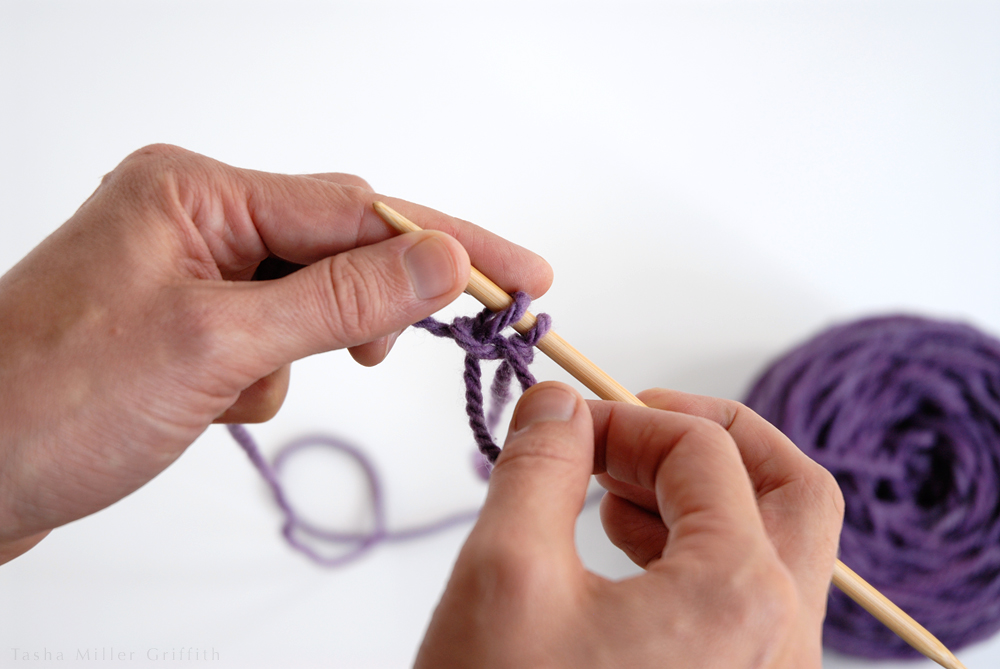
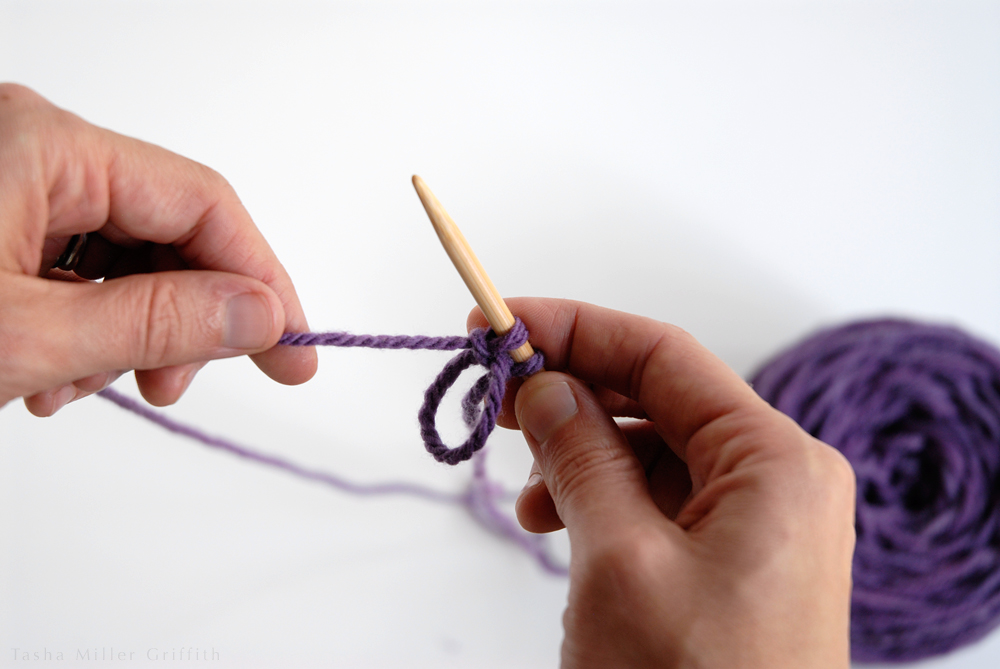
I’ve found that it works best if I get the new loop pretty snug, right up against the stitch before it on the needle, and the collar almost snug as well. Then with it set up, I hold the new loop against the needle and pull on the yarn end to finish the new stitch.
Although this undoubtedly adds a step, to me it’s totally worth it, since I can now use a whole lot more yarns with one of my favorite cast ons. And I don’t know about you, but I would rather have a slightly more complex but smooth process, rather than cursing and tugging on the yarn every few stitches because it keeps getting stuck.
*One of the many bonuses of going to a workshop with Cat Bordhi in person, is that she tells you all kinds of cool little tricks, and that’s where I first learned about this cast on. The original post about it on Jeny’s blog is here, she links both to her own video of the steps, and to another one which uses different motions. If you’d prefer not to hold the yarn around your thumb, there’s also a variation using two needles demonstrated by Tillybuddy on YouTube here.
Happy knitting!
