An Efficient Way to Chop Fruit


chopping fruit 1


I’d like this blog to be, at least in part, a primer for those didn’t have a mom or grandpa who could show them the basics of a handmade life.  A lot of the tricks that really help are about efficiency.  This post is pretty much an extension of the one about chopping vegetables, and most of my thoughts about efficiency and hobbies are there.  But I wanted to add a bit about fruit.

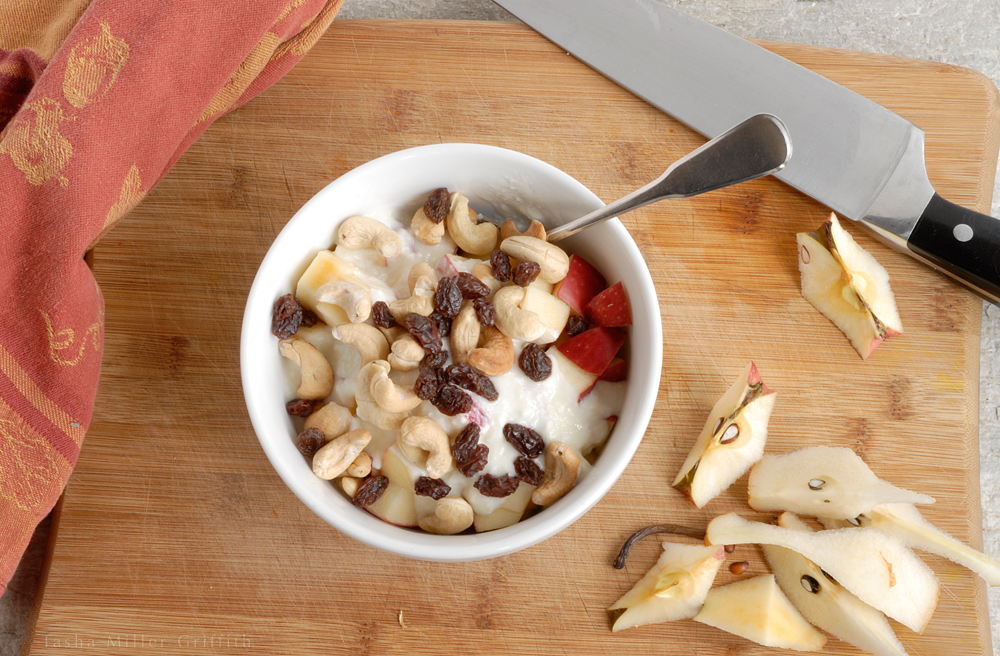
I cut up fruit, using exactly this method, every single morning that I can, and have it for breakfast.  I’ve found that if I don’t cut it up and put it in a bowl, I won’t eat it, it just seems too messy or something, but I really like eating it out of a bowl with yogurt, raisins, and nuts.  In the summer, I’ll use ripe melons, berries, whatever is fresh, but in the winter, it’s all about pears and apples.  I love this breakfast any time!

It’s also true that guests will devour fruit that is cut up and ready to eat, but tend to leave whole fruit in a bowl alone.

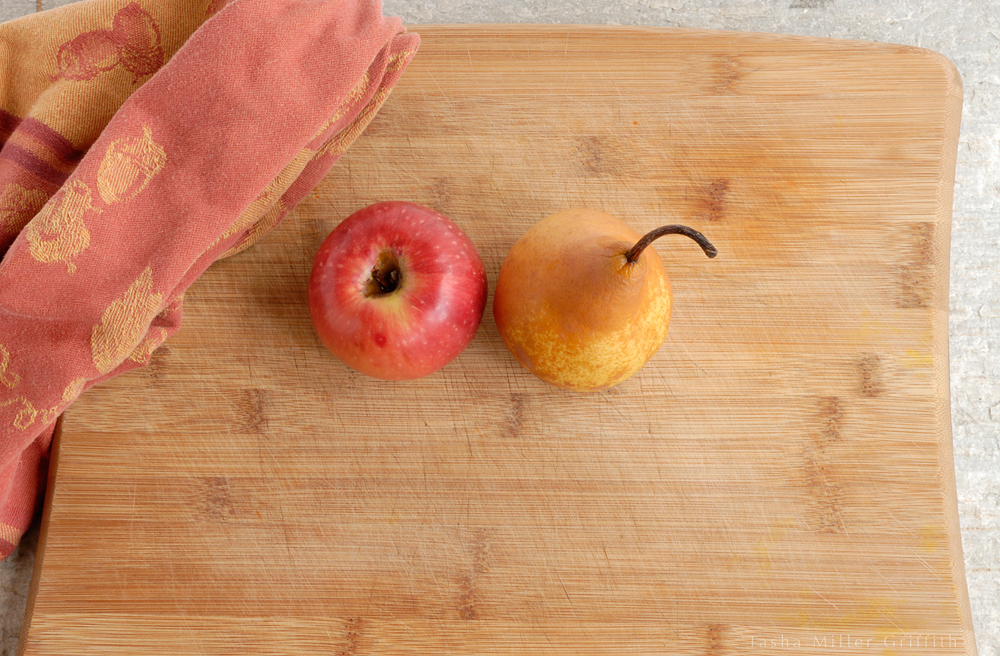
So, let’s get started.  Just like for veggies, one of the keys is having a big knife, so you can cut whole sections at once.  Using a small knife makes it take forever, and at least for me, anything that takes forever is not going to be a daily occurrence.

It’s pretty much all about the photos from here on down.

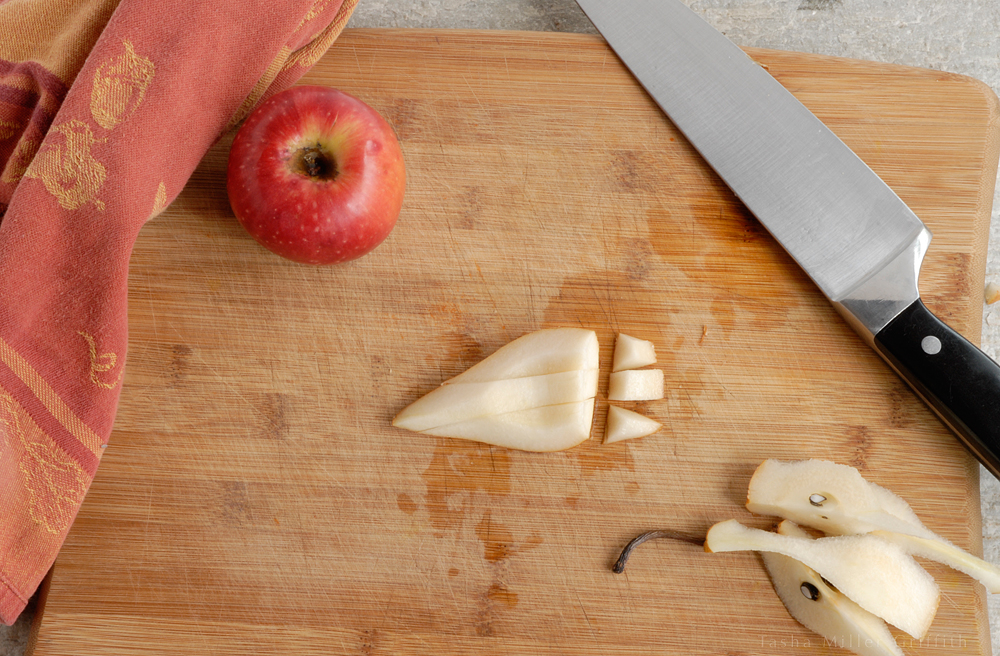
Cut the fruit into quarters.  Then cut out the cores.


chopping fruit 2

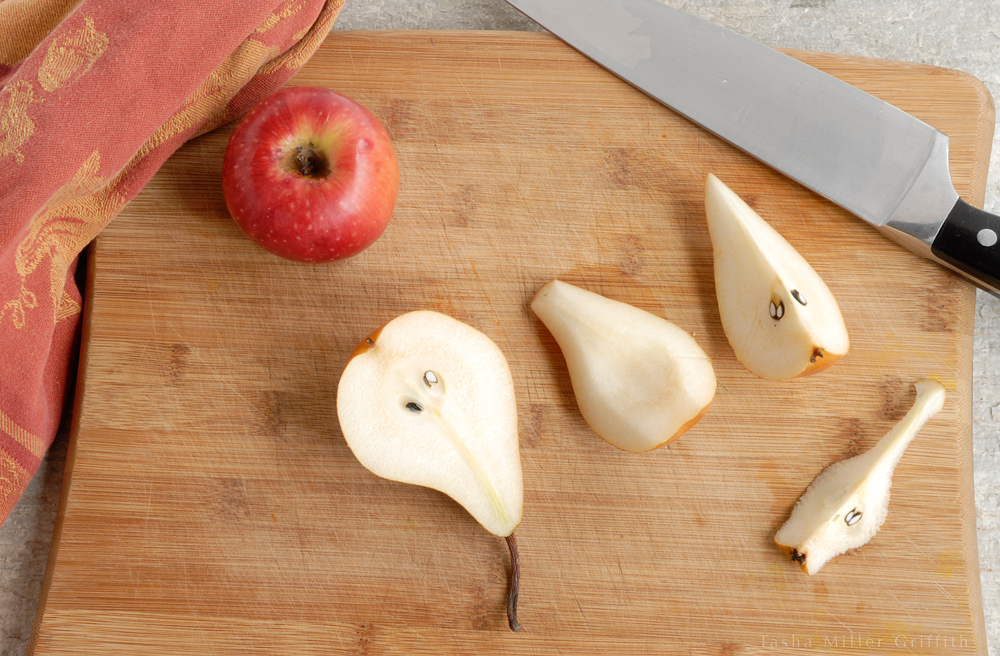
In the pear crisp recipe, I mentioned that I love it when pears are ripe enough to cut the core out in one smooth stroke.  This is what I mean, this one barely is ripe enough, you can feel where to slide the knife along the edge of the hard core, from the top to the bottom.

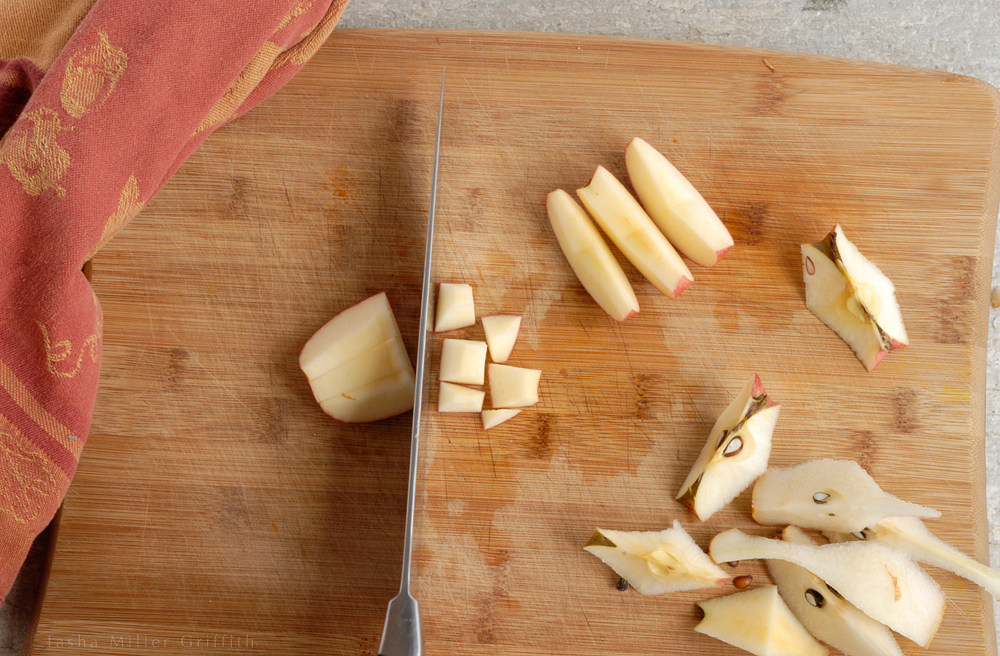
Then slice the fruit quarters.  Cut the slices thick or thin, depending on if you’re going to chop the slices or leave them as is, if they’re for presentation or for a pie, etc.


chopping fruit 3


If you want chunks of fruit, hold the slices together and chop them again.


chopping fruit 4


So, that’s pretty much it …  There’s only one difference for apples, you can’t slide the knife around the core, so cut it out from each side on the diagonal.  Once you cut one side, you can give the apple quarter a little flick and it will spin on its round base to the other side.


chopping fruit 5


chopping fruit 8


chopping fruit 6


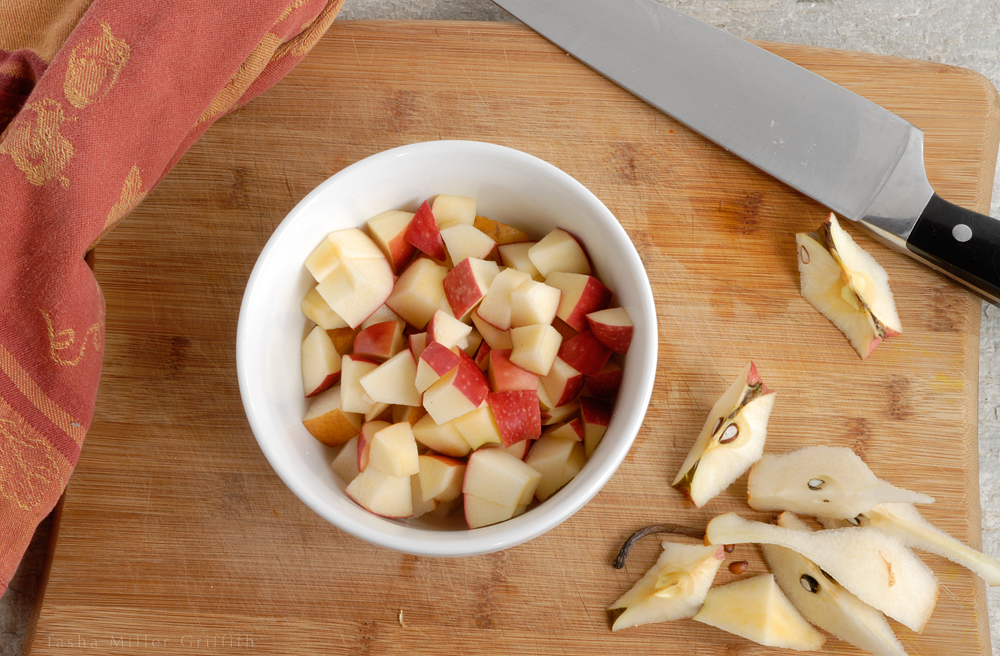
There you go, three minutes later, breakfast.  Did I mention I love breakfast?


chopping fruit 7


Simple & Satisfying Broccoli Pasta

With Garlic and Chile Flakes


simple broccoli pasta


Basically, I’m still in the same food mode I was when I wrote about the savory tarts (and still making a lot of them!).  Some days I feel like experimenting, and I have been working on a few new recipes, and trying a few others.  But many days, I’m in the mood to make something that won’t take forever, and that I know I’ll like.  Like this!  Broccoli appeared in our CSA store a couple of weeks ago, and I know Bryan likes it, so I always get some when it’s there.  This is one of my favorite ways to eat it.  Add a salad, and you have dinner.  It’s quick enough that I will even bother making it for lunch, if there aren’t enough leftovers in the fridge.


Simple Broccoli Pasta with Garlic and Chile Flakes

adapted from The Joy of Cooking


For dinner-size portions for two, start with two small or one large head of broccoli.  My second favorite thing about this recipe is that when I found it, I learned how to cook and eat the broccoli stems—it always seemed like a waste to just compost them.  The stems just take a bit longer to cook than the florets.  Cut off the florets, and cut them into about equal pieces.  Slice the stem into fairly thin rounds (leave out any of the bottom that seems too tough or stringy), and then dice up the slices.


chopped broccoli


Boil some water, to cook the pasta.  I like the deep nutty flavors of whole wheat or spelt noodles here, but then I like them with just about anything.  Use whatever kind of noodles you like.  For any even simpler gluten-free option, leave out the noodles all together, and serve the broccoli as a side.  The broccoli only takes a few minutes to cook, so you may want to cook the noodles first.  While you’re waiting you can mince a little garlic (I use about 1 small clove per head of broccoli) and grate some Parmesan, or other hard aged cheese of your choice.

To cook the broccoli, you will need a pan with a lid.  I keep a terrible, ancient skillet around because it’s the same size as my favorite one, and therefore functions as a convenient lid.  Add a generous amount of olive oil to the pan, and heat over medium.  When the oil is hot, add the chopped bits of broccoli stem, and sauté for a few minutes.  Then add the florets.  Stir, so that they all get a bit of oil, then pour in a splash of white wine if you have it, or water if you don’t, and cover the pan.

After a couple of minutes, lift off the lid.  The broccoli will have turned bright green.  At this point you want it to be slightly less done than your desired finished dish, taste some and see.  I like it about as far towards raw as I can get and still call it cooked.  When the broccoli is almost as done as you’d like, add the minced garlic and hot chile flakes to taste.  It can be subtle or spicy.

Let the garlic and chile cook for a minute or so, stirring with the broccoli.  The pan lid should be off at this point, to let any remaining liquid evaporate.  Turn of the heat, and add the cooked drained noodles to the pan, along with a little of the grated cheese.  Stir everything together, and add a bit more olive oil and/or cheese if it seems too dry.

That’s it!  Serve with a bit more grated cheese on top.


Yarn as Jewelry


I bought this yarn at a tiny shop in Albuquerque’s Old Town years ago.  It’s hand spun, and there was such a tiny amount on the skein (which I didn’t realize at the time) not even enough for a whole hat!  I ended up using it in part of a hat for Bryan.

But, it’s totally gorgeous!  Just look at it, there are parts that are spun so tightly that it’s basically too much twist, but those parts also give it a bit of shine, and highlight the natural color variations.  I fell in love with it right away, and I was still in love with this little bit I had left.  At some point it occurred to me to wear it as jewelry.  To me this wool yarn is just as beautiful as anything else you might put around your wrist.  So . . .


If you’d like to make one too, it’s quite easy and quick, I made this one (including a small sample and pulling that out) while talking to friends and waiting for dinner!  Just be sure to use a very stretchy cast on and bind off, because the whole thing must stretch over your hand and still fit close around the wrist.  I like “Jeny’s Stretchy Slipknot Cast-On“, I’ve been using it for all kinds of things lately, as it looks good in addition to being super stretchy.  “Jeny’s Surprisingly Stretchy Bind Off” is a little bulkier, but perfect for something like this, or the top cuff of a sock, etc.

I wanted mine to fit close, so I used my wrist measurement minus 10%.  Multiply your desired size by how many stitches per inch you are getting in your yarn, and that’s it!  Mine is 20 stitches around at about 3 sts/inch.  The pattern is purl 3, knit 1, repeat until desired length, or until you run out of yarn like I did.

Bryan called this my “warrior sheep woman cuff”.  I’m, um, calling that a compliment!

What unusual things do you think are beautiful?  Would you like to display or wear them somehow?