

I’m catching up here. You know how sometimes, if you prepare carefully for something, it doesn’t happen? I made this dress for Me-Made-May, but didn’t end up wearing it until the middle of June, due to unseasonably cool and rainy weather all month long. This year I wanted to up my pledge for May, so that I wore at least two items of me-made clothing at all times. When it’s really hot out, I like to wear only two items of clothing period, one of which must be a sundress, which allows as much heat to escape from my skin as possible. My airiest one in particular was 1. wearing out and 2. not me-made, so I clearly needed to replace it before May. It had a couple of features which I wanted to replicate in my self-stitched version: just about the lowest neckline I am comfortable wearing in public, layers of very light fabric, and gathering at the empire waist.
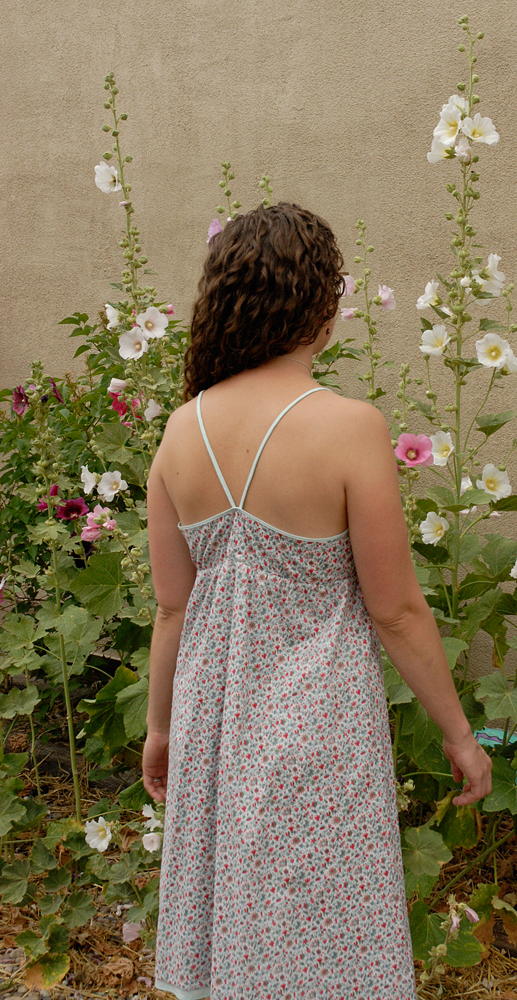
I used my self-drafted sundress pattern again, altering it this time for a cross-over gathered front. Each time I make a new version of this dress, I change the back in an attempt to make it not pull up at the center back, and both times so far it has not worked. Any ideas? I’m pretty happy with how the front came out though. One thing I’ve learned: the key to keeping the bodice from immediately gaping open when I bend forward is to ease the top edges into a slightly shorter binding, so that I take some of the fullness around the bust out again. It’s especially important since I replaced the darts on this version with gathers.
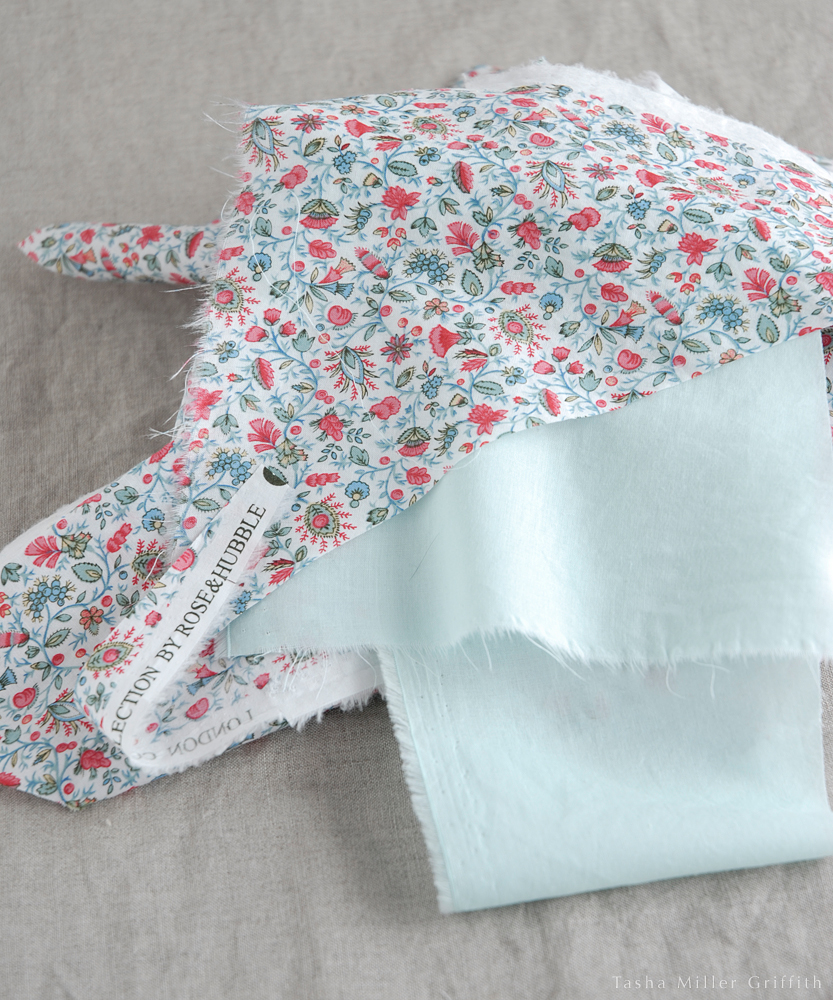
This fabric is a cotton batiste, I’m sorry to say I have no recollection of where it came from, I just remember it being in my stash for a long, long time. My first idea was to use plain white for the lining layer. As I was cutting out the main fabric pieces, I dropped a piece in my fabric scrap pile, and it happened to land on top of a piece of felt in this light minty green color. I suddenly remembered that I had another piece of lightweight cotton in a really similar color, which might look great as the inner layer. It turned out there was just enough of that fabric for the lining and bindings, and I really like how the green adds a little hint of color under the main fabric, and how it looks peaking out at the hem, a detail I added to show off the second color. Even though I decided not to join any of the official fabric stash-busting challenges going on this year (despite this cool anime dinosaur logo) I have been making a conscious effort to use the fabric I already have, and making some good progress, in part inspired by all the other sewers who are doing the same.
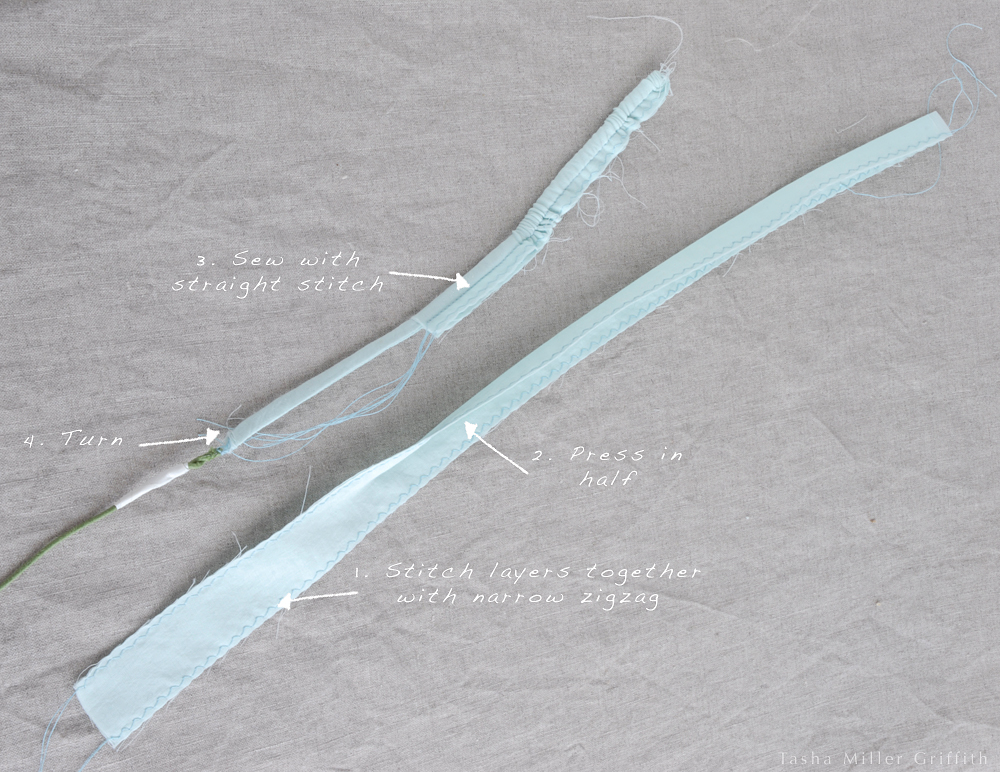
Click on this picture (or any of the others) to enlarge for easy reading.
With all the sundresses and tanks I’ve been making the last year or so, I’ve gotten a lot of practice making thin “spaghetti” straps, and come up with a method that I like. If the fabric is lightweight, like this one, I’ll use two fabric layers for each strap. Since the dress will hang from the straps for most of its life, I want them to be fairly sturdy. I cut each one 1 1/4″ wide, and a couple inches longer than I think I’ll need. I get the best results when I zigzag the two strap layers together first, with a narrow zigzag right on the edges. It keeps the layers from shifting as I sew, and from unraveling as I turn the strap right side out. Then I press the strap in half, to get a clean even fold. I stitch the strap seam with a short straight stitch, 1/4″ from the edges. Then turn it right side out. I use a long wire, as explained here. The straps come out about 1/4″ wide, and somewhat thick and rounded. If you do the math, the extra 1/4″ in the width becomes the “turn of cloth”, the extra fabric needed to go around the seam allowances which fill the middle of the strap.
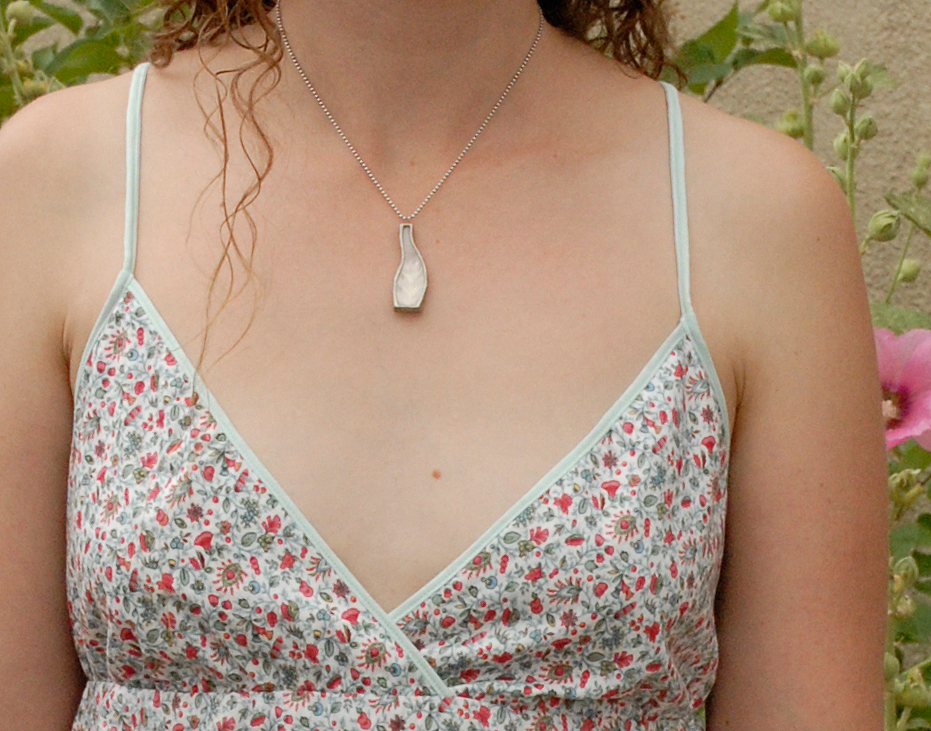
I decided to use light blue thread for topstitching the bindings and hems on both layers. I topstitched over the straps as well, to go with the look of the bindings. At one point, I started to wonder if I was going overboard using up things from my stash and adding more colors. But if I took a step back, I realized that if I saw this dress in a store window, I would want it immediately. So that was a good imaginary test! Since I’ve been wearing it, I’ve noticed that all the colors in the print go with lots of other things in my wardrobe too.
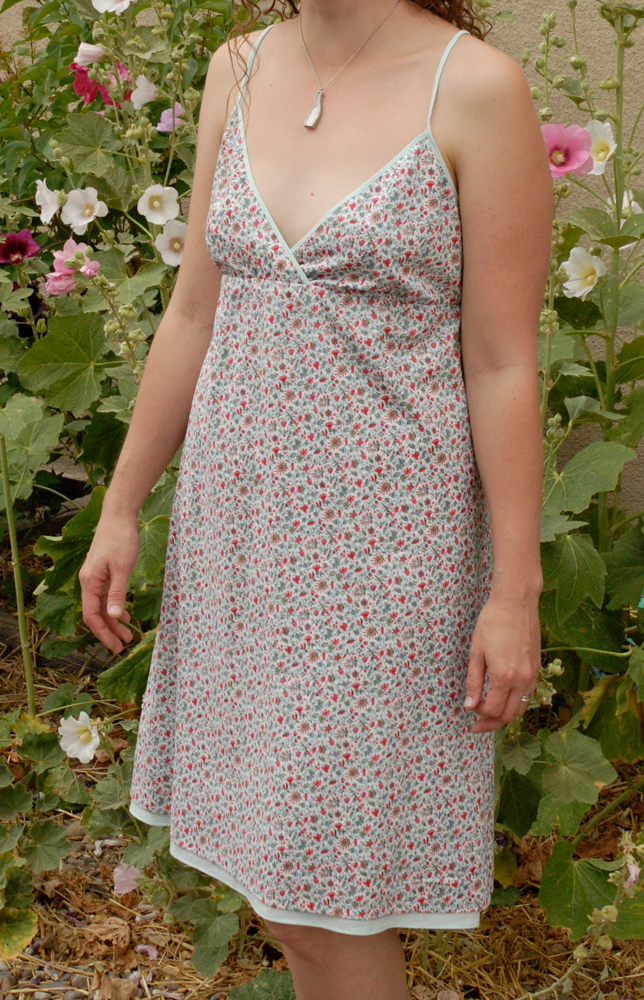
Special thanks to my aunt Barbara for taking the pictures of wearing the dress, and for letting me use the beautiful hollyhocks in her garden as a backdrop! That was the first time it was warm enough to wear the dress, as you can probably tell from my lack of tan here. . . What about you? Are you making anything for your current weather, or the coming season?


