DIY Crème Fraîche – and Kohlrabi Salad


Or, why I like The Joy Of Cooking so much.


creme fraiche and kohlrabi

I know, it looks like strange bedfellows, but keep reading . . .


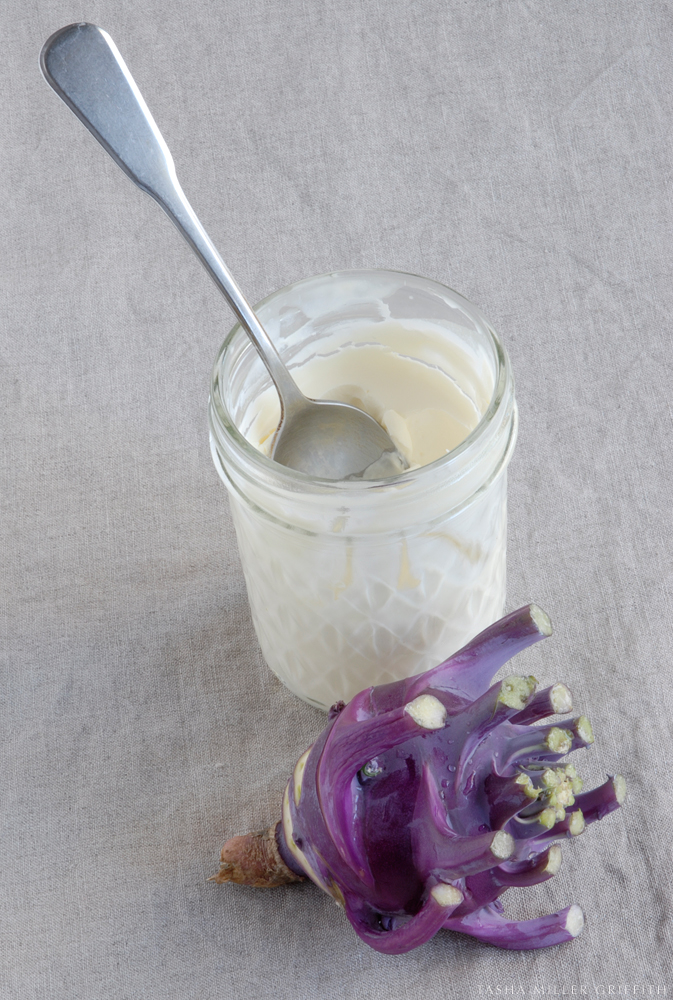
If you’ve never had crème fraîche, I recommend trying it.  It’s kind of like sour cream, but a little less sour and much more subtly flavored.  And expensive, at least here.  It’s a cultured food, so we figured that if some of the cultures are still active, we might be able to get more crème fraîche by adding some of what we had to some plain cream.  Good quality organic heavy cream is about 1/4 the price per ounce of crème fraîche, at least in Flagstaff, AZ.

And in fact, if you look up crème fraîche in the KNOW YOUR INGREDIENTS section at the back of The Joy of Cooking (I love that part of the book), they suggest as a substitute: adding one tablespoon of buttermilk to one cup of heavy cream, warming it to 110° F on the stove, and then pouring in into a jar, letting it set loosely covered “until the cream has thickened and has a pleasant mildly sour flavor,” anywhere from 6 hours to 3 days.

We tried the same thing, using one tablespoon of store-bought crème fraîche to one cup of cream.  And, almost three days later, tada!  It’s funny because it looks like nothing is happening for quite a while, the cream still very liquid, and then finally a few more solid clumps appear, and the then bam! it’s done.  Once it gets as thick and mildly sour as you would like, store it in the fridge to keep it from becoming overly acidic.

These directions say to leave it in a warm place while the cultures are working.  Our house is short on warm places in the winter, so the first time I tried it, I left the little jar near the stove, figuring that whenever I heated something up it would get a little warmth.  That was the time it took almost the whole three days, but definitely worked.  The next time, I actually forgot to heat it at the beginning, I just added 1 tablespoon of the first batch to one cup of fresh cream and stirred it around.  I thought it might benefit from a warmer place, so I put it in the middle of the burners on the stove as I was cooking dinner, checking from time to time to make sure the jar was getting warm, but not hot, and to rotate it around a bit.  That time the whole jar had become thick crème fraîche by the next morning!


kohlrabi salad


Ok, so once you have some crème fraîche, kohlrabi is probably not the first thing you are inspired to put it on.  Dolloped in soup or on waffles might sound more luscious, and both are wonderful.  But, if you’ve never had kohlrabi, I definitely recommend it.  It’s one of those winter vegetables that looks knobbly and scary on the outside, but on the inside has a lovely subtle flavor, in this case a little cabbage, a little nutty, and quite good.

I tried one recipe for kohlrabi salad earlier this winter, but I thought the amount of lemon juice in the dressing overwhelmed the soft flavors.  If you look up almost any specific vegetable in Joy, it will tell you not only whether it is good raw or cooked, and how to cook it, and whether to peel it first, but it also gives a list of flavors that compliment that veggie particularly well.  That features was a huge help when we joined our local CSA – even though I had never heard of most of the greens we got, they were almost all listed, and I could figure out at least whether they were for cooking or salad, and what they were likely to taste like.

Under kohlrabi it says, among other things, that it goes well with cream, parsley, and dill.  As do carrots, and so . . .


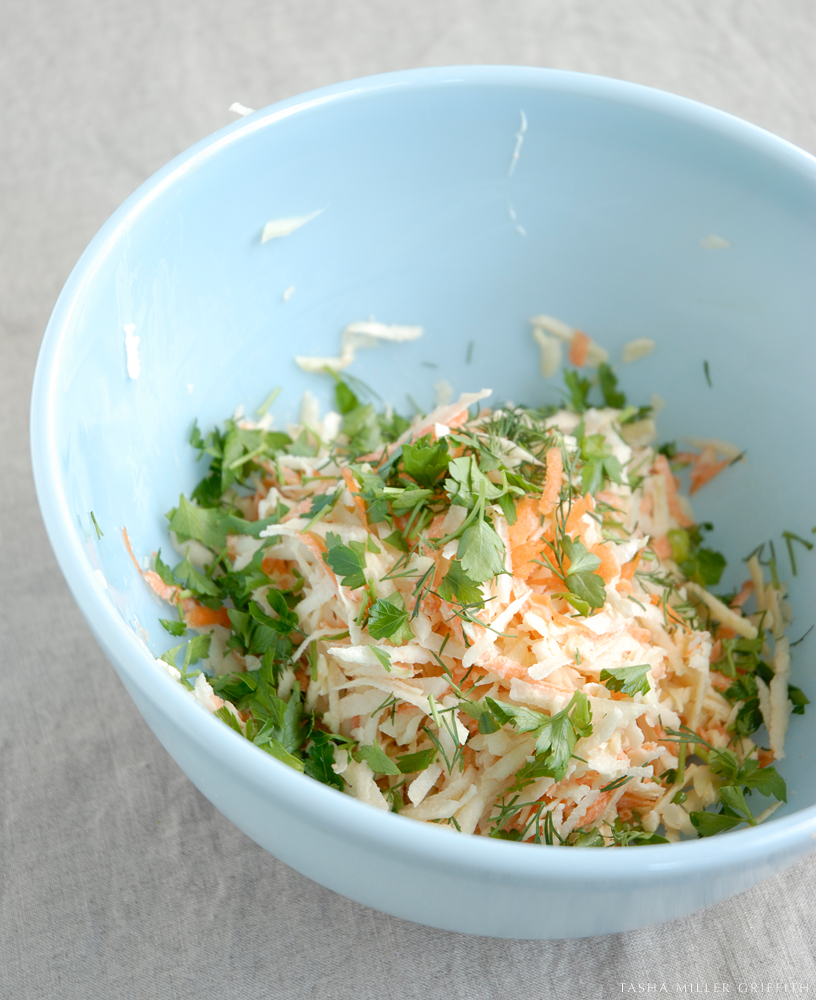
Recipe Sketch: Kohlrabi and Carrot Salad with Crème Fraîche

This makes enough for 2 or 3 servings, feel free to make more!


Peel, taking off the woody outside layer (chew on a bit if you are not sure), 2 small kohlrabi

Scrub one medium carrot (I pretty much never peel carrots)

Grate the kohlrabi and carrot on the largest teeth of your grater (a trick I only recently figured out is to leave the carrot top as a handle, start grating from the skinny end, and stop when you get almost to the top).

Put these in a bowl, add 2 – 3 tablespoons of crème fraîche, and mix with your fingers, it should be slightly creamy all over.

Sprinkle on about a tablespoon each of chopped fresh dill and fresh parsley.  (Remember how I keep herbs in a jar in the fridge?  Dill keeps practically indefinitely that way.)

Mix together, taste, and add a pinch of salt if desired.  If you are not serving it right away, you may find that the veggies have absorbed some the liquid and the salad is a little dry, if so you can add a little more crème fraîche or regular cream before serving.


I love all harmonious delicate flavors in this salad.  And, as you might guess, some crème fraîche mixed with the cream for carrot and raisin salad is pretty great as well.

If you can’t find any crème fraîche to start from where you live, you may be able to get the cultures from a source like New England Cheesemaking Supply.

I did a little research on using the same process to make perpetual yogurt, which I’m embarrassed to say I’ve never tried, but it’s now next on my list of kitchen projects.  From what I’ve read so far it seems only slightly more complicated, heating the milk, I presume to kill of any unwanted bacteria, then adding the yogurt or culture once it’s cooled back to warm.

What about you – have you made your own crème fraîche or yogurt, or other cultured food?  Any tips or thoughts?


Felt Flower Tutorial is Now on Craftsy


Hello!  So, you may have noticed that blogging here has been at a more, um, measured pace than usual, even for me.  That’s mostly due to a new project I’m working on, which I’m so exited about, sweat breaks out on my upper lip every time I start thinking about it – no kidding!  More about that before long.

In the meantime, I wanted to let you know that I found a great new platform for my felt flower tutorial.  It’s called Craftsy – the folks who run it have done a great job recruiting well respected authors in all kinds of crafts to teach their online classes, plus they are making a significant effort to support indie designers such as myself in their pattern shop!  The best part for customers is that you don’t have to wait for me to email you the pattern, you can download it instantly.  Just click on the picture at the top of the post.

Um, if you like it, tell all your friends!  As they say on American Routes, “If you don’t like it, don’t tell nobody!”


Finished flowers

Saving Pumpkin Seeds


I’m kind of jealous of my friend Tom, who grew about 2 dozen pie pumpkins in his yard this year, here in Flagstaff!  He has been sharing them, which has been great, but I still found myself wishing that I had dozens of pumpkins too – wait a minute!  I have a yard, I have some grey water, and we were home enough this summer that it might have worked, plus it wouldn’t be too much work for our house-sitters.  So, I saved some seeds.


After reading directions here and here, I picked out and rinsed the seeds in cool water, then spread them out on this cookie rack.  At first they were plump and glossy, but after a week or so they have flattened out somewhat and the skins are crinkley & papery.  I think I’ll leave them out a little longer.  Further bulletins as events warrant!

Heat Setting Fabric Ink, and “Green” Printing

Heat setting is the last step for a lot of fabric inks, including the ones I used for stamping (Speedball Fabric Screen Printing Ink).  The heat bonds the ink permanently to the fabric, so you can wash it and your design won’t come off.

So, how to do it.  The most foolproof method is what the manufacturer recommends: ironing.

After the fabric ink dries on the fabric, set a household iron at the highest dry heat (no steam) that will not scorch the fabric and with a cloth or paper between the iron and printed material, iron on each side for 3 – 5 minutes. This will make the ink withstand repeated washings.

from speedballart.com


The first time that I did screen printing and stamping, I decided to look for alternatives, since I wasn’t too excited about ironing each part of the skirt I had stamped as directed above.  I emailed the company to ask about other methods, and just how hot the ink needs to get.  I got a helpful answer back, including the answer, 350-375° F, and the suggestion that I could try heating my items in the oven.


My oven set method: Preheat your oven to 400 with an extra metal pan inside to pour water into.  Boil some water.  Fold your printed piece and wrap in scrap cloth or place inside an old T-shirt, so that any scorching or oven gunk goes on that and not your creation.  You can also put old fabric or paper between items if you are worried about transfer of ink.  Don’t make your fabric bundle so dense that it will take too long for heat to reach all of it.  Place your bundle on a cookie sheet.  When the oven gets up to temperature, turn it off.  Open the door and pour a cup or two of boiling water into the extra pan.  Quickly pop in your cookie sheet and shut the door again. Leave everything inside with the door shut for 10 minutes.  If you have an oven thermometer and a window in your oven, you should be able to check that the temperature stays above 350° for at least a few minutes.  Common sense note, this method will not work for synthetics (although I did a partly polyester apron and it seems fine) or anything that will melt at those temps. If you have a piece with meltable parts, like nylon bag handles, you will need to iron the design/printed part only.


I have had good success with this oven method, I did the skirt below this way, without a steam pan, and it has survived years of washing and wearing without any noticeable fading in the design whatsoever.  In fact, I remember that I washed it before reading the manufacturer recommendation that you wait a week before washing the first time, and as I said it still looks great!  Some other folks that I shared the oven method with (and even myself once, when I didn’t turn off the oven – not a good experiment) have had some problems with fabric scorching around the edges.  I came up with adding the steam pan, since fabric can usually take practically any heat without scorching as long as the heat is wet.  I heat set a big batch of dish towels this way with my friend Megan a couple years ago, I checked in with her and she said that those designs have held up to lots of use and washing as well.


A couple of things that didn’t work: as extra insurance against scorching I tried wetting the old towel that I wrapped my last piece in before putting it in the oven.  Everything smelled like warm steamy fabric, but I don’t think it got hot enough inside.  I have also heard that some people use a commercial dryer, so I snuck into the laundromat with a couple of samples from my latest stamping day with friends.  I put all these test pieces though the wash 6 times, as I was doing laundry between then and now, and hung them on the line to dry.  They all show significant fading and some of the motifs are totally gone.  So for now my best suggestions are the ironing and oven methods above, I will of course post an update if I come up with a new and better way!


One more thing I’d like to talk about, and this seems as good a place as any, eco-friendly printing!  Part of what I love about DIY is the ability to turn something you wouldn’t use into something you will, and save resources and cash.  I hate it when I realize that I’m wasting supplies, or sending lots of extra stuff to the landfill when I’m crafting.

My tips for “green” fabric stamping are: for clean up, you only need a cup’s worth of water and an old toothbrush, and a rag.  When your hands or tools get messy, rinse them in the water, then wipe them on the rag.  Heat set the rag when you’re done to use again (it looks cool).  Reuse paint mixing cups by pouring out excess paint (into the trash, or onto something else?) and letting them dry before putting them away.  I use one plastic spoon to scoop paint for each primary color, and one to mix each new color.  I let all the spoons dry at the end and save them for next time.  The foam brushes I rinse in the clean-up cup, then a final time in the sink, and again let dry.  If you use something that’s still useful with paint on it, like a mailing box, under your paint jars to protect the table, the total waste is down to a little unused paint!

Well, that’s about it for this project, please feel free to add comments if you try printing, how does it work for you?  I’d love to hear more ideas for heat setting as well!  Stay tuned for more DIY . . .


Carving a Handmade Rubber Stamp

This will be the first post of a couple about making stamps and using handmade stamps and objects to print on fabric.  For some reason, once you add the words “on fabric” to any art technique, I am suddenly interested . . . but of course you can also use hand carved stamps on paper, and even clay!  My aunt Barb taught me to make stamps, she uses hers to make beautiful collage-type art, in her handmade books (where I found this design which she let me use in an earlier post), and in her pottery work.  We talked about a feature of her art to go along with this how-to, but it’s a busy season for both of us, so we’ll save that to look forward to later.


For today, how to carve a stamp!  You will need a tool called a linoleum cutter (seen in the second picture), which you can get at most art stores, and some kind of block to carve.  Lately I’ve used two kinds, pink stuff called “Speedy-Carve” from Speedball, which I got at the chain art and crap store here, and brown “Eco Karve Printing Plate” from Inovart (made of recycled material!), which I ordered from Blick along with the paint.  The pink kind is a little softer, slightly easier to carve, and much easier to see to see your pencil designs on because of the lighter color.  It’s a little thin for bigger stamps, which can get floppy if you don’t attach them to anything.  I liked carving and printing with the brown stuff, and it’s thicker, and easier to see what you have carved out than the pink, but it can be hard to see your transfer design on the darker surface.  When I started making stamps we used a whitish carving block, which as far as I can tell from the scraps was also made by Speedball.  It’s not my favorite, little bits of it can crumble away while you’re carving, where you’d rather they didn’t (you can kind of see this in the inside corners of the star stamp).  In any case, you can probably find a material near you to try it out.

Now that you have your materials, you need a design.  I have been into five-petaled flower designs lately, and I liked the artwork on the posters for the cherry blossom festival we saw in DC earlier this year, so I decided on a cherry blossom stamp.  You can draw on the rubber carving stuff, but I find it easier to draw on paper and transfer the design.  It’s easier to erase your mistakes or start over, and the design when you stamp it will be the same as you drew it, instead of a mirror image (because it’s flipped once when you transfer it and again when you stamp).

It helps to use a soft pencil and make thick lines.  You can get a fair amount of detail in your stamps, but don’t go crazy with fine lines for the first one you make!  Once you have a design you like, flip the paper over onto the carving block, hold it still, and rub it with something hard and flattish, like a spoon or a bone folder, to transfer the design onto the rubber.  You’ll get more out of your carving blocks if you place the design on a corner instead of right in the middle.


Time to carve it out!  I think it’s easier to cut out the section of rubber around your design with a razor knife before you carve it.

The idea is to cut out everything that you don’t want to print, from around the design that you do.

Loosen the head of the linoleum cutter and put the smallest carving tip (sharp side goes out – watch out, it’s sharp!) in the curved slot that opens on one side of the ball as you loosen.  The previous sentence probably makes zero sense unless you are looking at the tool, but that’s Ok.  Start carving; each one of the tips for this tool acts like a sharp scoop, use them point or scoop down to carve out pieces of rubber that you don’t want.  I like to start with the smallest tip and go carefully around the edges of the design, it helps keep me from accidentally slicing through it with the bigger cutters.

Cut away from inside corners to both sides.  It’s helpful to turn the block, as well as the tool, while carving around curves.

Once you get the design outlined, switch to the larger V shape tip, and use it to cut around your outlines, making a deeper channel.  Then, use the scoop to carve out large sections that you don’t need.  Cut away from your design at a steep slope on the edges of your stamp, to keep them from printing.  Then go back with the smallest V tip and clean up any leftovers.  You can see this process progressing clockwise around my flower stamp above.

Try out your stamp with an ink pad and paper, you’ll get to see how it’s coming out, and any areas you don’t like will be helpfully colored with ink, so you can see where to carve them off.  Some little bits of messiness are part of the charm of a handmade stamp, but you can decide how much of that you want.


You can carve just about anything into a stamp!  I made the one above while hanging out with a friend, to stamp on the re-used boxes and envelopes that I send orders in (it also appeared on KP’s blog as part of her recycle package challenge).


If you’d like to jump- start your handmade stamp collection, talktothesun on Etsy sells some great-looking ones (not my shop, I just like it)!

Have a question?  A stamp carving tip? A material you like?  Leave it in the comments, I’d love to hear what you think!


Next time: use your stamps (and other stuff) to print on fabric.