Fire and Succotash


succotash 1


So here I am again!  And with a recipe as promised earlier.  I was holding onto this post until Bryan’s post on the Fires of Change blog went up, so that all of you not in Flagstaff could get an idea of what heck was absorbing all the energy around here in August/September … the post explains his thoughts and motivations for the new work, and even includes a making-of video with some footage shot by yours truly—ha!

And, how about some succotash?  I admit that we’re about done with fresh beans and corn here, but who knows what’s fresh where you all are … we actually snagged what’s probably the last fresh corn and black eyed peas of the season at the farmers’ market yesterday, so we may have one more variation on this in the coming week.  I snuck in these photos here and there over the past month or so.  It also includes my favorite tips for prepping fava beans—how I love them (I love the black eyes too, what is it about peas?).  Here’s to a last taste of summer for those of us in the northern half!
 

Shelling Fava beans:

Favas do take a little extra work, since you need to shell them twice, but I think the flavor is well worth it. Especially in the second shelling, this is one of those times when being efficient with your hand motions makes a big difference—the difference between a task that feels tedious and one that’s very doable.

Start some water to boil in a medium-size pot on the stove. Split the thick outer pods and pop out the beans. When the water is boiling, drop in the beans. Boil just until they all float, about a minute or two. Pour them into a colander, and either pour a little cold water over them, or just wait until they’re cool enough to handle.

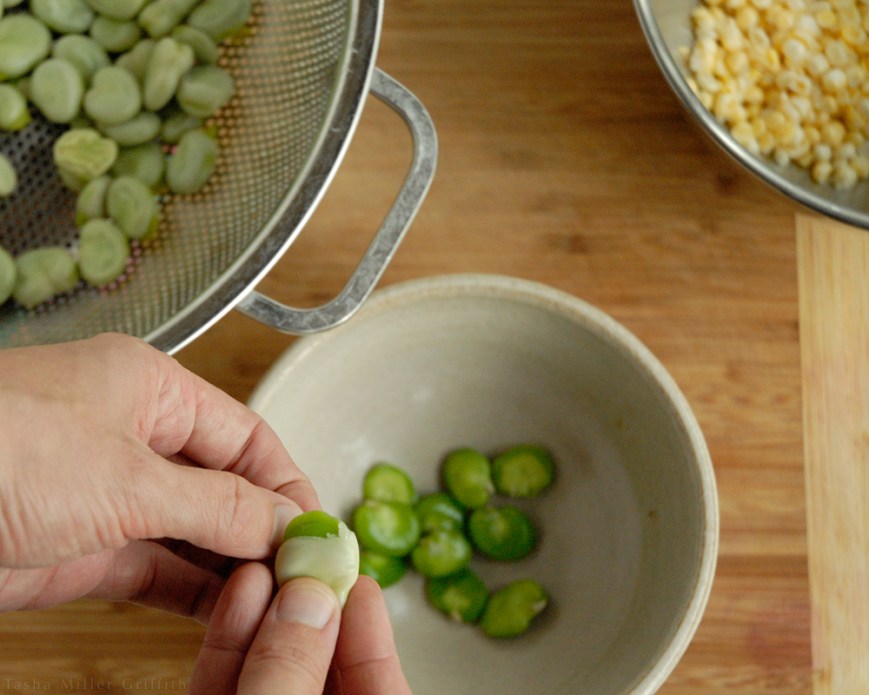
Boiling softens the inner shells covering the beans—they’ll be opaque whitish-green and leathery. They’re not very tasty as you can imagine, which is why we’re taking them off. My favorite way to do this is to use one hand to grab a bean, and hold it over a bowl to collect the shelled ones. Pinch a tear in the shell with the other hand, and use the first hand to squeeze the bean so it pops out of the shell and into the bowl. Reach for a new bean with the first hand at the same time the other hand drops the shell into a compost/discard pile. Repeat.


succotash 2


A quick note on cutting corn off the cob (as long as we’re talking about prepping veggies): any time I try standing the corn up and cutting off the kernels on a flat surface, it makes a humongous mess, which only makes me like this task less. Lately I’ve been holding the corn cob over a big bowl (with fingers as far towards the bottom of the cob as possible) and slicing off the kernels with a knife across the top. I know it looks like I’m about to cut my finger off, but I haven’t come close to that so far …


succotash 3


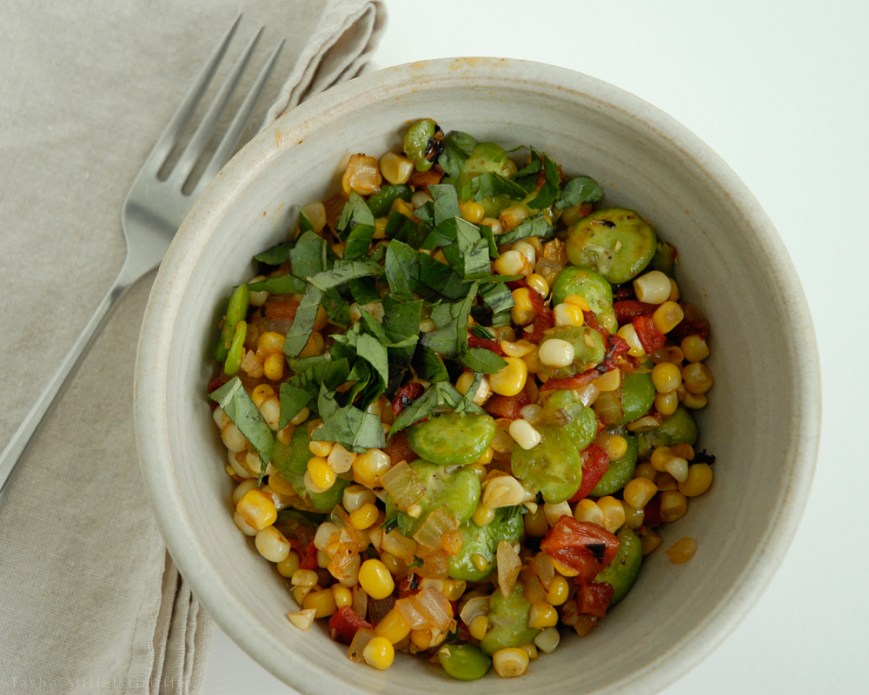
Fava Bean or Fresh Pea Succotash

Fittingly, this is mainly Bryan’s recipe. He made various iterations of it last summer, after we ate something similar at Riffs (highly recommended when in Boulder, CO). This makes a generous portion for two, or a side for more.

Prep 2 lbs unshelled fava beans (see note above). You can also use fresh shelling peas, starting with about 1 lb unshelled. Shell them and then steam briefly, until just bright green, before adding.  I would treat fresh black eyed peas the same way as green shelling peas, except they won’t turn green when you steam them, so taste to see when they’re just barely tender.  Lima beans, or any other favorite kind, would also be delicious here. You want to end up with between 1 and 1 ½ cups of beans/peas, depending on the balance you like. I like more beans.

Cut kernels off 3-4 ears of corn, to yield about 2 cups.

Melt 2 Tablespoons butter in a skillet over medium heat. It seems like a lot, but the buttery, slightly salty flavor here is key to offset the sweetness of the corn and make a really lovely contrast.

Sauté ½ of a yellow onion, diced, in the butter until it’s translucent and starting to brown.

Add 2 cloves of minced garlic.

Then add 2 chopped roasted red peppers, either sweet or slightly spicy.

Sauté for a couple of minutes, then push all this to the sides of the skillet, and add the beans or peas to the middle. Cook until they’re barely tender. Stir everything together, and then push to sides again.

Turn up the heat to high, and add the corn to the middle of the skillet. Leave it alone there for a couple of minutes while you sprinkle 2 teaspooons of fresh herbs on top—we like mainly thyme, but you can use a little sage or oregano as well.

Ideally the corn will get slightly browned, but in any case taste it and when it’s barely done, turn off the heat, stir everything together. Sprinkle with salt (we use unsalted butter and about ¼ teaspoon salt) pepper, and smoked paprika if you have it for a little smoky/spicy flavor. Taste for seasoning.

Top with shredded fresh basil, and enjoy while still warm!
 

succotash 4
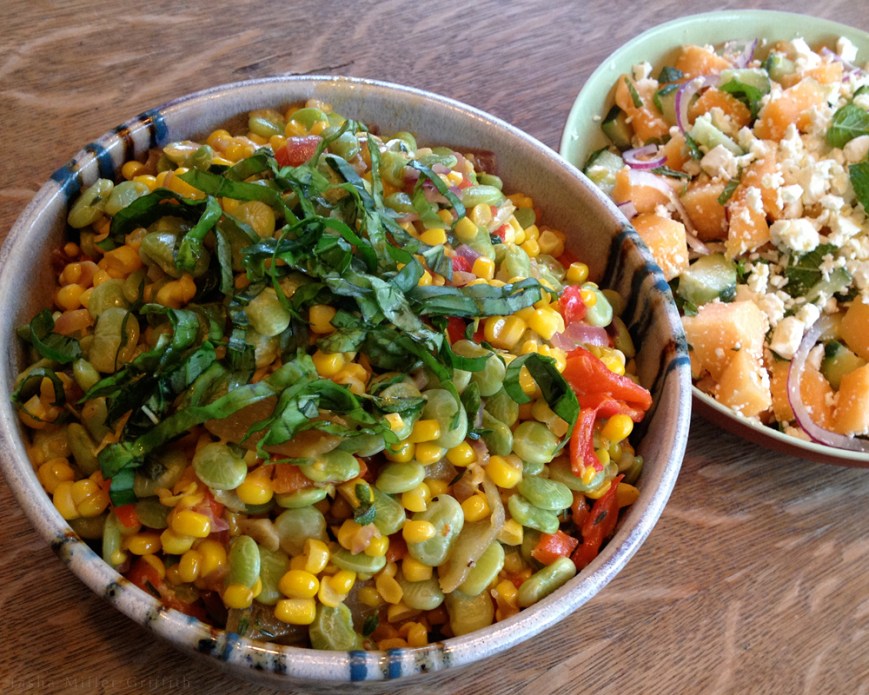
Succotash in the wild with another summer favorite, any variation on the (water)melon and feta salad from Plenty.

 

Peachy


peachy pie 2


It’s been a crazy few weeks around here.  Bryan has been finishing up a HUGE project for an art exhibition opening shortly—huge in physical scale, and in time invested, etc.  It took over his life, and then started to encroach on mine too.  Many things I’d been planning to work on got put to the back burner, until finally near the install date I was doing nothing besides helping get ready, unless the other thing had an already-agreed-upon-in-writing due date, and even then not too much was happening.

I’ve been cooking a lot though.  It’s the kind of situation where logically it would make sense to just make a big pot of soup and eat it for the whole week.  But, it’s my absolute favorite time of year for eating.  All the ingredients for ratatouille are sitting there, fresh and glowing, at the growers’ market, and it would be make me feel much more deprived not to cook them and eat them.  And it turns out, not surprisingly, when I’m not spending my creative energy on other projects, I end up experimenting more with food and making up recipes.  And, when Bryan is burning lots of extra calories working on huge sculptures all day, he’s more excited about having dessert, and any time I’m stressed I definitely want dessert.  Any two weeks in which we ate two of these pies can’t be that bad.

Although things evolve and change, and I’ve been excited to have so much fiber stuff to share lately, I wouldn’t want recipes to disappear entirely from this space, so here you go.  I’ll be back soon with a little more about the sculpture project & the exhibition (which is really pretty cool) and maybe even one more recipe.  But for now:


Weekday Peach Pie with Nut Crust

(adapted from various bits of the Joy of Cooking)

This isn’t a humongous Southern-Sunday-dinner peach pie, but instead one you can make if you just grab a few extra peaches at the market.  Pecans are my favorite for this crust, which is the same one I use for pumpkin pie in the fall, and just happens to be gluten free.  You can use other nuts that grow near you and/or you like, and it should work fine.

Preheat the oven to 375° F

Peach filling—put all this in a bowl:

1 1/2 lbs peaches (weighed whole), cut into 1/4″ thick slices.  (Freestone peaches are much easier to slice.)

1/4 cup sugar if your peaches are ripe and juicy, maybe a tablespoon or two more if they are firm and tart.

1 1/2 Tablespoons quick-cooking tapioca or cornstarch for thickening.  I ground the tapioca in a spice grinder to get finer grains, which I think I read about in an Alice Waters cookbook.

1 Tablespoon fresh lemon juice.

1/4 teaspoon almond extract (optional but I like it).

A small pinch of salt.

Stir up the filling and let it sit while you make the crust:

You can either put all these ingredients in the bowl of a food processor and pulse together, or grind the nuts first and then mix everything by hand.  Either way, don’t chop the nuts super fine, or the crust won’t have a lot of structure, a texture like coarse crumbs is good.

2 cups pecans (or walnuts, almonds etc.) chopped, see note above.

4 Tablespoons butter (especially if you’re making it in the food processor, it’s important to soften the butter first, otherwise you’ll end up with chunks of unmixed butter).

3 Tablespoons sugar

1/4 teaspoon salt

Butter a pie pan well, and pour in the mixed crust in it.  Use your fingers to press the crust over the bottom and up the sides of the pan, getting it reasonably even if you can.

Prebake the crust in the preheated oven for 10 to 15 minutes, until it starts to brown.  The edges of this crust are apt to burn, so cover them with a pie shield or strips of aluminum foil first.  If the sides of the crust start to sag or the bottom gets too puffy, you can push them back in place with the back of a spoon.

While the crust bakes, beat 1 egg (the smallest egg you can find) with just a tiny bit of water, until well beaten.

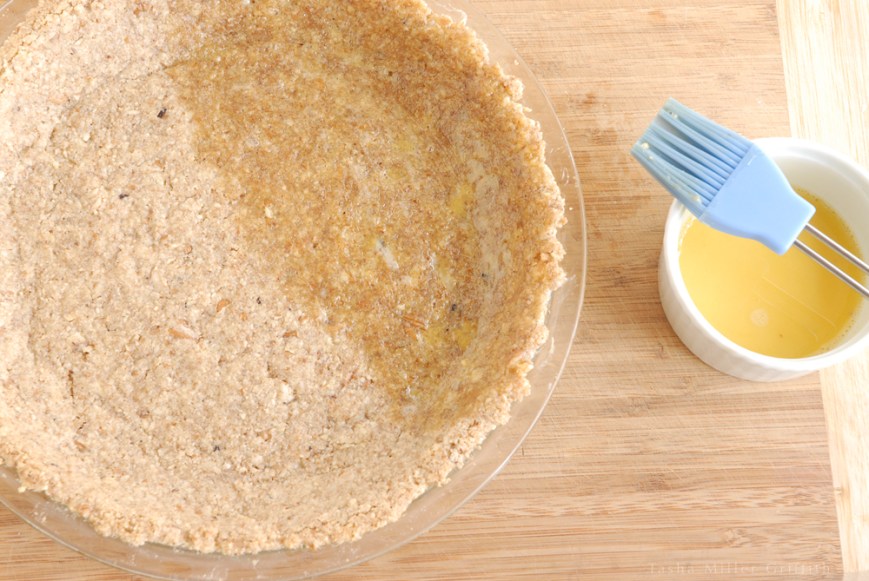
When the crust is warm and starting to brown, take it out of the oven and glaze it with the beaten egg. This is the key to putting a moist filling in the nut crust without getting a soggy crust!  Use a pastry brush to apply a thin layer of egg wash all over the inside surface of the crust, up over the sides, etc.  The egg will want to slide down, but just keep brushing it up, until the warm crust starts to absorb it and hold it in place.


peachy pie 3


Put the egg-washed crust back in the oven for just a couple of minutes, until the egg is cooked and shiny.

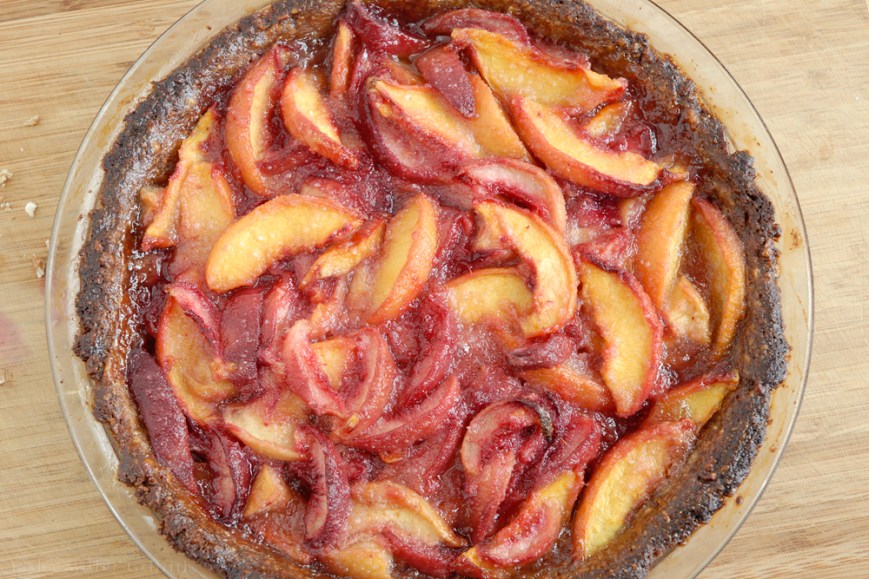
Then pour in the peach filling.  Cover the edges of the crust again, and put the whole pie back into the oven until the juices of the filling are thick and bubbly, about 45 minutes.  No matter what you do, the edges of the crust will probably get a “bold” baked color (as the bread makers say). If it goes all the way to burnt, just scrape off the very top.  This crust is really simple and delicious, so it’s totally worth it.

Here’s to a weekday-peach-pie kind of week …


peachy pie 1


Celery Root and Apple Soup


celery root soup


Celery root is one of those vegetables that just looks intimidating.  Covered in dirt, all-over-knobbly, seems like it’s been underground for about a hundred years … but underneath all that, it’s surprisingly easy to slice and really delicious, with a subtle nutty flavor.  I discovered it last winter, when I started making this soup, and a lentil and celery root dish from Plenty * that’s really good (also how I discovered that “celeriac” is British English for “celery root” and therefore I could get what Ottolenghi describes as “probably my favorite root” in my own home town!)

This is originally a Deborah Madison recipe, and I love how thoughtful she is about both using up all the veggies, and using your time wisely.  The root trimmings go into a stock, which cooks as you get everything else ready.  This time of year, I’m waiting for spring, and ready to eat something new (or at least new-to-me).  Want to come on a new vegetable adventure?


Celery Root and Apple Soup

Adapted from Vegetable Soups from Deborah Madison’s Kitchen

Get out your vegetable brush, and go to town on:

1 1/2 pounds celery root

Thickly peel it, with a knife.  You’ll be able to see the boundary between the outer and inner layers.  Throw any pieces that are too deeply rutted or full of tiny roots to be clean into the compost.  Put the clean peelings into a stock pot (use a smaller pot here if you can, you’ll need a bigger one to start the soup in) along with:

1 cup chopped leek greens OR a few slices of onion

1 chopped carrot

1 chopped celery stalk

1 bay leaf

3 sprigs of fresh parsley (if you have it)

Pinch of fresh thyme

Pinch of salt

Cover all this with 6 cups of water, bring it to a boil, and then let simmer for 25 minutes.


celery root chopping


Meanwhile,chop:

The peeled celery root

1 onion OR 2 fat leeks

1 cup celery

1 apple, thinly sliced.  I like to use a Pink Lady, either a small one or half a large.  I really like the flavor, but too much can make the soup a little too sweet.  Or you can follow the original directions and use a more tart apple.

1/2 cup potato

Melt in the big soup pot:

2 Tablespoons butter

Add all the soup vegetables, plus another pinch of salt.  Cook over medium for about 10 minutes, stirring occasionally, then add:

1/2 cup water

Cook on low until the stock is done.  Pour the stock through a strainer into the soup, and simmer for about 20 more minutes, until the vegetables are soft.  Let cool and then puree the soup to the texture you like.

A splash of cream is good in the soup when it’s done.

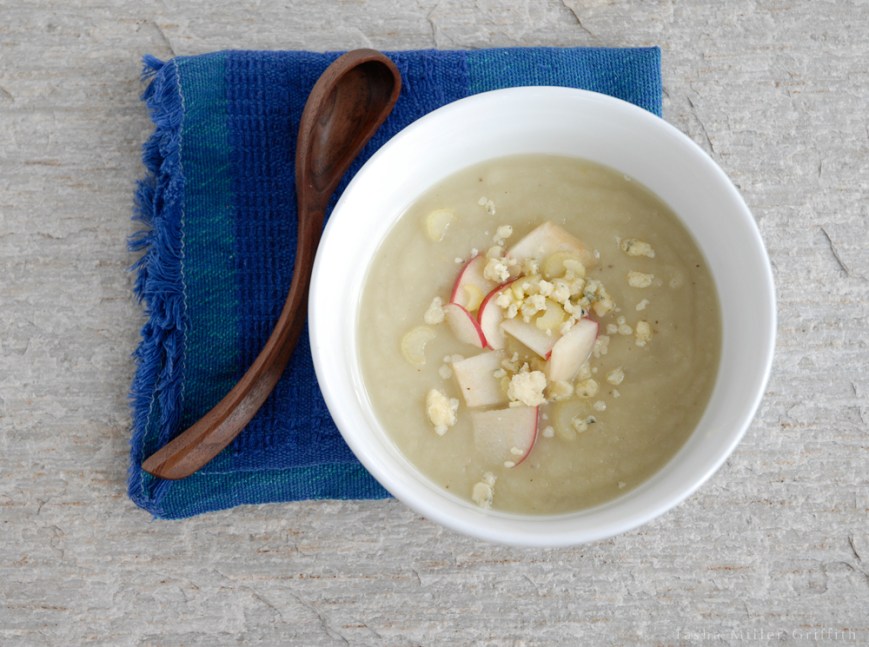
Reheat gently, taste for seasoning, and serve with:

Very thinly sliced celery heart

Very thinly sliced apple, and

A little crumbled blue cheese on top.

Don’t skip the toppings, they really make this soup special.

* You can also read this recipe on his website.  The main variation I like is to saute the chopped celery root in some butter/olive oil instead of boiling it.  It comes out golden and tender and super yummy.

What about you, tried any new vegetables lately? Have any favorite late-winter recipes? (If you’re reading from the Southern Hemisphere right now, I’m jealous …)


Pistachio Pesto


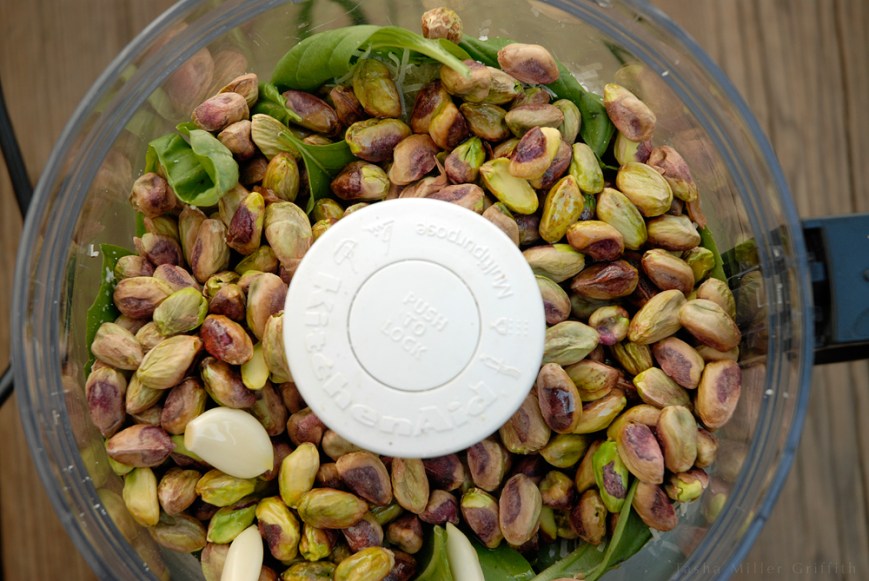
Apparently, it took me all the time since pine nuts were suddenly out of my price range (years!) until this year to figure out that pistachios are the pesto substitution nut to beat all others.  I’m amazed.  It’s so obvious once you taste it.


pistachio pesto 3


It also took me a little while (but not nearly as long) to nail down some quantities for this recipe.  I get in this funny mood sometimes when I’m cooking by taste, where I just want to, um, cook by taste.  Any attempt to quantify what’s going on feels like an unwelcome intrusion of thoughts that might be interfering with my creative process. It’s funny because I’m also a fairly obsessive note-taker.  I guess it’s just hard to take the notes at the same time I’m making the thing … in any case, I tried a few times, and finally got it close, I think.

The worst that could happen is that you’ll also need to make and eat a few batches to nail down the proportions you prefer … that’ll be terrible I’m sure.


pistachio pesto 1


Pistachio Pesto

Makes about 4 servings, enough for each person to have on top of ratatouille (which is fabulous!) or pasta.  Any leftovers are delicious just spread on bread.

I’m convinced that the food processor was invented by someone who needed to make big batches of pesto in a hurry.  It pretty much the perfect tool for this.  Combine in the bowl:

pistachio pesto 41 level cup shelled unsalted pistachios

1 1/2 cups very well packed basil leaves

1/2 cup grated Parmesan Reggiano 

2 large or 3 small garlic cloves

A generous drizzle of good quality extra virgin olive oil

A sprinkle of black pepper

Process until you get close to the texture you want.  Taste and adjust.  I usually end up adding a little more olive oil partway through, even though I prefer it slightly chunky and not too oily.  I find it salty enough from the cheese, but of course you can also add a little salt if you like.  I predict that if you try it, you’ll be converted, the taste is worth the shelling!


pistachio pesto 2


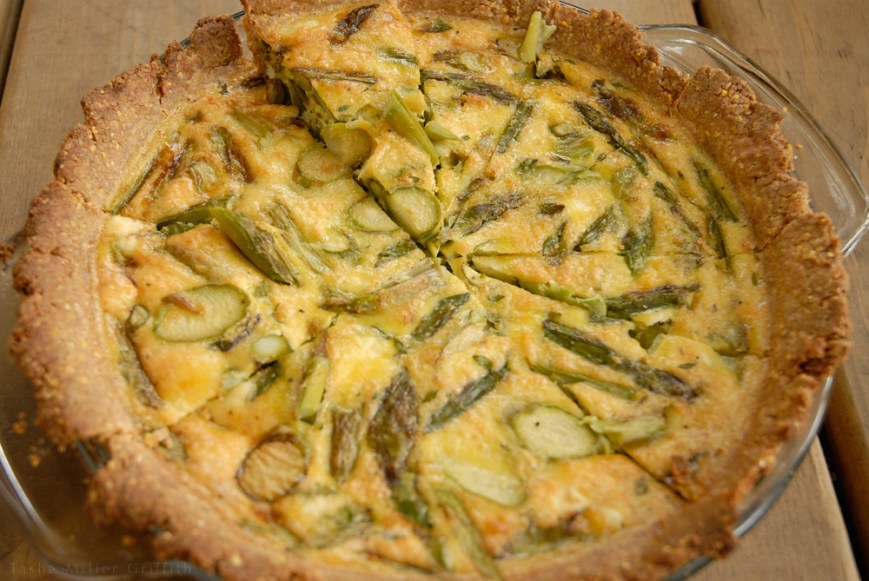
Asparagus Tarts for Spring and Early Summer


asparagus tart


Posting this recipe feels kind of, sort of, almost like cheating. It’s a variation on the savory tart/quiche recipe I’ve been using all the time since this past fall. With the late spring in the Midwest this year, there’s still a lot of asparagus around, and I’d have a hard time thinking of anything easier and more satisfying to do with it than this. I made the tart shown here with about a pound of asparagus, and some fresh thyme. A week or so later, I made another one for a new friend who’s eating gluten free, without the crust, with slightly less asparagus, and adding some leftover potatoes and onions. This really is one of those recipes (my favorite kind) that encourage experimentation and new flavor combinations.


Asparagus Tart Variations


Refer to the original recipe for the cornmeal crust, if making a crust, and more filling ideas.

For the asparagus, either broil it lightly first for more smoky flavor, or simply wash, and chop it into approximately equal diagonal segments, discarding any tough or dried out ends.

Optional: prepare potatoes as for the potato and green chile tart, or use any other leftover cooked potatoes you happen to have around.


For the Filling:

4 eggs

A generous splash heavy cream or milk

A few Tablespoons grated cheese (I like a hard cheese such as Parmesan)

Fresh ground pepper

(Salt is optional, depending on your taste, and saltiness of cheese)

Fresh thyme or other fresh herbs to taste (Tip: if the stems are sturdy enough, you can get most of the thyme leaves off by grabbing the stem near the top and running the fingers of the other hand down the stem from top to bottom.)

Feel free to add an extra egg, and a little more of the other ingredients, if it seems like there’s not enough filling for the veggies you have.

If not using a crust, make sure to grease your pan thoroughly.

Mix the cut asparagus (and potatoes) in with the filling, and pour into the pan/crust. For the second variation, I sprinkled the top with minced garlic and more Parmesan, which puffed and browned as the tart cooked for a tasty crispy top.

Bake at 375° F for about 40 minutes, turning once, until the tart is golden on top, puffed up, and just moist inside when tested with a knife.


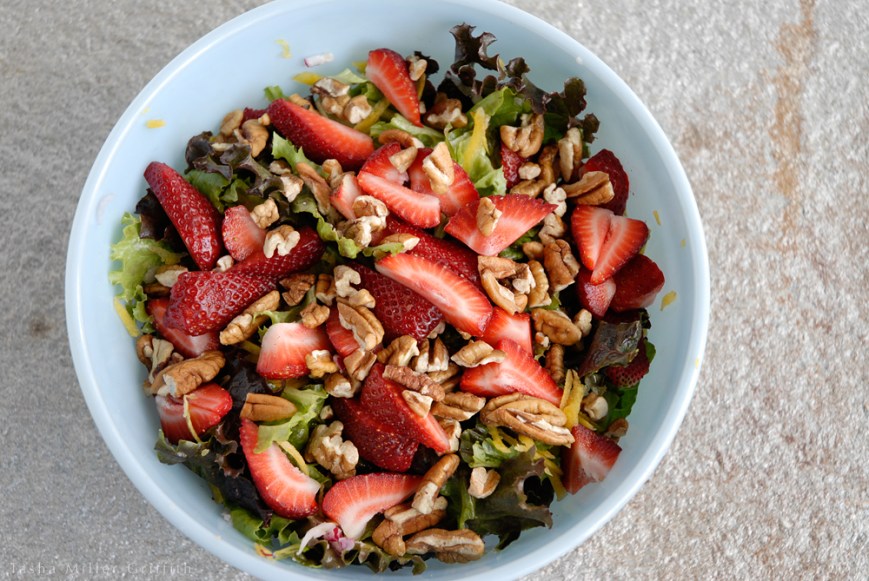
Spring Strawberry Salad

With maple candied walnuts and creamy goat cheese balsamic dressing.


spring strawberry salad 1


For some reason, this spring I’ve been craving the fresh new foods that come with the changing season, much more than I normally do.  The strawberries in my yard are nowhere near making fruit yet, but a few weeks ago, the strawberries in the market were suddenly glorious.  A strawberry out of season tastes Ok, but when they’re actually ready, ripe and fully red, full of sweet juice that seems composed of the very flavor of renewal and new growth, they are magical things to eat.  I was immediately obsessed.  Another good thing about food in season is that it’s bountiful, and therefore on sale, and I pretty much stuffed as many fresh ripe organic strawberries into my gullet as possible.  I also came up with this recipe, the first one in a while that I’ve invented without looking anything up or searching for ideas.  So:


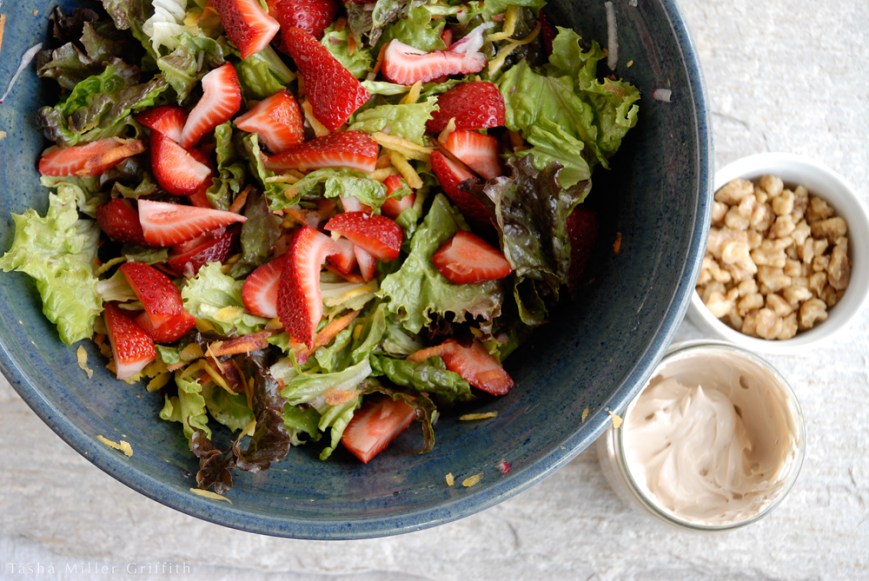
For the salad:

Lightly shred about a handful of lettuce (I like red leaf or butter lettuce) per person.

Add 1 small or 1/2 large grated carrot per person.

Add grated radish, about half as much as the carrot.

Add sliced strawberries, as many as you like, I suggest a lot.


spring strawberry salad 2For the dressing:

Put about 4 Tablespoons of plain fresh goat cheese in a jar.

Add heavy cream up to about the top of the cheese.

Add 1 Tablespoon good quality balsamic vinegar.

Add a pinch of salt, and stir together (a small whisk is great for this).

Add a little water, stir, and add a little more, until the dressing reaches the consistency you’d like.  Taste and adjust seasonings.

This makes a fair amount of dressing, enough for about 6 people to have salad, and maybe find some other things to spread it on.


For the walnuts:

Lightly crush 1 cup of walnuts (I just do this with my hands).

In a skillet, melt about 1 Tablespoon butter over medium heat.

Add two teaspoons of maple syrup, one teaspoon of brown sugar, and a large pinch of salt.  Stir until the sugar is dissolved, and then add the walnuts.  Stir until most of the coating is on the nuts rather than the skillet.  Let cool.

If you run out of time, this is also good with un-candied walnuts or pecans, although these lightly candied ones add a really nice touch.


Sprinkle the nuts on top of the salad, and let each person add the creamy dressing as it’s served.


spring strawberry salad 3


Now, if only I can find some fresh peas …


Recipe Sketch: About a Million Ways to Make Orange Marmalade


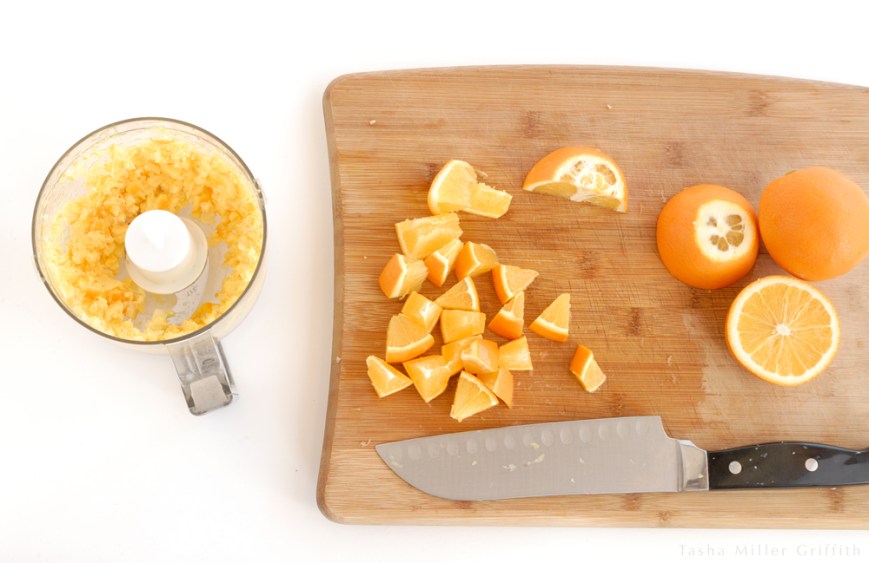
thick marmalade chopping


Remember when I posted about how to make French toast, and the “failed” orange sauce I had tried making to go with it?  Well, it wasn’t that bad in the end.   In fact, at least a few of my friends really liked it.  Ever since then, I’ve been thinking about different approaches to marmalade, and how that sauce, which seemed like it was going to be a total waste of time and effort, did actually come together, and with a little more time and effort, become something good.  Here I send out a silent (yet public—interesting) prayer to the universe that I will one day say the same about all the things which that sauce represented to me on the first of this year.


Anyway, orange marmalade:

It’s really just a combination of orange peels, juice, and sugar (and usually pectin to thicken it for canning).  My New Year’s orange spread had all of the pith inside the peel, and all of the membrane around the orange slices, still in it too.  I just washed & sliced the oranges (discarding the ends), pulled out the center strings of pithy stuff, chopped the slices to get out the seeds, and put them in the food processor.   I added the juice of a couple more oranges, and some sugar to the pot, and started boiling it on the stove.  For a while, it seemed like a kind of bitter, barely cooked orange goo … and eventually I realized that I was going to have to add a lot more liquid, and a lot more cooking time, and some more sugar.  All the pithy parts of the orange needed to absorb a LOT of liquid in order to cook down, more than I wanted to juice oranges for, so I started adding water.  After that, all it needed was time—a couple of hours of simmering on the stove.  Check on it periodically, adding more water and sugar to taste as necessary, until all the parts of the orange are tender enough to eat on toast, and the sauce tastes as sweet as you want.  The result has a full, whole-orange flavor—some of the bitterness remains, but you get lots of other flavor elements as well.  At the time, I didn’t feel like taking a picture of the finished whole-orange sauce, but it comes out mostly opaque and pale orange, with darker bits of peel mixed in.

I’ve made a quick kumquat marmalade using a similar method.  Kumquats have a lot of seeds, so be sure to chop them in quarters and check each one for seeds before putting them in the food processor.  They don’t have very much pith or membrane at all though, so you can cook them fairly quickly into some tasty preserves.  Just add juice and sugar and boil them on the stove until you get the consistency you want.

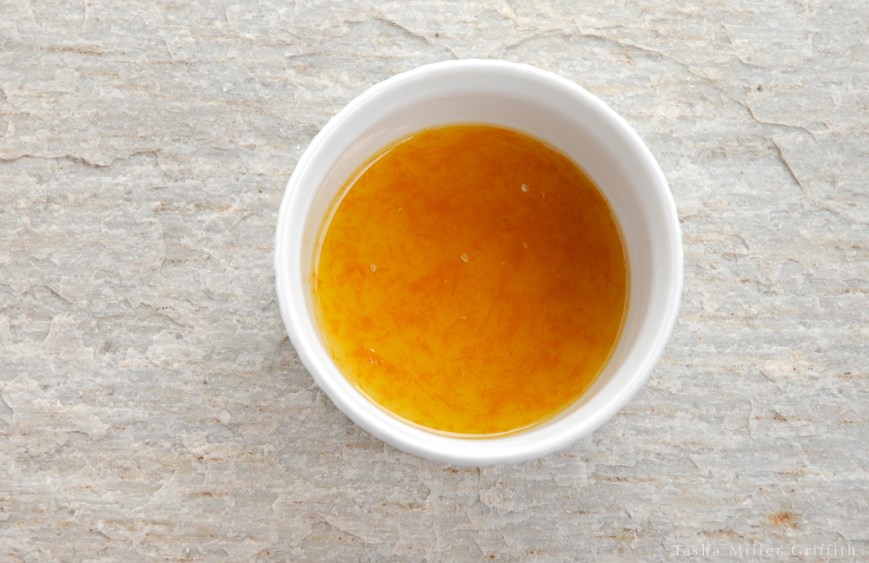
On the other end of the cooked-orange-peel-and-juice spectrum from the whole orange spread is a quick thin sauce we made quite a lot a couple of years ago, because it’s awesome on crêpe.  It’s mostly orange juice, with just the thin outer peel grated into it.  Save a little fresh juice, and put the rest in a small saucepan with the peel.  Add sugar to taste as you go, and boil until it thickens somewhat.  Add the reserved juice back in when the sauce is done, it brings the brightness of fresh orange to blend with the more mellow cooked flavors.


thin marmalade finished


And of course, you could use other citrus.  You could blend them.  You could add honey, or a different juice, or another sweetener you like.  You could cook it thick or thin, add pectin, can it, freeze it … At first I was going to wait to post this until I had tried a few more variations, maybe one somewhere in between these in terms of how much pith is in it.  But the more I thought about it, the more ideas for different marmalade I thought of, and it seemed pretty silly not to just put this idea out there and let you all do whatever you want with it.  It might be a fun way to wait for spring.


How to Make French Toast—and Happy New Year

With variations, tips and tricks to customize your own perfect French toast recipe.


french toast in skillet


It took me long enough, right?  (Can you believe it’s been almost two years?  Yeah, me neither.)  For a blog with this name, which features recipes, the lack of actual directions for making French toast was getting a little ridiculous.  Here’s the thing, I didn’t want to post just a recipe for French toast, that seemed silly, everyone already knows how to make French toast, right?  Instead I would put together some marvelous, unheard-of combination of toppings and put that in a post, with the actual French toast just included almost as a by-the-way, here’s how I make it.

I started off yesterday morning with just such a plan, to make a seasonal orange-based sauce.  I wasn’t going to tell you this next part, but it now seems important: it did not go well.  In fact, it reminded me specifically of the part of the year just passed that I would very much NOT like to repeat in the year to come: me trying very hard for a goal which I (perhaps) have somehow misjudged in one or more ways, expending a lot of time and energy but not quite getting where I’d like to go.

I like to think I’m not superstitious, but at first, this seemed like the most inauspicious possible sign for January 1.  Then, as it rolled around in my brain a little more, I started to think that maybe the failed orange sauce (it came out ok after all) was a cautionary tale, and if I took it the right way, I could use it to steer away from the process I don’t want, and towards the one I do.


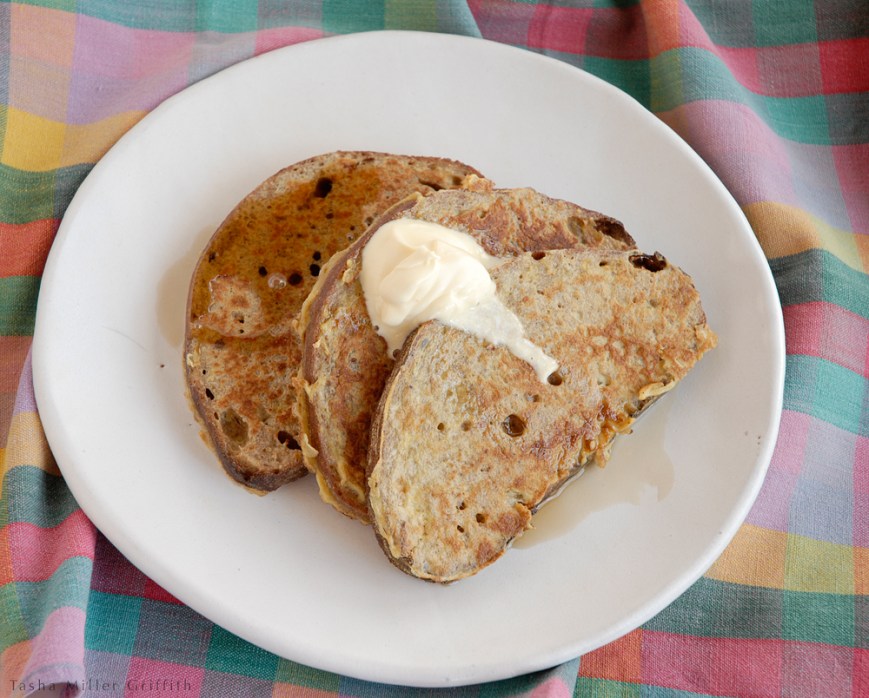
french toast on plate


I started thinking; maybe just French toast is enough.  Of course not everyone already knows how to make it.  Especially since I have some tips and ideas to get you started with your own never-before-seen, awesome variations.  After all, this space is supposed to be about empowering you to make things, and not about me showing off, even though I love sharing the things I make here.

In 2014, I’d like to be more grounded, less hectic.  I still have a million dreams of every kind, so many things that I’d love to do.  But my journey towards them might not be about reaching as far as I possibly can in one grasp, or frantically trying to fit as much as I possibly can into every single day.  Maybe it will be more about doing one little bit at a time, and even about recognizing and sharing the good bits I already have right in front of me.

Happy New Year, friends!  May it be a good one for all.


How to Make French Toast


First, and most importantly, you need bread.  You can use any kind, and it’s not just a metaphor, or part of the 6 words I chose to describe my life, it really is the best possible use for bread that’s staler than you’d like to eat it.  Brioche, or banana bread, or any other thing that’s called a “bread” and maybe borders on dessert, will make amazing, Ann-Sather-worthy French toast.  I’ve used my homemade bread for our most recent versions.  As always, a quality bread (or any ingredient) will lend even more layers of subtle delicious flavor to the toast (or any finished dish), but it also may be a tastier use for a less-than-stellar bread than eating it alone.  How much batter the bread will soak up varies wildly depending on the type of bread and how dry it is, etc.

Next, you need some egg and stuff to soak the toast in.  I like it to be mainly egg, because I do not like the inside of the bread to be soggy when it’s done.  I like to whisk up the egg etc. in a glass dish with a flat bottom rather than in a bowl, so I can put a few pieces of bread in to soak at a time, and not be left with a little well of liquid at the bottom that the bread can’t reach.  For about 6 pieces of bread (again, this varies a LOT depending on your bread, but you can always add a little more to the pan) I use:

3 eggs, whisked up well with:

1/4 cup milk (it’s Ok to substitute non-dairy milk here)

A pinch of salt

A larger pinch of sugar

Next, add some flavorings to the egg mixture—whatever your heart desires.  A generous sprinkle of cinnamon, a pinch of ginger and a pinch of cloves is a good way to start, especially in winter.  A splash of liqueur is good—for an especially luxurious version, substitute a generous splash of cream for the milk, and add the lost liquid back in by way of brandy or rum etc.  Vanilla extract is good (but probably choose it or liqueur), or try another extract, maybe paired with a spice or two, for a unique flavor.  I especially like to compliment whatever I’m planning to put on top with a bit of something in the batter, but keep it fairly subtle.

french toast soakingSoak the toast in the batter for a few minutes, then flip the slices over, and let them soak for another couple minutes.

To cook the toast, heat up a heavy skillet over medium heat and melt some butter in it, maybe 1/2 Tablespoon butter for four slices (in my little skillet I used less).  The toast should sizzle when it hits the pan, and the egg batter should start to set up right away.  It only takes a few minutes to get lovely brown spots on the bottom side, at which point flip the toast over.  You may need to add a little more butter between batches.

If not all of the toast is done at once, you can keep it warm on plates in the oven at 200° F, until you’re ready to serve it.

For toppings, really, the sky is the limit.  It’s—ahem—delicious with just real maple syrup and homemade crème fraîche.  A little orange zest (or even iffy orange sauce) is really good with this basic setup.  Practically any fresh seasonal fruit is amazing on French toast, strawberries in spring are particularly wonderful.  Any jam you have is good.  Coarsely chopped toasted nuts are great (bread with nuts in it would also be great as base).  Melted butter, fruit syrup, whipped cream . . .

Some of my favorite flavor combinations may yet appear as time goes on.  Please share yours as well!


Pear Crisp with Cardamom

In which I also resolve to illustrate some posts for this blog.


pears 1


Every fall, it’s the pears that get me over my disappointment at the end of the stone fruit season, and convince me that everything’s going to be Ok.  I like to wait until they’re really ripe to eat them (at least most of the common kinds), ripe enough to slide a knife in one clean curve down the stem and around the seeds, with pear juice forming instantly on the cut surfaces.  That first bite of juicy ambrosial pear, that’s what convinces me that maybe I’ll get along with autumn alright after all.

I was hoping to have a recipe, not a just a short soliloquy, about pears for you, and I do!  It turns out that two of the dear friends we visited in the Northwest at the end of the summer have a copy of The Art of Simple Food by Alice Waters, and so I spent a little time pouring through that book looking for various ideas.  I’m really starting to admire the way she looks at the simplicity of cooking.  In the second household there was also a huge bowl of free pears from a colleague’s tree, and the inspired idea to combine pears and cardamom (thanks Becca!), so here you go.


Pear Crisp with Cardamom

Adapted from The Art of Simple Food by Alice Waters


Slice 7 cups/4 lbs of fairly ripe pears (they don’t have to be as ripe as I like them for eating)

Toss the pears in a bowl with:

1  1/2 Tablespoons flour (can be white or wheat or gluten-free alternative, it’s just for thickening the juice)

Zest of 1 (organic) lemon

About 1 Tablespoon lemon juice


Pour the pears into a baking dish and make the crisp topping in the bowl:

Toast 2/3 cup walnuts in the oven at 375° F for about 10 minutes, until golden brown (set a timer!  I’m so bad at that, I burn things more often than I’d like to admit).  While they are toasting, mix in the bowl:

1  1/4 cups flour (again use what you like, gluten is not required to hold the crisp together.  I used a mixture of white and whole wheat flour)

6 Tablespoons brown sugar

1  1/2 Tablespoons turbinado sugar

1/4 teaspoon salt

About 1/4 teaspoon crushed cardamom seeds (if you have whole green pods, crush the pods lightly with the flat of a knife if necessary, pull the pods open, and extract the seeds.  Grind just the seeds in a mortar and pestle or with a spice grinder.  Fairly coarse ground is fine.)

Chop the walnuts and add them to the above mixture.  Mix well, and then cut in 1 stick (8 Tablespoons) of butter (cut into pieces), using your fingers or a pastry blender, just until the mixture comes together and has a texture like big crumbs.

Sprinkle the topping over the pears, and bake at 375° for about 50 minutes, rotating once for even baking.  When done, the crisp topping should be golden brown, and the fruit should be juicy and bubbling down in the dish.


pears 2


About the illustrations: I know I need to keep up my drawing skills, and I’d even like to practice enough to keep improving.  Since finishing Hello Sewing Machine, I haven’t had too much incentive to draw (other than little sketches like these, which I still make all the time).  I thought if I made it a goal to illustrate at least one post a month, I would be sure to get practice drawing.  I kind of forgot that I would also get practice scanning drawings and working in Photoshop . . . but it’s also practice I need.  I’m more of an illustrator than an artist, and more used to trying to make things clear than to capturing 3-D fruit in all it’s glory.  And I need to find some smoother paper . . . but one little bit at a time, right?

Good luck with your fall goals, whatever they are!  (And eat some pears!)


Blueberry Picking, Blueberry Pie


blueberry picking 1


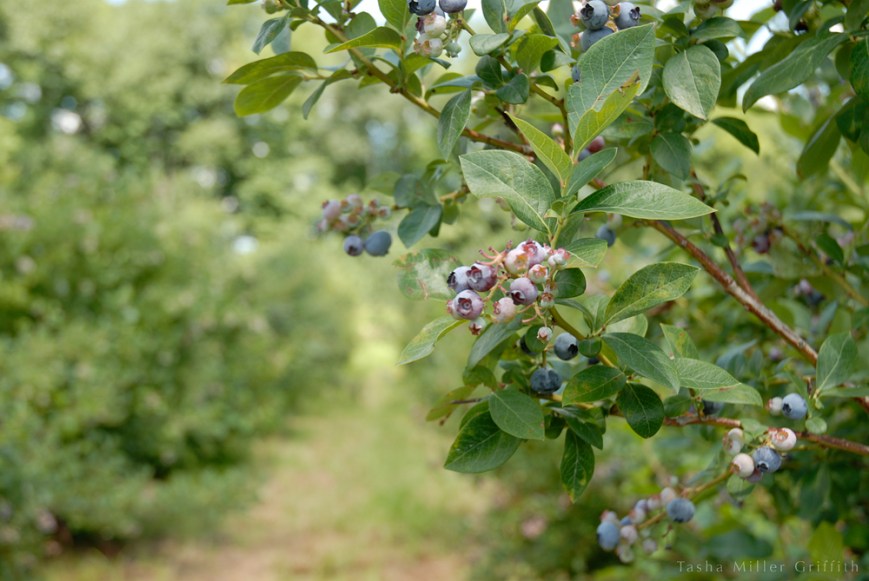
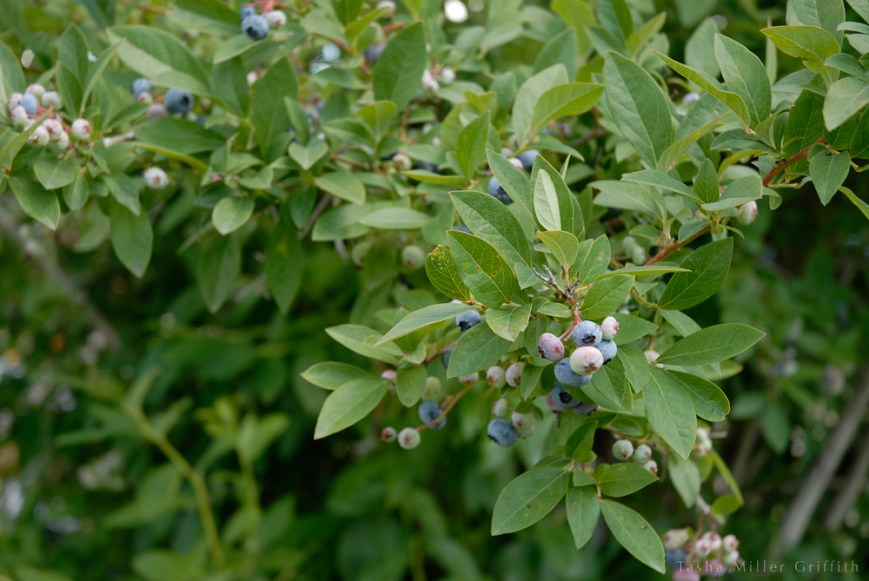
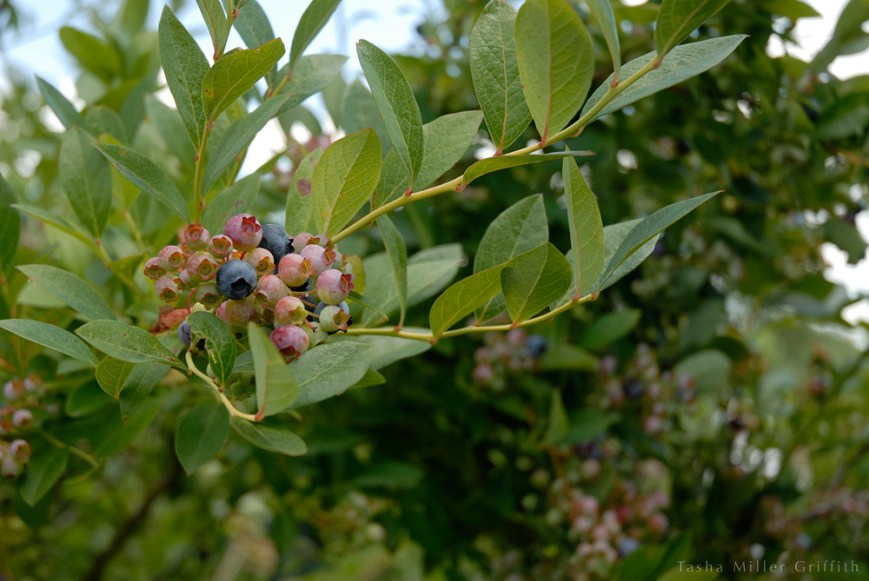
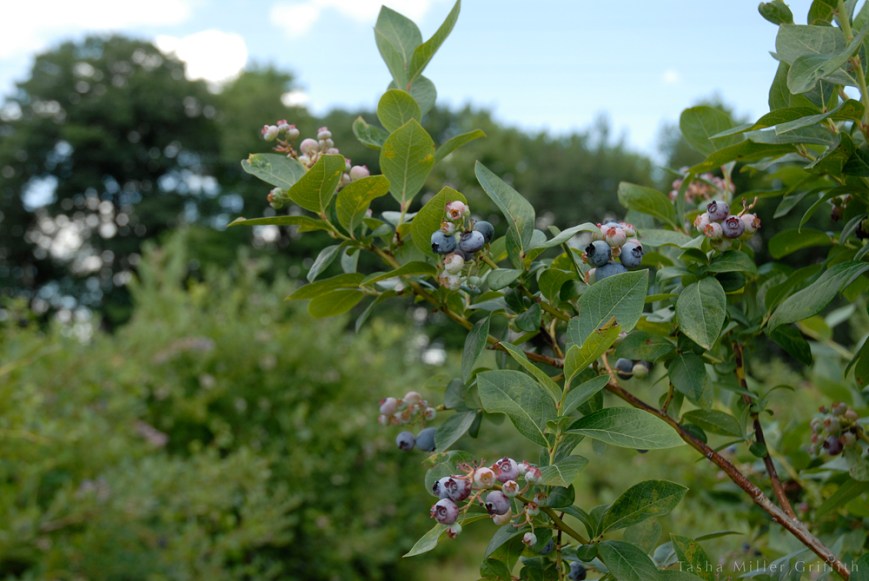
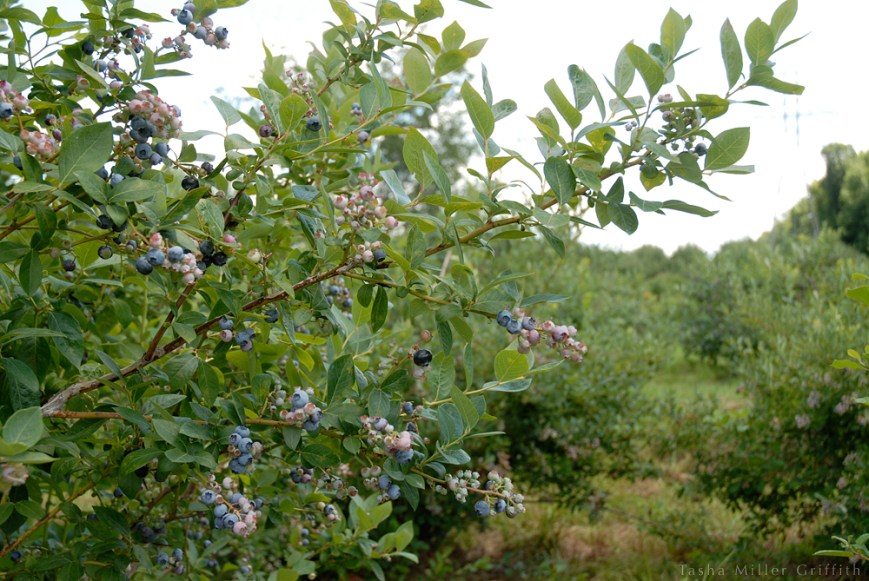
I want to get this out there while there are still blueberries on the bushes.  A couple of weeks ago, we went blueberry picking with my husband’s father, sister, and our two little nieces, at Versluis Orchards near Grand Rapids, MI.  The pictures pretty much tell the rest of the story.  The blueberries were gorgeous, as well as delicious, and I found myself picking like mad, but leaving some of the most photogenic branches until the clouds cooperated for good lighting.  At which point I’d grab my camera, and (with a pang for the blueberries not filling my bucket during the moments of shooting) do my best to capture the lovely morsels, in all their shades from translucent green to lavender blue.  Then I’d force myself to grab the ripest ones from the shot and drop them in the bucket.


blueberry picking 2


blueberry picking 3


blueberry picking 4


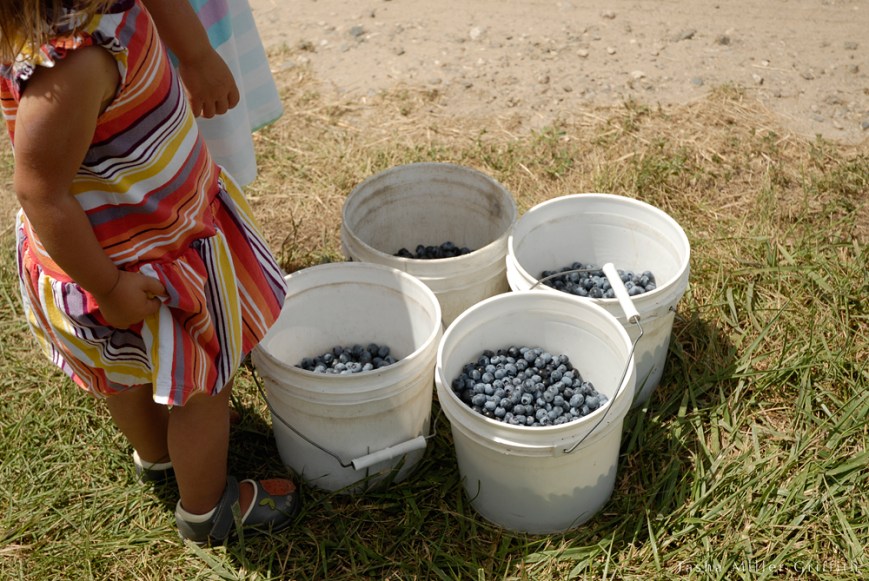
Even with two youngsters in tow, we managed to pick a LOT of berries, about 10 pounds between us all.  They were astoundingly cheap compared to what you would pay at the grocery store, or even at a farm stand.  By way of something to think about, I’ll point out that these berries weren’t organic, although they were about as local to our location at the time as you could get.  And totally scrumptious.  There was a good essay on The Yellow House last week about how it’s not as simple as just choosing something labeled “local” or “organic,” and I agree 100%, although I think that either of those, especially local, are a great place to start.  My next step may be to ask more questions of the farmers, find out what are their thoughts about their practices.  I’m pretty shy by nature, but I’ll try to make that happen.


blueberry picking buckets


Anyway, there are so many good recipes out there that have blueberries in them (as the older niece pointed out) that it seems almost needless to include one here, but I will anyway.  It’s pretty simple, even if you don’t make pie often and/or have little ones sticking their fingers in your crust, it will turn out fine.  The five of us adults handily polished off the whole pie after dinner . . . it can’t have been that bad.


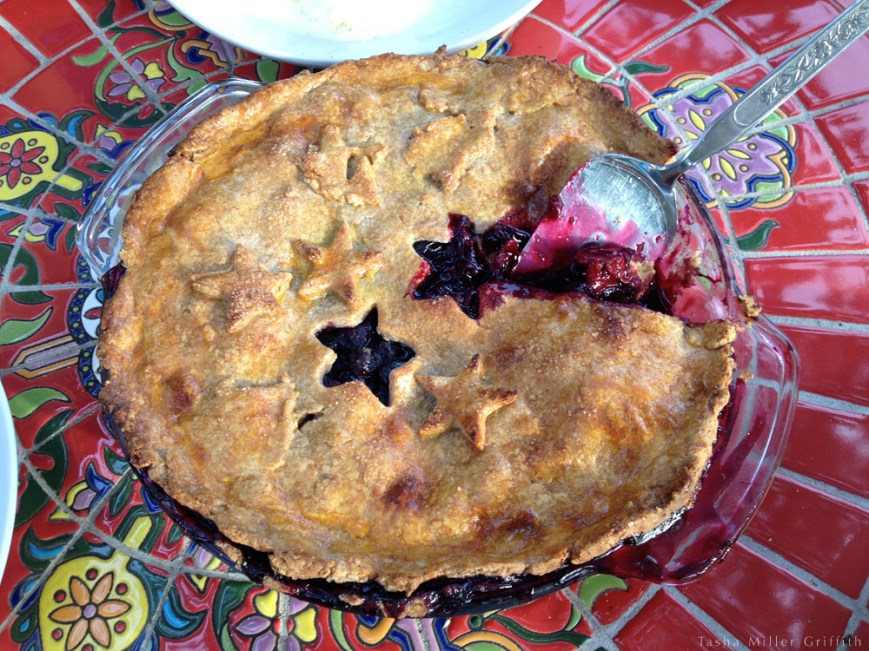
blueberry pie


Blueberry Pie

(adapted from The Joy of Cooking)


For the crust:

You’ll need 2 1/4 cups of flour.  You can vary the percentage of whole wheat flour up to 100%, which is my personal favorite.  Since there were kids who might eat this pie too, I used 1 cup whole wheat, 1 1/4 white flour.

Put the flour in a bowl and add 1 tsp salt and 1 tsp sugar

Take 1 stick unsalted butter, cold from the fridge.  Cut it into pieces of about 1 tablespoon each.  You want to mix it into the flour so that tiny chunks of butter remain throughout the dough, without letting it melt or blend into the flour too much.  If you have a pastry blender, use it.  If not, my still-favorite method, especially if it’s not too hot in the kitchen, is to use my fingers to break up the butter into the four.  You can also use two knives, I have never gotten the hang of this, but one of my aunts is really good at it.  In any case, when you’re done, there should be some pea-sized chunks, as well as some dough with the texture of coarse cornmeal.

Put some ice and water into one of the measuring cups you’ve already used, and pour a little bit if it onto the butter and flour.  Start with just a few tablespoons, and mix it gently in.  You want just enough water that the dough will form a tidy ball and not look too dry.  Mix in just a little more ice water at a time until it looks good to you.  How much you need varies with the humidity, the kind of flour you use, etc.  When the dough is moist enough, divide it into two pieces, roughly round-shaped, and either cover the bowl or transfer the dough to an air-tight container.  Put it in the fridge to rest for about 1/2 hour.


In the meantime, place a rack below the center of the oven, preheat the oven to 400° F, and make the filling:

Rinse 5 heaping cups of blueberries.  A good method to separate any debris from the berries is to put them in a bowl, fill it with water, and stir until the debris floats to the top and you can pour it off.

Pour off all the water, and add to the bowl with the berries:

3/4 cup sugar (I like turbinado or natural sugar, a hint of brown sugar flavor is really nice with the berries)

3 Tablespoons cornstarch

1 Tablespoon lemon juice (you can add some lemon zest as well if your lemon isn’t sprayed and waxed)

Mix all this together and let stand for about 15 minutes.

Roll out one half of the crust into as good a circle shape as you manage, about 1/4 inch thick.  Put that half into an 9-inch pie pan, pressing it against the bottom and sides.  Use any pieces that stick out over the edge to patch any holes or gaps around the edges.

Roll out the second half of the crust.  For fun, instead of cutting a vent for steam, you can cut out shapes with a small cookie cutter before you put the crust on, and use the cut out shapes to decorate your pie (I got this lovely idea from my friend Megan years ago—thank you!).

Pour the filling into the bottom crust, put the top crust over it, and pinch the two crusts together around the edges.  Again, you can use any overhanging bits to patch holes.

To get your cookie cutter shapes to stick, and also to give your crust a little bit more deliciousness, you can glaze the crust with 1 egg yolk whisked with a little water.  If you can’t foresee using the egg white for anything (throwing it into an omelet, pancake batter, etc.) you can use the whole egg, the egg wash will be thicker.  Anyway, brush the egg wash all over the top crust with a pastry brush.  Stick your extra cookie cutter shapes on top, and brush more glaze over them.  Sprinkle a bit of sugar (the large crystal kind is nice, but regular granulated sugar works fine) on the glaze to give the crust a little more sparkle for your eyes and your mouth.

Bake the pie at 400° for 30 minutes.  Put a cookie sheet underneath to catch bubbling juice, lower the temperature to 350° and bake for another 20 to 30 minutes, until thick juices are bubbling through the holes and the crust is a warm brown all over, and darker in places.  If the crust starts to get too brown before the pie is done, you can try covering the whole thing or just the edges with aluminum foil.

Do you have a favorite blueberry recipe?  I’d love to know!


blueberry picking 5