So here I am again! And with a recipe as promised earlier. I was holding onto this post until Bryan’s post on the Fires of Change blog went up, so that all of you not in Flagstaff could get an idea of what heck was absorbing all the energy around here in August/September … the post explains his thoughts and motivations for the new work, and even includes a making-of video with some footage shot by yours truly—ha!
And, how about some succotash? I admit that we’re about done with fresh beans and corn here, but who knows what’s fresh where you all are … we actually snagged what’s probably the last fresh corn and black eyed peas of the season at the farmers’ market yesterday, so we may have one more variation on this in the coming week. I snuck in these photos here and there over the past month or so. It also includes my favorite tips for prepping fava beans—how I love them (I love the black eyes too, what is it about peas?). Here’s to a last taste of summer for those of us in the northern half!
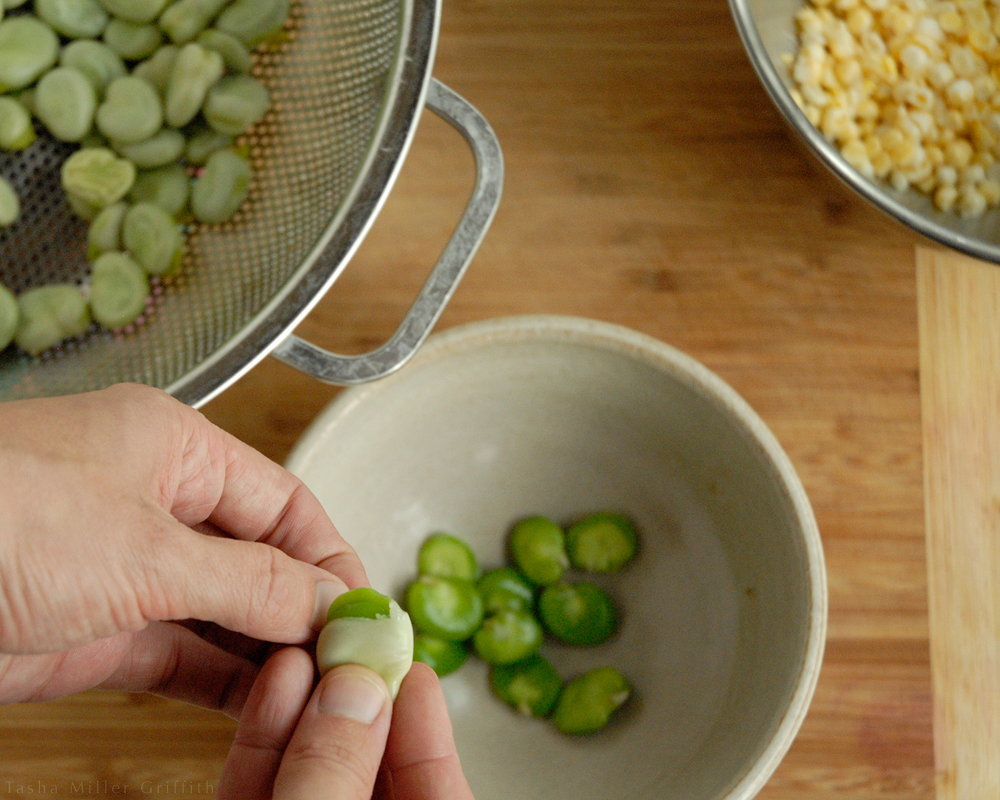
Shelling Fava beans:
Favas do take a little extra work, since you need to shell them twice, but I think the flavor is well worth it. Especially in the second shelling, this is one of those times when being efficient with your hand motions makes a big difference—the difference between a task that feels tedious and one that’s very doable.
Start some water to boil in a medium-size pot on the stove. Split the thick outer pods and pop out the beans. When the water is boiling, drop in the beans. Boil just until they all float, about a minute or two. Pour them into a colander, and either pour a little cold water over them, or just wait until they’re cool enough to handle.
Boiling softens the inner shells covering the beans—they’ll be opaque whitish-green and leathery. They’re not very tasty as you can imagine, which is why we’re taking them off. My favorite way to do this is to use one hand to grab a bean, and hold it over a bowl to collect the shelled ones. Pinch a tear in the shell with the other hand, and use the first hand to squeeze the bean so it pops out of the shell and into the bowl. Reach for a new bean with the first hand at the same time the other hand drops the shell into a compost/discard pile. Repeat.
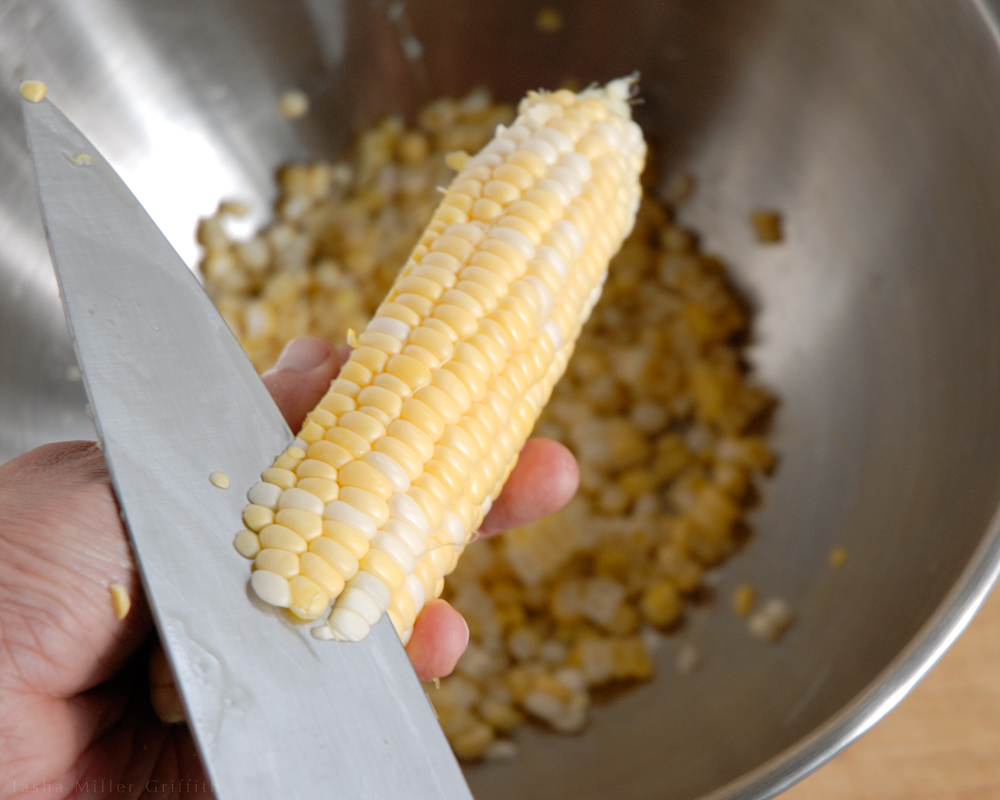
A quick note on cutting corn off the cob (as long as we’re talking about prepping veggies): any time I try standing the corn up and cutting off the kernels on a flat surface, it makes a humongous mess, which only makes me like this task less. Lately I’ve been holding the corn cob over a big bowl (with fingers as far towards the bottom of the cob as possible) and slicing off the kernels with a knife across the top. I know it looks like I’m about to cut my finger off, but I haven’t come close to that so far …
Fava Bean or Fresh Pea Succotash
Fittingly, this is mainly Bryan’s recipe. He made various iterations of it last summer, after we ate something similar at Riffs (highly recommended when in Boulder, CO). This makes a generous portion for two, or a side for more.
Prep 2 lbs unshelled fava beans (see note above). You can also use fresh shelling peas, starting with about 1 lb unshelled. Shell them and then steam briefly, until just bright green, before adding. I would treat fresh black eyed peas the same way as green shelling peas, except they won’t turn green when you steam them, so taste to see when they’re just barely tender. Lima beans, or any other favorite kind, would also be delicious here. You want to end up with between 1 and 1 ½ cups of beans/peas, depending on the balance you like. I like more beans.
Cut kernels off 3-4 ears of corn, to yield about 2 cups.
Melt 2 Tablespoons butter in a skillet over medium heat. It seems like a lot, but the buttery, slightly salty flavor here is key to offset the sweetness of the corn and make a really lovely contrast.
Sauté ½ of a yellow onion, diced, in the butter until it’s translucent and starting to brown.
Add 2 cloves of minced garlic.
Then add 2 chopped roasted red peppers, either sweet or slightly spicy.
Sauté for a couple of minutes, then push all this to the sides of the skillet, and add the beans or peas to the middle. Cook until they’re barely tender. Stir everything together, and then push to sides again.
Turn up the heat to high, and add the corn to the middle of the skillet. Leave it alone there for a couple of minutes while you sprinkle 2 teaspooons of fresh herbs on top—we like mainly thyme, but you can use a little sage or oregano as well.
Ideally the corn will get slightly browned, but in any case taste it and when it’s barely done, turn off the heat, stir everything together. Sprinkle with salt (we use unsalted butter and about ¼ teaspoon salt) pepper, and smoked paprika if you have it for a little smoky/spicy flavor. Taste for seasoning.
Top with shredded fresh basil, and enjoy while still warm!

Succotash in the wild with another summer favorite, any variation on the (water)melon and feta salad from Plenty.