Pistachio Pesto


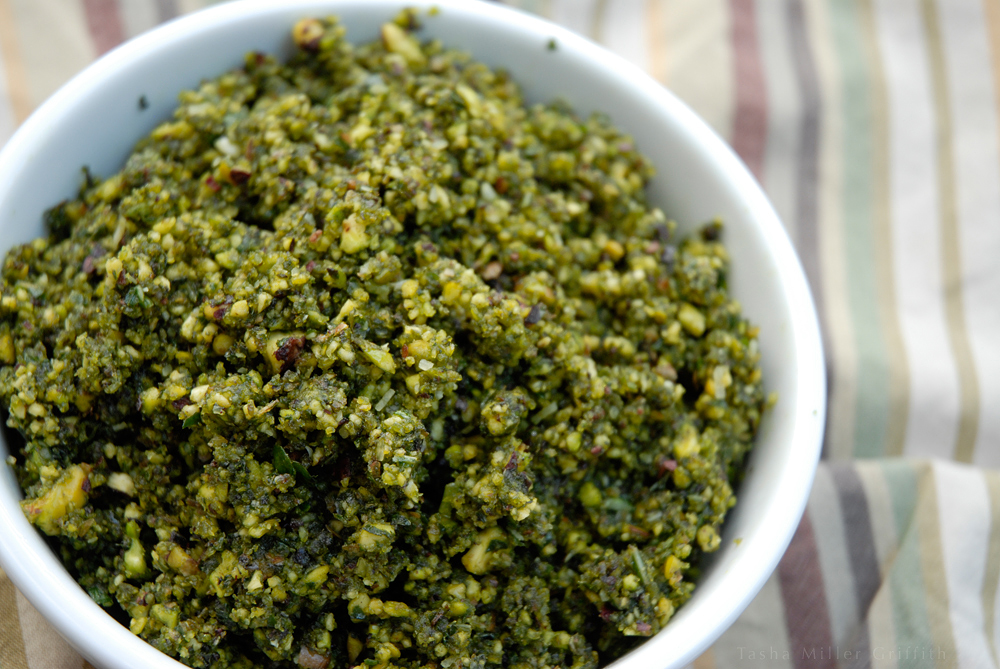
Apparently, it took me all the time since pine nuts were suddenly out of my price range (years!) until this year to figure out that pistachios are the pesto substitution nut to beat all others.  I’m amazed.  It’s so obvious once you taste it.


pistachio pesto 3


It also took me a little while (but not nearly as long) to nail down some quantities for this recipe.  I get in this funny mood sometimes when I’m cooking by taste, where I just want to, um, cook by taste.  Any attempt to quantify what’s going on feels like an unwelcome intrusion of thoughts that might be interfering with my creative process. It’s funny because I’m also a fairly obsessive note-taker.  I guess it’s just hard to take the notes at the same time I’m making the thing … in any case, I tried a few times, and finally got it close, I think.

The worst that could happen is that you’ll also need to make and eat a few batches to nail down the proportions you prefer … that’ll be terrible I’m sure.


pistachio pesto 1


Pistachio Pesto

Makes about 4 servings, enough for each person to have on top of ratatouille (which is fabulous!) or pasta.  Any leftovers are delicious just spread on bread.

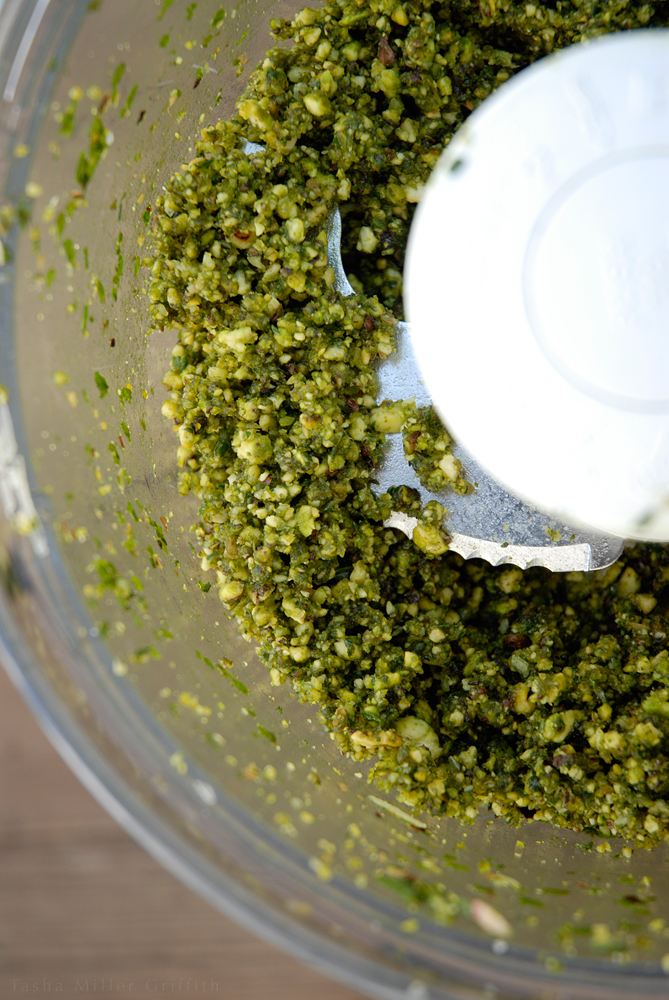
I’m convinced that the food processor was invented by someone who needed to make big batches of pesto in a hurry.  It pretty much the perfect tool for this.  Combine in the bowl:

pistachio pesto 41 level cup shelled unsalted pistachios

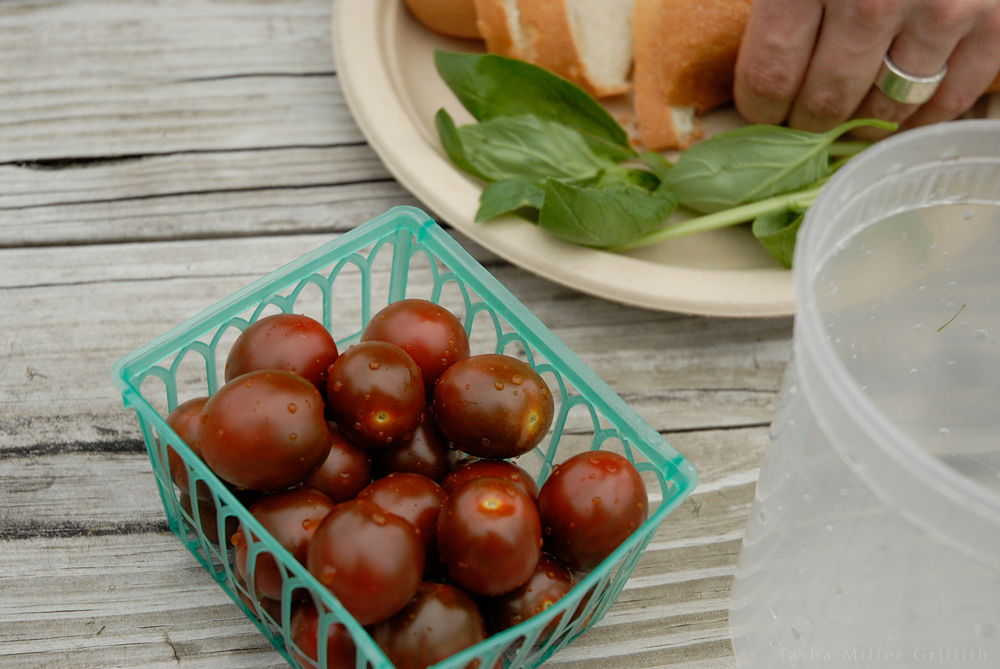
1 1/2 cups very well packed basil leaves

1/2 cup grated Parmesan Reggiano 

2 large or 3 small garlic cloves

A generous drizzle of good quality extra virgin olive oil

A sprinkle of black pepper

Process until you get close to the texture you want.  Taste and adjust.  I usually end up adding a little more olive oil partway through, even though I prefer it slightly chunky and not too oily.  I find it salty enough from the cheese, but of course you can also add a little salt if you like.  I predict that if you try it, you’ll be converted, the taste is worth the shelling!


pistachio pesto 2


Washing Fruit and Veggies on the Road


washed fruit in cooler


So, you’re driving along on a late-summer road trip, the farmers’ markets and road-side fruit stands are overflowing with beautiful produce, but you hesitate to buy a bunch of berries or tomatoes if you can’t figure out a way to wash them, right?  Here’s our solution.  All you need is a container (a tub that yogurt came in is perfect) and some water.  A cooler is optional. I’m not really sure why it took us so long to figure this out.  It works a lot better, and uses a lot less of our drinking water, than trying to pour water with one hand while somehow holding and scrubbing fruit with the other hand by the side of the road.  Even if you are on your way to a house or hotel where you could wash fruit, this has the advantage of letting you eat it right NOW, while you cruise along with the windows rolled down, or at your favorite picnic spot.

Put your produce in your little tub, and pour in enough water to cover it.  Swirl everything around with your fingers for a minute or so, and then hold the fruit back and pour the water off. If a lot of dirt comes off in the first round, or you just want to make sure it’s really clean, repeat.


tomatoes in tub of water


Then you can put the clean tub of fruit in your cooler, or on top of the parking brake between the seats for easy access.  If you’ve washed something like tomatoes that does better dry and room-temp than cold and wet, you can dump them out onto a towel, or use one of those little green plastic baskets to store them. If you knew how many picnic style meals we’ve eaten, consisting mainly or entirely of various versions of caprese sandwiches, you’d laugh out loud.


tomatoes in green basket 1


A couple more notes: basil does well in the cooler with the stems in the water, or in a sealed plastic bag with a little moisture inside (kind of like the cooler version of this method), but not if the leaves touch the ice (they’ll frost and turn black).  Thanks to Bryan for hand modeling, and for being as enthusiastic about fresh local edibles as I am.


tomatoes in green basket 2


Storing Herbs in the Fridge


Ok, one more thing related to our super haul from the last farmers’ market last week.  It’s also related to a big bag of assorted herbs that some visiting relatives left at our house this summer.  They were from the garden, and I made it my “herb challenge” to use every one, and in some cases to figure out what they were.  After having fresh oregano in pasta sauce, rosemary potatoes, lemongrass syrup for soda, and tarragon butter – the finale – I decided this was way too much fun to stop just because we got to the bottom of the bag, and I’ve been buying more fresh herbs ever since.  They just add such a punch of round, fresh flavor.

This tip for storing them is something we figured out last fall while visiting friends in Bend, OR.  You know how basil wilts in the fridge pretty much immediately?  Well, the farmer at one stall told us to try putting the stems in a jar with water in the refrigerator, which we did – and it wilted immediately, maybe even faster than in a bag.  I was telling this story to another farmer the next week and he said, “But, did you put a plastic bag over the top?”

Aha!  This works amazingly well, like some kind of magical super-cold greenhouse.  Put the bag loosely over the herbs, and then use a rubber band to keep it tight to the base of the jar.  For basil, I also trim the stems just a bit like I would cut flowers.  The basil in this picture is already a few days old, it will stay fresh for about a solid week.  The other herbs have so far all been eaten before they show signs of wilting.

Hope this inspires you to add some fresh herbs to your fridge!

Update: If your basil stems aren’t long enough for a jar of water, I’ve had good success keeping them sealed tight in a plastic bag in the fridge, with just a little moisture inside.  If it seems dry in the bag, I sprinkle in a little water and distribute it by gently mixing the leaves around, then seal the bag again.  This works in a cooler too, as long as the leaves don’t touch the ice.

Ratatouille


This time of year, at least where I live, the market is simply overflowing with fresh veggies.  While the fruits seem to come in a relatively orderly sequence, one replacing another, the vegetables apparently just multiply, more kinds, more flavors, more colors, every week until the frost.

So, a perfect time to make something delicious out of them!  Something full & rich with the flavors of all the late summer bounty.

Ratatouille

Makes enough to feed 4 as a main course

Chop into large chunks (see the next post):

2 medium summer squash; zucchini, crookneck, etc.

2 smallish bell peppers; red, orange, yellow or purple

1 medium yellow onion

4 small or two larger eggplants

1 mildly spicy chile (optional but really good) If your chile happens to be already roasted, add it with the tomatoes.  Otherwise, keep it with the peppers, squash and onion.

This many veggies will not fit in my largest skillet in anywhere close to a single layer, meaning I know they won’t all brown on the edges.  So, I put the chopped eggplant on a baking sheet and toss with a little olive oil, and roast it in the oven at 375° F until soft and slightly browned, about 30 minutes.

Meanwhile, chop the other veggies and put them in a large heavy skillet on high, with more olive oil, enough to keep them from sticking.  Stir occasionally, letting the surfaces of the vegetables get a nice medium brown.

While the veggies are cooking in the skillet, also chop:

4 -5 large tomatoes chopped roughly, or a little more than a pint of small ones cut in half

3-4 cloves of minced garlic

When the veggies in the skillet are just about browned, add the eggplant to them.  Make a clear space in the center of the skillet, add a drizzle of olive oil, and put the garlic in it.  When the garlic just starts to color, mix it in with the rest of the veggies, and add the tomatoes.  Turn the heat down and cook until the tomatoes start to collapse.

That’s it!  Serve with a generous portion of fresh basil (fresh oregano is also nice, although I like basil best), and a few grinds of black pepper on top.  You can salt to taste as well.


This recipe is delicious with risotto, or any cooked grain with a little cheese mixed in, or just with bread and cheese for lunch.


Recipe Sketch – Summer Tomato Bruschetta

About time for a post about food, don’t you think?

Although I haven’t had very many opportunities to cook on the road, we’re coming up on the part of summer where there is so much fresh lovely produce, it hardly needs actual cooking.  We found some local heirloom tomatoes last week in Maryland, although they are from the hothouse, they put me in mind of late summer bounty.

Bruschetta is one of those foods that doesn’t need much of a recipe, you can vary it infinitely to suit your taste and what’s available.  It’s also easy to present in a variety of ways; either everything mixed together to spoon on toast, or all the ingredients laid out for everyone to layer on their own.  If you are just learning to cook, it’s a wonderful way to experiment with mixing flavors and proportions.

Summer Tomato Bruschetta

I like the bulk of mine to be tomatoes, the fresher and more colorful the better.  Any size will work, bigger ones cut into smaller pieces will make the bruschetta more juicy than baby tomatoes cut in half.

I also like a lot, a lot of basil, it’s one of my all-time favorite favors.  When we rented in Madison I would get a few little basil plants at the farmers’ market in the spring and keep them going though the season.  If I’m mixing everything together, I stack the leaves, roll them up, and slice the roll into strips to sprinkle in.  If you are setting things out buffet-style, whole leaves are fine.

This is tasty with cheese, but don’t feel limited to mozzarella!  Try any kind you like, or what’s locally available where you are.  My favorite recent find was a goat cheese with the soft texture of brie.  I like not too much cheese, not to overwhelm the tomatoes, but of course you can vary it.  A soft cheese will blend more with the other ingredients, especially if you mix it all in a bowl.

A little olive oil, balsamic vinegar, salt and pepper will really bring the flavors together.  You can set them out if you are doing make-your-own, and drizzle them on top.


A feast so simple to make, you can enjoy it in your hotel room.

Here’s to the coming joys of summer!