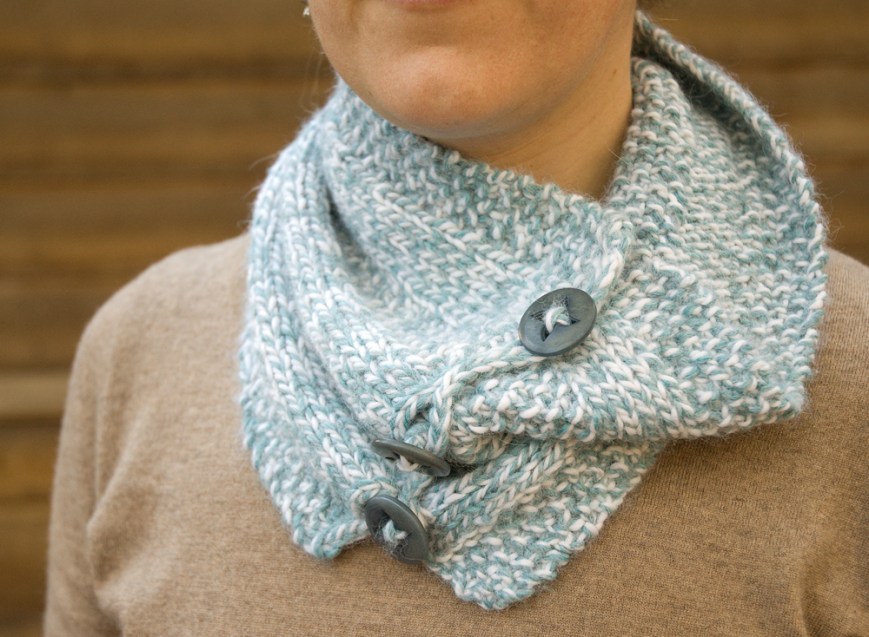
 When my cousin was about 12 years old, she knit me a scarf. I’m touched by this gesture every time I think about it. That’s a lot of time and effort to put into an object for someone else when you’re that young. The scarf (at left) is great, made from a colorful thick-and-thin yarn, but it’s kind of short. Then one day a couple of years ago I realized that if I added buttons and buttonholes to the ends, it could be a stylish cowl, and I’d probably wear it a lot more. Which I do.
Then I realized that a cowl like this, just a knitted rectangle with buttons added, would be a perfect second or third knitting project for my students. For when you can knit and purl, but maybe you’d like to make something besides a washcloth using your current skills, before moving on to knitting in the round and all that.
I made a sample one with some seed stitch columns added, and left it at the yarn store where I teach. One day not long ago I was over there, and the owner and one of the employees were telling me about how people ask for the pattern a lot. I was quite surprised. I agreed to write it out. Then I got to thinking, if I’m going to give this pattern to whoever comes into the shop, I’d like to give it to you guys too. So here you go:
Knitting 102 Cowl Pattern

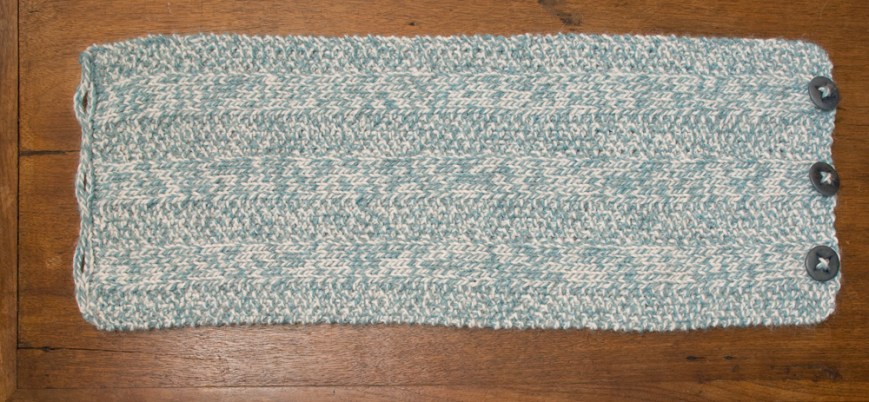
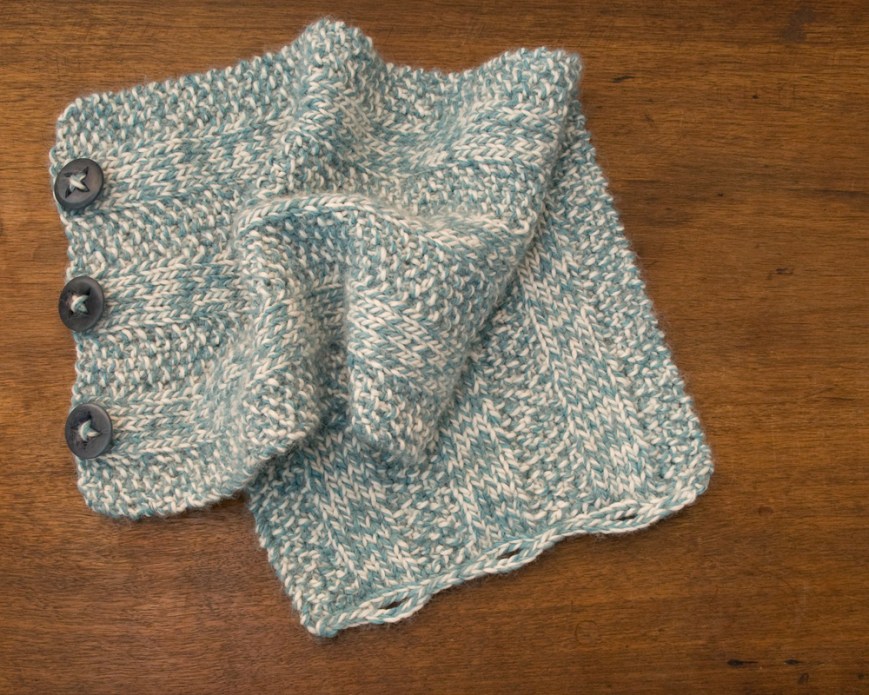
To make this cowl, you’ll knit a long rectangle, and then use a simple crochet stitch to make buttonholes on one end. Sew buttons on to the other end, and it’s ready to wear!
This concept is very adaptable. It’s easy to vary the yarn, stitch choices, and size to suit your own taste and knitting level.

Materials
Yarn: the sample is made in Cascade Baby Alpaca Chunky, a very soft yarn with a lot of drape and not much bounce. One skein is enough for a small cowl like this. The finished fabric hangs in liquid folds. If you’d like a cowl that will stand up more, choose a yarn with more body and spring.
Gauge: the finished sample has 4 stitches per inch in both stockinette and seed stitch. It’s OK if your gauge comes out a little bit differently, since exact size isn’t super important for this project. It’s still a good idea to make a swatch with your yarn and see if you like how the fabric is coming out, and measure your gauge to get an idea of how big your finished cowl will be.
Needles and Hook: try US size 8 (5mm) knitting needles, but keep in mind that you may need a larger or smaller needle to get the gauge you want (especially if you use a different yarn). You’ll also need a crochet hook in a similar size for the buttonhole loops. In my experience the hook size doesn’t need to be exactly the same for such a small section.
Finished size: the sample cowl is 8 ½“ wide and 22 ½” long. It fits fairly close around my neck, but is big enough to get over my head without undoing the buttons. You can compare the dimensions to any cowl you like to see if this seems like a good size for you.
Directions
Cast on 35 sts (or your stitches per inch x desired size in inches).
Other options: If you’re not quite ready for keeping track of the seed stitch columns, you can also make a perfectly good cowl using garter stitch (knit every stitch, every row) or using seed stitch across the whole piece. (A cowl made with all stockinette stitch—knit one whole row, purl one whole row—will curl up at the edges.)
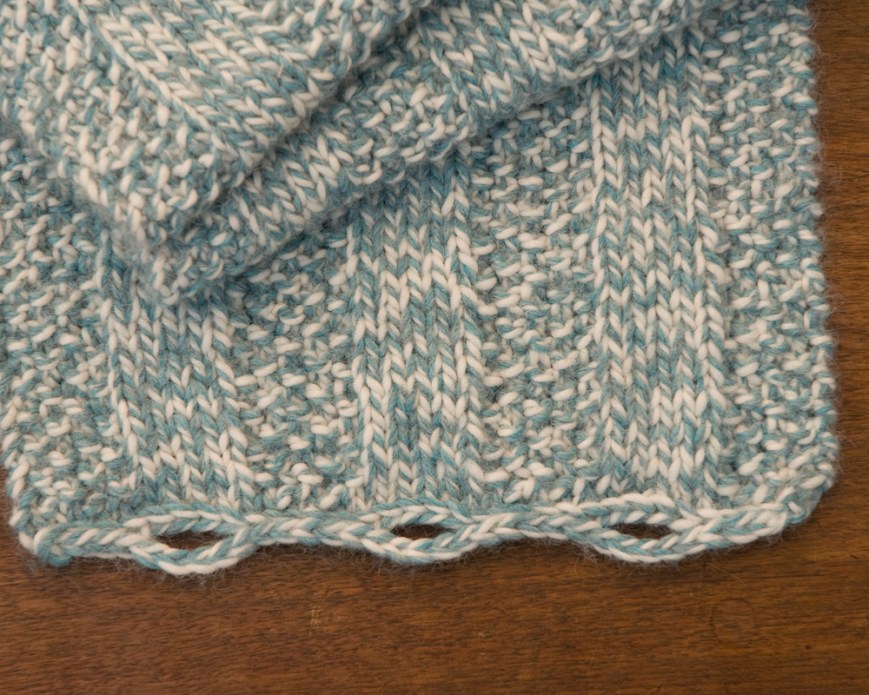
For the seed stitch pattern, you’ll need an odd number of columns of stitches. In the sample cowl, there are 7 columns of 5 stitches each. You can also vary the number of stitches in each column if that works better with your stitch count.
First row (right side): work in seed stitch for 5 stitches (knit 1, purl 1, knit 1, purl 1, knit 1), and then knit 5 stitches. Repeat this sequence of 10 stitches (2 columns) two more times, and end with 5 stitches of seed stitch.
Note: You may want to put a stitch marker around the needle between the sections to help remember when to switch patterns.
Second row (wrong side): work seed stitch for 5 stitches (knit 1, purl 1, knit 1, purl 1, knit 1), and then purl 5 stitches. Repeat this sequence of 10 stitches (2 columns) two more times, and end with 5 stitches of seed stitch.
Note: this seed stitch in this pattern alternates every stitch between knit and purl, both horizontally and vertically. After set up in the first row, work a knit stitch on top of each purl stitch you see in the seed stitch sections, and vice versa.
Repeat these two rows until you reach your desired length for the cowl.
Bind off—not too tightly or the edge will pucker. Leave a long tail (a couple of feet long) and you can use it to make the buttonhole edge as well.

Crochet buttonhole edge
Go into the first stitch of your bind-off with a crochet hook. Pull a small loop of yarn through with the hook. Go into the next bind-off stitch the same way, pull another loop through, and then pull the second loop through the first loop so that you have only one left on the hook.
(I drew these illustrations for my students, who would also have me standing next to them to show them how to do it. If this whole concept of crochet edges is new to you, check out this explanation from Knitty, which covers crocheting on to a knitted edge, as well as the difference between a crochet slip stitch and single crochet stitch.)

Continue in the same way, going into each stitch as you come to it, pulling a loop though it and then through the loop you already have on the needle. This is called a “slip stitch” in American crochet terms.
You’re making a line of crochet stitches, which should look like another bind off row on top of the first one.
When you get to the place where you want to make a buttonhole, chain (pull loops through your working loop one at a time, without connecting to anything else) until you have enough stitches to just fit around your button.
You can make the buttonholes flat to the edge or more of a loop—your choice, depending on where you attach them—but either way they should be just big enough to push the buttons through, otherwise they may come loose while you wear it.
Reattach the chain to the edge by going into the bind-off stitch you choose, and making a slip stitch as you did before.

The sample cowl has three large buttons and buttonholes, which line up with the three stockinette stitch columns.

Sew on your buttons to line up with the buttonholes. I use the same method as I do with sewing thread, except the yarn only goes once each way through the buttons since it’s so thick.

Enjoy! If you make one, I’d love to see it.

What a beautiful cowl!! I’m in love with how you added the buttonholes to the edge.
Thank you for sharing this wonderful tip.
Thanks Jennifer! Enjoy!
Very pretty! I’ve actually never thought about adding button holes by crocheting… Thanks for the pattern!
You’re welcome! I think it’s easier than knitting them in, at least on an edge like this.