
Hello! There’s been just a little more radio silence around here lately than normal, but hey, that’s what retreats are for, right? Today let’s jump back in with some thoughts about drawstring casings on bags. In the second part of Hello Sewing Machine, I guide you though making a drawstring bag and leaving a “buttonhole”—a gap in the side seam for the drawstring to pull through. That’s probably my favorite way to finish the casing, and one that helps you think about how a piece of fabric becomes a finished project, which is why I chose it for my beginner e-book. There are lots of other options though, basically any method that encloses the raw edges and leaves a place for the drawstring will work. One of my proofreaders asked about making a little hem on the sides of the bag instead, and I wanted to present that option here. In my example, I’m altering a commercially made bag which doesn’t have much in the way of seam finishing, and is not going to stand the test of time. You can also easily use this technique on DIY bags. Click on any of the pictures to enlarge for a closer look.
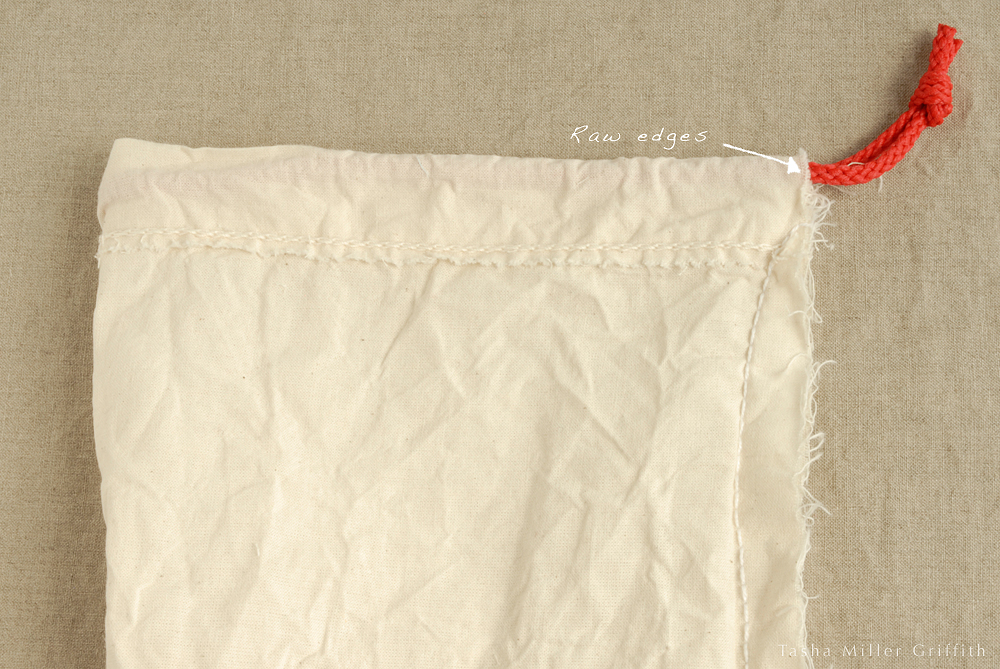
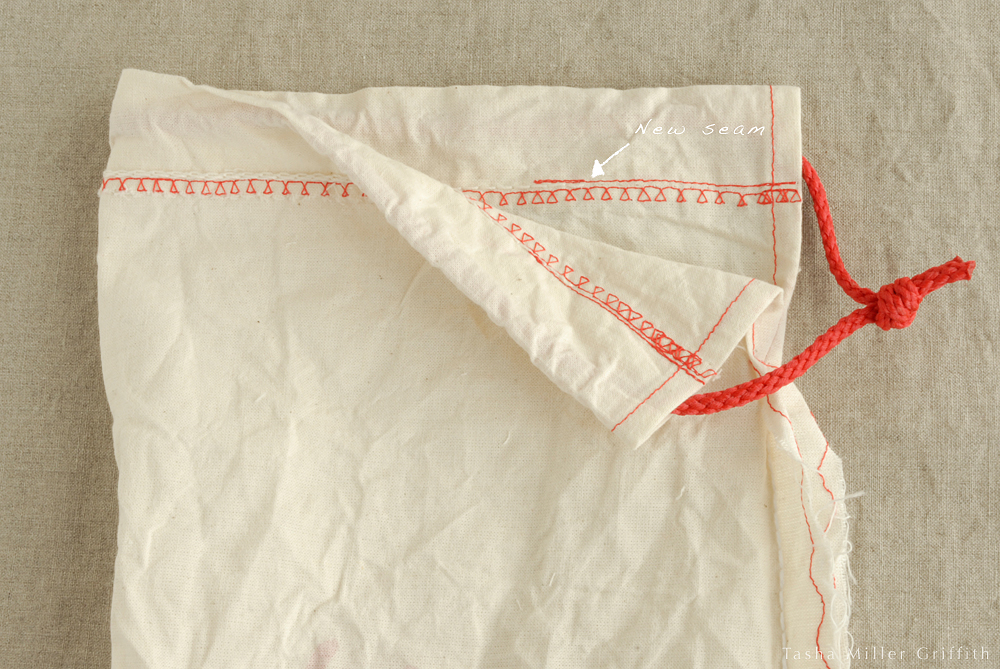
On this bag, there’s nothing to keep the raw edges from unraveling. I’m especially concerned about the area where the drawstring emerges from the bag, because it’s likely to get a lot of wear and tear, which will cause the fabric to unravel faster.
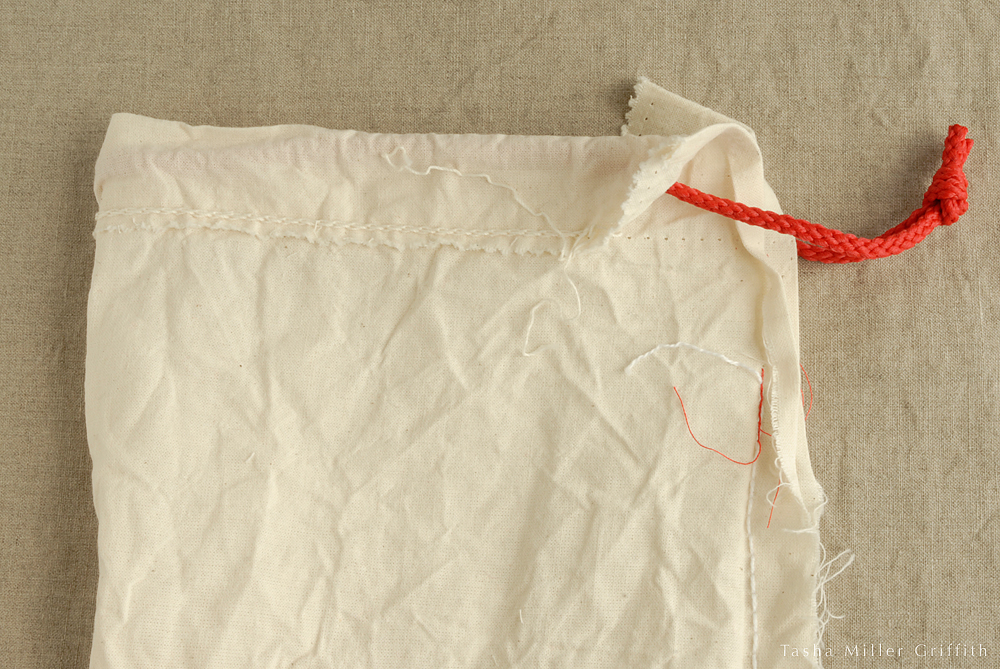
My first step was to take apart the seam stitching, down to where I wanted the seam to stop for the new finish. I stitched up to that point and back down (with red thread) to hold all the stitching in place. Then I took apart enough of the seam holding the casing down to let me make a narrow hem on the edges.
If you are making your own bag, just stop sewing the side seam a little ways from the top, and back tack over the seam end. To figure out where to stop, think about the parts of the casing you need to leave room for at the top of the bag.
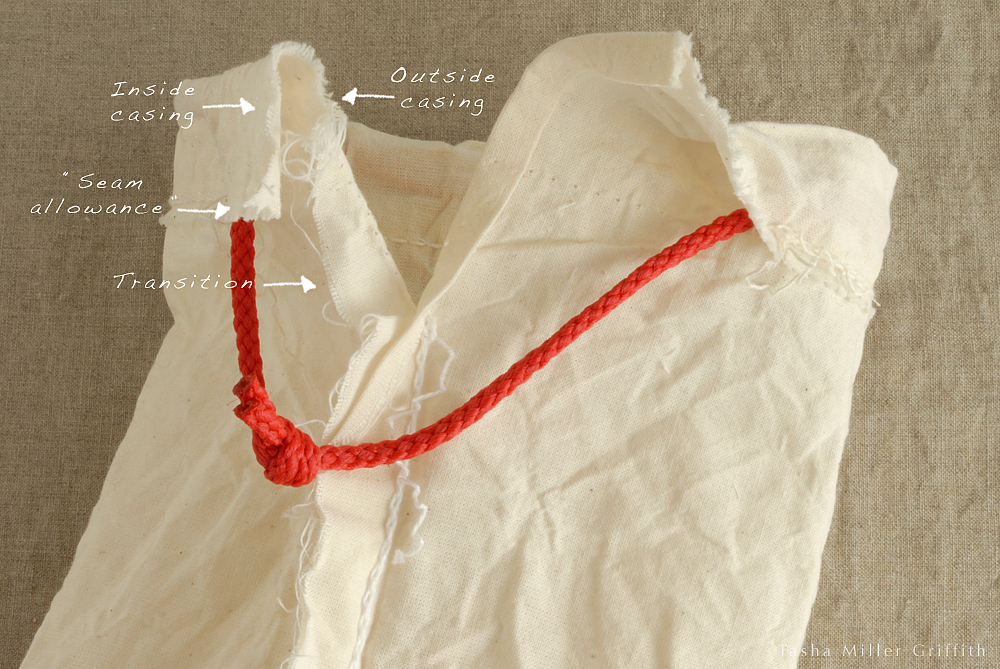
At the very top is a little extra fabric, usually turned under (or stitched over) so that it won’t unravel. It serves the same purpose as a seam allowance. Then you have the inside and outside of the casing (keep in mind we are looking at the bag from the inside), and you will also need a little more room (about 1-2″ or 3-5 cm) for the transition between the hemmed edges and the seam. Once you figure out where the end of your seam will be, go ahead and overcast the seam edges, continuing a little bit past the point where your seam stops. Then on each edge above the seam, fold over and press down 1/4″ (or .5 cm) with your iron, towards the inside of the casing. Fold over the edge again in same direction, using your first fold as a guide, and press in place again. Then stitch down your hemmed edges, sewing close to the edge with a straight stitch. Sew across the seam as well, below the top where you stopped stitching, so that all the stress from opening the bag is not on just one point.
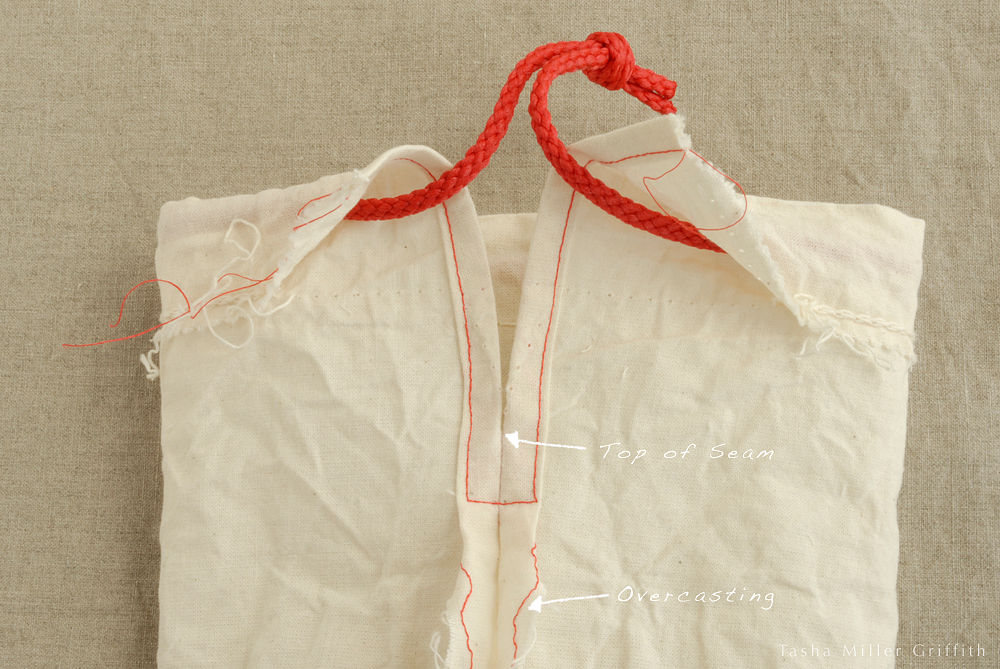
Next, sew your drawstring casing in place. Normally I would press a small fold at the top edge towards the inside, and then fold and press down the width of the casing. Since the casing here is already sewn in place around the rest of the bag, I opted to replace the original stitching, overlapping it with the red thread. Make a small back tack at each edge, since those ends won’t be held down by any other stitching later. Then I used a mock-serger stitch to go over the small raw edge below the casing, since I don’t want it to unravel and lead to my casing pulling loose.
A quick note about ends: I like to bury them inside the casing or hem, or wherever there’s a double layer of fabric, so that enough thread remains to keep the stitching from pulling out, but it’s hidden. I thread the ends on a hand-sewing needle, pull them between the fabric layers for one long stitch, and snip them off where they come out.

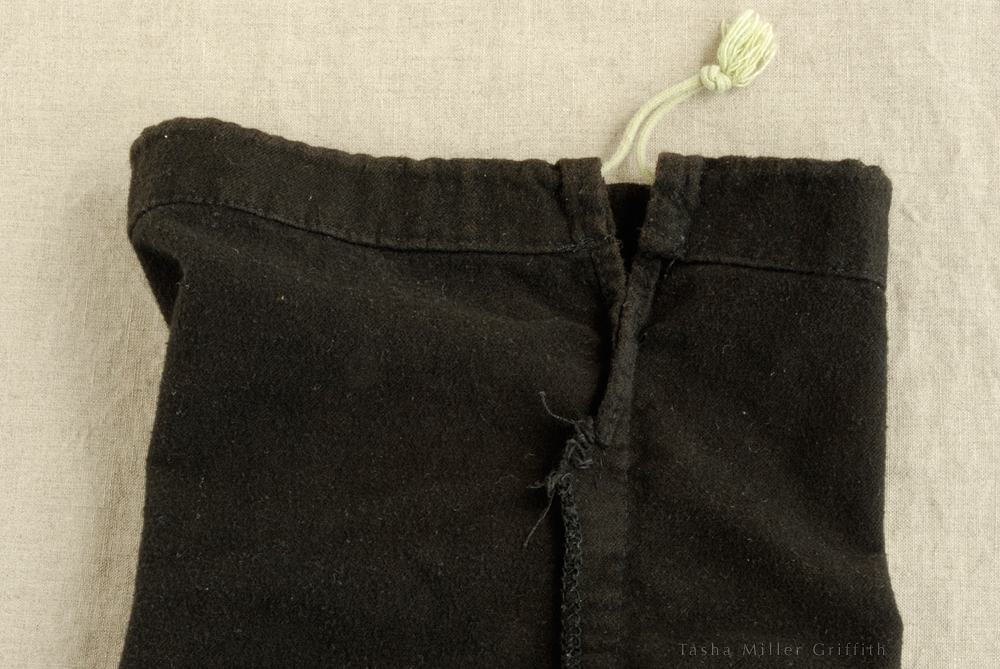
Here’s an another example of a commercially-made drawstring bag using the same concept. I think they hemmed the sides of the drawstring first, and then caught them in the side seam, and finished the seam allowances with a serger. As I said, you have a lot of options!
There’s lots more thorough and friendly beginner-oriented directions for sewing seams, overcasting, using your iron to make a casing, and everything else you need to know to plan and sew a drawstring bag in my e-book, Hello Sewing Machine!
If you have other beginning questions, feel free to let me know, I’m always curious about what’s on your mind. You can also read my answers to others’ questions in this post on Sew,Mama,Sew!
