
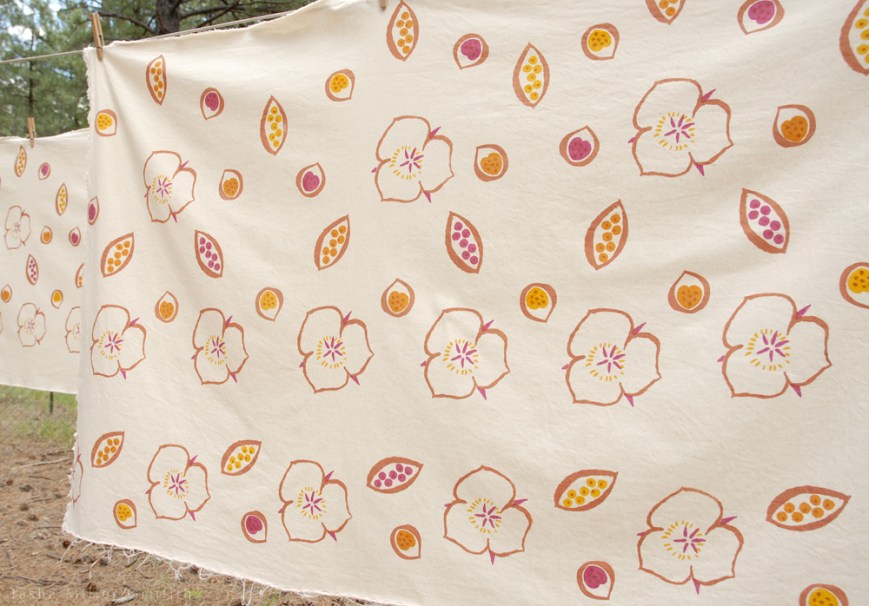
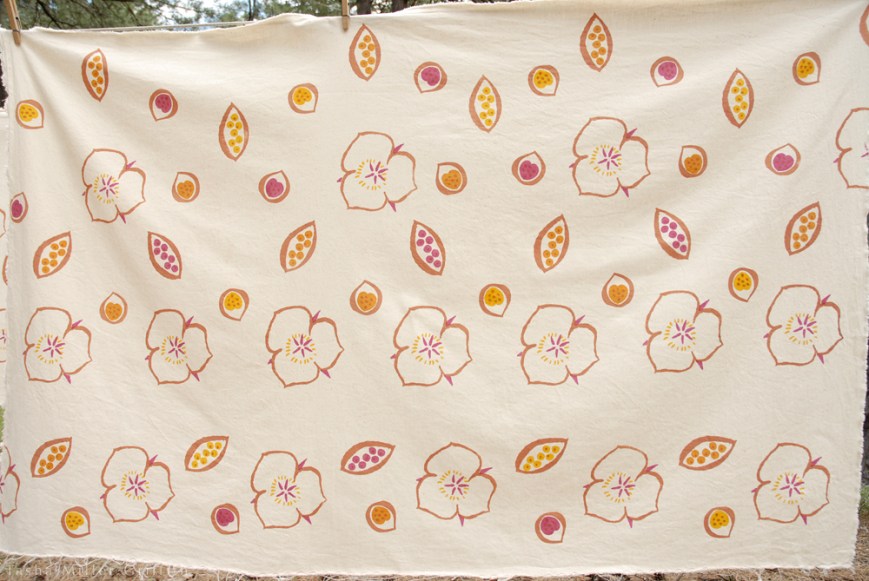
This is the fabric I made for my one Year, one Outfit project. Well, I didn’t make it as in weave it, it was manufactured in Texas (from US grown organic cotton, as per my pledge for the project) and I bought it through Organic Cotton Plus online (it’s this one). But I printed it myself, using natural dyes.
Here’s what happened: I knew that coloring/printing fabric would be a major component of this project for me. I do love the native colors that come from color-grown cottons and the fleece of colored sheep, but that’s not all I want to wear. Most people feel the same, and have for thousands of years. So I thought that getting color & design onto ethical, locally-sourced fabrics (which are often available in very limited colors) would be a good thing to tackle.
I had already promised to teach screen printing with dye (rather than with fabric paints designed for printing, which are fun too, but leave a bit of stiffness on the fabric) at our annual family craft retreat. The time for the retreat was getting closer as I decided to join up with #1year1outfit. At first I thought I would just take this fabric and print on it with the fiber reactive dyes that most crafters use for cotton. These dyes may not be the best thing for the environment, but I would apply them myself, in extremely limited quantities, and do the cleanup responsibly. I was sort of wrestling with these ideas, and reading Printing on Fabric by Jen Swearington. This is an excellent book, I learned a lot from it. And I appreciate, among other things, that she’s realistic about safety. I was reading the part about steam-setting fabric you’ve printed with dye, in which she recommends wearing a respirator and/or having good ventilation … for whatever reason that was my “I’m done” moment. I don’t need to be using toxic stuff, and I don’t want to be exposing myself, or my family (some of whom are small kiddos) to it.
So what next? I tried looking for less-toxic dyes, and I found some cotton clothing and fabrics dyed with metal-free or low-impact dyes, but I couldn’t find any of the dyes themselves available to the average person. (Unlike if you want to dye protein fibers like wool, then you can buy Greener Shades dyes.)
That pretty much left natural dyes. I love their colors, but they have a reputation of being less easy to use on cellulose fibers like cotton. From the bits and pieces I read (and the fact that there were printed fabrics long before there were synthetic dyes) I knew it could be done, I just didn’t yet know how to put it all together.
As much as I value balance in life, sometimes it just feels so good to throw my whole self and all the energy I can muster at a single project. With the retreat coming up fast, that’s what I did; reading everything I could find about using natural dyes on cotton, printing with dye, and the very little out there about putting the two together, and experimenting all the time on my own. By the time the retreat came, I felt confident enough to share what I’d learned so far, and continue learning along with everybody else. At the end of it, I took over an entire now-vacant worktable, and printed my fabric in two sections (before collapsing from whatever virus got a bunch of us that week).
A few details:
- The dyes were: cochineal, osage orange, madder, and black tea (and combinations of those).
- We thickened them into a paste using sodium alginate.
- We scoured the fabric (using soda ash and textile detergent), then mordanted it with aluminum acetate to bond with the dye.
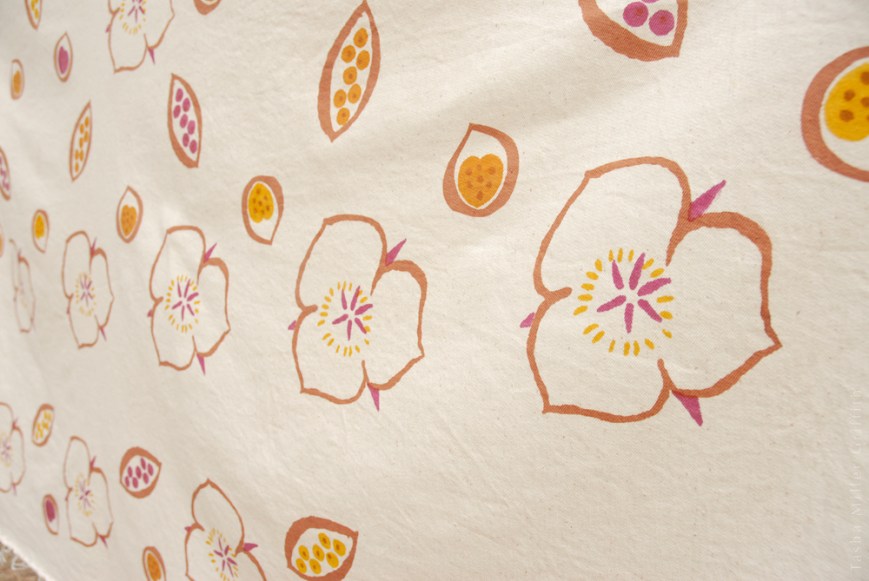
- We applied the dye using small printing screens made from embroidery hoops. For my designs, each motif had its own hoop for each color (not the most efficient way to do it, but very flexible design-wise).
- I wanted a hand-printed look, so I came up with a vague plan, then eyeballed the placement of the first motifs, and made little registration marks to line up the hoops for subsequent colors.
- After drying/curing, we steamed the fabric to heat-set the colors, then washed to remove the thickener. The dye remains, and the fabric has the same hand it did before printing.
If you want to get more technical than that, email me! I have so many notes …
Somewhat needless to say, I’m pretty stoked with how this came out. And I’m looking forward to seeing how the colors wear, and doing more experiments with natural dyes!
A few more resources if you’d like to experiment too:
- The Modern Natural Dyer came out after I made this project, but it has good basic natural dye info (and totally gorgeous photography).
- This PDF from Maiwa is also a good overview, I used it heavily as a reference while I was figuring out what to do.
- This online article is pretty technical, but it gave me a lot of confidence that natural dyes and cotton can play well together. It also helped that I think I’d be happy to use only the color palette in that first photo forever …
- The book Printing on Fabric, which I mentioned above, is not about natural dye but covers a bunch of other useful stuff, like how to make designs for screen printing, registering multi-colored and repeating patterns, and steam-setting fabric.
Stay tuned to see what I made from the fabric!

This fabric is so beautiful, Tasha. What an amazing project!
Thanks Charmain!
Genius! I’ve been thinking about the same thing so will be using your tips!
Excellent! Shoot me an email if you have questions when you get closer, I’d be happy to help!
What a fabulous project! I came for a pie crust, and left with “that Tasha sure has some cool projects!” – Can’t wait to see what you make with it. Well, I can wait, but I am both excited and intrigued.
Ha! Thanks! If it wasn’t winter you might have seen it already. As it is, the finished object is in my closet, waiting for a day when I can get both the weather and Bryan to cooperate for an outdoor photo shoot. Very soon I hope!
Beautiful! I’ll be looking forward to seeing what you do with it. And I love that you used tea!
Thanks Becky! Tea has been my first and best friend when it comes to dyeing, especially for things I’ve thrifted when I love the fit, but the colors are just too bright for me. So it was at the top of my head when I started experimenting with printing, and it was a great place to start!
Sooooo pretty! It looks amazing xxx
Pingback: Every Day | Stale Bread into French Toast
Pingback: Origins, Materials, and Connections | Stale Bread into French Toast