Giant Cyanotype on Silk!


Some of you may be wondering what I have been up to lately, besides cooking and (occasionally) posting about it here.  Well, in part – this!  Bryan has a solo show on at the Flagstaff Photography Center for the next month, and for part of it he had this crazy brilliant idea to make a huge public participation project.  On silk, panels 12′ by 6′.  Which would hang on curved wooden supports (making that part was his responsibility).  The idea is that you walk through it, not just look at it, and the fabric touches you and moves with the wind, thus making a different, more interactive experience of what a photograph can be.


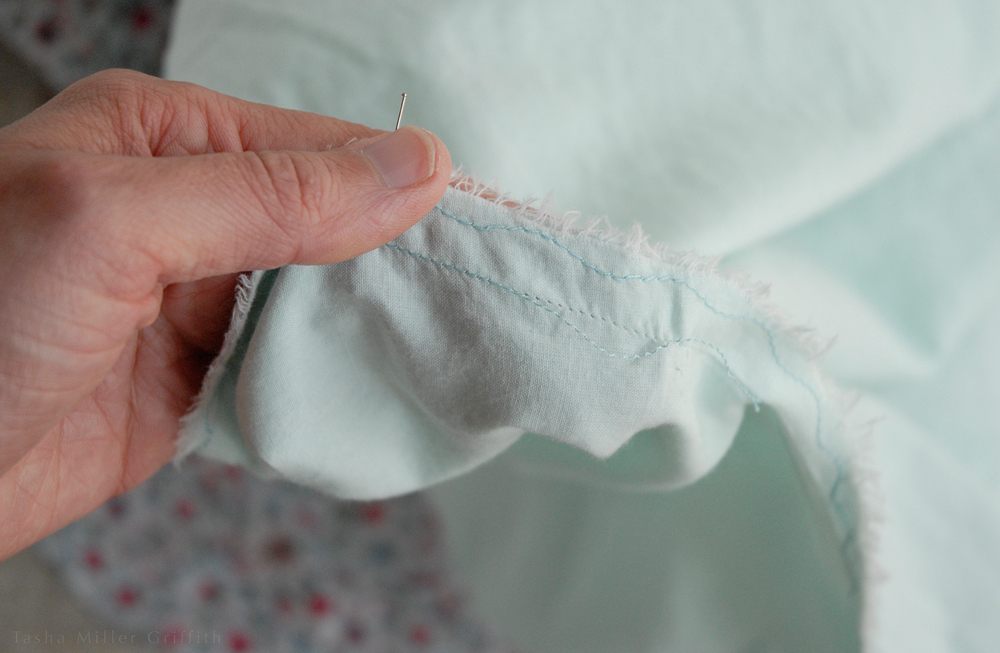
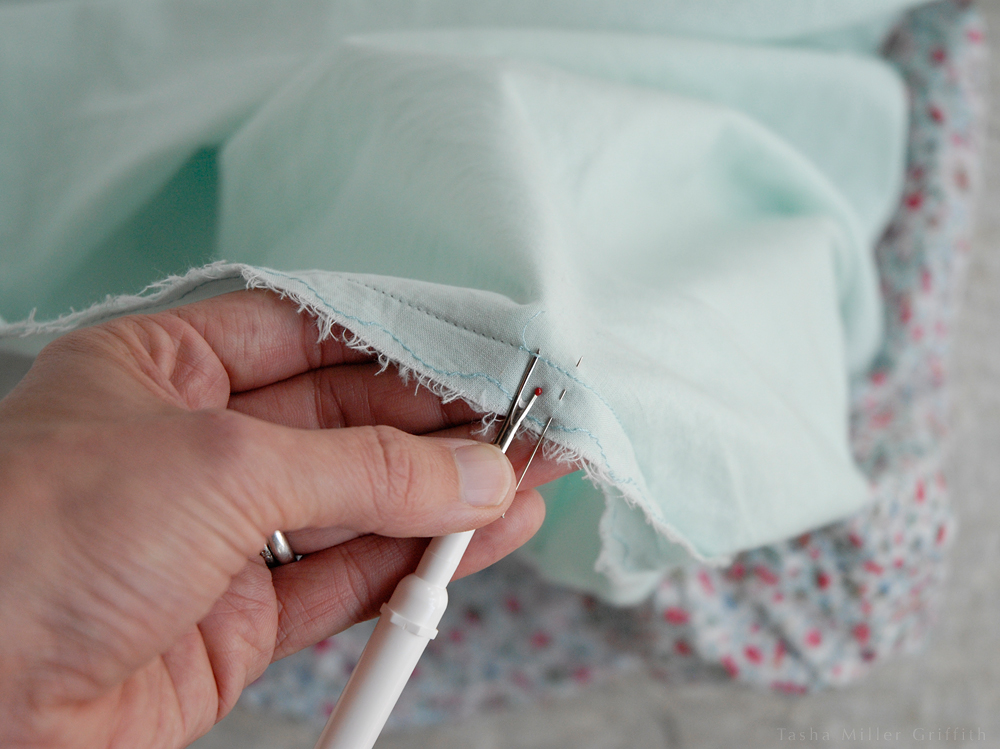
The first part for me was making the silk panels.  Suffice it to say I have never been this nervous about sewing a rectangle.  Ever.  I attached a measuring tape to my work table so that I would tear all the pieces exactly the same length, and got out my walking foot so as not to distort the long seams.


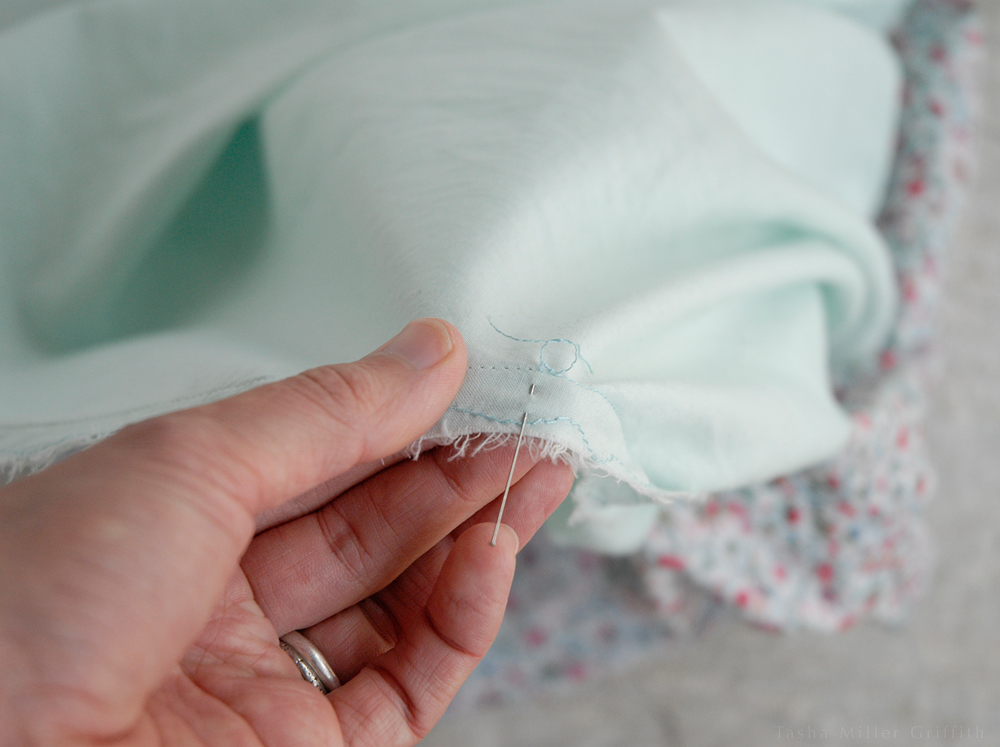
In the process, I kind of fell in love with this huge expanse of crepe de chine.  Having never sewn anything nearly this big out of silk before (a ballgown is the only thing I could think of that would compare) I had never studied how it falls like liquid, but somehow also holds a body, almost a stiffness in certain circumstances.  Amazing.  I’m not-so-secretly hoping that the leftover fabric ends up in my stash.


But back to the photo project – the next step was to soak the silk panels in the chemistry for cyanotype – like those blue prints you may have made in the sun with leaves and flowers, and hang them up to dry.  This we did at night, inside the garage.  It took longer to dry than Bryan expected, so we ended up setting the alarm for 4 am to take them down.  They got rolled up and the rolls went into a long skinny bag of blackout fabric (also made by me, and luckily went together easily like the plan in my head).  By now you are starting to see how this project had a certain secret-agent-mission appeal.  At one point I had a grocery list which included 8 gallons of distilled water, blackout fabric, muslin, carpet rolls/large dowels, thread, and shellac.


On the morning of the exposure, we set up (mostly) clean trash cans to hold water for rinsing, a hose, the muslin sheet so everyone could practice where to put their hands and bodies, and a hugely tall clothesline to hold the finished pieces while they dried.  Thankfully, a bunch of our friends and members of the photo community showed up and agreed to lie still in the sun for 15 minutes while they and the silk sheets took in enough light to make a photo.  And thankfully the monsoon clouds held off just long enough to get it done (it rained later)!  Bryan repositioned people partway through to get a lighter blue in some places.


Meanwhile I ran around taking snapshots, and then with the help of a few volunteers, dunked the first panel in successive changes of water to rinse out the unexposed chemistry, while Bryan and the rest of the volunteers exposed the second one.


Even though I was very involved with this project, I didn’t anticipate quite how much I would like the finished result.  I think Bryan did a great job bringing his vision for it into reality.  And, after obsessively checking my math at the beginning, I could finally breathe a sigh of relief as the panels slid onto the wood and I could see that everything came out the right size!  It’s hard to see just how cool it is here, but imagine walking through it.  I am impressed with the little details that come through, aspects of people’s hair and clothing that make it more personal.


If you are passing though Flagstaff, you can check it out yourself at the Photo Center (right on Heritage Square) through the end of August!


Summer Spark Batik Dress


I finished this dress on time!  Just barely.  I know that sewing on a deadline is not my friend, but in this case I had backed myself into corner, since I really wanted to finish in time for my annual family and friends women’s craft retreat.  You see, last year at the same event we batiked fabric (which was ridiculously fun) and I dyed this panel with this sundress in mind.  I should at least be able to sew one dress in one year, right?  Well, sure, but a whole lot of other projects of various types jumped ahead of it in line throughout the year, until I found myself headed to retreat 2012 with the mostly-finished dress and my hand sewing kit.  I finished the hem in the car on the way over.


When I got there I tried it on again.  Although I had carefully tested out this pattern in a previous version, I decided that the darts from that version were a little out of hand.  Although I liked the fit, the darts just took up a lot of the bodice, and I thought that they might not look so good with the sparser print of my batik fabric.  So I decided to convert the darts to gathers.  Lesson 1 from this project: darts and gathers are not the same thing!  Although they both take up excess fabric and fit it into a smaller area, darts control the release of the excess up to a certain point, while gathers release it all right away.  Although I liked the gathers at center front, the ones under the bust were clearly not working, they created a big poof of fabric right under (definitely not at) the fullest point of my bust.  There’s no picture of this, it looked ridiculous.


Since I had already sewn the gathers, and my sewing machine was hundreds of miles away by this time, my idea was to hand sew a few of the gathers closed, essentially creating a few small darts to release the extra fabric where I wanted it, which hopefully would not look too jarring.  I tried it out by basting the darts in place.  Have I mentioned I love basting?  It’s just a collection of fairly loose, impermanent stitches, but it’s one of the sewing world’s most perfect tools.  I truly don’t understand why anyone complains about it, it’s so wonderfully precise and useful, and you can see exactly how something is going to come out before you commit to sew it, without the distortion of pins or clips.


Anyway, I basted my new tiny darts in place, using the places where the gathers naturally wanted to make a deeper fold.  I tried on again, then hand sewed them in place.  I used all tiny backstitches, which was probably overkill, but for such a small seam it didn’t slow me down very much, and I wanted a similar look to the rest of the machine-sewn seams on the dress.  If I was at home with my machine, I could also have taken out the gathers, planned and measured for the darts, sewed them in place and stitched the bodice down again.  To be honest I’m not sure it would look much better, although it would look more precise and even on each side.  However, I have been comfortable with this dress having a handmade, not-so-perfect look ever since the very first flower I drew in wax (note the splotches/wax drips).


Checking out the final result, I am overall thrilled.  Probably what makes me the happiest is that I was able to plan the print on the fabric in a way that worked how I envisioned when I went to sew the dress!  It also makes me happy to look at the little bits of hand stitching on the inside, for some reason I can’t explain I love that look, when I worked at a museum I used to spend much longer than necessary checking out hand stitching on antique garments.  I will tweak the bodice a little more in further versions of this dress, it still has a funny wrinkle or two, but as I said this project was not meant to be a showpiece and I think it looks cute.  I wore it all day, on a retreat field trip to the fiber festival at El Rancho de las Golodrinas and then out to dinner with the whole group.  One of my favorite things about custom-fit clothing is how comfortable it is – I could easily have also worn this dress to sleep in, but restrained myself, after all it was pretty dusty out, and the dress doesn’t need that wear and tear.


I realize as I’m working on this post that some of these pictures have quite a different color cast, some are from my iPhone on the trip which may explain it.  If you are curious, the laundry line picture is probably the closest to the real colors.

Although I don’t have a specific project like this to be ready for next summer, I am so hoping I have learned my lesson about timing and leaving things until the last minute.  We shall see.

A New Month, A New Challenge – Spark Your Summer

The thing I love about setting a particular goal or participating in a challenge is that it can push me to take something I am vaguely thinking about doing and make it something I am actually doing and concretely thinking about.

I loved participating in Me Made May’12 this last month.  I was surprised by how much pride and self-sufficiency I felt wearing at least one me-made garment every day, even though I didn’t make anything new for the challenge!  It also got me thinking about what I really wear and how I want my style to evolve.  Although I’m not sure I would want to spend as much time thinking about my wardrobe all the time as I did in May, it really pushed me to better define my style (see this post), to figure out what I really need to make (pants!), and to meet some other sewers/thinkers/bloggers, all of which has been wonderful.  In another unexpected spillover, after MMM ended I found myself coming up with new combinations of my not-self-made clothes to better fit my style – bonus!


So when my new friend Alessa, along with Ali and Sarah, announced a new challenge for June, I was pretty much in at the word go.  Plus, this one is a little less involved, you just sew one special garment in June, something you’d like to wear all summer.  It’s good timing for me, since I have fabric I batik dyed last summer that’s supposed to become a dress in time for a special event which starts June 20!  I’ll be making my self-drafted sundress, with a few modifications from the first one.  And, I’ll be home late tonight!!  One thing I have really missed during MMM is my studio – sewing starts tomorrow!


Again, it seems to me that there’s no reason you have to sew to set yourself a helpful challenge for this month.  What about a cooking one?  An art one?  What are your broader goals and how can you set a specific goal to help you get there?  What would you like to do more of?  Why not set aside a specific amount of time for that every week?  Whatever you decide to do, I’d be willing to bet you’ll get some unexpected lovely side effects.

Personal Style, Me-Made-May, and How the World Sees Us

Oh, never mind the fashion. When one has a style of one’s own, it is always twenty times better.

~Margaret Oliphant

I’m so excited about this post, because I’ve recruited some awesome fellow participants in Me-Made-May’12 to share their photos and their thoughts about personal style with us!  I was so inspired by clicking through the Flickr group and checking out everyone’s photos, and by the thought-provoking comments they sent me!

I’ll start with my own style, which is definitely still a work in progress.

When I first started making my own clothes, quite a few years ago now, I chose what appealed to me most, (if you don’t want to know how much of a nerd I really am, please skip to the next paragraph) which was mainly historical styles.  If no one cared what I wore, I could happily wear long skirts, petticoats, 1940’s style dresses, etc. every day for the rest of my life.

But what I wear does affect how people see me, and how seriously they take me.  Sometimes what I’d like to wear doesn’t broadcast the message that I’d like people to get when they see me.

I still love historical clothes, and wear lots of long skirts in the winter, but now I look for ways to incorporate silhouettes I love with more timeless, modern designs and details.  I’d like what I wear to say, “I am unique, interesting, capable, beautiful, feminine, grounded, elegant.”  As I said, it’s a work in progress.


My first new friend for this project is Alessa.  I love the playful element her outfits have.  Check out her lovely blog of her handmade adventures by clicking any of her photos, or here!


She says:

I wouldn’t know to put a name to it, but there’s definitely a trend there. I think pretty and comfy sum it up best. I like dresses, because they are less constricting than jeans and I guess I also don’t like to be part of the “uniform” (jeans and t-shirt) wearing masses. Also, they make my stumpy legs look longer. 😉 A lot of people put labels like “nice” and “cute” on me, which I guess I generally am, and which is also reflected in a large part of my wardrobe. I like that I can also dress up to other facets of my personality, though, like “girlishly nerdy” (skirts and sciency graphic tees) and “playfully sexy” (that would be a black polka-dot dress with a red belt, red lipstick and a bowler hat).


Next is Oona.  I love how much body language is in her photos.  If you need a laugh in your day, you MUST read her blog!


She says:

i’d say my style is schizophrenic, vivacious, and a bit colorblind.  i like to think i make other peeps smile when they see me, especially strangers.  as a whole i don’t feel we dress up anymore, and peeps seem to take happy note of bright colors and thoughtful (if clashing) ensembles.


Finally here’s Sallie.  I love how sleek and put together her outfits are!  There’s lots more pictures and witty comments about the outfits on her blog.


She says:

I think personal style is really complicated because it involves a certain amount of self-awareness. Sometimes the things we love, sadly, don’t love us back. For me this translates into my love for vintage, an unrequited love that I think I’ve finally given up on. But the great thing about fashion and making your own garments is that the possibilities are endless. So instead I’ve focused on more modern looks that make me feel lady-like and put together. I like my clothes to fit well and to maybe have a touch of drama – like playing with texture, color or volume/structure. I think other people see me as someone who always looks laid back, but still elegant, and maybe a touch prissy – I’m taking this from compliments and comments I’ve received over the years (and I just asked my husband and thats what he said! haha!).


I can’t help feeling like I don’t have much to add here!  These ladies have summed it up and given me a lot to think about.

One last thing I will say, I know many of us who sew (or make anything else for that matter) do it at least partly so we can have just what we want, what’s not available anywhere else.  It’s a great feeling when you can be creative, and make something that you’re proud of, something that broadcasts the message you want to send.

So, how does the world see you?  What would you like your style to say?

A Permanent Fabric Exchange – Fabric Recycles!


In Kansas City last week, we stumbled on a great idea: a resale store for fabric and notions! It’s called Fabric Recycles. It’s full of rolls of fabric, notions, thread, books, patterns, and all kinds of other sewing and crafting bits and pieces from real vintage to practically new.


I could have spent quite a while there; digging through odds and ends for that special something is the kind of shopping I really like, like a treasure hunt. The fabric isn’t labeled for content, so you will have to do your own burn testing if you want to find out what’s in it. If you are in the area, I would definitely stop by, you might find a gem. I also think this is idea worth trying in more than one place. It works for books and music . . .

Me-Made-May Thoughts So Far, and my Cartoon Summer Wardrobe

Ok, I realize that it’s the middle of Me Made May, and I haven’t said anything about it!  I have been thinking about it a lot though, and keeping a daily log of what I wear and my thoughts.  So far I have met my goal of wearing one me-made article every day, and on only one day has underwear counted.  (I have one sundress, not a me-made, that I wear when it’s just too hot to wear anything else.)


I wanted to make some kind of visual record so you could see what I’m thinking about for this project.  I loved Tilly’s photo collage of her me-made wardrobe, although photographing mine during several days of camping didn’t seem very practical.  But one of my goals for this summer is to draw more, a perfect activity for unplugged time.  Then I saw the book Information Graphics on Brain Pickings, and was inspired to make my own graphic for Me Made May.

The space we have in the truck for clothes is quite limited.  Every year I try to pack less, leaving out the things I don’t end up wearing much, but a little more of the most versatile, the things I can wear a lot of different ways and the things I know I wear all the time.  This also leaves me with a small enough wardrobe that my drawing project seemed practical.


I circled the clothes I made in yellow.  Somehow, this didn’t seem to represent the amount of effort that it feels like goes into what I wear.  So I circled things I had dyed or otherwise substantially altered in green.  Due to the careful selection of these clothes discussed above, there are only a few things here that I haven’t worn a lot.  I circled them in blue.  All four of these I included this season as a change from wearing mostly the same clothes I did at art shows last year – too much of that and it starts to feel like a uniform, which makes me start to hate even clothes I really like.  Still it looks like I have a little tweaking to do to make these pieces fit, and a couple of them may not fit in my summer wardrobe.

I was surprised to see how many tops I had in relation to pants and skirts, especially since I have been thinking I need to make some more.  I even have one about half done at home, based on the shiny top but in a linen fabric more suitable for every day.  Then I remembered that all three of my me-made tank tops are not exactly spring chickens, in fact, they are getting to the only-suitable-for-camping stage.  I circled everything that is wearing out in red.  After that, I does look like I could use a couple more basic tops, and sundresses, I live in those when it’s warm and it would be great to have a couple more.

One of my favorite things about a challenge like Me Made May is that it asks us to take a look at what we are really using and what we need.  For example, you can tell that pants that fit are the hardest thing for me to find ready-to-wear.  And making my own is still a journey, every time I wear those grey ones I think about what’s wrong with them, but I also get inspired to make better ones this fall!  In fact, with the cool weather we’ve been having so the past week or so, I’ve renewed my vow to make pants I like.

I’ve thought a lot the past few weeks about how what we wear is a compromise between what we’d ideally like to wear, what’s available (due to funds and time), and circumstances like the weather, what we have to wear to work, etc.

What do you think?

What’s in your closet?  What do you need, and what do you have but don’t wear?


Another Way to Rip Seams


pocket seam ripping 1


If you’re going to make anything, it’s fairly certain that you’ll have to un-make and re-make part of it at some point.  It’s not bad, it’s just part of the process.  In sewing, this involves seam ripping.  It’s an essential skill for makers, and especially those who are interested in refashioning, repairing, upcycling, etc.

Although some folks rip stitches fast and furious with razor blades, I have always stuck to my trusty seam ripper.  Recently I’ve been using it in a slightly different way on straight and zig-zag seams, with really good results.

seam ripping 2014 0


The photo at left shows classic seam-ripper technique.  Slide the seam ripper into the seam, use the pointed part to pick up a stitch or two, and slide them into the blade in the middle of the ripper to cut.  Once you have a couple of stitches cut, pull the seam open and you will be able to see and cut more without harming the fabric.


seam ripping 2014 1For this technique though, everything stays flat, which is especially nice if you have a delicate fabric or it’s hard to see the stitches in the seam.  Use the ripper to cut a stitch, and then another one 1 -2 inches away, creating a small thread section with cut ends.  Then use the long prong of the ripper to pull a few stitches up and out of the back thread without cutting them.  You may need to do this one by one if the stitches are small.  The object is to get a little tail that’s long enough to hang onto with your fingers.


Once you get a tail, grab it with one hand, hold the fabric with the other, and pull the the thread section out in one go!  Pulling close to the plane of the fabric, instead of straight up, will make it easier.


pocket seam ripping 3


If you flip the fabric to the back you’ll see that the stitches on the other side, which were held in place by the ones you just pulled out, are now free.  All you have to do is cut a stitch a little way down the seam and you can use the free thread to pull out another section.  Every time you pull out a section, flip the fabric over and you’ll find a tail ready to pull out the next section.  I find this quite fast, and it also creates fewer tiny thread ends that you’ll have to clean up.


pocket seam ripping 4


If you are ripping out a specific part of a seam, such as between the pins here, you may want to have a longer thread to work with when you get to your stopping point, so you can tie a knot to hold it in place.  In this case, pull up the last inch or two of stitches without cutting either side.  It may help to turn the seam ripper so the stitches don’t slide into the cutting part.  Once a stitch is loosened, you can also use your fingers, the whole handle of the seam ripper, or another tool to pull the stitches up without cutting them.


pocket seam ripping 5


When you get to the new end of the seam, pull on the thread to get the last stitch from the back side to pop through onto your side.  Slide the point of the seam ripper into this new stitch and pull it up so that both ends are on the same side.

Tie a knot or use backstitch, and bury the ends if they’ll show.


pocket seam ripping 6


Again, this last part is only necessary if the end of the old seam won’t be crossed by or stitched over with a new seam, and so you need to secure the end.

This way of seam ripping works great on zig-zag seams, too, although it won’t work with seams where the thread crosses back over itself.  Sometimes I’ll get lucky and pull the right thread on serged seams, but I don’t have a sure-fire formula for those yet.  Maybe you do?

I’m sure that others use this technique, I just discovered it recently and I’ve been using it all the time …


Me-Made-May 2012!

What is that, you ask?  It’s a fabulous idea from Zoe of the blog ‘So, Zo…’ wherein participants make a pledge to wear one or more self-made garments every day for the month of May, and/or to interpret the challenge in their own way.


What I really love about it is the idea of spending a month thinking about what we make and wear and why.  Does what you wear suit your personality and what you want to say about yourself to the world?  Why do you choose to make things?  Do you wear/use the things you make?

My pledge for May is to wear at least one thing I made everyday, and document my experience here in a way that’s also relevant to those of you who don’t sew, and addresses some of the interesting questions above.

If you do sew, I encourage you to head on over to Zoe’s blog and check it out!

If not, what about coming up with your own Me-Made-May challenge?  Maybe pledge to cook one new recipe or make one up yourself each week, or finish your woodworking project, or even the mending!  I think anything we make has the tendency to push us towards, as Zoe puts it “a more self-sufficient, sustainable and authentic life.”  I love that phrase – I couldn’t have described my own goals better!

The last part of my personal pledge for MMM’12 is to make more friends in the blog world and reach out to the other creative types out here, so I’d love it if you let me know your ideas, and pass on the spirit of Me-Made-May!

My First Real Self-Drafted Pattern—Sundress!


My sundress is finished!  I’m really excited because a) it’s done in time for summer, and b) this is the first pattern I have really made from scratch, not by copying a garment or altering an existing pattern.  I draped the top part with the help of my dress form, and measured and flat drafted the pieces for the skirt and ruffle.

The fabric is a very lightweight soft cotton which I am about 98% sure came from Gayfeather Fabrics in Madison, WI – a great place to stop if you are nearby.  It’s lined with a similar plain white cotton which I still have a fair amount of from the former Buttons n’ Bolts in Tucson – I miss that place.


Although I am thrilled with how it came out, there are still a couple of alterations I’d like to make.  I had made enough versions of the top out of muslin that I thought it was safe to try one in “real” fabric.  At least for me there are some things I never can tell unless I’m really wearing something around, not just trying it on for a few minutes in front of a mirror in a partially finished state. I think it would be more flattering if the join between the top and the skirt was about 1/2″ higher, which means I’ll extend the top up at the neckline as well, otherwise I think there will be too little top part.  One of the darts needs to be more curved, although the wrinkle it’s making now is kind of cute.  For the next version there won’t be a ruffle at the bottom, because I’m making it out of fabric I batiked last summer, and I made a border for the print!  For that version I think I will have the skirt a little less gathered at the top, flaring out to about the same width.

My plan was to put the dress on my form for photos, (especially since the high was 47 F the day I finished).  But I neglected the fact that while I like minimal closures and shimmying my clothes over my head, my duct tape form has immovable shoulders, there was no way I could shimmy the dress onto it!  So thanks to my dad, who stopped by this morning, for taking these snapshots.  Luckily, it was much warmer today as well, although unfortunately not warm enough to wear this all day.

Hope this gives you some ideas for summer projects!

Sewing Machine Painter’s Tape Stitch Guide

Just a quick tip today.  Last night I was sewing pillowcases for my wonderful massage therapist, Cindy Clark of Hand Dance Massage.  I know, this is good trade to have, right?

Some of the hems were deep, I needed a seam guide outside the ones engraved on my stitch plate.  Painter’s tape/blue tape is perfect for this – it’s easy to apply and reposition, it has a sharp edge which I  can see clearly against the machine, and it peels right off when I am done.  Other types of tape work too but they may be more prone to leave sticky gunk behind (duct tape = no).

You can either use the edge of the tape as a guide or draw a line (or more than one) on the tape.  Either way be as precise as you can with your measuring.  Measure from the center of the foot, where the needle enters the plate when it’s centered.  Once you know how far out the other lines on your stitch plate are, it may be easier to measure from one of them or from the edge of the plate.  Try to get your tape even, and at the right distance, so you can use the whole length of it to guide your fabric.

Remember that if hemming, you need to sew slightly inside your hem to catch it.  For example, I pressed up 2″ for a hem, so my guide here is at 1 and 7/8″.  By watching the guide, you can sew the hem from the top or the bottom, whichever works better for your project.

Zoom in on the picture to see more clearly what I’m talking about.

What do you use painter’s tape for?  What are you trading for?