Get Your Sewing Questions Answered with Me and Sew,Mama,Sew!

cartoon with both threaded small


Here is the first exciting event in celebration of the release of my new e-book Hello Sewing Machine – I’ve collaborated with the lovely ladies at Sew, Mama, Sew! to answer your sewing questions!  Head on over there and put in any basic questions you have, and I’ll answer some of them in a post coming up soon.  I’m curious to see what you want to know!


How to Hem Your Own Jeans, and Keep the Original Hem


Jeans hem finished hems


Once you get started sewing, I’m guessing one thing you’ll want to tackle is to hem your jeans.  You can definitely do it yourself, and keep that distressed hem just as it is.  You’ll need just a few more pieces of equipment than for normal sewing.

(If you need to start with some basic instruction about how to use your sewing machine, check out my e-book for beginners!)


Jeans hem equipment


A zipper foot lets you stitch with the needle to one side of the foot, right next to the original hem.

Jeans needles for your sewing machine have a sharper point and a longer eye, for sewing through layers of denim.  For the most part, you won’t have to stitch through too many layers with this method, but it still helps.  If you don’t have jeans needles, use a sharp rather than a universal needle.

It really helps to have a spacer, something you can prop up part of the presser foot with as you sew over thick seams (you’ll see why below).  This one came with my sewing machine, but you could also use something not too wide and about 1/8 to 1/4” (3 to 6 mm) thick, like maybe a popsicle stick.

A sturdy hand-sewing needle, and a thimble to push it with, is essential for the finishing of this method (I’ll go over that in the next post).

You’ll also need pins and thread.  The ones you use for regular sewing are fine.  I didn’t happen to have matching thread, so I used black.  It doesn’t show at all on the finished jeans.  Darker thread colors usually blend in easier than lighter ones.

Once you gather your equipment, try on your jeans, and fold up the hem to figure out where you would like it to fall.


Jeans hem measuring


You can get someone to help measure how much you want to hem your jeans up, while you try them on.  Or pin, try them on, and adjust until you get the hem where you would like it.

Figure out how much in total you want to take out of the length.  Make a fold that measures half that much, starting at the inside edge of the original hem.  You’re going to stitch right next to that original hem, effectively removing the fold of fabric from the length of the jeans.  Whether you’re using cm or inches, the principle is the same, your fold should be half the amount you want to take out, since both sides of the fold are removed from the length.

Make sure your fold is on the inside of the jeans, so it won’t show when you’re done.

Pin the fold in place every couple of inches.  Put the pins in perpendicular to the fold, or at an angle as shown, to make them easy to pull out as you sew.

Pay special attention at the seams, making sure that the original seam lines and topstitching match on both sides of the fold.


Jeans hem zipper foot


Set up to sew right next to the original hem, using a straight stitch (width 0), length about 2.5 mm.  Use your zipper foot so that the foot can sit flat on just the fold of fabric.  Move the needle position all the way over to your left, towards the original hem, so that you can stitch right next to it (and not hit the foot with the needle).  Let the edge of the foot touch the edge of the hem as you sew.

When you get to the leg seams of the jeans, you’re suddenly sewing through a whole bunch of denim layers, instead of just two.  When this happens, the presser foot ends up at a steep angle, which makes it much more likely to skip stitches (resulting in a weak seam).  This is where the spacer comes in.  When the front of the foot reaches the seam, prop up the back of the foot with the spacer to make it level.  Then as you stitch over the seam, move the spacer to the front of the foot, to keep it level until you are past the bulky seam.  Be careful to keep the spacer in front of the needle, so that you don’t hit it as you sew!


Jeans hem spacer


If your machine still skips a few stitches, try sewing in reverse and then forward again over the part that’s giving you trouble.  Going slowly over the bulky parts will also help.  You can even use the hand wheel on your machine to make just one stitch at a time.  If it’s skipping a bunch of stitches in a row, check to see if the bobbin thread has broken.  If so, stop and cut the top thread too, then start again so that you overlap a few of the last stitches before the thread broke, to hold them in place.  If the leg seams are giving you a lot of trouble, you can also try flattening them as much as possible using a steam iron, or pounding them with a hammer.

When you get all the way around the leg, sew over the first few stitches that you made, to hold them in place.

Do not skip this step: once you sew around the hem, try on the jeans again to check that the length is where you want it.  If not, at this stage all you have to do is pull out this one line of stitching, and start again.  If the length looks good, you’re ready to finish off your hem.

If you took out more than about an inch in total, it’s likely that your folded out fabric is long enough to show below the hem if you turn it down.  If so, trim it to about 3/8″ (10 mm), or a bit smaller than the original hem (I repeat, try on the jeans and check the length of the new hem before you do this).  To keep these cut edges from unraveling, overcast them with a zigzag stitch.


Jeans hem overcasting


Use a regular sewing foot for this (zigzag and a zipper foot don’t mix).  Stitch close to the edge.

This whole process is pretty darn simple once you get the hang of it.  You can also use this method to hem other pants, when you want to keep the original hem intact.  It will be even easier if you don’t have think layers of denim to sew through.

In the next post I’ll go over my method for tacking down the extra fabric to make the hem look natural.  In the meantime, if you have any questions, just leave a comment!


Hello Sewing Machine—Behind the Scenes, and Acknowledgements


So today, a bit more about my new e-book, how I made it, and some well-deserved thanks to those who helped out!


HSM page 6 small


My first idea to make this book revolved around a cartoon sewing machine, and adding real thread to my drawings.   I thought it would help explain how all sewing machines are (in a lot of ways) pretty much the same.  I hoped that the thread would show up, and look like thread, and add a fun element of style (it did!).  But I knew that I needed more detail to explain some things.  For months I was stuck, thinking that I needed photographs, and not figuring out how to make them as good as I knew they would need to be.  That’s when my husband Bryan (a professional photographer) suggested maybe I didn’t need photos at all.  After all, instruction manuals of all kinds are still full of illustrations.   Sometimes they are even clearer than photos would be.  The more I thought about this, the more I thought he was right.  I started drawing, and then I knew he was right.  In an illustration, everything that I would like to be in focus is so, and the visual emphasis can be wherever I want it to be.


bobbin winding treadle small

This has got to be my favorite drawing in the book.  To find out what’s going on, you might have to get yourself a copy!


As I drew, I took some snapshots for reference, so I wouldn’t have to keep moving my hands back and forth and get them in the same place again, etc.  I also took a couple just to show my process and progress.


HSM paper sewing

Sewing thread onto a drawing of my mom’s treadle sewing machine, using that same machine!


The fact that Bryan suggested doing these drawings points to another really important thing about Hello Sewing Machine, which is that I didn’t make it by myself.  In fact, sometimes it seems like I didn’t make it all (despite the weeks of drawing, months of writing and editing, etc.), but more like I stood in the middle and brought together elements from everyone and everything I knew, things which already existed, and they coalesced and became this book.  I now understand why authors seem so passionate about their acknowledgements!   Mine are in the book, but I’m going to post them publicly here too.  Lookout!  Thanks below:


HSM desk chaos

Desk reaches maximum level of chaos, near the end of the drawing phase.

First and foremost, thanks to my mom.  She made most of my clothes when I was little, and created fabric magic right before my eyes.  Not only that, she taught me to sew, too!  She gave me access to all kinds of creative tools and supplies from the time I was old enough to hold them.  When I grew up, she bought me a sewing machine I couldn’t afford on my own, and I’m still welcome to anything and everything in her sewing room at any time.  I absolutely would not have the skills I do now without her in my life.

A close second for thanks is my husband Bryan.  Besides the idea to illustrate this book, I also leaned quite heavily on his knowledge during the design and layout phase.  Every day I lean on his love and support, and the fact that he believes in me.  I couldn’t ask for a better partner in life and our many adventures together.


HSM page 32 small


Also many thanks to Van and Charlie Odegaard, for letting me teach sewing to real live students at Odegaard’s Sewing Center!  I’ve learned at least as much as I’ve taught.  And I would like to thank Jena R. and Michael K. for the music. I listened to a lot of music during this project, and the CDs they gave me were like friends keeping me company.  Thanks to Brian S. for a great idea in word processing—it worked!  And last but never least, my truly amazing proofreaders: Kelly, Tom, Wendelin, & Lauren.

I’ve been as much humbled as excited by this whole process.  Both are great feelings!  I hope to continue to share the love here.  More soon . . .

Start Sewing with my Brand-New E-book!


HSM cover small


It’s the reveal of the super-secret project I’ve been working on for so long!  And it’s safe to say I’ve never been as excited about a post, or a project, as I am about this one.  Nearly a year ago, I had an idea to make a tutorial that would get people started sewing.  It would assume the reader knew nothing, and explain as clearly and approachably as I could make it, how sewing machines work and how to use them.

Well, it’s here, today!  Hello Sewing Machine is a PDF e-book, available for instant download from my Etsy shop!  I’ve spent the past year dreaming about it, writing it, drawing the illustrations, editing, doing design and layout, and learning so much about all of the above as I went.  It’s kind of unreal to finally see the finished product on a screen in front of me.  


HSM in progress


So, do you have a sewing machine sitting in your closet?  Would you like to get it out and start sewing?  Do you already sew, but you have someone you’ve been wanting to teach?  Do it today!  This guide will get you going.  It has everything you need to know about how your sewing machine works.  I want Hello Sewing Machine to be a bridge between would-be sewers and all the patterns, sewing blogs, fabric stores, everything that’s out there to help you make whatever you want.  All you have to do is take the first few steps to get started!


HSM page 7


As you know if you’ve been reading this blog, I’m a firm believer in handmade, and that by being makers, we make our lives better in just about every possible way: more connected, more sustainable, more grounded, more satisfied, more joyous.  It’s my hope that this little book will give more people the tools they need to realize those benefits in their own lives.


HSM page 13


I’ll be celebrating this release with some very relevant beginning sewing posts (including an all new one on hemming jeans) plus some other very exciting things, so watch this space!


Broiled Asparagus – Simple Spring Vegetables


broiled asparagus 1


I’ve been working super hard on my soon-to-be-released project lately, as you may have noticed since no post has appeared yet this week!  Luckily, some spring produce has also arrived lately, heralding the long season of practically effortless vegetables.  Perfect timing!  I could use some easy dinners right now.

If you’ve never tried asparagus broiled, it’s great.  It’s just a little caramelized and crispy on the outside, juicy and delicious inside.

If your asparagus varies widely in thickness, like this bunch did, either separate it into two batches or take the tiny ones out when they’re cooked, sooner than the thicker spears.   Cut or snap off the ends of the asparagus spears, put them in a broiler-safe pan and smear a little olive oil on them.  Start your broiler on low heat.  Put asparagus pan close to the broiler and check it every couple of minutes.  The spears will turn bright green first.  When they have caramel-colored patches and the ends are barely crispy, they’re done.


broiled asparagus 2


Broiled asparagus is delicious as a side to just about anything I can think of.  On the day I took these photos we ate it on lemon pepper pasta from Decio (a Christmas gift) with a little cheese, accompanied by a salad and then artichokes.

Enjoy!  And feel free to share your favorite spring vegetables/recipes . . .


In Which I Read My Diary From Last Year, and Re-Up for Me-Made-May!


If you were reading this blog this time last year, you no doubt remember that I signed up for Me-Made-May ’12, hosted by the fabulous Zoe.  I just think this is the best idea, it encourages all those of us who make clothing to actually wear it in our everyday lives, and thus think about what we make and use and why.

I had a great time doing it in 2012, and learned a lot.  My pledge was to wear one item of me-made clothing every day, which I succeeded in doing.  Sometimes you would not have been able to tell, since I made underwear count.  I also pledged to blog about something MMM related once a week, which I almost succeeded in doing.  I did draw and post a cartoon of my summer wardrobe, an extension of the way keeping track of what I wore for the month helped me clarify what I wear and what I would like to wear.  My overall favorite thing I did was to get three other lovely bloggers/sewists to share their thoughts on style and how sewing allows them to express themselves, in this post.

I knew that I wouldn’t take a picture of every outfit I wore, so I decided to also keep short notes for each day.  I dug them out recently and I was surprised at how much is in there, about my thoughts and how far I’ve built up my me-made wardrobe in a year, so I thought I would share some of them.  If you are bored by reading other peoples (very brief, not edited for grammar) diary entries, please skip to the bottom of the post.  I’m going to include a couple of explanatory notes – May was as usual for us, a busy travel month, and even with the notes it’s going to feel pretty disjointed.


Me-made skirt.  I'm kind of tired of these two tops together, but they work well. . .


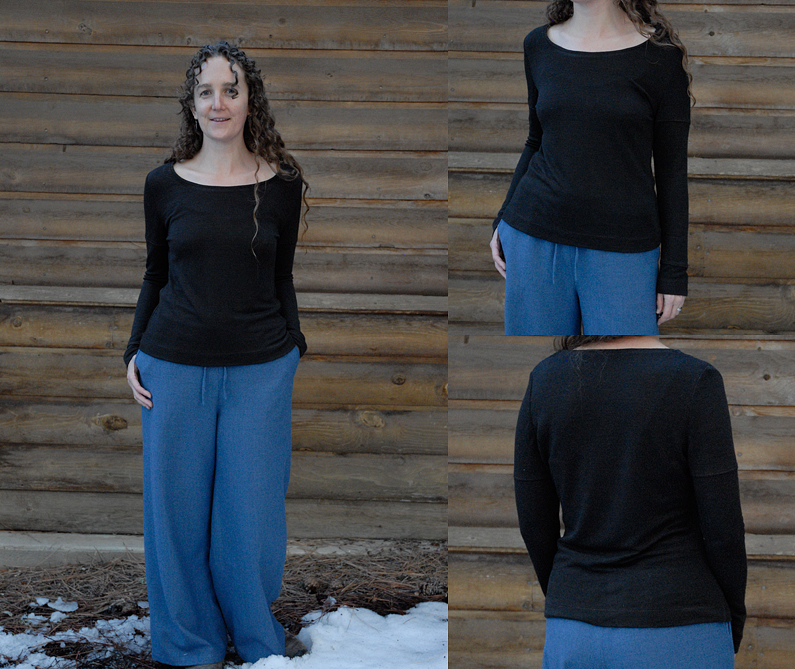
Day 1 – wore green Deva yoga pants, blue Henley. I felt more proud and self-sufficient than I thought I would!

Day 2 – I wore Henley & pjs to clean, then grey pants & ‘Bethan t. I thought about the various imperfections of those pants and vowed to make better ones.  (On this day we flew from home to pick up our truck and continue our summer art show circuit.  I promise to write a post about what exactly that means and what it’s like, soon.)

Day 3 – Wore cropped drawstring pants and strapless top. Found myself wishing I could wear all me-made outfits!  Wanting more time to sew since this month is good inspiration.  (When we are on the road I am separated from my sewing machine by hundreds or thousands of miles.)

Day 4 – wore all me-mades! Shorts & blue tank to set up, then new sundress + undies.


booth setup outfit

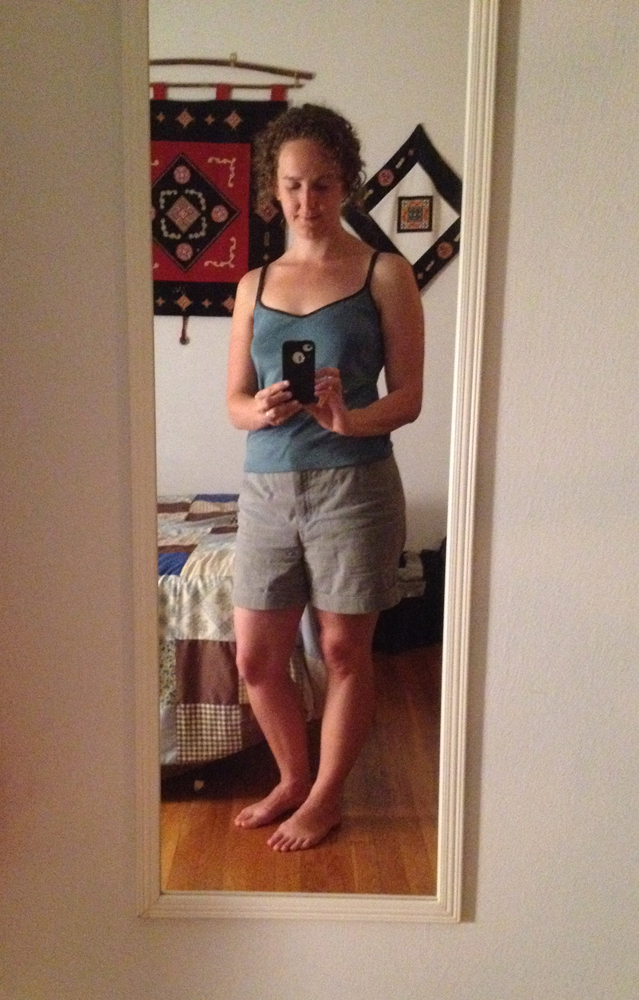
This is my standard booth-setup outfit, shorts that were a test make, and a tank that’s near the end of its life.

Day 5 – washed undies the night before to wear, wore those under too hot for anything else dress. Thought about need to make another airy dress, fabric is key.

Day 7 – laundry day. Repeat of plane ride outfit and thoughts about pants.  (We are camping out between shows, as we drive to the next one.)

Day 10 – wore B’s jeans & mm pink top in anticipation of City Museum. Maybe I should make some jeans? Would it be more work to find or make? Is either worth it – probably I will stick with the no jeans plan.  (We stopped off at City Museum, in St. Louis, which is like an amazing cross between mixed-media sculpture and playground.  It’s awesome.  Wear sturdy pants.  I once lost a fair amount of corduroy on the multistory slide.)

Day 12 – blue skirt/jeans for hiking with mm black tank. Dressing this way may mean laundry sooner. It’s cool and I’m wishing I brought mm hiking pants/another sweater. Thinking about how what we wear is a compromise between what we’d like, what’s available and the weather.

Day 13 – still camping, wearing mm tanks with alternating skirts & B’s jeans. Kicking myself for not bringing mm hiking pants.

Day 14 – now wearing B’s socks as well with more of the above and freezing!  Raining out and did laundry.

Day 15 – with fresh laundry! Wore grey mm pants, tank & sweatshirt. Thought about the ideal summer wardrobe – two pairs of pants, one for setup/camping, one nice enough for town/at show if cold. Thought that I have as much affection for the non-mm clothes that fit well, color I love, etc.

 
The pink shirt is the me-made


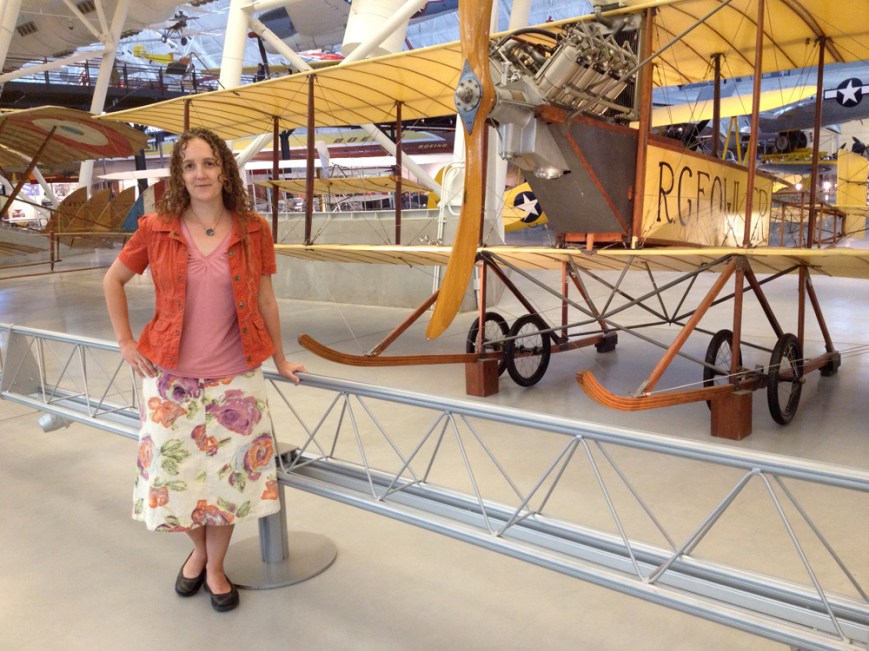
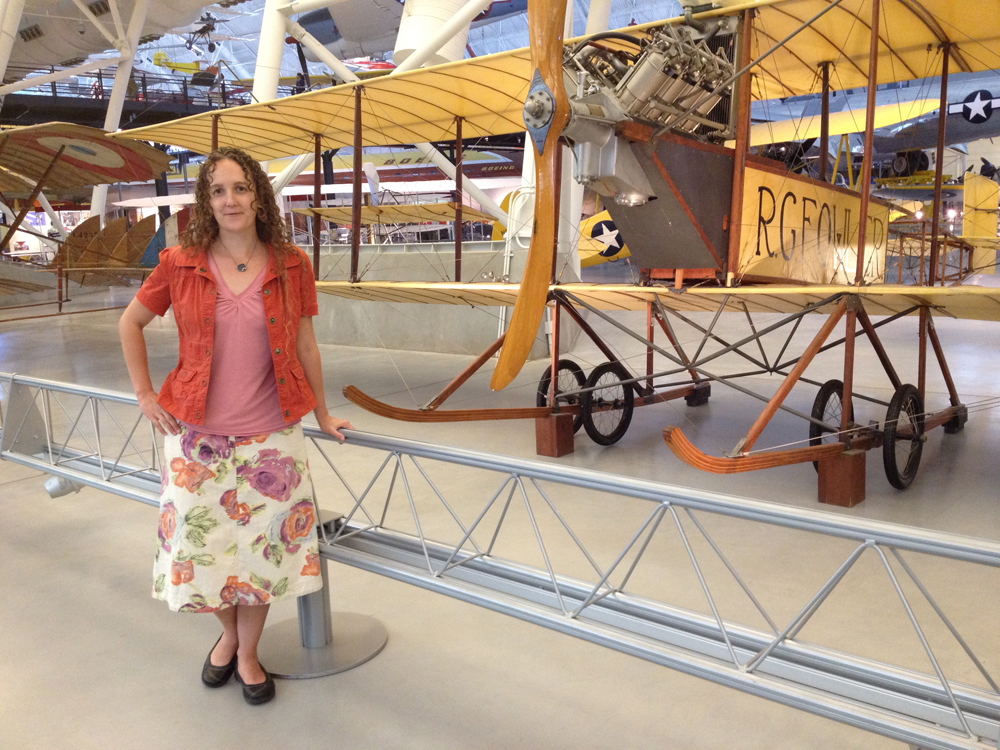
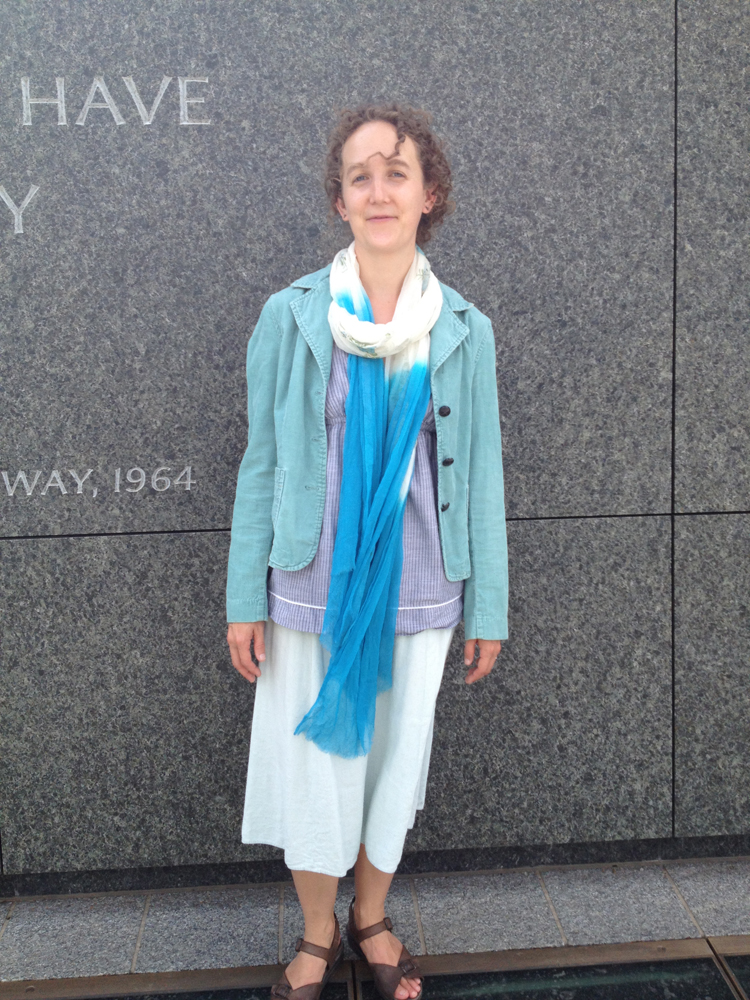
Day 18 – all mm! Shorts and blue tank for setup, wedding test dress for show. Thought of a plan to shorten/line dress.  (This show is in Reston, VA.  I love the DC area – the picture above is at the Air and Space Museum Udvar-Hazy Center, and the one below at the MLK Memorial.)

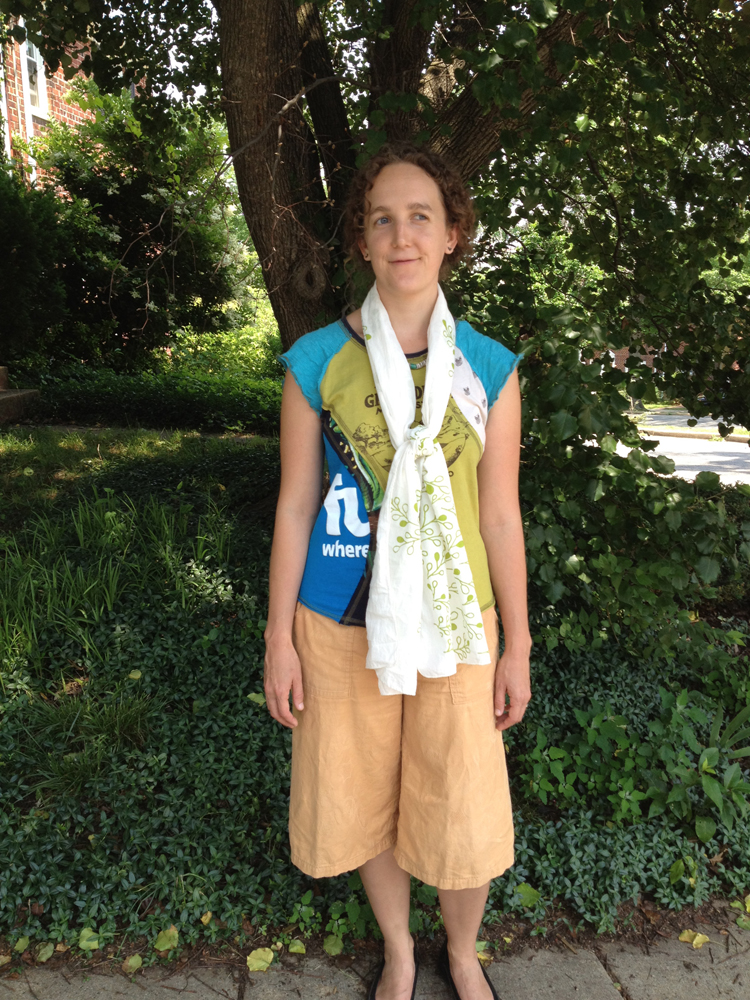
Day 21 – lounging/computer work/groceries and cooking at friends – good day for mm cropped pants & berry T.

 
Same me-made skirt.  I've really just discovered scarves lately. . .


Day 23 – same outfit as day 16, boring!  Me made pjs for laundry.

Day 24 – sorely tempted to cheat, but we are almost done  & I can stick to my pledge. Mm black tank & pink stripe skirt. Stuck in Floyd Bennett Field.

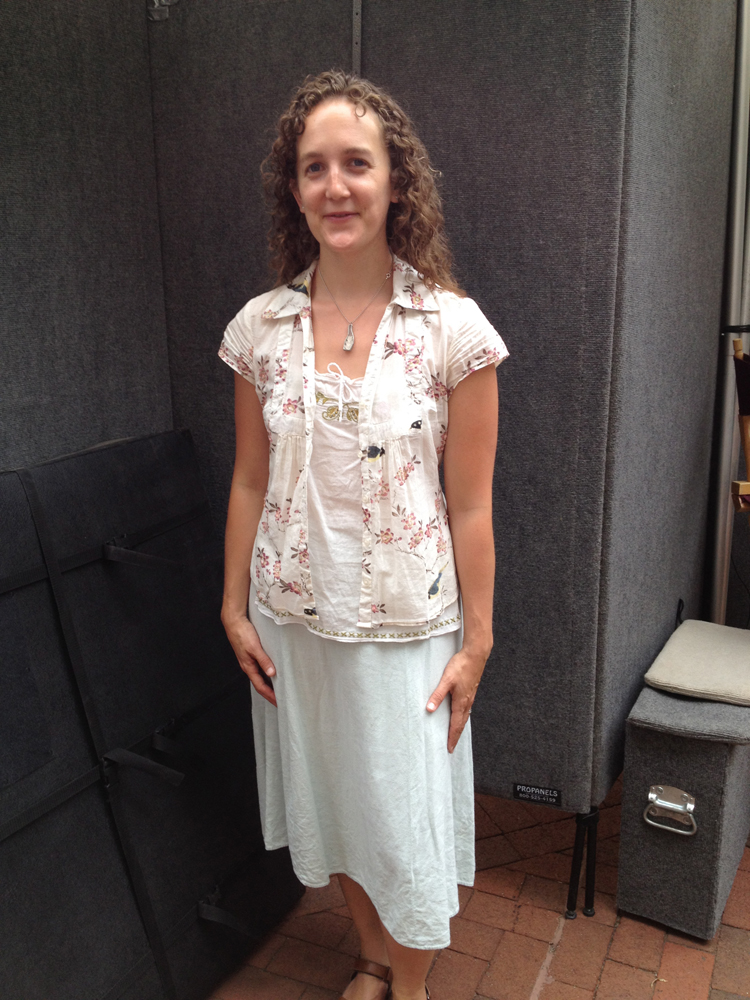
Day 25 – in NYC. Mm linen skirt (loving it!) & dk blue top stitched tank with blue cord jacket.

Day 26 – poor packing leads to undies only today –  with ‘bethan top and blue tea dyed skirt with flowers.  Also no bra – but fabric shopping in NYC!!!!  (This really happened.  Maybe I’ll tell you about it some time, we had quite an adventure.)

Day 28 – Mm drawstring pants & pink shirt w/ mm bra. Good for driving/hanging out with nieces. Wishing I could wear all mm pieces for the rest of May  but don’t think I have enough.


pink shirt drawsting pants

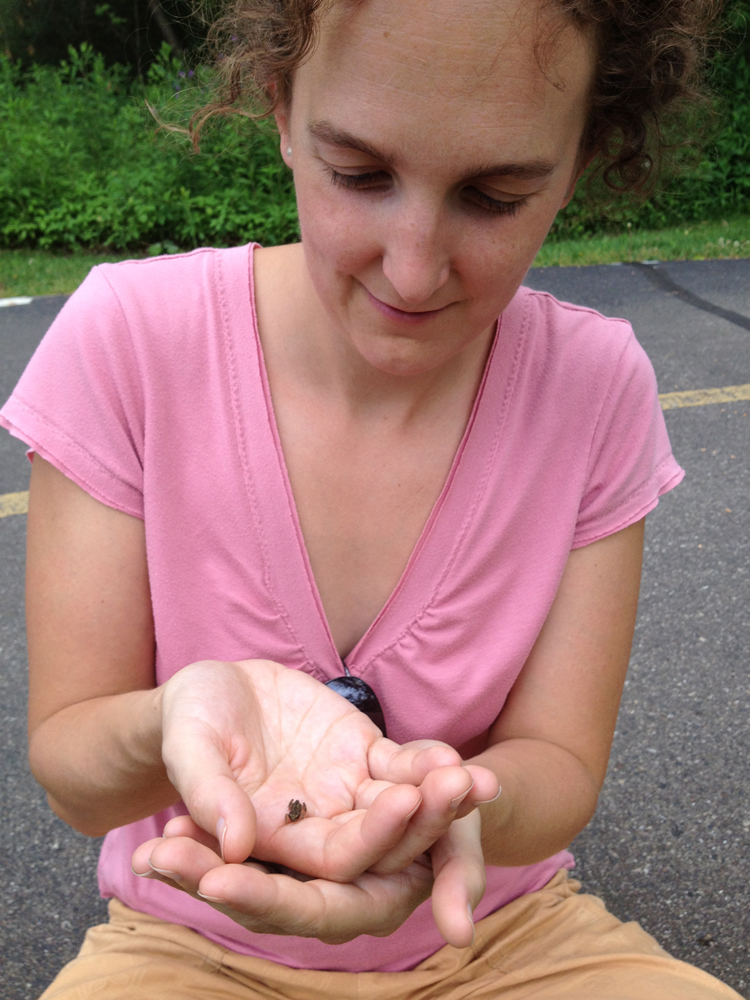
Catching tiny frogs with our little nieces at a pond in MI


Day 30 – grey pants even got a compliment from Mandy! With pink mm shirt and sweatshirt.

Day 31 – same as day 30 – camping out – cool again. Even though at times frustrating, I’m a little sorry to see the end of mmm.


bethan shirt, pants and scarf


So, um, there you have it!  Reading these over, I think I should make another shirt like the pink one, it was probably the most-worn item.  I’m certainly glad to report that my me-made wardrobe has grown by a few of the pieces I most needed last May – now that I have good me-made pants I shouldn’t end up wearing Bryan’s jeans this summer!   I also thought more about what I would pack this year (we’ll be on the road again for most of May), there are plenty of me-mades in various layers ready to go.  And I made a new airy dress, which I hope to show you some time during Me-Made-May – knowing that I wanted to up my pledge this time was an incentive to get it done in time.

My pledge for this year is: ‘I, Tasha of Stale Bread into French Toast, sign up as a participant of Me-Made-May ’13. I endeavour to wear two handmade garments, of which underthings may count for only one, each day for the duration of May 2013’

I’ll definitely take some pictures, although probably not every day, and put them up at the MMM Flickr group.  It was really fun last year checking out what everyone else was wearing there.  I’ll make notes again too.  I’m looking forward to seeing what new ideas I come up with during this year’s challenge.  There’s still time to sign up, until the 30th, and all are welcome, so go check it out, I highly recommend it!


Three Long Sleeve Tops, and Experimenting with Sewing Knits

brown silk front piece


So, here is the sewing update I promised! I finished all three of these shirts months ago, but I haven’t got around to photographing and putting this post together until just recently.  The snow you see here has all melted away, in fact it’s almost warm enough to wear just one shirt outside!  Well, some days yes and some days no.

After I finished my fabulous purple pants, I was ready for a faster and easier/less fitted project, and also getting desperate for some long sleeve knit shirts of any kind in my wardrobe.  I had one looser, comfy knit top in cotton with a little lycra, definitely on its way out, but I liked the fit and decided to copy it.  It also helped that I found two big pieces of cotton knit fabric in the stash I share with my mom.


grey shirt on


I made this grey version first, and was overall pretty pleased, the fit isn’t totally perfect, but it’s, um, a knit shirt!  Since it was something I needed, I started wearing it right away and it’s lovely to have a soft new long-sleeve top.  It went together like lightning, no edge finishing, some double needle stitching for the hems and it was done.  And I thought it was close enough to what I was going for to try in silk.

I bought this silk knit fabric at Promenade Fabrics in New Orleans.  That store is such a treat to explore, it’s full of the loveliest wools, linen, ribbons, it’s very NOLA in that it’s unusual, but high quality.  There aren’t rows of the same thing next to each other in different colors, I swear each bolt I looked at was totally unique, so naturally I had to dig through as many as possible (which was a lot, since luckily I had all morning).  I knew I wanted to make more long sleeve tops, and I was hoping to find some wool knit, which I didn’t really, but I did find this rather amazing silk, knit in two layers, shiny inside, heathery soft and slightly fuzzy outside.  “Where did you find THIS?” the owner’s son asked when I went to have it cut.  Score!


brown silk sleeve


So, having tried out the pattern, and curious to see the differences, I got out the silk.  Only three problems; one, it raveled!  I guess I’ve been spoiled in a way by stable cotton knits, you can imagine my horror when I pulled on one edge and tiny runs immediately started down the fabric, as the two layers peeled apart!  Fortunately, if I zigzagged the edge it seemed to hold everything in place, even when I tugged on it, so I decided to play it safe and overcast all the edges of all the pieces, before sewing them together.

The second problem wasn’t really a problem, more like me being thorough/not having enough knowledge of silk knits to dive right in – I just took a lot of time making samples.  Since this fabric is incredibly slinky, plus stretchy, I knew that it would be easy for the seams to come out either baggier or tighter than the rest of the fabric, which would make my finished shirt look decidedly amateur.  So yeah, I made a LOT of samples.  I definitely recommend making as many test seams as it takes, especially if you are working with an unfamiliar fabric!  I decided to tag all these with a little bit of muslin so I could write down what I changed.  I think the most interesting thing I learned was that by increasing the stitch length, I could get the seam to pull the fabric in a little more, shortening the seam.  The colored stitching is my first, just to make sure the silk would not get runs as I washed it (by hand).  See how the other edge goes from stretched out to pulled in?  I also found that some stitches worked well on one layer, but not as well on two.  Eventually I settled on using a mock-serger stitch to overcast around the pieces and sew seams, and a regular zigzag for topstitching.  Although I have to admit that I decided matched seams and a total lack of skipped stitches were too much to ask for in this project, overall I’m really pleased, the seams neither draw in nor pooch out, which is exactly what I wanted to achieve.


brown silk samples


Oh, the third problem?  I totally didn’t have enough fabric.  This seems to be a theme of mine lately . . . I ended up cutting the sleeves in three pieces each.  Eight more edges to finish, four more seams, but the first thing that Bryan said when he saw it was, “I like the sleeve seams!”  Still, next time I’ll try to remember to just get two yards, having enough for full sleeves and a matching tank top is NOT a bad thing.


brown silk shirt on


When I first finished it I couldn’t decide if it was worth all the extra effort for the fancy fabric.  But, the more I’ve worn this top, the more I’ve been bummed when it’s in the wash.  It has the kind of drape that makes wrinkles disappear or just look elegant, it feels divine on my skin, and it looks like something just a little special.  In short, I’ll be hunting around more fabric stores for unusual silk knits.


color grown cotton shirt and samples


While I was at it, I decided to make one more shirt from stash fabric, and play with the fit a little.  I narrowed the back around the waist, and flared it out again over my hips, to try for a little less puddle of fabric at the back high hip area.  It did help some, but I’m left wondering if I need a center back seam to make a big difference, and if so, wouldn’t princess lines work better and look better?  Or should I just reserve this pattern for slinky fabrics – this one is decidedly not.  It’s a lovely color-grown cotton, but the fabric has very little recovery from being stretched, meaning it tends to hang a little bit loose, and it’s kind of thick.  I made a few more samples before sewing it, mainly to try for a stitch that wouldn’t stretch out the seams.  I like this shirt and I’ll definitely keep wearing it, but it’s not a perfect match of pattern and fabric.

Since I was playing with different fabrics, I thought it would be fun to show the tops with a similar contrast in pants.  They’re the same pattern (another one I copied from an existing thrifted garment) of no-side-seam drawstring pants.  The green pair are a textured cotton, I wear them to yoga a lot, and sometimes to lounge around in.  The blue pair (which aren’t quite as electric blue in real life) are wool crepe – the result of a time when I really needed some new pants, hadn’t fit regular ones well enough yet, and had some lovely wool just hanging out in my stash.  I’ve worn them teaching a lot, and to swing and tango dancing, and they’re great for travel, but I would definitely not wear them to yoga!  Again, I think it’s the drape and the body of the fabric that makes them look so much more elegant.

Next up for sewing: summer stuff!  Especially a dress, for Me Made May ’13 . . .


Using Fusible Web to Alter Patterns


From reading this blog, you might think that I haven’t been doing much sewing lately, but actually I have, and altering patterns too.  I intend to catch you up soon.  In fact, I intended to catch you up Monday Tuesday today, but I’ve been busy, and I’m realizing that by the time I finish the photo editing it will be next week.  Never fear though, I have something good (but short) the meantime, one of those why-didn’t-I-think-of-that-ages-ago things.  This one involves adding paper to patterns.

If you have ever changed a pattern in a way that required drawing part of it outside the current cut edge, or cutting it apart and adding more in the middle, you know what I’m talking about.  It’s hard to tape more paper to the pattern smoothly, it tends to make folding and cutting weird, and smoothing the pattern pieces when you get them out to use again involves carefully dodging the tape with the iron, or cleaning tape gunk off the iron (ask me how I know that).  Sure, I could trace the whole pattern again, but that seems wasteful of my lovely pattern paper.


fusing pattern paper


Then one day it just occurred to me – I have fusible webbing tape.  If I fuse the two pieces of pattern paper together, folding and ironing them is suddenly super easy, and the edges are seamlessly held together all the way along, with no gummy stuff on the outside!

I peel the fusible web off of the backing, and tack it along the edge of the pattern paper with my fingers.  Then I lay the pattern on top of the new paper, making sure that both are flat and smooth.  I press with a dry iron and voila!  I can trim the new paper edge right next to the fused part for a smooth join.

I use Sewable Swedish Tracing Paper”, which I get from Birch Street Clothing, to draft and copy my patterns.  I usually don’t sew it, but I love everything about it, it’s sturdy, yet soft, I can see through it to trace, and also write all over it with ballpoint pen.  It worked great for this technique.  If you try it on another pattern paper (must be iron-able) do let me know how it works!  I used Lite Steam- A-Seam 2 fusible web tape, which I got from my local quilting store.

Sometimes it seems like I should have a talk with my brain about timing (as in, could we have this idea before ironing Scotch tape by accident?), but on the whole, I guess I’m willing to wait for new ideas, if they’re as elegant and helpful as this one is to me.


I’m in a Fashion Show at Flagstaff Photography Center


FPC Fashion show poster

Look, my name is on this poster!


I know what you’re thinking, I’m too short to be a model – but it’s not like that!  Actually, there’s an eclectic show at FPC this month, celebrating fashion, photography, and the intersection between art and what we wear, and featuring some of my work!


4 bags photo fashion


If you are in town, come by, I will be there this Thursday night for the fashion forum, and Friday during First Friday art walk.  I have a lovely selection of one of a kind purses, scarves, and wallets in the show, all made from recycled and handmade materials and totally unique!  Plus the work of four different photographers, and some totally wild and amazing macramé masks made by Sheree.


4 scraves photo fashion


If you’re not near Flagstaff, I’ve also been working feverishly on my latest project, which will be available worldwide, very soon if all goes well!


In the Desert, We Wait for Spring, and Eat Roasted Butternut Squash with Sweet Spices


grand falls 1


Bryan and I drove out to Grand Falls the other day, down a long dirt road, to see the spring runoff flooding down the Little Colorado river and over the cliffs (as high as Niagara, or so they say around here).  I kept thinking about how our Ponderosa pine forest seems so complete when I’m in it (which is most of the time), but really, just on the other side of town is a transition zone between our high-elevation forest and the lower-elevation piñon pine and juniper, and the scrub-covered desert.

It’s getting warmer all over our varied section of the landscape, including the valley further south where most our local produce comes from.  We are not, however, California, and we are still waiting for asparagus and strawberries.


grand falls 3


In fact, as we drove, it seemed like the desert was waiting too, the little bushes looking soft and sun-bleached, flocking the hills.  Maybe the roar of muddy water will bring some green, a few desert flowers . . . but not yet.


grand falls 4


Fortunately, in the meantime, we still have squash.  Butternut squash was the first winter vegetable I fell in love with, since what’s not to love; the round, slightly sweet flavors, the vibrant orange color, and in this case, brightened up further for the coming spring with some new and unexpected spices and a tangy sauce.

I mentioned that we’ve cooked a LOT of recipes from Plenty by Yotam Ottolenghi this winter, this is latest one; which I adapted to my tastes and what was in my pantry that day.  It was just perfect to make ahead and leave in a friend’s refrigerator while we gallivanted around the desert, ready and waiting for all of us to be hungry when we got back.


roasted butternut with sweet spices


Roasted Butternut Squash with Sweet Spices and Tangy Chile Sauce

Adapted from Plenty by Yotam Ottolenghi

Serves 5 as an appetizer


Preheat the oven to 400° F

Take two very small, or one medium-large butternut squash.  Cut the squash in half lengthwise, scoop out the seeds and set them aside for later.  Slice the squash 3/8 inch or 1 cm thick.  Lay out the slices on a baking sheet lined with parchment paper or a non-stick mat.

Take 1 Tablespoon of dried cardamom pods; break the green pods open, either with your fingers or by crushing them a bit in a mortar and pestle.  Discard the pods but keep all the seeds which are inside.  Crush the seeds until they are roughly ground, either with a mortar and pestle or a spice grinder.

Add the ground cardamom to a small bowl with: 1 teaspoon ground allspice and 3 Tablespoons olive oil.  Stir this up and brush it all over the squash slices.

Sprinkle a little salt over the squash, and roast in the oven until the slices are tender but not mushy when stabbed with a fork, about 15 minutes.

Meanwhile, separate the squash seeds from the stringy stuff they grow in, and put the seeds into the bowl with the leftover oil and spices, mix them around to coat.

For the sauce: stir together the juice of 1/2 lime, several heaping Tablespoons of crème fraîche (once you have it, you put it on everything) and some chopped fresh chile  – I used 1/2 of one large defrosted frozen roasted one from last fall (you can put those on everything too).  If dairy is not your thing, these would also be great with just a little chile or hot sauce, or maybe even a sweet and hot sauce . . .


roasted butternut sauce and seeds


When the squash is done, transfer it to a cutting board, or platter or bowl to serve, and put the seeds on the same baking sheet and roast them for 10 – 15 minutes, until golden and crunchy.  You can serve them with the squash, or eat them as a road-trip snack.  The leftover spices are more subtle, but delicious with the toasted seed flavor.

To serve the squash, slide a small sharp knife around the outside of the slices, taking off just the peel.  If you run out of time, you can also serve them as they are and let the eaters peel their own.  This is good cold or room temp, with a little sauce drizzled over the top.


So, what are you eating?  Is it spring yet where you are?


grand falls 2