A Silk Watson Bra

You may have noticed that I’m not big into bandwagons, and if I am going to jump on one, I like to wait until it’s safely parked back in the barn and everyone else has left first … I actually bought a copy of this pattern right when it came out and it seemed like everyone in my sewing-internet-world was talking about it, but then in more my typical style, I decided to think about it for quite a while before actually making it.


silk watson bra 1


What was/is really exciting to me about the Watson Bra pattern is that someone else already did all the hard work of figuring out the exact curves of each piece to make a smooth cup shape, make it fit into the band, etc. (thanks Amy!), and that it’s specifically designed to be made without underwires, which is exactly what I wanted.

What I was less excited about is the fact that it called for mainly synthetic stretchy stuff; lots of kinds of elastic and power mesh, etc. As you may also have noticed, I’m so over it with all of that, and I’m trying to use all natural materials whenever it’s even remotely feasible. And one of the things that kept popping into my head whenever I looked at all this cashmere felt I have around* was, “this would really be perfect in a bra!” Since you know, it’s substantial but flexible, and insanely soft on the skin. But could I really make a bra using all natural fabrics? Maybe without even elastic?

It turns out the answer is a resounding yes! Not only can it work, but it did work beautifully on the very first try (some luck involved). Using my measurements of approximately 31 ½” underbust and a 1” difference between full and upper bust, I decided to make a size 34A, erring on the side of a slightly smaller size since my materials weren’t super stretchy and I didn’t want it to come out too loose. I made a couple of alterations to the pattern; adding ½” to center front since I knew that would fit my frame better, and straitening out the bottom line of the band to allow for the possibility of using an existing hem when upcycling garments for fabric (although I didn’t do that this time). I also added to the seam allowance in the center of the outer cup pieces, so I could grade it with the inner seam allowance to avoid a noticeable ridge there.


silk watson bra 2


The grey fabric is from a silk knit top that had worn out around the underarms and cuffs but still had plenty of life in the body. The pink binding is leftover fabric from making these camis (very thin silk knit), cut 1 ½” wide, sewed ¼” from the edges, and turned under. And the inner cups are indeed felted cashmere scraps*—oh yeah! I sewed it all together with a simple zigzag stitch, and sewed the straps on by hand.

According to my notes I made this back in February, which means I can now safely report that it works as well in real life as I’d hoped. The only alterations I’ve made since then are to move the back attachment point of the straps closer to center back (typical for me if the straps are slipping off my shoulders at all), and to tack down the bindings at center front with some tiny hand stitches, since the edges pulled up a bit after a few wears and washings, revealing the cup layers.


silk watson bra 3


I thought this might be a wearable muslin version, but instead it came out near perfection in fit and function. It does everything a want a “real bra” to do: provide a smooth and socially acceptable silhouette under a single other layer of clothing, and add a little bit of support. It’s also so comfortable I forget I’m wearing it, which is key for me. I thought about making another one (I even have another old silk top or two with some features that might be really fun to incorporate) but the truth is I don’t need it right now. This one, plus my more bralette-type past attempts at upper-body lingerie, are covering all my wardrobe needs. So, I’m officially checking “make real bra” off of my bucket list goals, and moving on!

I’ve been thinking a whole lot about what it means to have “enough” as I get closer to actually filling the gaps in my wardrobe. This post by Felicia has only broadened my sense that this is a really important thing for us all to be thinking about. A whole post about it here is likely coming … I’d love to know your thoughts at any time.


Previous makes


*Thanks to all the Fiddleheads hats I’ve made over years now, I have an entire giant plastic bin of small bits of luscious felted cashmere knits, which I could never throw out despite the fact that there’s way more than I’ll use in one lifetime (unless maybe, a giant intricate patchwork cashmere blanket—don’t even think about that, self!). Which is why I’ve started sorting them into groups of pleasing colors and offering them to fellow makers in my Etsy shop. I’ll continue to sort and list more batches as they sell. If you’d like some and you have color requests, just give me holler, here or there!

Cheers!


At John C Campbell Folk School, and Thank You


jccfs17landscape4


Once I start talking about my time at John C Campbell Folk School, I usually can’t stop. So much happened in the three weeks I was there that one story just leads to another … in case that happens in writing too, I want to begin with a heart-felt thank you to all of you reading this. This blog may not have thousands of followers or get major media attention, but it stands out here on the big ol’ web as a picture of who I am, what I’m doing and sharing, and where I’d like to go. The fact that it exists has helped make several opportunities possible lately, including this one. The ties between this space and the real world are many and interwoven. So, thank you all for being part of this piece of my life, which has contributed much to the person I’m becoming.


jccfs17landscape1


A heart-felt paragraph is actually a good introduction to this story, since one of the biggest things that stands out about JCCFS is just how many people I met there who were speaking and acting from the heart. My wonderful new friend Becky (who got recruited to be my assistant in the second felting class) told me about another student who had said, “I always knew I marched to the beat of a different drummer, but at the Folk School I met the rest of the band.” I feel more than a little of that myself. Somewhere towards the end of the first week I started to realize that whoever I was standing next to while waiting to go into the dining hall, though they may look like a mild-mannered Southerner somewhere around retirement age, was in fact very likely to be a member of my own quirky maker tribe! And that if I started talking to them, it was also likely that I would learn something really interesting and/or get a new idea. It was amazing. It also made me wonder if part of the reason I’m usually shy with strangers is that I’m convinced they won’t understand me, and if I’m not giving the strangers in other places enough credit. In other places though, it is harder to start conversations with, “Oh, you’re taking blacksmithing, very cool! What are you making this week?”


jccfs17landscape5

Part of the view walking from my temporary home to breakfast. The garden is in the left background, hay right background.


The physical Folk School is a collection of a couple dozen buildings for classes, housing, and community areas. Some are new, and some are gently worn with the passing of many feet and hands. The campus is out of the way enough to feel like its own little world, surrounded by various hills (which people from lower elevations might call mountains), fields complete with picturesque rolled hay, and lots of greenery and flowers towards the end of summer. There was fog most mornings (which being from a dry place I find exotic and beautiful). The chorus of night insects and frogs stood out to me enough that I made a little recording to remember it. On a few weekend nights you can also hear the distinctly incongruous sounds of a nearby car racing track.

Each day is scheduled with class time, meals, and optional extra activities in the afternoons and evenings. Music and dance are a big part of things; there are songs before breakfast (optional of course), contra dances every Tuesday night (so much fun) and concerts on many weekends. And a dozen or more classes in different craft subjects going on all at once! It really is a lot like my family craft retreat every single week—that much energy, that much community, that much learning, that much working intensely—except that during mealtimes and free times you also see a bunch of other people who are having a similar experience in another studio nearby.


jccfs17landscape2

The door through the gazebo on the left goes to the Wet Room, home of felting, dyeing, and other great classes, one of my new favorite places. The door on the right goes to the cooking studio.


I taught three classes; two on felting (one was a week long and one was a quick weekend format), and a week on screen printing with natural dye. Anyone who has seen me in person (or even on my Instagram) in the last two years or so knows that I’ve been fairly obsessed with natural dye and printing in particular. So much prep work went into that class especially, because it’s the one that’s the newest to me, and also because of the nature of the subject. What makes working with natural dyes so compelling is the infinite possibilities, the way that every single variable seems to affect the color you get … but that also makes it nearly impossible to feel prepared for class! Nevertheless, we all learned a lot and my hope was that the students would all leave with a solid foundation for their own experimenting. I had had some really lovely students in all three classes, people who were gracious, and helpful to each other, and full of new ideas. I was really impressed with the curiosity and creativity of the students who are drawn to JCCFS. You would not believe how many unique felted objects can materialize (and how much wool can disappear) even in a weekend class. In the week-long felting class we formed such a little community that some of us (including me) cried when it was time to say goodbye.


jccfs17felt1

Felting in the Wet Room.

jccfs17printing1

Printing in the Quilting Studio.


After the classes I taught were finished, I stayed a third week as a student (one of the benefits of teaching at the Folk School is that you get instructor credits which allow you to take a class more or less for free). I’m so glad I did, it was wonderful to experience the place from a more relaxed perspective, to have a week with more time for walking, extra activities, and hanging out with Julie, one of the student hosts who took my first felting class and became a fast friend. I took a class called Sheep to Shawl with Martha Owen, who is the resident artist in charge of felting, spinning, dyeing, etc. (and the person who hired me to come teach felting). We washed and dyed fleece in some gorgeous natural colors (without felting it, which I always found intimidating before), we learned to hand card, and we practiced spinning different styles and preparations. I also got to try out a great wheel, and even spinning the fuzz right off of an angora bunny! Martha is a generous teacher who shared a lot of her life with us, taking us to visit her sheep and her home. She knows/knew many people in the fiber world who are legends to me (like Norman Kennedy and Jim Liles), and her class is full of stories. The whole school actually is full of stories, and connections being made.


jccfsfb-greatwheel1

Photo of me at great wheel via the JCCFS Facebook page.


When I got home I knew I still had some internal processing to do, continuing to turn over everything from a very full three weeks until it started to make sense with the rest of my life. Still, I kept thinking that it was taking me quite a while to get back to feeling “normal” … until I realized that is what it feels like when you’ve left a part of your heart behind. I grew a lot at the Folk School. I left as a better teacher, and as a person more able to be calm and trust that things will work out. I met and bonded with so many wonderful people. I’m surrounded by little reminders of them now; handmade things people generously gave me, and other beautiful things that I bought to bring home, and lovely wool from Martha’s class which I am trying to comb a little bit of each day. At least once a week, and usually more, I get a postcard or an email from one of my new buddies. Even if I wanted to pretend to be the same person I was before I left it would be impossible. Whether or not this turns out to be a “big break” that leads to other things for me, I’m profoundly grateful to have been able to go, to have learned all that I did and made all of these connections, to have been somewhere where I felt so at home that I understand what it’s like to fall in love with a community. As my excellent assistant for the printing class, Sally, says, “The Folk School is the easiest place in the world to practice gratitude.” I will endeavor to practice at home too.


jccfs17landscape3


A New Slow Sweater, What it Says, and the Idea of Knitting “And”


MMHenley 3


You know how sometimes you see someone, a stranger, and without meaning to, you imagine that whatever they’re wearing and whatever car they drive are the things they have chosen out of all possible options, that these things say something meaningful about their personality and their life? And then you look at yourself, your car, and maybe your clothes, and realize how many other circumstances played a part? I feel like we who make our own wardrobes move slowly (slowly, please cut yourself some slack, it’s going to be a process) towards the point where at least for what we wear it’s true: our clothes say exactly what we want them too. (My car is another story, I don’t know about yours. It does say that I would rather duct tape the mirror back on and buy better food than other possible options …)

This sweater feels like a step towards what I want to say with my knitting. It’s made with Mountain Meadow Wool (they’re a woman-owned company using US wool from the West, committed to eco-friendly practices) in a sheep-grown color (“natural dark gray”) which I love. I feel like the message that real wool is beautiful and good comes through, even if you saw me and assumed I bought this sweater (although if you saw my car you’d know I couldn’t afford it). You can also see that I love texture and value detail, and hate being cold.


MMHenley 1


I’m pretty sure this was supposed to be my One Year, One Outfit project for 2016. I started planning it in late 2015, started knitting as spring came around, and brought it with me on the road last summer, but it took until this spring to finish. This was a long knit for a whole lot of reasons. The textured stitch patterns just take longer; there was more stopping and checking and thinking than with plain stockinette or one pattern all over. Sweaters are big, and pretty soon I wouldn’t necessarily take this one everywhere I went. Making something only loosely “inspired by” a pattern (the Cotswold Henley by Meghan Babin) takes a lot of thinking, and measuring, and planning, and sometimes ripping out and knitting again. All totally worth it, but time consuming, and sometimes I ended up not knitting because planning the knitting was daunting and I was too tired or overwhelmed.

When we got home in the fall, I really wanted to keep making progress on it, so at first I decided I would work on the sweater before bed, instead of spinning, until the sweater was done. I love spinning before bed, and it has to be said that I did not love knitting the sweater during that time as much. Sometimes I would just skip it. After a while I realized that, although I’m not the kind who likes having a bunch of projects in progress, this was a false choice—it’s actually healthy for me to have a little knitting and a little spinning going on at the same time. I also realized something about how I like to work that I kind of already knew; knitting is an “and” activity for me. I love knitting while traveling, knitting while hanging out with friends, and knitting at meetings, but I really don’t love sitting quietly by myself and knitting. I’d rather do something else with that time. So I went the other way; I started spinning at night again, and hauling an extra tote bag full of sweater-in-progress with me to social events and anywhere else I could see that I might have some down time. That worked much better, and before long the sweater was actually done!


MMHenley 2


I believe that it’s done and that I knit it, but I’m having trouble believing that I get to keep it, if that makes any sense. In other words, I got pretty much exactly what I wanted. Of course there are a few things I’ll change in the next version, but there always are. I’ve decided that just shows that I’m still on a journey.

I started wearing it as soon as the last seam was sewn, and it went on quite a few outings this May, and into June in our variable mountain weather. The yarn has pilled some, but I’m hoping that how brilliantly it held up to being ripped out and re-knit (ahem) multiple times in certain sections means that the pills will be temporary and not terminal. I drafted Bryan to take the photos of it on me on the last cool day we’re likely to have until fall, and then carefully packed it away. Getting it out when the weather turns again is going to be such a treat!


MMHenley 4

There are two different stitch patterns, but they’re hard to see unless you’re really looking. I possibly should have gone with something bolder/more contrast, but then again subtle is my jam …


A few knitting notes: I wanted this to fit over my thickest winter shirt/sub-sweater (I hate being cold). I used Karen Templer’s idea of in-the-round “seams”. This is seriously brilliant as far as I’m concerned. Knitting seems so perfectly adapted to be made in the round, to be shaped organically, to be seamless, and I’ve never been willing to give all that up for the structure that seams can add. Now I just might get both! I made a pretty detailed/extensive chart of measurements for various sections of the sweater when I was planning where the “seams” would go and how big the whole thing should be, based on trying on an old sweater and marking it with pins. I’m really looking forward to having that chart and this sweater for planning future sweaters. I’ll be able to look at them and compare pattern measurements and know how big I want the sleeves, or how wide across the shoulders, etc.


MMHenley 5

Guts: Picked up stitches around the neck/placket, and where the sleeve joins the body. “Seams” closed with mattress stitch between the two stitch patterns vertically in the body, and horizontally near the bottom of the sleeves.


For now, I’m enjoying knitting socks in spare moments. Compared to this sweater, they seem to appear instantaneously! I have a pair almost done already. I think the speed is mostly due to the “and” factor; socks are really suited to occupying my hands while other things are going on. They’re small enough for me to keep the whole project in the bag I usually carry, and I purposefully kept the stitch patterns simple enough that I can keep track without needing to refer to a pattern most of the time—which also means I don’t have to stop much for deep thinking. I could really use some new socks, so I may just make a few pairs before settling down to anything big and complicated again.

I’d love to hear any thoughts you want to share about big versus small projects, or crafts you like to do on your own in a quiet space versus things that are good for groups and busy times, or where you are in your journey of what you’d like your wardrobe to say …


MMHenley 6


A Winding Road to a Versatilde Headband


versatilde headband on 1


Hello! Life has just been a flood, a river of things lately, but this space has still been on my mind, and now seems like as good a time as any to share a somewhat long-lost project.

I took a workshop on Versatildes with Cat Bordhi in July of 2015. As you know if you’ve been reading here for a while, Cat is my knitting heroine—and Cat if you’re reading this I’d like to include a sincere and hearty thank you for all your warmth, humor, and love of knitting and of the world in general that shines through in your classes and projects!

I wanted to make something that I knew I would wear using the Versatilde ideas, and as usual I wanted to experiment, so I sketched this headband and started working on it during the workshop. It didn’t actually take that long to finish knitting it, and it was a fun journey. I’m usually a note-taking, think-it-through kind of person (as you might have noticed), but I really enjoyed Cat’s way of making these, which is much more about enjoying the process and not over-thinking decisions. There isn’t a chart, instead you decide things like when to make cable crossings and increase/decrease at the sides as you go, following a few suggestions to make it flow organically.


versatilde headband flat


I’m not sure if I over-thought it at the end. My original plan was to close it with buttons, but I couldn’t find any that went with the wool and the pattern without distracting from it, so eventually I just sewed it closed. Somehow, it took me the rest of the time until now to get photos of the finished thing and type this up … these things happen.


versatilde headband sewn 2


versatilde headband sewn 1


This yarn is semi-worsted spun Romney from Solitude Wool. I got it because I’m interested in single-breed wools, and I wanted to try some samples for another project, so it was already in my stash. I was also curious how I would feel about Romney next to my face, since it’s more of a “medium” wool, rather than a super fine one like Merino. It turns out it’s totally OK (at least for me, these things are individual of course). At first I could feel a little bit of a prickle, but certainly not enough to keep me from wearing it—if it’s cold I want my ears covered! And I was surprised to find that it softened more in the first wash, so that the prickle was less noticeable. I really like this yarn; it’s wooly, sturdy, and a little bit smooth/slick, and the finished fabric has both some drape and some spring. Also, whatever processing they use, it smells the best—sheepy and soft and clean. I wouldn’t choose this yarn for underwear, but other than it that it would be good for all kinds of things.


versatilde headband on 2


My plan worked; I’ve worn this headband quite a bit. It’s especially good for cross-country skiing and hiking when the weather’s cold, since it allows some heat to escape out of the top of my head while protecting my ears from the wind, which can be vicious around here. It stays on well too. And, you know, that art-deco-meets-rustic look is really big in the woods this year, right? But seriously, I’m really pleased with how this came out, and glad I’ll have it in my wardrobe for more cold seasons to come!


Some Good News for February 2017


jccfs-projects-2017


This year promises to be a challenging one in a lot of ways, as we’ve seen already. And yet there are good things on the horizon too. Personally I’ve been looking forward to 2017 since about this time last year, when I found out I would be teaching at the John C Campbell Folk School this summer! At last my classes are up, I can tell you about it, and you can go check it out on their website. In case you hadn’t guessed, I’m just thrilled for this!

I have two felting classes, a weekend and a week-long one, both of which will give students an opportunity to sink their teeth into wet felting. In the week-long one there will be lots of time for exploration of your own designs and ideas, with plenty of guidance of course!

The third class will be a full week of diving into printing with natural dyes, covering all aspects from preparing the fabric, making screens and designs, to printing and finishing. A longer workshop is really the only way to cover this whole process, and I’m really looking forward to sharing what I’ve learned over the past couple of years working on these techniques, and having the quality time to grow together with my students! Please sign up and spread the word.


healing-the-heart-of-democracy-cover

On another note, but related to finding the cracks where the light gets in and finding ways to come together, I’d like to recommend this book to everyone in America (and maybe in other democracies too), especially to anyone who is worried about the direction we’re headed in. It made me rethink what it means to be a citizen, and to live with people we disagree with, in a really good way.

Anyone else have good news to share?


The Star Blossom Hat, A Pattern for Solstice

A free pattern to knit and embroider.


embroidered-hat-1


I designed this hat for myself, and decided to share the pattern after a friend declared it her favorite thing I’ve ever made. It feels like a really good time to put a little bit of beauty out into the world right now. I’ve been collecting the pieces of this pattern—the photos, the drawings, the yarn specs—in spare slices of time over the past weeks, and now it’s ready to go!

The Star Blossom Hat is mainly seed stitch ribbing, shaped with short rows for a longer back to cover your ears, and designed to be long enough to turn up all around. It has a stockinette stitch top to serve as a background for some sweet and simple embroidery, reminiscent of a cherry blossom or a starburst.

Yarn

Lucky me, I had a big skein of my friend Lauren’s handspun just sitting in my stash. All I remember her telling me about it is, “It’s alpaca.” It was just waiting for this hat I think. Assuming that Lauren didn’t go into production on this and start selling it around the country without telling me, here are the characteristics you want to match in your yarn to get a similar look and feel:

•It’s worsted weight, about 9 WPI.
•It has bounce. 4” of yarn will stretch another ½”, and then easily spring back. It needs a little elasticity so the ribbing pulls in just enough to keep its shape on your head. My yarn has some drape too, like most all alpaca, which is not a drawback here, but also not necessary for this shape to work.
•It’s not too fuzzy. An alpaca yarn with a lot of “halo” effect would obscure the textured stitches and the embroidery, so opt for something fairly smooth.
•It’s a 2-ply yarn, and each ply is a slightly different (natural alpaca) color. It’s also a little bit thick-and-thin, being handspun. Neither of these characteristics is essential to the hat, but both give the texture of the stitches a little more dimension.
•It’s soft enough to comfortably touch my face.

This hat took just about exactly 130 yards of yarn. 150 yards would give you plenty for swatching and margin of error.

Spinning geek details on the original yarn for those interested:

•Angle of twist 27°
•3.5 – 5 twist bumps per inch in plied yarn
•587 yards/pound

Yarn scraps for embroidery:

These are also something I’m lucky enough to have; little bits and pieces from my grandmother’s stash which I’m pretty sure were dyed with natural materials by her or her fiber friends. You can use any scraps you have in colors you like! Or even ask your knitting friends to share and swap scraps. Embroidery is my ultimate use for tiny bits of yarn too beautiful to get rid of. These are singles (one ply) yarns, which gives the stitches a soft fuzzy look.


embroidered-hat-2


Gauge

Before blocking I got 5.5 to 6 sts/inch in seed stitch ribbing, and 5 sts/inch in stockinette.
After blocking I got 5 to 5.5 sts/inch in the ribbing (stretched slightly during blocking) and the same 5 sts/inch in stockinette.

Needles:

I think I used US size 4. I knit pretty loosely. Size 5 would probably be a more common recommendation … the point is it doesn’t matter, use the size you need to get the gauge you want!

Sizing

I have a fairly big head, and I hate hats that squish my hair (or worse, my head!). Straight around my forehead, with the measuring tape snug but not tight, measures 22.5 inches, and that’s the size I made the hat (using 5 sts/inch for math). This gives me my personal hat fit of dreams: snug enough to stay on my head, but never tight or uncomfortable. I highly recommend that you measure the hat recipient’s head and take her/his preferences into account. You may have to modify the decreases for the top a bit, but that’s a small price to pay for a hat that really fits!

Seed Stitch Ribbing

This is just so nubbly, I’ve been knitting it into everything lately. I wanted a combination of stitches that would look good on the right or wrong side, so the brim of the hat could be turned up, and this is what I came up with. The columns of ribbing are always purl knit purl, with two stitches of seed in between.

It does look a little confusing at first, so put as many markers as you need, until you can see where the ribbing columns are and which are the seed stitches that should always alternate.

embroidered-hat-seed-rib-chart

Pattern

Cast on 115 stitches (or the number you determined from your head size). You’ll need a multiple of 5 stitches for the seed stitch ribbing pattern. I used this cast on.

Bring the beginning and end of your cast on stitches together, and knit in the round, in the seed stitch ribbing pattern, until the hat measures 6 1/2 inches tall. (If you have extra yarn, you can knit further at this stage, which mean you can make a deeper turn-up in the brim of the hat when it’s done).

Short rows:

Reserve 40 stitches (or about 1/3 of your total stitches if different) which will be the center front of your hat, by placing a marker on both sides of them. Keep knitting around until you are 4 stitches away from reaching the first marker again, and then turn and knit back until you are 4 sts away from the second marker. (Remember to match the patterns to what you see on the wrong side as you work back.)
Continue to work back and forth, each time stopping 4 sts away from the last turning, until there are 5 groups of short rows or 6 “steps” on either side of center front, and about 40 sts in the middle that will be the center back. The back of the hat should measure 8 to 8 1/4 inches tall.
Work around on the right side, integrating the turning stitches. My favorite is Cat Bordhi’s “Thanks-Ma” method, which uses a clever pick up to make the “steps” basically disappear. Cat’s video explains it specifically for her sock heel, but I’ve used it on all kinds of things since learning it. Still, if you have another favorite short row method feel free to use that instead.
Then knit one more round on the right side, maintaining the patterns, to smooth everything out.

You shouldn’t need to change the numbers in this section, unless your stitch count is very different from mine. If short rows freak you out, you can also skip them altogether, and just keep knitting in the seed stitch ribbing pattern until the hat is 6 1/2 to 8 1/2 inches tall, depending on how much you want to turn up the brim.


embroidered-hat-6


Crown:

Switch to stockinette stitch and knit one round plain (knit every stitch). Place a marker at the beginning of your round.
Round 2: Work a K2tog (decrease 1) at every column of knit stitches from the ribbing pattern (23 times around). Or you can think of it as k2tog, knit 3, repeat around. I just think it looks nice to line up the decreases at the knit columns.
Round 3: Same as round 2 (decrease 23 sts again in the same places, or k2tog, knit 2, repeat).
Rounds 4-8: Knit these 5 rounds plain.
Round 9: Decrease at every column again (k2tog, knit 1, repeat).
Rounds 10-14: Knit these 4 rounds plain.
Round 15: knit every two stitches together all the way around (k2tog, repeat).
Rounds 16-18: Knit these 3 rounds plain.
Round 19 to finish: Continue k2tog until there are only 6 stitches left.
Break the yarn, leaving a tail, and thread the tail on a blunt needle, and through the remaining stitches, continuing in the order you would knit them. Thread the tail through the top of the hat to the inside, and pull the last stitches snugly together. Secure the yarn on the wrong side of the hat.

If your stitch count is different, I suggest trying the same number of decreases in each decrease round as you have knit columns from the ribbing, and using my spacing of plain rounds between. If that doesn’t work or you have questions feel free to get in touch, I’d be happy to help you figure it out! I unraveled my crown twice to come up with this formula. It should have a little curve (like your head), but not be too loose or floppy, to show off the embroidery.

Embroidery

I used just two stitches; the simplest running/satin stitches (in two different groupings), and Colonial knots, both which I explain in this post.

I used pins to visually mark the placement of the five knots nearest the center, and then based the other motifs on those, moving outward.

embroidered-hat-drawing-1

Tips for embroidery on knits:

Whatever stitching you add will also add some bulk and stiffness to the knitted fabric. You can minimize this by:
•Taking the shortest path on the wrong side between the end of one stitch and the beginning of the next.

embroidered-hat-drawing-2

•Stretching the fabric gently after every few stitches (minimizes puckering).
•For longer stitches between motifs on the wrong side, catching a little bit of the yarns in the fabric as you go along, so you don’t have long floats that can catch on things (I show this for yarn ends in this post).


embroidered-hat-5


That’s all, folks! I really hope you all enjoy this pattern, and if you decide to make it of course I’d love to see! It’s now up on Ravelry as well.
Take care everyone and enjoy your winter!


Intentional Kindness to Strangers


the-power-of-love-is-in-our-hands


I don’t talk about politics in this space, and I fully intend for it to be a place where everyone who is interested in creating a more thoughtful, joyful life through craft and making will feel welcome, regardless of their feelings about which party is better able to govern. But some things are beyond politics, and that’s what I’d like to say a little bit about here, while I’m very aware that feelings are still running high on both sides. Maybe we can start by agreeing that it’s been quite a week?

I made an intentional choice quite a while ago to not hold back from sharing, here and elsewhere, how much I care about preserving our planet, and nurturing our relationships with natural systems. Whether you believe that it’s God’s creation, or that we are here by an entirely random, incredibly lucky chance, surely we can agree that life on this Earth is a gift, and it’s up to us to take care of the environment and the other creatures here, if for no other reason than that we are the ones who have the power to protect or destroy, and it is so good for our own spirits to engage with nature. I hope we can also agree that every human being has a right to live free from fear and hate, and no matter how far from reality that may be right now around the world, we can work toward that goal.

After the election, I started looking around for things I could do to make a difference, anything I could think of that might bring us together and let us start to talk about where we can find common ground and move forward, rather than demonizing the other side and driving us even further apart.

One of the first things that occurred to me was to be kind to the individual people I meet as I go through my day, regardless of how much or little I know about them, or the judgments I’m tempted to make when I first see them. I’m not alone in thinking about this. I’ve heard it spontaneously both from friends of mine via text, and from people I’ve never met speaking on the radio. Somehow it seems to have been an available, actionable idea in the minds of a lot of folks, which must be a good thing!

For me personally though, I was really surprised at the actual power it has. Like a lot of writers and creative folks are I think, I’m a naturally shy person. I’d rather be quiet and observant, especially in strange or complicated situations, and I don’t usually want to engage with strangers. Until last week, I wasn’t fully aware of how that awkwardness on my part can come off as a coldness that the people I meet can sense, making our encounters strained. The most amazing thing about having the intention of kindness is that I don’t even have to do anything or say anything, so I get to skip what seemed like the hardest part before. If I merely walk into a room or up to a person with the intent to be kind to them, they can sense it (just like they could sense my previous reluctance) and we spontaneously start to have friendly conversations, leading to lovely encounters that brighten the day with a genuine acknowledgement of our shared humanity. I swear it’s true, it just happens! I don’t have to change the way my mind works, I just have to set out to be intentionally kind. I’ll freely admit that in the first week of trying this, some days it’s been easier than others. But I’ve made a personal commitment that I will try to do it every day, from now on. Since I tried it and saw the wholly unexpected beauty there, it might be impossible to stop.

So I’m starting with kindness, meeting with friends, making things, and talking about ideas. I still believe in my bones that all of our actions, all of our intentions and words and the things we make with our hands, these all make a difference, and they all can be a part of building a brighter future.

From my hands and heart to yours!


Slow(er) Fashion is for Everyone

decoration spool 1

A start-where-you-are, one-step-at-a-time, use-what-you-have, guide.

Here we are in Slow Fashion October again! It kind of snuck up on me, actually; we just got home from traveling for shows, and if it were any other challenge/focus for the month, I probably would have just let it go. But not this one—it’s too close to the heart of what I think is important. I remember last year being amazed at how articulate and thoughtful everyone was being around these topics on Instagram. As I sat down to write an introduction to where I’m at this year, I surprised myself with how much I cared about what I was writing, and the idea for this post sprang into my head.

I almost didn’t write it though. It just feels too big. I’ll never cover it all, and I’ll leave out things that are important … which I probably will. But it turns out I care more about what I want to say than about how I might screw it up, so here goes.

It bothers me when people complain about the idea of Slow Fashion being elitist or exclusive, because to me at the center it’s about buying less, and being more thoughtful. It’s about the power of choice, and the fact that every single choice makes a difference, whether or not it’s a difficult or expensive choice. It starts with small steps that almost everyone can absolutely do, today, and if we all moved just a little bit toward Slower Fashion, it would mean a massive shift in the way the fashion industry operates.

These steps are roughly in order of difficulty. Each one has actions (readily available things we can all do) and ways to level up (which are more involved and could also make a bigger difference), plus notes for those of us who already make part/most/all of our own clothes.

In case you are still wondering what all this is about or why the heck you should care (but miraculously still reading), I invite you to check out this article about how our level of clothing consumption has reached the point of totally overwhelming any market for secondhand clothes.

One last thing before we start: although I’ve tried my best to keep this list simple and actionable, trust me, I know it can seem like these are humongous problems, way too overwhelming for any one person. But I can honestly say that the deeper I dig, the more I come through the uncomfortable feelings into a space where I feel better about myself, and what I’m making and wearing, and even about my place in the world. Each of these actions, even the ones that seem simplest, can have ripple effects into the rest of our lives as well, making things seem just a little bit slower and saner. Taking it slower has been such a healthy and fulfilling choice for me on quite a few levels.


refashioning scraps


1. Buy Less

This step is available to anyone who is buying clothes, anywhere, and has a budget for anything more than the bare necessities. If everyone did only this—nothing more than being more thoughtful about what we bring into our closets—it would be a true fashion revolution. Opting out of the constant consumerism which is so much a part of our economy that it’s also part of our culture is a big deal.

Actions:
Before you purchase an item of clothing, ask yourself some of these questions:
Do I need this?
Can I see myself wearing this frequently? Does it go with what’s already in my closet?
When I look at this, what message does it send? Is that the message I want people to get when they see me?
Do I need this many?
Is this so cheaply made, or so trendy, that it won’t last me very long?
Am I shopping for something I really need, or is this “retail therapy”?

Level Up:
Try to buy pieces that will last longer, either because of more timeless style and/or more quality materials and construction. Instead of buying several cheaper pieces, wait and use the same funds towards one better quality item.
Unsubscribe from emails/newsletters/magazines etc. that make you think you always need more and promote seasonal “must have” items. If you enjoy shopping and contemplating your wardrobe, you might try a project like the Wardrobe Architect (designed for makers, but with exercises that work whether you make or buy most of your clothes) that encourages thinking about and honing a personal expression of style, rather than following trends.

For Makers:
I would not encourage you to be less creative, or spend less time using your hands and your favorite tools. However, it’s all too easy to switch from consuming finished goods to consuming materials, with as little thought to their origin and future usefulness. The same questions above can apply to fabric and yarn, or to potential makes. If you should find yourself in the enviable position of having already made everything you need, consider learning a new skill, taking on a longer/slower project, and/or making something for someone else who can really use it. Check out the very thoughtful Stash Less series for a lot of exploration of the emotional reasons we stock up our stashes, and ways to avoid doing it.


sw sweater palette


2. Care for Your Clothes

If we started treating our clothes like things we cared about, instead of disposable items, that would be another big cultural shift with big, positive ripple effects.

Actions:
Wash clothes only when they need it. When washing, soak clothes longer and agitate less. This may require turning off your washer and setting a timer to remind you to turn it back on. Use the delicate cycle.
Hand-wash. It’s ridiculously easy (and also saves money and chemicals if your alternative is dry cleaning). I wrote about my favorite method in this article for Seamwork.
Use a clothesline or a dying rack. It lets your clothes last longer (by saving the abrasion of the dryer) as well as saving energy.

Level Up:
Mend. Everyone should know how to sew on a button and do simple repairs. There’s no shame if you don’t though, as these skills have been largely abandoned. Luckily, they’ve been replaced by the internet, where you can find people willing to help you with almost anything (including right here on this site). There are even challenges and forums that focus on mending, like #visiblemending and #menditmay. Some locations also have in-person repair events (a fantastic idea)—check your local listings.

For Makers:
One of the benefits I’ve found of having a more handmade wardrobe is that it encourages me to take the best care of those clothes so they’ll last as long as possible. I’m not always the best about extending that care to my non-handmade clothes, or my husband’s non-handmade clothes … but that’s a step I could and should take.
Teaching your friends simple mending is another way to make a difference, and darning socks is way more fun in groups. Why not organize your own mending event?


What is that thing on the right anyway?  Not sure, a rug maybe?


3. Consider Origins & Life Cycles

This is where it gets sticky, but we’ll end with some hope. Acknowledging that the way most companies make clothes now does harm to the environment and/or to other humans, and that by buying those clothes (or that fabric) we are complicit in that harm, feels bad I know. But I also think that we have to know where we are in order to move on and make better choices. The other hard part is that this is where the choices get narrower. Clothes that are produced more sustainably and with fair labor practices are more expensive than clothes that aren’t, because the ones that aren’t are carrying a bunch of hidden costs we aren’t paying in money—but we are paying them in environmental damage and bad conditions for workers. As we hopefully move towards a more sustainable fashion future, it will almost certainly mean all of us buying fewer clothes, and paying more for them. I hope that we can navigate this transition with fairness both to the people making the clothes (and the ecosystems that produce the raw materials) and to the people buying them, but I definitely don’t have all the answers here.
Here are the icky facts: synthetic fibers (like polyester & nylon) are made from the same stuff plastic is: oil and tar … plus increasing evidence shows that just washing these fibers releases tiny synthetic bits that make their way all the way into oceans and the food chain. Most chemical dyes are toxic, and few of the countries where fabrics are now produced have good enough environmental regulations to prevent them being released into waterways and harming human health. Most yarns and fabrics are also treated with other harmful chemicals (bleach, agents that change the hand or finish, etc.) before they come to us. If, as that article on textile waste states, there is enough of these chemicals left in our garments once they reach the landfill to leach into the groundwater, surely they are also leaching into the wash water, and probably onto our skin.
Now that you’re thoroughly freaked out, may I remind you to take this one step at a time, and do the parts that seem achievable today. Some of this is subjective, or depends more on the individual case. Is it better to buy polyester made from recycled pop bottles, or non-organic cotton? I don’t know either … but I’m making my way as best I can.

Actions:
Choose natural fibers. I’ve been making this choice for a long time, out of personal preference and knowing that they wear better than synthetics, but knowing about the micro-fibers in the ocean cements this one for me. Even if they are treated with chemicals, biodegradable fibers usually find an easier place in the ecosystem.
Buy quality whenever you can. Pieces that last longer save resources.
Buy secondhand.
When buying new, buy things produced in countries with good labor practices and environmental regulations (such as the one you live in?) whenever you can.
If you can afford a couple of really special, locally made, responsibly sourced items of clothing (or the materials to make them), please buy them! But if you can’t, your choices still make a difference.
Pass on unwanted clothes responsibly.

Level Up: (Most of this boils down to research.)
Consider raw materials individually. For example, it takes less water and fewer pesticides to grow linen or hemp than cotton.
Choose minimally processed, low-impact dyed, and certified organic fabrics if at all possible. Look for the Global Organic Textile Standard (GOTS) label, which covers all stages of production. I’m not going to lie, these can be hard to find, and looking for them puts you in danger of being labeled a hippie. Nevertheless, more mainstream brands are starting to offer organic options, especially for cotton. (I found GOTS certified sheets at Target this year, very reasonably priced.)
Buy from brands that have a commitment to fair labor. Often these brands are concerned about the environment as well, so starting with either one can lead to both. The more questions we ask, the better. Searching for “ethical fashion” will give you a bunch of places to start.
Organize a clothing swap with your friends (this is an especially good way to pass on handmade/special items you aren’t using, and make sure they get a home with someone who will appreciate them).
Look for charities near you that can actually use your old clothes, and donate there.

For Makers:
You know the bad news here already: making something yourself does not erase the environmental or labor impact of the materials you’re using. The good news is: it’s easier to find responsibly made materials than finished clothes, and the more of the process you’re doing yourself (i.e. knitting or spinning your own) the more available and reasonably priced those materials tend to be. I have a list of sources for more sustainable fabrics, and there’s a good roundup of resource lists from the end of Slow Fashion October last year. It seems there are more American-made, domestically-spun yarns every time I turn around, which is a great thing! I know the local wool movement is also going strong in Britain, and probably other places as well …


TOCMC cotton 4

Photo courtesy of Texas Organic Cotton Marketing Co-op
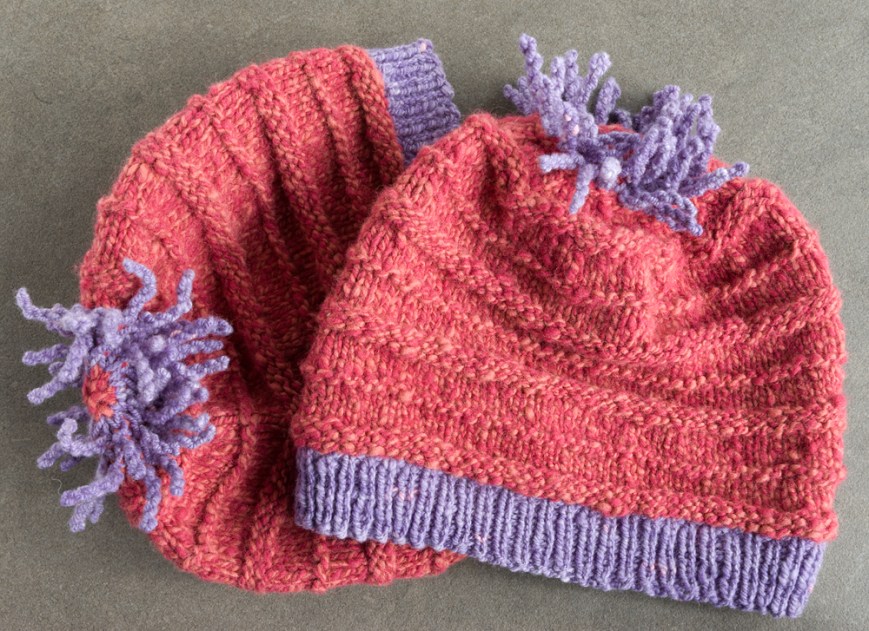
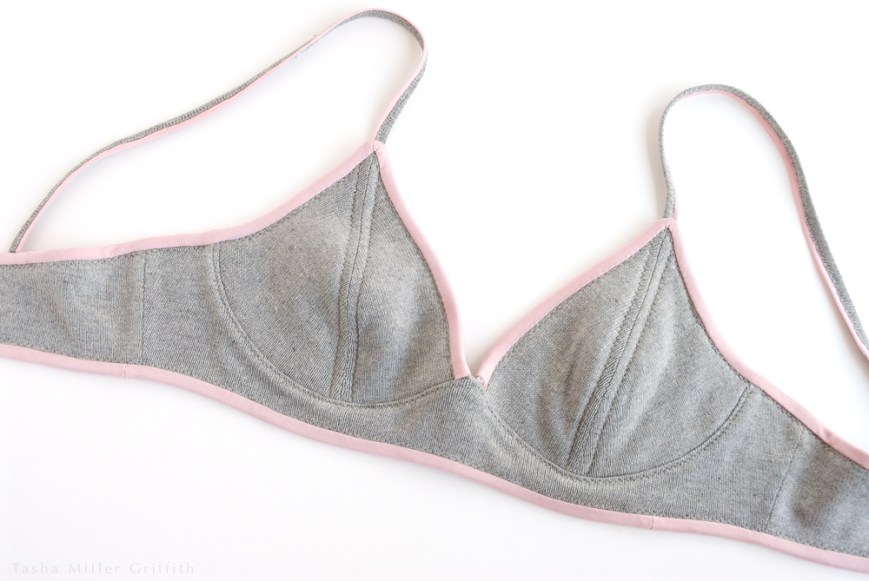


4. Make

Making your own clothes is the final frontier of fashion independence, and opens up a new world of choices, both stylistically and in materials (new and repurposed). If these are skills you aspire to, start with small, doable projects (ahem, mending) and get a feel for the tools and materials. You’ll be able to grow your skills quickly, especially if you can find a good mentor/teacher.

Actions:
Try a new skill, like knitting or sewing. There are about a million tutorials and friendly folks online if you can’t find someone to help you in person. If you can, you’ll get a head start. Look for classes or ask crafty friends. Be patient with yourself, especially if you’re not used to working with your hands. New skills take practice, but they’re so worth it.

Level Up:
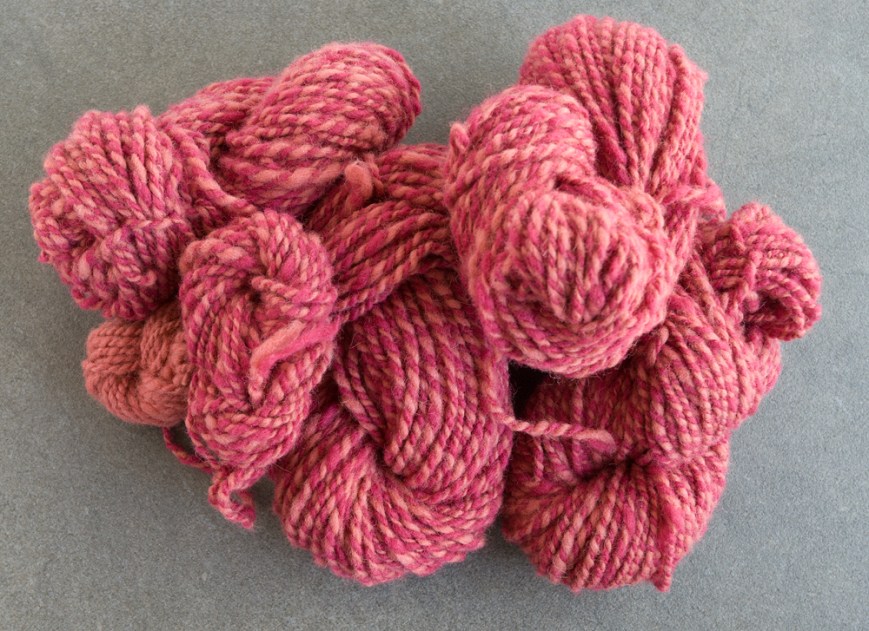
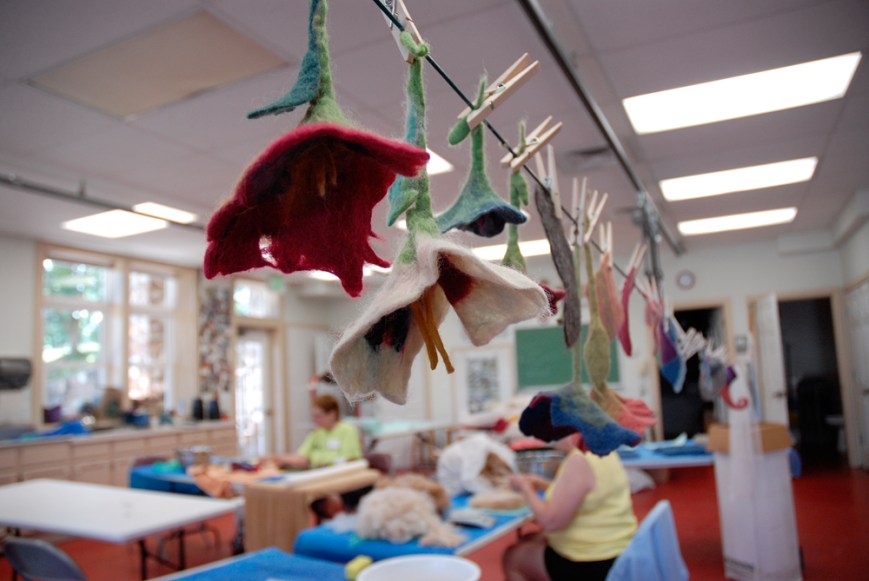
Already knit or sew? Try spinning! I’m only a little bit kidding. Spinning is aaaamazing, and perhaps the ultimate expression of slow fashion.
Learn any other new skill you’ve wanted to try. Leatherwork? Natural dyeing? Each one only increases the possibilities of what you could make, and for me at least, feeds into the creative whole with new ideas.

For Makers:
Help the new makers!


cartoon with both threaded small


So, I hope you’re convinced that you don’t have to run out and get a sheep and start from scratch in order to make a difference. (But if you want to do that, I totally have your back!)

I’d welcome your thoughts, resources, notes about things I forgot … take care everyone!


DIY Fabric Shower Curtain


fabric-shower-curtain-2


Hello everybody, it’s been a little while! I’m a firm believer in blogging whenever you can and feel inspired, not on a pre-ordered schedule, and I also think that most blogging apologies are a waste of time and just make you feel bad. Still, it’s been much longer than I meant it to be, and I’d like to echo Molly’s sentiments on Orangette: if I ever decide to leave this space for good, I’ll tell you so. It seems only fair. The way she puts it at the end of that post is so good.

The first reason for my losing track of online things was one of the better ones: for the second time ever, we hosted our annual family and friends craft retreat at my house last month. The first time we hosted it, two years ago, was when I had an inspiration—the infinite to-do list—that started a big difference in my thinking.

I have to say, I was pretty proud of myself this time. I felt calm and relaxed in the lead-up, and I even slept well before and during at least the first part of the week—proof that I’ve made progress as a human lately, and let go of some anxiety, even the good kind that’s more like excitement. (If you need this too, may I highly recommend the book The Three Marriages by David Whyte, which is full of deep insights about things in general, and came into my life at exactly the right time. You can also listen to a good interview with him from On Being.)

It was one of those times when being calmer and going slower actually ended up meaning that I got more done. We cleaned off the back porch, for instance, which probably hadn’t been done in the two intervening years …

And I made a new shower curtain! Well, “made” might be exaggerating somewhat. I took a length of wide fabric, hemmed it, installed some grommets, and there we go.


fabric-shower-curtain-1


I’d like to apologize to all of our previous guests for the old shower curtain, a cheap vinyl thing with one ripped eyelet, which someone bought right as we were moving into our house a decade or so ago, and had been there in various states of nastiness ever since. Incidentally, I also figured out that if I actually took the vinyl thing down, soaked it in the tub with vinegar and dish soap, and took a scrub brush to it, it came out clean—enough better that I decided to save it in case I need a waterproof something.

Back to the new curtain though: I’ve been slowly moving more and more away from synthetic materials and towards natural ones for all kinds of reasons. I got another push that way when I found out that polyester and nylon clothes shed tiny synthetic fibers in the wash which eventually find their way into the oceans, enter the food chain when they’re eaten by small critters, and never break down. I first heard about this on Science Friday a while back (but cannot now find the specific program). It came up again recently on Root Simple. This was one of those last-straw moments. I’m convinced, I’m done with that, and I’ve been trying harder not to buy any synthetic fabrics.

So I wanted a natural fiber shower curtain, and as I was looking for one and researching options, it occurred to me that I had in my stash some wide cotton fabric which was basically what I was looking for—lightweight but tightly woven. And with stripes!

I measured the old curtain to figure out what length would work best (a little shorter than standard turns out to be good for my tub) and if one width of the fabric would be enough (it was, but you could always add a seam if not).

I made a deep hem on the bottom, and a narrower one at the top. The hardest part was hammering in the grommets. Typically for me, I liked the “wrong” side of the fabric better since it’s a little more textured and subtle, so I put that on the outside.


fabric-shower-curtain-3


I had a few questions, but figured it was worth trying to see what would happen. Would plain cotton keep the water inside my shower? Yes it did! Would a deep hem be enough to weigh down the bottom? It was! To be on the safe side as far as mildew, I’ve been wringing the curtain out after I shower, and then spreading it out as much as possible to dry. So far, it’s working really well, and it’s so much nicer to look at than the old one, it’s fairly ridiculous. I also like the idea that I can take this one down, put it in through the washer, and hang it to dry in the sun once a month or so, which should actually be easier than cleaning the vinyl one.

If you wanted a sheer curtain, or a liner for a more decorative fabric on the outside, I suspect that silk organza would be amazing (although I haven’t tried it, not having that much on hand). Something so thin but crisp and tightly woven should dry almost instantly, and look beautiful. Oh printed silk …

Anyway, I hope this give you all some ideas!

It feels good to be writing here, and I intend to do it again soon.


fabric-shower-curtain-4


The Comfort of Washing a Rug

And of making a rug, especially with friends.


sw rug hanging up


I can’t pretend I’ve been unaffected by the news the past few weeks. It could easily start to feel like the world is crumbling around us. It may seem trivial at first to post about anything I usually talk about here. But I believe it’s not. Actually, I believe that we need our creative pursuits, the things that give us comfort and fulfillment, more than ever when times get rough. Even more than that, I believe that by making something with our hands, by sharing it with friends, by just cooking dinner and eating it with people and having a face-to-face, honest conversation, we are making a difference. Taking a small step towards the world we hope for,”being the change,” as Gandhi said.

Last week, during a dry spell in our monsoons, I decided it was time to wash the kitchen rugs. I wove the one shown here two years ago, at my friend Lauren’s house (but never posted these photos). It occurred to me while I was cleaning it that this rug is actually a pretty good metaphor for the value of craft in our lives. All the yarns I put in it are ones I saved from my grandma’s stash after she passed away—a reminder of our connection, the passing of knowledge between generations, and the “waste not, want not” I try to put into practice.


sw rug weighing yarn

Weighing yarn and winding into balls, making a plan for the rug.


Lauren did the math, wound the warp (for several rugs, not just mine), and put it on the loom, so all I had to do was show up and weave, which was wonderful. We spent time together weaving and listening to music. We lit a fire. I remember other friends were there at least one day while I worked on the rug, doing what women have been doing for millennia: talking, eating, and making things together in community.


sw rug on loom

My rug on the loom.


The act of weaving brings up all kinds of good memories for me too, of learning to weave with my family and working on my grandma’s big loom. Like most textile crafts, the rhythm of the work is meditative. It calms my mind so that sometimes creative ideas bubble up, and other times I can think less, and just be. I’m coming to believe that just being is an important part of my growth as a human, something I need to carve out distraction-free time for, and practicing in fiber arts definitely helps me do that.


sw rug through warp

Looking through the warp at the rug in progress.


This week, it rained. The rain falling onto my high-desert home is a miracle of relief. Knowing that the forest will be sustained for a little while longer makes me feel better about everything—even politics, even tragedy. As long as we have the solace of nature, and a way to nurture our creativity, I think we’ll be alright. In fact, more than alright—I believe if we can keep those two things near the top of our collective priorities, we’re still working towards a better world.

Here’s to better weeks ahead!


sw rug on floor

The finished rug in the kitchen.


PS Karen wrote on a similar theme this week, and I found the comments on her post heartening. It involves seeking peace in the beauty of landscape and sheep …