Blocking Knitting Without Special Equipment

When I mention blocking your knitting, I get a lot of blank looks from my students, and concern about how to do it and what they need to make it happen. Although it can be a magical transformation, it doesn’t need to be mysterious. And although there are a bunch of gadgets (special mats and pins, forms, blocking wires etc.) sold specifically for blocking, you don’t need to use any of those to get good results.  Some pins and a place to hold them will do, and sometimes you don’t even need that.

 
lupine cowl blocking


What does blocking mean anyway?

Blocking is actually a simple concept.  It just means using water and/or steam to set the final shape of something after you knit it.  As you knit, you make a new structure—a fabric—with your yarn. When the fabric gets wet, the yarn has a chance to settle into its new shape.  Sometimes it can change quite a bit, expanding or relaxing in response to the tensions (or lack of) that are now on it.

In blocking we take advantage of the fact that the yarn can form new shapes, and influence those shapes in the direction we want.  This can be as simple as gently stretching and patting a sweater so that it looks good flat, and leaving it to dry.  Sometimes more dramatic blocking is part of what makes a pattern shine, like stretching lace as much as possible to make the most of the open areas in the pattern.

Essentially, blocking is getting your knitting wet, shaping it how you want it to be, and holding it in that shape until it dries.


Why wet?

Yarns, especially wool ones, can change shape much more easily when they’re wet.  This is because of the structure of the fibers themselves.  (If you’re curious about the science of wool and haven’t seen the wool article I wrote for this month’s Seamwork, check it out!)

You can also stretch/shape your object while it’s dry, and then steam it to set the shape.  In general, I prefer the wet method for a few reasons.  It’s gentler on the fibers, and gives them a chance to relax before being under tension. It also gives a good idea of what your finished project will be like when it’s washed later.  A damp yarn object is easier to shape.  And when you finish knitting something, it may have been dragged all over hither and yon and have oils from your hands (or sticky stuff from your toddler) on it, and washing it is probably not a bad idea anyway.  (Hey—my favorite method for hand-washing is in that wool article too—good timing!)  (And speaking of good timing, Karen posted an eloquent argument this morning about why you should wash/block a swatch before embarking on a big project.  This is especially important when you’re making something like a sweater, where the final size/fit/drape is crucial to success.)


Does everything need blocking?

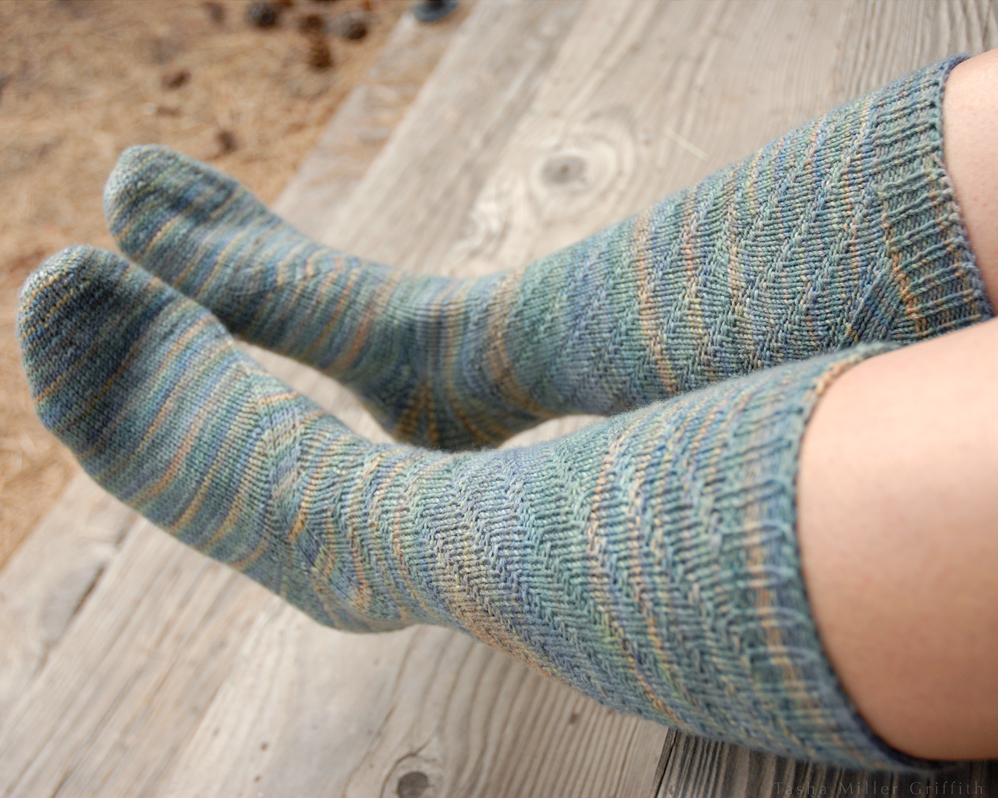
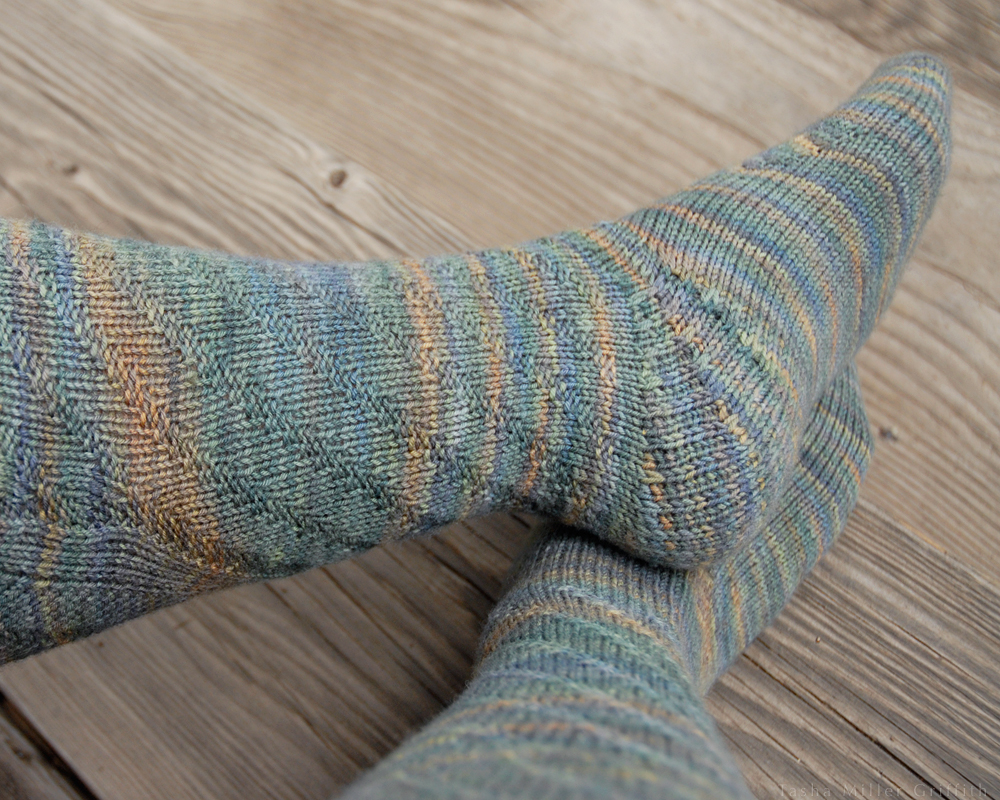
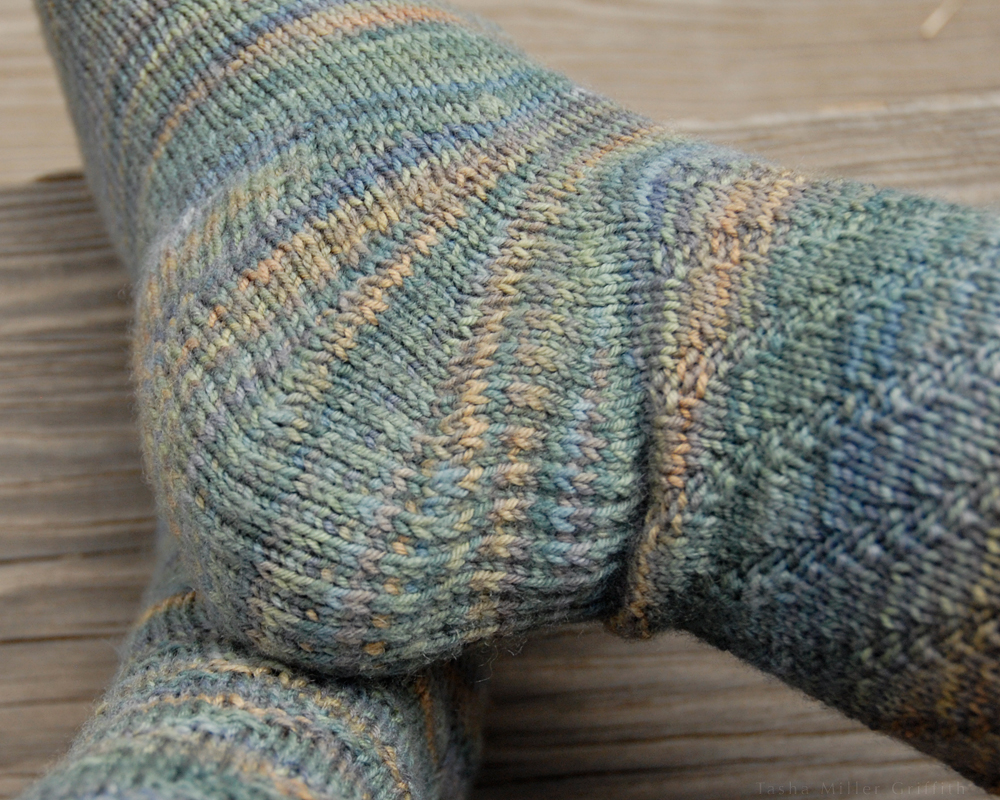
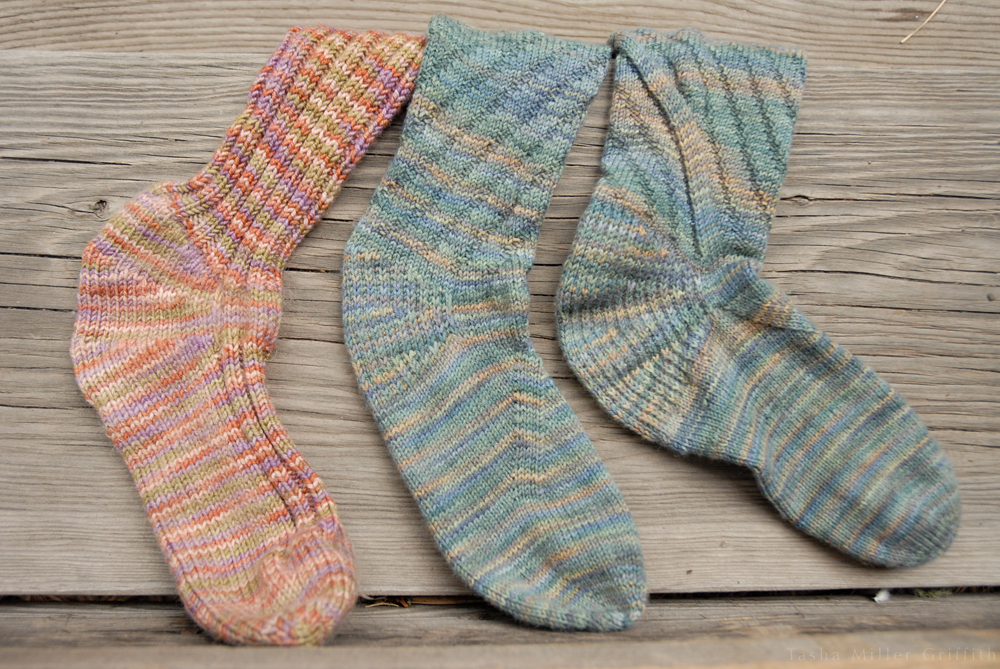
Not really.  I do wash all my finished knitting projects, shape them gently with my hands, and then leave them to dry.  But not everything needs to be pinned out, or to dry in an exact shape.  Socks, for example, are meant to be a little smaller than my foot, and to take on the exact shape of my foot when I wear them, so I don’t see much point in carefully shaping them before wearing.


How do I block something without special gadgets?

Everyone should have sewing pins, they’re useful for all kinds of things.  I’m not counting them as special equipment, but, it’s worth getting some with large, easy-to-see heads if you don’t have them already.  I like plain flat-head pins for sewing, but they get lost in the structure of hand knits.

The only other thing you need is a surface where your knits can dry that you can pin into.  A lot of times I use the same folded piece of flannel that I iron on.  An ironing board or a couch cushion covered with a towel are good choices for small projects.  For big items I stretch an old sheet over my bed (see below).


blocking shawl 1I tuck a doubled-over old sheet in tight over the bed covers.  That provides enough tension to hold in place when I pin onto it.  Plus it protects the covers from pin marks or any dye transfer from the yarn.  (Forgive the weird indoor lighting.  I wanted to show how I actually do this, but our bedroom is not ideal for photos …)

 
When your finished project is clean and damp, it’s ready to block.  Stretch and shape it with your hands, patting wrinkled areas out, smoothing ridges parallel, etc.  Pin in place any pieces that try to shrink back, away from the shape you want.


blocking shawl 2
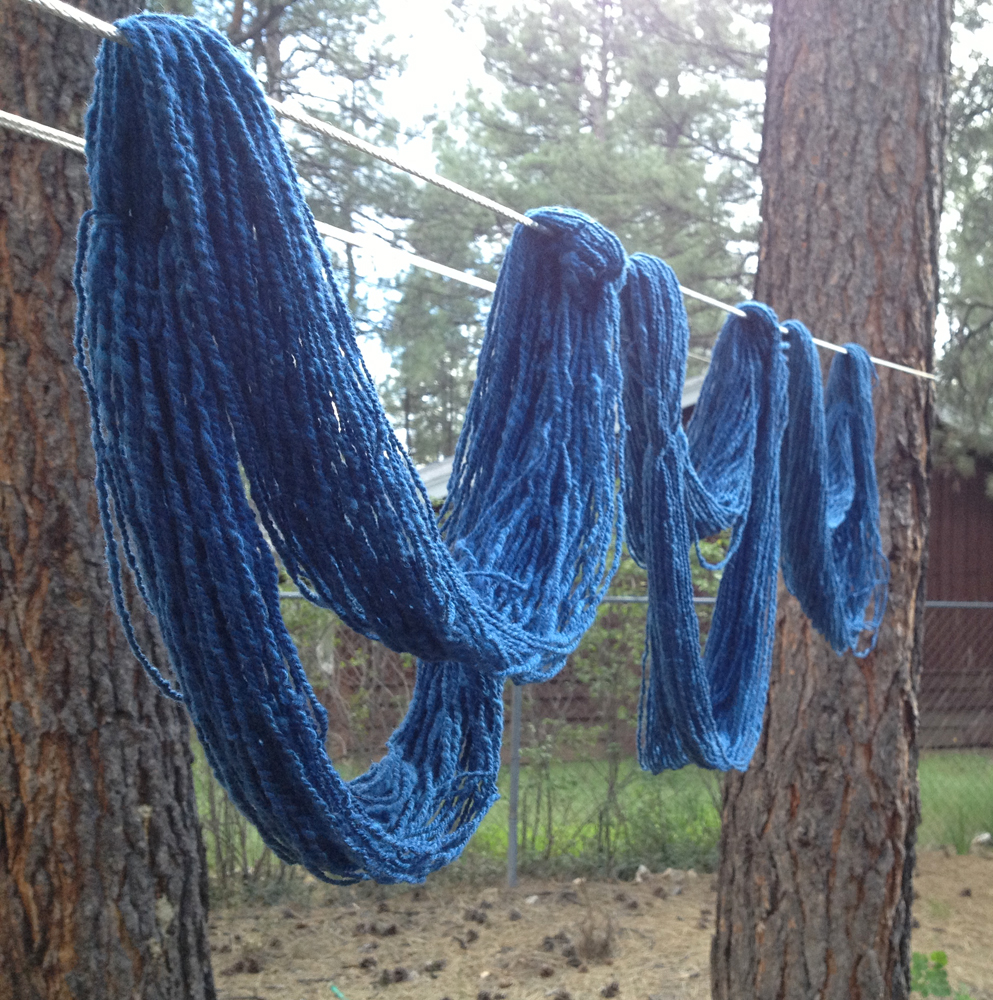
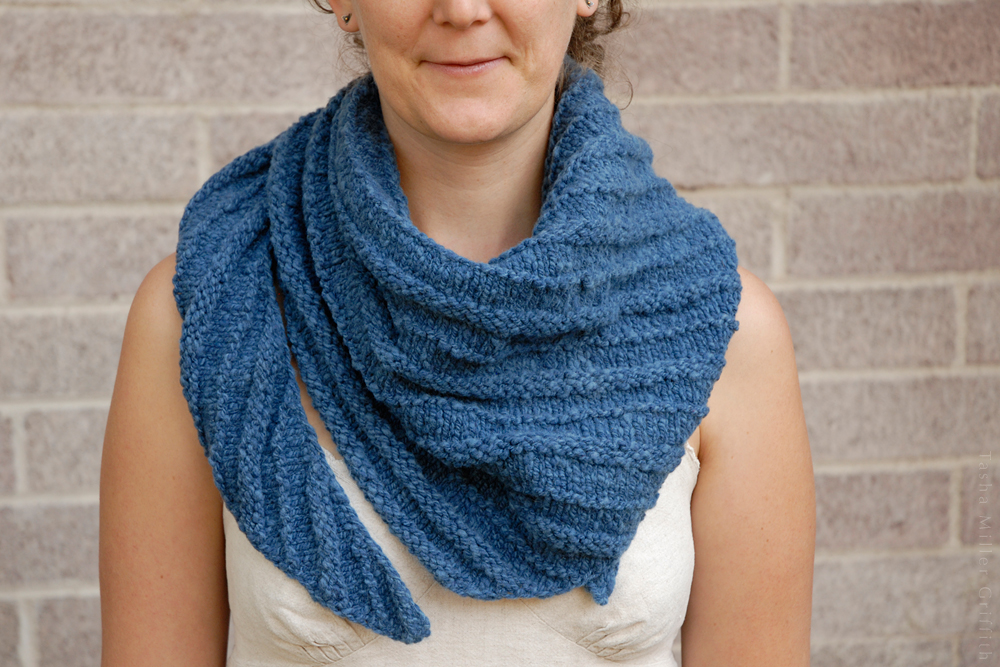
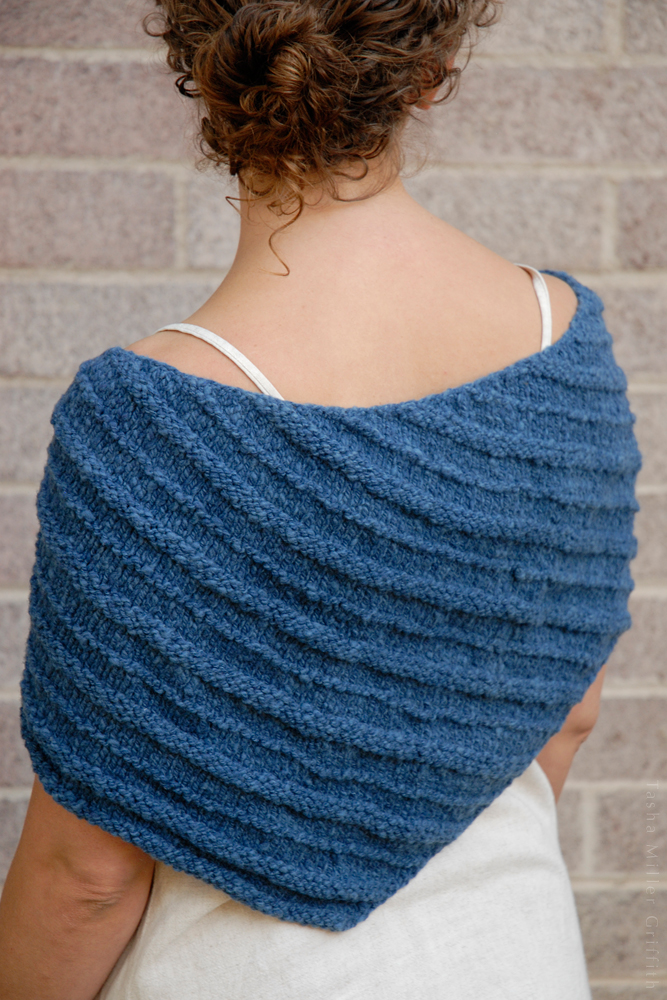
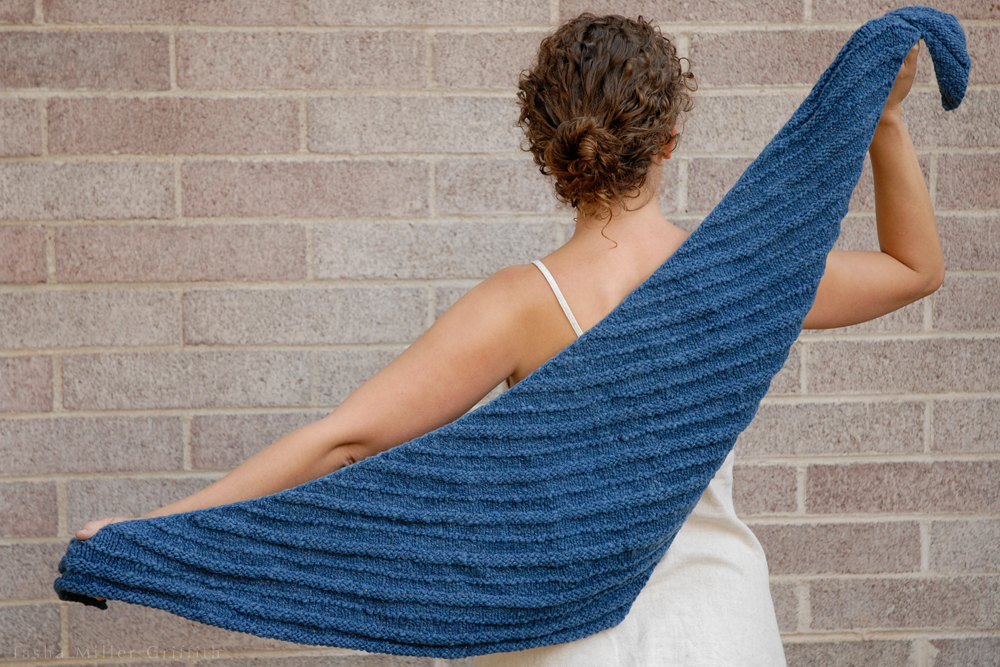
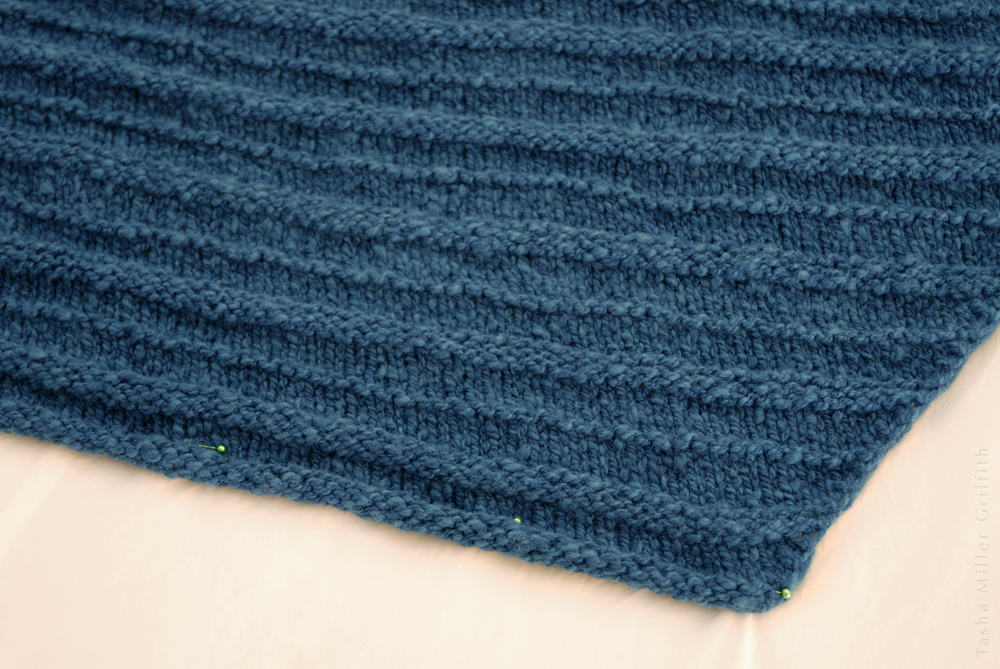
For this shawl, I pinned it at regular intervals along the straight edge, and intermittently along the other two edges.  You may have to move the pins as you smooth out the whole project, and that’s fine.  (This is my Indigo Boomerang, made with handspun.  More details are on Ravelry, and pictures of it worn are also in this post on slowness.)

 
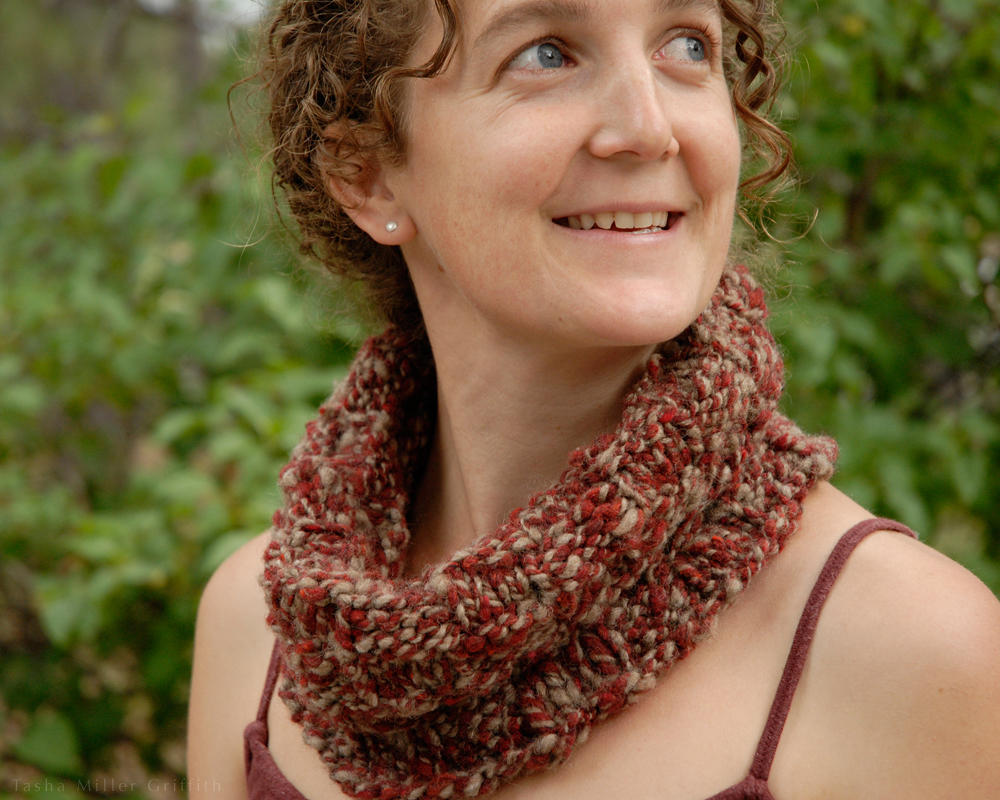
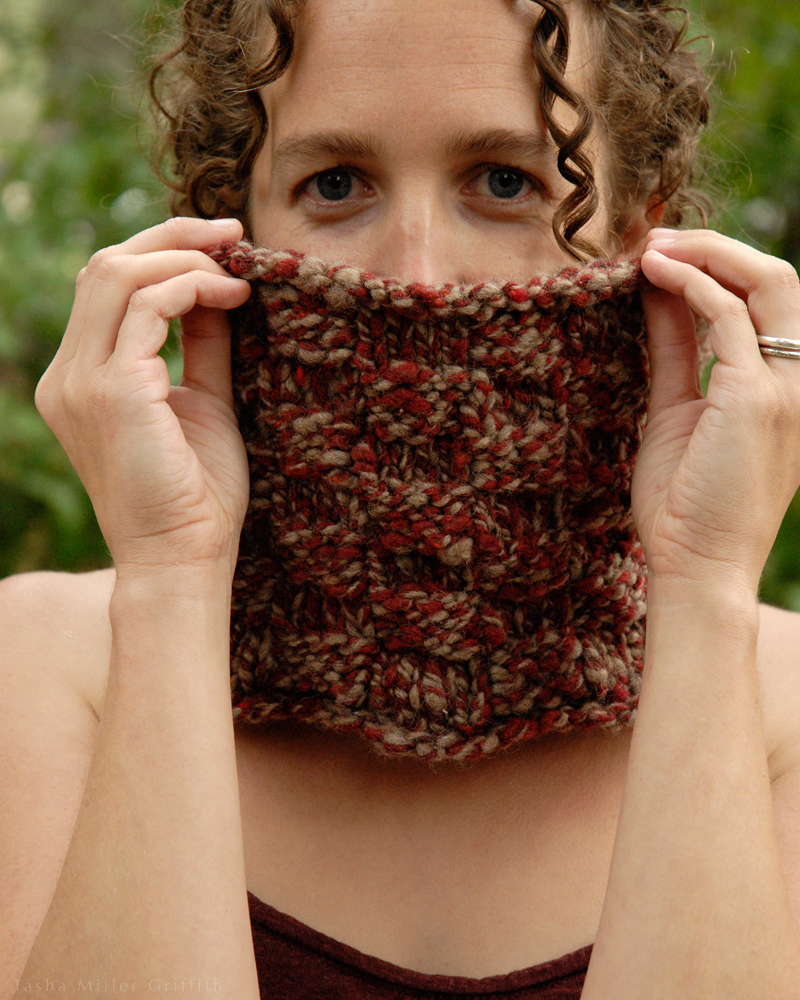
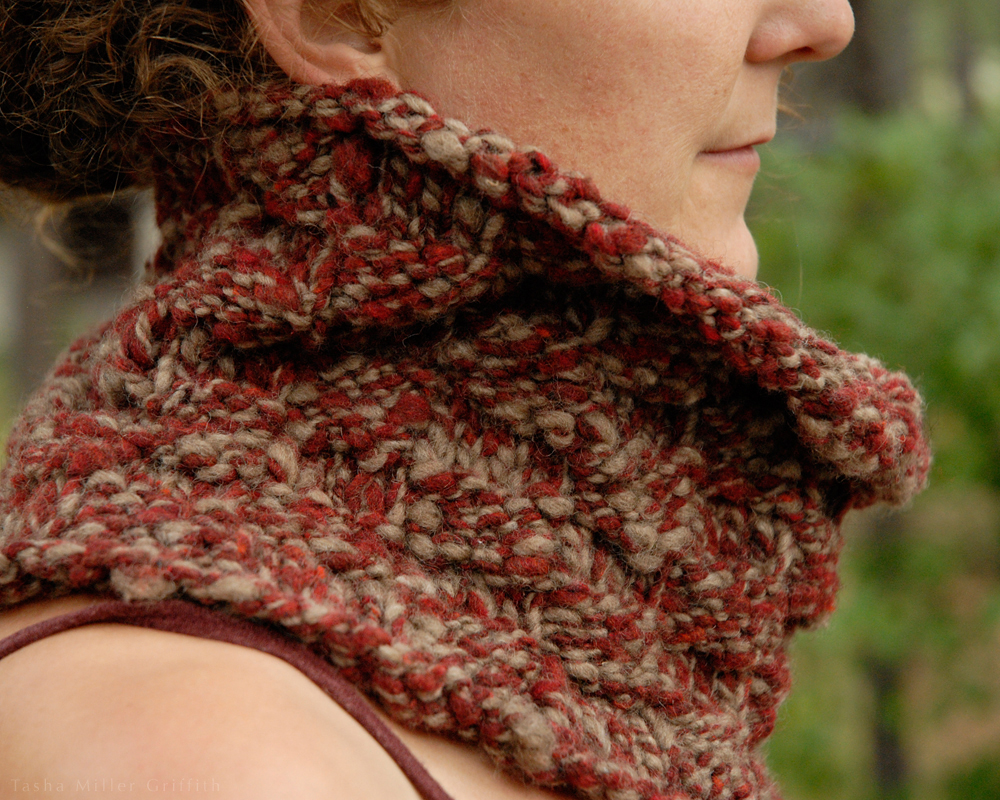
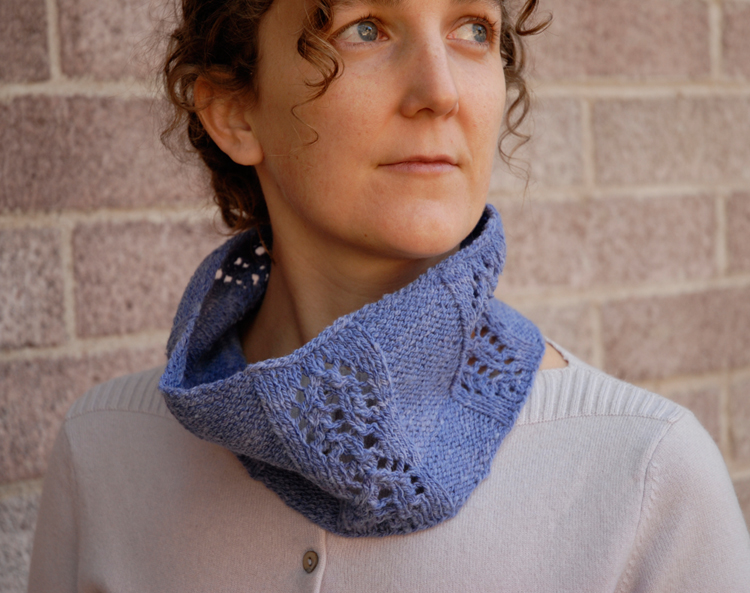
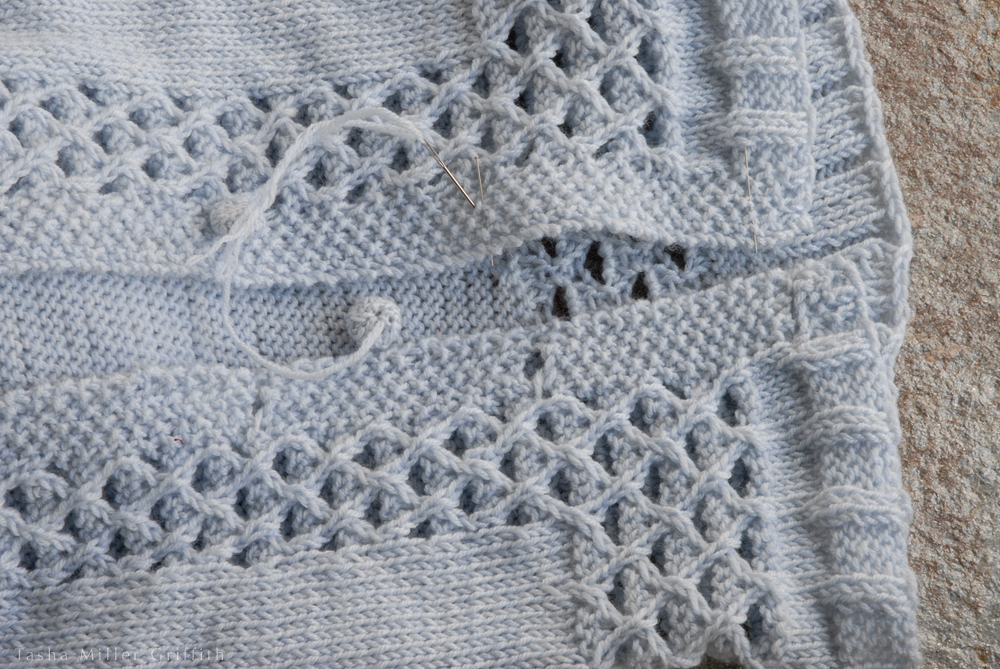
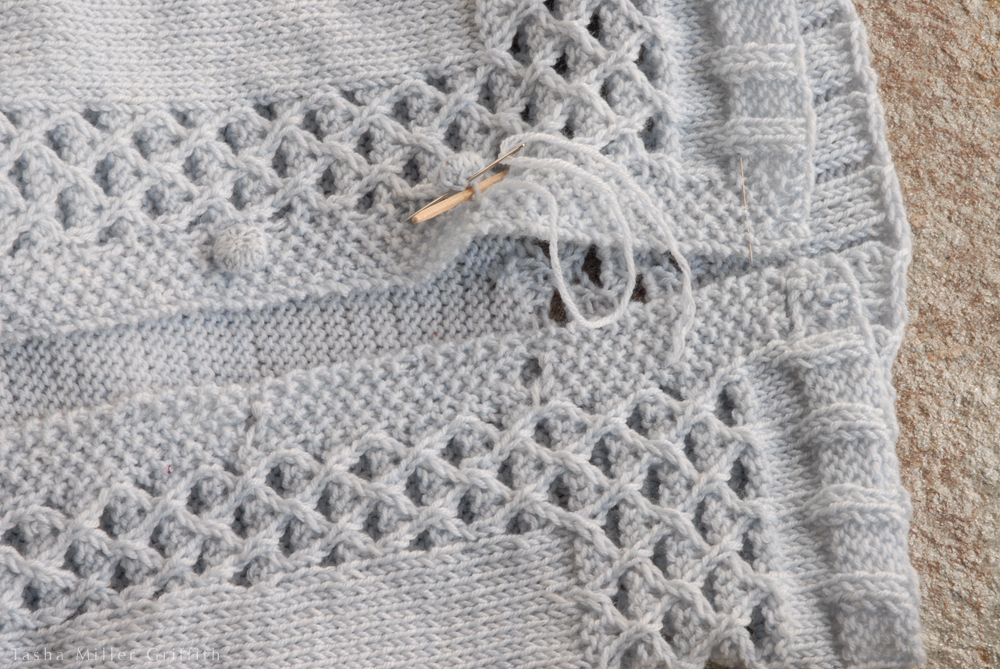
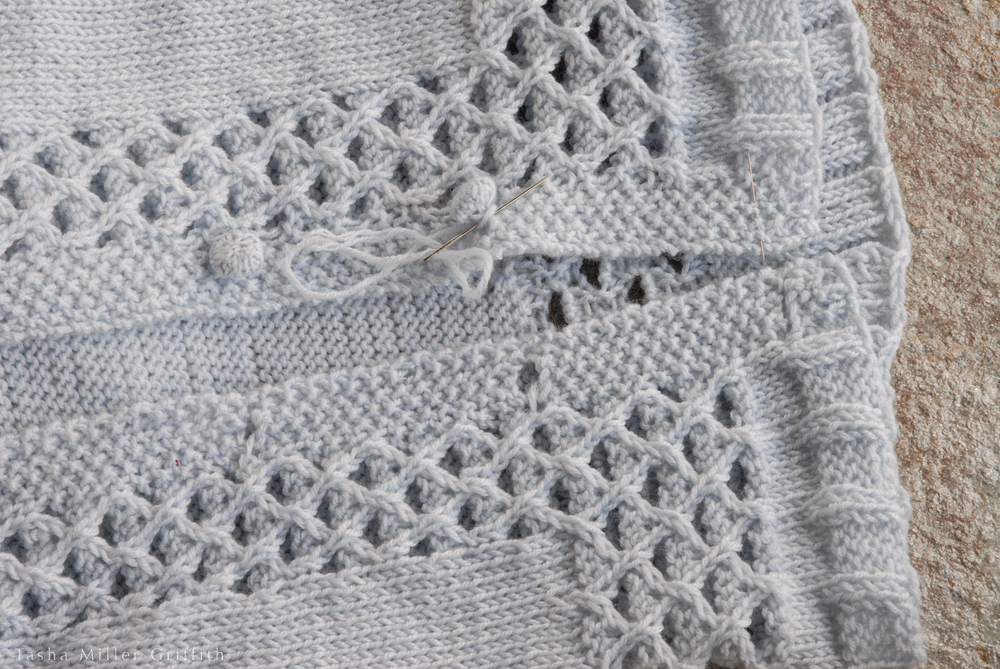
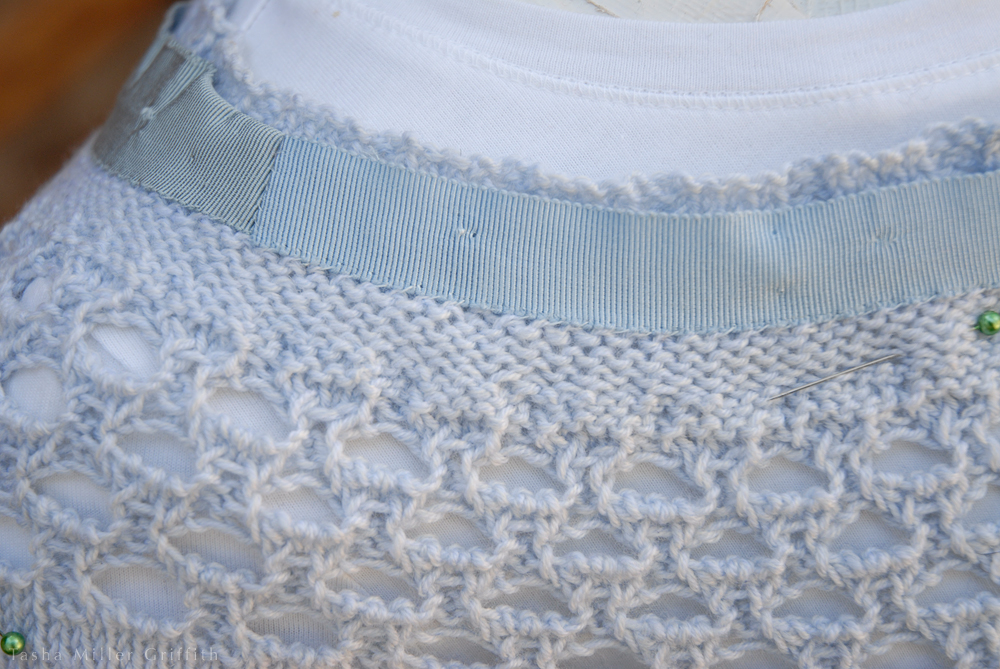
For the cowl at the top of the post, I wanted to stretch the lace sections, but not the plain knitting in between.  I could have blocked it flat, a couple of sections at a time, and that would probably have worked fine, especially if I steamed it.  Instead I decided to experiment with different sizes of rolled up towels, and found a combo which was the right size to block it around.  I opened up the lace with my fingers while it was damp, and pinned the two edges parallel.

When your blocked knitting is dry, take out the pins and check out the shape.  If there are any parts you’re not happy with, or little pulled areas from the pins, those are great places to steam.  Hold your iron over the part you want to adjust (don’t flatten it) and fill it with steam.  Then take the iron away and reshape it with your fingers.


Will I have to block my knitting every time I wash it?

Probably not.  The most dramatic change takes place the first time the yarn gets wet in its new knitted shape.  Unless something extreme happens to it, it will stay more or less how you blocked it, with the additional influence of how it’s worn.  Lace may need to be re-blocked to look its crispest, but it won’t go all the way back to how it looked before you blocked it the first time.  For most items, a quick smoothing/stretching with your hands, before letting them dry flat is enough.  I like to drape bigger things like the shawl over the top of a wooden drying rack, using lower bars of the rack to hold the ends so that no part gets too stretched by gravity, or too folded and wrinkly, while it’s drying.

If your project does dry with wrinkles, a little steam will fix that right up.

I hope this helps demystify blocking for you!  The more we can all understand what’s going on with our yarn at various stages and why, the more we can get the results we want.  Happy knitting!


Slow — What it Means to me Now


How I think about slowness, and about my life list of things I’d like to make, has changed pretty dramatically lately. I’ve been wanting to talk about it here, and Slow Fashion October has given me the perfect reason.

It started when I learned to spin. Then a little later, I realized how much I really could make, and how little I really needed. That feeling built, fed by the other things I was doing and reading, until the vast universe of possibilities suddenly felt expansive instead of overwhelming.


indigo handspunThis is apparently the only picture of my second batch of handspun before knitting.


You wouldn’t think that learning to spin would speed up my knitting, but it kind of did. The two batches of handspun I’ve made so far have gone pretty much straight to the needles, partly because I was so curious to see what I would learn by making something from my own yarn. So one thing was obvious from the start: I can spin all the yarn I need to knit with. In fact, if I spun even a little bit every day, I would end up with much more yarn than I usually consume.


tasha's quaker yarn stretcher 3It became a Quaker Yarn Stretcher Boomerang, a fantastic fit for the yarn.  I’ll post Details are now on Ravelry, but for now I want to focus on the thoughts.


I already have a pair of fingerless gloves, and a pair of dreamy mittens, and that’s really all my hands need. Between (ahem) making them and the ones my grandma wove, I’m approaching more fantastic scarves/shawls than I can actually wear. And then, I can’t imagine I need more than four good sweaters. Actually, my ideal would probably be three sweaters I absolutely love, and one to throw on when the going might get rough. Right now I have the rough one, a thrifted one I think is OK (but Bryan is not a fan of), and some other kind of makeshift stuff. But those got me through all last winter just fine. And my SFO goal is to re-finish one that will hopefully become one of the loved ones. I could make another one next winter or the winter after, and that would be more than fine. There’s actually plenty of time for me to find the perfect fleece, wash it, comb it, spin it …

So need, or maybe it would be more accurate to say lack of need, is a big part of this shift in my head. I find it incredibly helpful and freeing, and it goes something like this: if I already have most of what I really need for this winter, I’m free to spend my time making something really special (no matter how long it takes) or trying something new (ditto).

What I don’t know how to explain (in fact I’m not sure I’m explaining any of this very well) is why spinning in particular set me free from the desire to make all the things, but here I am. Of course, if I didn’t spin it would still be perfectly valid (maybe even more so) to say, “I have the capacity to make so much more than I will ever need.” In fact I think maybe every maker should say this, and see how they feel about it.

I know that time always seems short. I have struggled and struggled with that myself. But I’m coming closer to peace with it, and for me anyway, it doesn’t really have anything to do with productivity, with figuring out how much I can “fit” into a given time, how much I can accomplish or make. Ultimately, a good life isn’t about how much we do. It’s about what we do, what’s memorable, how we shape and enjoy our experiences.


tasha's quaker yarn stretcher 2


In theory when we decide to sew or knit something instead of buying it, we’re taking more time about it and being more thoughtful. But somehow pursuing a craft can also pull us into a spiral of wanting to make more and more, of making something just to finish it and go on to making something else, because we have so many ideas. Thinking about everything I’d like to make leaves me perpetually unsatisfied, as it always must, since I can think of about a dozen new ideas per day. Framing my making around what I need allows most of those ideas to pop up, get admired, and then just float away. Lovely though ideas are, they should not all be added to a perpetually growing list of things I “must” make.

Ironically, giving up on making all my ideas for the realms I usually work in (mainly clothing) may leave me time to take on things in my wildest crafting dreams. Try making shoes? How about a quilt from those passed-down handwoven scraps? Well if I’m content with what I have to wear for the moment, why the f#^k not?!


tasha's quaker yarn stretcher 4


I’ve been thinking a lot lately about all kinds of ideas around slowness. I listened to an interview with William Powers and I’m convinced I need to read his new book New Slow City. One thing he talks about is taking time to fully have an experience, just focusing on what you’re doing instead of already planning the next thing you’re going to do after it. I want to do craft like that. This week, I’ve been in the final stages of refinishing a treadle sewing machine cabinet, a project I have probably a months’ worth of total work hours sunk into. Just doing that, and thinking about nothing but that, running my hands over the velvety smooth wood and mulling over all the steps that got me there, it was so incredibly satisfying. Much more so than finishing four little projects and for each one just thinking “oh good, that’s done,” and moving on.

Letting go of a lot of my ideas does feel like somewhat of a surrender, but it feels like the kind when the heat of the day won’t let up, insects drone on, and finally there is nothing for it but to peel off whatever clothes are handy and throw yourself into the nearest body of cool water. Or the end of a long winter day, when nothing feels better than to pull warm cozy blankets all around you, and let your whole body relax.


tasha's quaker yarn stretcher


So here’s what slow fashion means to me right now: it means I will make just a few things at a time, and I will make them with my whole heart. It means I will allow ideas for things that I don’t need to float away, and concentrate on the projects that mean the most to me and those that will be the most useful. It means I will give myself space to enjoy the processes, the parts that bring me the most joy (like spinning) without worrying about what’s next on the list. And I think it will mean that the more I make in this slow way, the more I will wear my heart on the outside, all over my body.

Anybody else want in? The water’s fine …


Making Jeny’s Stretchy Slip Knot Cast On with Lumpy Yarns

Or, how to make it easier in any yarn.

I love this cast on*; how easily it stretches and bounces back right along with the knitting, how invisible it is (it’s like whatever pattern you’re knitting just appears fully formed, without a visually different edge), and the bonus that since it only uses one end, you don’t have to worry about starting with a long enough tail.

But it’s notoriously difficult to do with uneven or thick-and-thin yarns, since the yarn has to be able to slide easily past itself to make the required shape.  Or does it …  My knitting students were having a hard time with this cast-on, even in a relatively smooth yarn, which got me wondering if I could figure out a trick that would help keep the yarn moving.  I decided to try it with my first handspun project (a thick and thin yarn if there ever was one).  And I did figure it out!  It may have helped that I was stuck on an airplane at the time without too much else to do …  It turns out that there’s one place that the yarn gets hung up on itself, and if you can get past that, you can do this cast on in a lumpy yarn too!  I’ll show you how below.

First, a quick review of what makes a slip knot, since that’s the structure this whole cast on is based on—you’ll essentially make one slip knot after another.  First of all, you need a loop.


slipknot cast on 1I’m going to show you using a bit smoother yarn—otherwise it would be hard to see what’s going on.  This is “Sheridan” from Mountain Meadow Wool—yummy!


Next you need another loop, and to put that second loop through the first one.  Remember that the ends must cross each other for the loops to stay in place.  So, you can either make a second loop in the bottom strand of the first loop and bring it through the top, or make a loop in the top strand and push it up through the bottom, which is what I’ve done below.


slipknot cast on 2


Tighten it up by pulling the second loop through until the first loop closes around it.  If you’ve made a successful slip knot, it will go away if you pull on both ends of the yarn.


slipknot cast on 3


Put this first knot on a needle, and you’re ready for the cast on.  I like to put the working end of the yarn (not the short tail) around my thumb, and hold the end with the last two fingers of my hand, as shown below.  (There are other hand positions and motions that work perfectly well to make this cast on, these are the ones I use.)


slipknot cast on 4


To make the first loop, I use the needle to scoop up the strand nearest me around the thumb, moving from the bottom up.


slipknot cast on 5


Leaving this first loop on the thumb, I use the rest of my hand to bring a second strand of yarn over the needle, making the second loop.

I used to think that looping this strand one direction vs. the other over the needle might make it easier to pull the yarn through in the last step.  That might be true, but it also (of course, silly me) determines which way your first round of stitches sit on the needle.  Chances are you want them as shown below, so wrap the yarn starting at the front and moving to the back.  If you’re a “combination” knitter or you learned in a tradition that knits through the back of the stitch, you’ll find your stitches ready to go if you wrap the yarn the other way, starting at the back and moving to the front.


slipknot cast on 6


In either case, now we have two loops on the needle.  We want to move the first loop over the second one, so that it makes a collar around the base of the second loop, just like in the first slip knot we made without the needle.  To do this, I use my thumb to lift the first loop up and over the tip of needle, and then let it go.


slipknot cast on 7


In the instructions I’ve seen before, the next step is to hold the new loop against the top of the needle, and pull on the end of the yarn so the collar around it tightens up.  Sometimes this works great, but if your yarn has any resistance to sliding along itself, it will probably get caught up, stop short, and cause you to curse, tug on all the ends available, and try again.

The reason the yarn gets caught easily is that there’s one place in its path where it has to loop quickly around itself, making almost like a little knot (indicated by the arrow below).


slipknot cast on 8


What I found was that if I pull the yarn through this tight place first, I can then pull on the end and the stitch will tighten up smoothly, even in my lumpy handspun!

I take hold of the outside of that little loop-de-loop, and pull it out, so that the collar starts to form around the bottom of the new loop on the needle.


slipknot cast on 9


I’ve found that it works best if I get the new loop pretty snug, right up against the stitch before it on the needle, and the collar almost snug as well.  Then with it set up, I hold the new loop against the needle and pull on the yarn end to finish the new stitch.


slipknot cast on 10


Although this undoubtedly adds a step, to me it’s totally worth it, since I can now use a whole lot more yarns with one of my favorite cast ons.  And I don’t know about you, but I would rather have a slightly more complex but smooth process, rather than cursing and tugging on the yarn every few stitches because it keeps getting stuck.


slipknot cast on 11


*One of the many bonuses of going to a workshop with Cat Bordhi in person, is that she tells you all kinds of cool little tricks, and that’s where I first learned about this cast on.  The original post about it on Jeny’s blog is here, she links both to her own video of the steps, and to another one which uses different motions.  If you’d prefer not to hold the yarn around your thumb, there’s also a variation using two needles demonstrated by Tillybuddy on YouTube here.


Happy knitting!

Simple Textures

Here’s what I made with that first batch of my handspun yarn.  And how to make something similar yourself, if you’re interested!


first handspun cowl 2


I really wanted something simple, that would let the (ahem, very thick-and-than-thin) nature of the yarn shine through.  But, I’m not a knitter who’s happy with endless rounds of stockinette.  No offense to those that are, but I just need a little something pattern-wise to keep my brain engaged, and let me see that I’m making progress.

My gut-instinct guess was that I’d have enough yarn to make a small but substantial cowl.  Of course, there’s no label on my handspun to let me know the yardage, but I was able to estimate how much knitting I could get from the yarn pretty successfully.  I knit a swatch in my pattern, measured the dimensions, and weighed it, so I knew about how many square inches of knitting I could get from a certain amount of yarn by weight.  Then I weighed all the yarn I had, and used that number to figure out about how many square inches of total knitting I could make from it in this pattern.  I tried on a cowl I had, and estimated how big it would need to be to comfortably fit over one’s head, and how tall I would ideally want it, and arrived at a compromise number to cast on.


first handspun cowl 4


The finished cowl is 25″ around, and 7″ tall, which turned out to be plenty big!  At my gauge of 2.5 stitches/inch, I cast on 64 stitches.  I used Jeny’s Stretchy Slipknot Cast On.  (In this yarn—yes really!  More about that here.)  I did two rows (or maybe three? Forgot to write that down …) of plain knitting to make a little roll at the bottom, then switched to my pattern; alternating blocks of four knit and four purls stitches, and switching them after 4 rounds.

Of course you could use another simple pattern for the body of the cowl.  Just make sure that the total of your pattern repeat (in my case 8 stitches) divides evenly into the number of stitches you cast on.


first handspun cowl 3


When I was getting near my estimated total height, and at the end of a pattern repeat, I knit a couple more plain rows, and then bound off, using Elizabeth Zimmerman’s sewn bind-off.  I ended up using almost every bit of the yarn, which was definitely my intent!

I almost never buy yarn this chunky, so it seemed like the whole thing took about 5 seconds to knit.  In reality, it took parts of two days of traveling, and it was done!  So far, it seems like spinning is actually speeding up my production of finished knitted items, if that’s possible.  I actually have another finished handspun thing that just needs photos … and this one is off to live with someone dear to me, hopefully it will keep her neck warm this winter!


first handspun cowl 1


In the meantime, I hope this is helpful if you’re looking for something to make with a special bit of
thicker yarn, whether made by you or not!


The End of the Yarn


end of the yarn 1


My knitting students inspired this post. I do explain in class what to do when your skein of yarn runs out and you need to add more, but it’s a little tricky to visualize without actually cutting the yarn, and easy to forget when you get home and you’re left alone with an internet full of confusing videos … so here you go! These are my favorite, simple, fairly foolproof methods. The first one works with practically any yarn, any project, any time, and the second one makes a totally seamless join in any feltable yarn.

Personally, if I can’t felt the ends together (see below), I almost always just leave the tails, and I don’t mind sewing them in later. There are lots of methods for weaving in the tails as you go, by wrapping the new yarn over/under/with the old yarn, and most of them work just fine. You may find one that you love. But, you don’t need to do any of them. Leaving the tails to work in later is perfectly good. And if you’re still thinking about how to knit, you don’t need anything more complicated going on when you get to the end of a skein.

So, just stop knitting when you have about 6 inches of yarn left unknitted. Pick up your new ball of yarn (mine is purple) and, leaving another tail of the same length, start knitting with it. The stitches on either side of the tails will probably be a little loose, but you can cinch them up later to match their neighbors when you weave in the tails, so don’t worry about it for now. If you like, you can tie the two ends together into a slipknot to keep things neat while you’re working on the rest. That’s it!


end of the yarn 2


end of the yarn 3


end of the yarn 4


As long as we’re talking about joining yarn ends, I wanted to include my very favorite method, which takes advantage of the felting properties of wool to join two lengths of yarn without any tails left at all.

Untwist and fluff out a couple of inches on both ends. The first key to this method is to get the fibers as separated as possible. Just like in any other felting, fuzzy, loose fibers will attach to whatever is next to them, and fibers that are already joined or clumped will attach mainly to each other.


end of the yarn 5


The second key to this method is to mix the fibers from the two ends together thoroughly before you start rubbing them. You want as many places for them to meld as possible, so move the strands around so that all the ones from one end are not on the same side.

Add just a little moisture (I usually use spit unless water happens to be handy). The fibers should be barely damp. Squeeze the join lightly between your hands, and start rolling it back and forth. You want to agitate the fibers together without disturbing their orientation.


end of the yarn 6


end of the yarn 7


end of the yarn 8


Small areas like this felt very quickly. The join is done when you can pull gently on it from both sides and the fibers don’t slip. It’s possible to go too far, so that your little felted area becomes noticeably stiffer than the rest of the yarn, so stop when it’s holding together.


end of the yarn 9


Other than with non-felting yarns (superwash, plant fibers, silk, synthetics etc.) the only time I wouldn’t use this method is if a slight difference in yarn texture will be noticeable in the knitting, like in a very smooth or shiny yarn. A felted join is basically invisible in fuzzy singles, and it also works well with textured and handspun yarns, as well as your more “standard” multi-ply wool yarns like Cascade 220 (shown here, you can see the felted join in the bind off near my thumb below). And, if for any reason the felted method doesn’t work or you don’t like how it looks, you can always cut it off and go back to the first method.


end of the yarn 10


Happy joining!


Sweet Coriolis Socks


sweet coriolis socks 6


Hello everyone! So, I knit some more sweet tomato heel socks over our last couple of times on the road. After making a few pairs using thicker-than-normal sock yarn, I wasn’t sure how I’d feel about using the “real” stuff. But as it turned out, I thoroughly enjoyed watching the tiny neat stitches appear one after the other, and it didn’t bother me that it took a little longer.

I divided the yarn by weight, thinking that way I could make both socks from the toe up, stop when I ran out of yarn, and they’d end up pretty much the same length. But, I threw in enough experimenting that my yarn usage wasn’t the same at all on the second sock … I should have known that would happen! Next time I’ll either make both at the same time, or, if after the first heel I want to try something different for the next one, I’ll wait to finish the legs until I see how much yarn is left.


sweet coriolis socks 5


Another thing I learned while making this pair is that for my feet and legs, 425 yards of fairly standard sock yarn will make a boot sock, tall enough to overlap leggings, but not tall enough to reach over my calf. As far as I know, no force on Earth will keep socks of this length up, unless they have something that provides more friction than a leg to hold on to. I like wearing these, in fact they’re my favorite socks right now. However, having substantial leftover yarn drives me crazy, and next time I’d like to get enough to make knee socks, so maybe I’ll look for two smaller skeins, or a really long one.


sweet coriolis socks 3


If you’d like to make a similar sock, or see the knit-nerd details about the two heels and what I’ve learned about fitting sweet tomato heels so far, all that is on Ravelry.

This pattern is the “Sweet Coriolis Socks” from Cat Bordhi’s Sweet Tomato Socks ebook. She also recommended this yarn in a workshop I took, it’s Mountain Colors Crazyfoot. This particular color (“Chinook”) called my name at Purl in the Pines. I liked working with this yarn, although a fair amount of blue-green dye bled off in the first washing. We’ll see how they hold up!


sweet coriolis socks 1


Cat Bordhi is one of my knitting heroines, and I know variations of this pattern have appeared in several of her books, so I was excited to try it. Although I like how the finished socks look, my brain and this pattern weren’t quite in harmony. I never really got into a flow with the coriolis ribbing, and I kept having to check to make sure I was in the right spot. And, the experiments I tried with the heels threw off the expected path for the coriolis band at the hinge of the foot, especially on the second sock, where it got lost for a while. If you’re still experimenting with the fit of your heel/foot, I’d recommend sticking with a pattern that holds steady on top of the foot, until you figure things out and can do some calculating ahead of time.


sweet coriolis socks 4


I’m getting really close to a great fit with this heel, and I liked the padded variation I tried this time a lot. Still, I’m thinking I may knit some non-sweet-tomato socks for my next pair, if for no other reason than to get some perspective on the different heel techniques … there’s always more to learn, which is what keeps me knitting!


Winter/Spring 2015 Workshops & Announcements

tasha's lupine cowl

Hello everybody! I’ve got some fun opportunities for hanging out with fiber folks and in-person learning coming up that I wanted to share.

I’m teaching felting again this year at the Fiber Retreat at Arcosanti, AZ, coming up this weekend (Jan 23 and 24)!  My class is full, but there are still spots in other classes, and overall it should be a good time, with vendors, a speaker, and lots of opportunities to just hang out and knit or spin.  If you’re in the area and you’d like a little more info, contact me and I’ll send you some.  (Their website is a little sparse.)

And, if you’d still like to take a felting class with me in AZ you may be in luck, because I’m also teaching at the newly revamped Flag Wool and Fiber festival this spring, May 30 & 31st!  I’ll be teaching felted flowers and 3D wet felting.  Details about the workshops should be up on their site soon.

A new year also means new classes at Purl in the Pines.  Beginning Knitting and Sweet Tomato Heel Socks start the last Saturday of January.  Coming February 21st is a class I’m quite excited about, because we’re knitting a pattern of my own design, which I put together just for beginning lace knitters!  It’s called the Lupine Cowl (pictured above).  Please contact the store for more info and to sign up.

I’m also talking with the folks at LocalWorks (Flagstaff’s maker space) about running some beginner sewing classes there, and hopefully I’ll have more info on that soon.

While we’re on announcements, I keep meaning to mention (for those of you reading via email) that I’ve been working on the site slowly, starting this summer, and it this point I think it looks about as good as it’s going to unless I break down and pay someone to help with it (what—people do that?).  There are now category pages which hopefully make it a lot easier to find what you’re looking for, and a bunch of hand-carved stamps and typewritten words which have found their way into the digital world, so if you haven’t been in a while, check it out!

I’m going back to preparing for Arcosanti now, but I hope to see you all soon, either in person or out here on the interwebs!

Make Your Own Tiny Hand-Knit Cover Buttons

tiny knit covered buttons finished front


These are the buttons I made for my Talamh sweater.  I found some factory-made buttons covered with knit fabric in my button stash as I was starting the sweater, and the idea stuck.  When I finished the sweater, I knew I wanted buttons covered in my yarn, so I made some.  Afterwards, it occurred to me that I might have been reinventing the wheel here, but searching Google and Ravelry turned up nothing like these, so here are the directions!  At the end of the post I’ll also include some links to other ideas I did find, in case these aren’t quite your style.  As always, click on any of the photos to enlarge for a closer look.


Knitting the Cover

Pick your buttons to go inside the knitted cover first.  They should be a little smaller than you want the finished button to be, and ideally a similar color to the yarn you’re using to cover them.

These buttons are knit in the round from the center out.  Since they are tiny, there are only a few rounds before you decrease, and secure the knitting to the button.

You want the button fabric to be tight, so that it will be sturdy and the button underneath won’t show through.  Use a much smaller needle than you usually would with the yarn (even if your yarn is thicker).  Here I used size 1 needles, after using size 4 with the same yarn for the sweater.  I’ve illustrated using double points, but of course you could use two circulars or a magic loop if you prefer.

Start by casting on four stitches, using Judy’s Magic Cast On, or another method that starts seamlessly from the middle (this one from Cat Bordhi is also good).


tiny knit covered buttons cast on


If you increase 4 stitches per round, it makes a flat circle of knitting.  I learned this from Daniel Yuhas’ book, Knitting from the Center Out.  Since a flat circle is my goal here, I knit into the front and back of each stitch, for 8 total stitches in the next round.  (If you aren’t sure how to knit front and back, otherwise known as kfb, just Google it—more tutorials than you’ll ever need will pop up.)


tiny knit covered buttons 8 sts


Increase 4 stitches again in the next round (ie: knit into the front and back of one stitch, knit one stitch, repeat those two actions around).  At this point I switched some stitches onto a third needle, to keep my little circle from getting too stretched out where the needles join.


tiny knit covered buttons 12 sts


Since my button is tiny, I only needed one more round of increasing 4 (knit front and back, knit 2, repeat around, for a total of 16 stitches) to reach the size of my button.  You can compare the amount of knitting you have to your buttons, but it can be hard to judge without finishing.  Luckily, these only take a few minutes to make, so it’s easy to try another one if the first one isn’t quite right.


tiny knit covered buttons 16 sts


When the button is the size you want, start decreasing, so that the knitted fabric will cup around the edges of the button smoothly.  If your button is bigger and/or thicker, you may want a plain round before you start to decrease, but for these little guys I found it made the cover too baggy for the button, so I went straight from an increase round to a decrease round.

I did one round of knit 2 together, knit 1, repeat.  You can see how the cover begins to puff up in the middle as the edges draw in.


tiny knit covered buttons decreasing


On the next round, I knit every 2 stitches together, until there were 5 stitches left.  If you have a lot more stitches, it may take a couple more rounds of decreasing.  You also want there to be enough fabric on the back of the button so that you can pull these few stitches together at the center back.

When you have just a few stitches left, cut the yarn, thread the end on a sewing needle, and pass it through the remaining stitches.


tiny knit covered buttons needle to yarn


Knitting Meets Button

At this point the actual knitting part is done.  There are a couple more tricks I want to show you as we sew it together, to make the button come out really nice.

First, before you start to cinch up the knitting around the button, take the sewing needle from the end you finished knitting with, and thread it on the end left from casting on.


tiny knit covered buttons yarn tail inside


Open out the little circle so the inside of it is clearly visible.  Use the center yarn tail to cinch up the first stitches from the cast on, if necessary.  Then sew around in a little spiral, starting near the center, piercing just the backs of the knitted stitches (use a sharp needle).  This secures the tail, and adds a little extra cohesion to the stitches that will be the button front.


tiny knit covered buttons inside spiral 2


When your spiral is done, trim the inside tail, and thread the outside/last knitted with tail back on the sewing needle.


tiny knit covered buttons ready for button


Place the button in the middle of the circle, and draw the edges up with the remaining tail.


tiny knit covered buttons gathering back


Pull the last stitches tight together in the center back, which hopefully will snug the whole cover nicely around the button.  If it’s too loose or too tight, just start again, make another one with modifications.

Once your cover fits your button, secure it by taking a stitch through one hole in the button, out to the front side.


tiny knit covered buttons stitching through button


Then take a stitch back, aiming to enter the knitted fabric in the same place you came out (so as not to leave a stitch on the surface) but angle the needle so it goes through a different hole in the button.  You’re putting a loop of yarn through the button itself, to secure the knitting in place.


tiny knit covered buttons stitching through button 2


I think this technique would also work with shank buttons, you would just want to take a few stitches around/through the shank instead.

Lastly, I stitched around the edges of the back side of the button, adding a little more yarn and securing the stitches there.


tiny knit covered buttons reinforcing back


Tada!  A tiny knitted covered button, ready to go.


tiny knit cover button back finished


I sewed these on using a variation of my usual technique (I updated the photos on that post just this week, and love how they came out): sewing through the yarn on the back of the button rather than through the button itself.


knit cover buttons sewing on 1

knit cover buttons sewing on 2

knit cover buttons sewing on 3


I’d love to try making some bigger buttons using this techinique, too.


More Ideas

As if that weren’t enough, when doing research for this post I stumbled on a few other fun things.  Actually, I fell down a bit of a rabbit-hole of cool ideas for DIY covered buttons, both for sewing and knitting, and another post is probably coming soon.  In the meantime …

Kate Davies has a lovely clear tutorial for yarn-wrapped buttons that come out looking sweet.

What about embroidering a design with your yarn on fabric, and then covering a button with that?  There’s a tutorial here on The Purl Bee.

There’s always traditional thread-button techniques, like these from Threads Magazine. Full disclosure: I long ago tried and failed to make sturdy buttons using similar techniques, but I’m pretty sure it was user error.

You could also knit a circle from the bottom up, rather than from the center out, increasing and decreasing at the sides, and then gather it over a button or use a commercial button form.  There’s an example on Knit Darling here. She uses a cover button kit, and rightly points out that those don’t work in small sizes with thick fabrics.  I think you could gather a smaller size over a regular button and secure it something like the second part of my technique (but I haven’t tried this yet to be sure).


Not that there aren’t beautiful buttons out there, but especially during this season when we’re surrounded by encouragement to over-consumption, I just love the idea of putting the final touches on a project myself, made with bits and pieces I have around the house. Here’s wishing you all a restful, creative December!


Me-Knit Blue Sweater with Lace

Plus some tips for finishing hand knits.


blue talamh sweater 2


First things first: stop press!  I finished the sweater which I started knitting in Me-Made-May this year!  Between times when I made a real effort to work on it at least an hour a day while on the road, and times when I was back at home and pretty much ignoring it completely, it averaged out to just about 6 months start to finish.  And I’m fine with that, I mean, it’s hand-knitting an entire sweater.


blue talamh sweater 5


An entire sweater which I’m pretty much totally in love with.  This is the Talamh pattern by Carol Feller.  I wanted a pattern with some lace, but also some edgyness, some modernity, and I thought the lace pattern she used really fit the bill.  I added the wide lace section to the center back (it looks awesome, right?) but otherwise actually made fewer changes than I normally do when I’m knitting someone else’s pattern.  If you’re interested, I decided to keep those notes on Ravelry this time, feel free to check them out!


blue talamh sweater 3


In this space, aside from how pleased I am with this project, I thought I’d share a bit about finishing, specifically sewing in a ribbon for stabilization around the neck (which totally saved this sweater!) and how I “weave in” yarn ends.


Adding grosgrain ribbon

As I was blocking this sweater (basically just getting it wet, stretching the lace out a bit, and smoothing out bumps before letting it dry) I decided to try putting it over my dress form (if it’s good enough for Kate Davies, it’s good enough for me!).  But the sweater kept slipping down, and, rather than pin it up every inch or so, I decided to let it dry flat.  Well, after it was dry and I tried it on in front of the mirror, the same thing happened.  The join between the body and the sleeves is a bit low anyway (my fault, and one of only two things I’d probably change if I make a sweater like this again).  As the neckline stretched wider, the underarms and the whole rest of the sweater sagged downward until it looked fairly ridiculous, at which point I’d tug the neck up again.  Clearly, the loose-ish ribbing at the top was not enough to hold the rest of the sweater in place.


blue talamh sweater ribbon 3


I had stabilized various parts of other sweaters with ribbon before, and it occurred to me that I could try it here.  I opened the drawer where I keep bits of ribbon, and there were two lovely grosgrain sections, probably salvaged from recycled sweaters, that both almost matched perfectly!  And each was a width to fit under part of the ribbing on the sweater.  Call it good karma for using up this yarn I’ve had for ages, or proof that if you save the good stuff, it does actually come in handy later.

Pinning the sweater inside out on my dress form to hold it in place, I shaped the ribbon around the curves and steamed it lightly to match them.


blue talamh sweater ribbon 1


Note that in order to curve nicely like this, you need authentic grosgrain ribbon, the kind with the bumpy edges, where the thick yarns in it are free to move a bit.  “Grosgrain” ribbon from your local big box store often has tight edges, which are fine for straight sections, but won’t curve worth a darn.

grosgrain ribbon


I bought sewing thread to match my yarn as closely as possible, and sewed the ribbon on with tiny whip stitches, at the edge where the ribbing meets the first plain knitting section.  After trying on the sweater to check that it was working, I put it back on the dress form inside out, and sewed around the top edge of the ribbon as well.  If you do this, don’t pull the sewing stitches too tight, just try to keep the ribbon softly snug to the sweater, and not to distort the knitting.


blue talamh sweater ribbon 2


This worked so well!  Like magic, my sweater now stays in place, just where I want it, and the ribbon is basically invisible from the outside.


Finishing yarn ends

There were quite a lot of ends in this sweater, mostly because I’ve had this yarn for over a decade (!).  Part of that time was before I knew how to deal with moths, and the outside of a few of the skeins got rather munched early on, leading to extra breaks in the yarn, and weak places that I decided to treat the same as breaks (ie, not use them, and leave the tails to work in later).  I usually tie the ends or the break/place I don’t want to use into a slipknot, just to keep a little tension on the yarn as I’m knitting around it.


finishing knitting 1


I’m sure there are other good methods for burying yarn ends, this is mine.  Keeping the tail going in the direction it was headed, I take a short stitch, then a tiny back stitch to anchor the thread, followed by a tunneling of the yarn along the back of the existing stitches.

Don’t pull tightly, or you’ll pucker the knitted fabric.  Leave enough yarn tail so that as the sweater stretches, the tail can move without catching or distorting anything.

Maybe my best tip is to use a needle with a big enough eye to hold the yarn, but a very sharp tip, making it easy to pierce just the backs of stitches, and keep the yarn tails out of sight.  My absolute favorite are “Chenille” needles from John James, available at fine sewing and embroidery stores.

With each end, take one short stitch, catching just the back of the knitting stitches:


finishing knitting 2


Followed by a tiny backstitch, which functions like a knot to keep the yarn in place.  I start just behind where the last stitch ended, and then continue skimming along the backs of the knitting stitches for the length of the needle. In a stockinette fabric like this, the purl “bumps” make handy diagonals, good directions to hide yarn without it showing on the outside.

If you’re particularly worried about this part of the knitting getting stress or pulling out, (or your yarn is slippery) you could take another short stitch and back stitch, then the long burying stitch. That should hold it!


finishing knitting 3


If at any point you’re unsure if a stitch might be showing on the public side, just check.  One good thing about stitches is that they’re reversible.

Note that the ends should go in opposite directions, at least with the first short stitch.  Take them in the direction they’d pull from if you kept knitting, so that the two ends cross, rather than pull away from each other.


finishing knitting 4


On garment edges, a good place to bury ends is often along columns of ribbing.


finishing knitting 6


When you’re finished, trim the ends so that enough remains on the back for the end to stay there, and not poke through to the front.

That’s about it for now.  Just in case you’re wondering, I did make those matching buttons, and I’ll post about them soon too.  I hope this is helpful, and just let me know if you have more knitting/finishing questions!


Me-Made-May’14 Thoughts and Drawings


mmm'14 day 6


Hello, all!  I’ve been keeping up with my pledge for Me-Made-May’14; wearing, and drawing, and working on some sweater.  You can see some of my sketches and sweater progress on Flickr.  I think it’s fun to check out the whole MMM’14 group and see what everyone is wearing.

Also, in case you missed it, my thoughts for sewing/dressing in May were on ‘So, Zo …’ this past week!  Along with a bunch of other people’s from around the world.  One thing we mostly seem to agree on: spring is a time for layers, and a good pair of pants!  Check it out …

Happy Sunday!